Add a digital product
In the Products section, you can create digital products with downloadable files or links that customers receive after payment. You can also manage product sales in your CRM.
For example, a software vendor can create a product for a software license, sell it through an online store, chatbot, or payment link, then automatically send the customer a download link after payment.
Let's talk about how to create and set up a digital product.
Getting started
Before you create a product, prepare your product materials as a link or a file that your customers will receive after payment.
You'll need to fill in the product name, the price and currency, the category, and the link or file in the Product post-purchase delivery method section. Empty required fields turn red.
Images, SKU, sample, properties, SEO, and integration fields are all optional.
Your CRM keeps the product card and sends the name, description, images, price, and properties to the website or chatbot where you sell.
Read more: Digital product basics, Import products to your CRM.
Create a product
Go to CRM > eCommerce > Products and click Add product. In the type field, select Digital product.
You can select the product type only when creating a product. You cannot change it later.
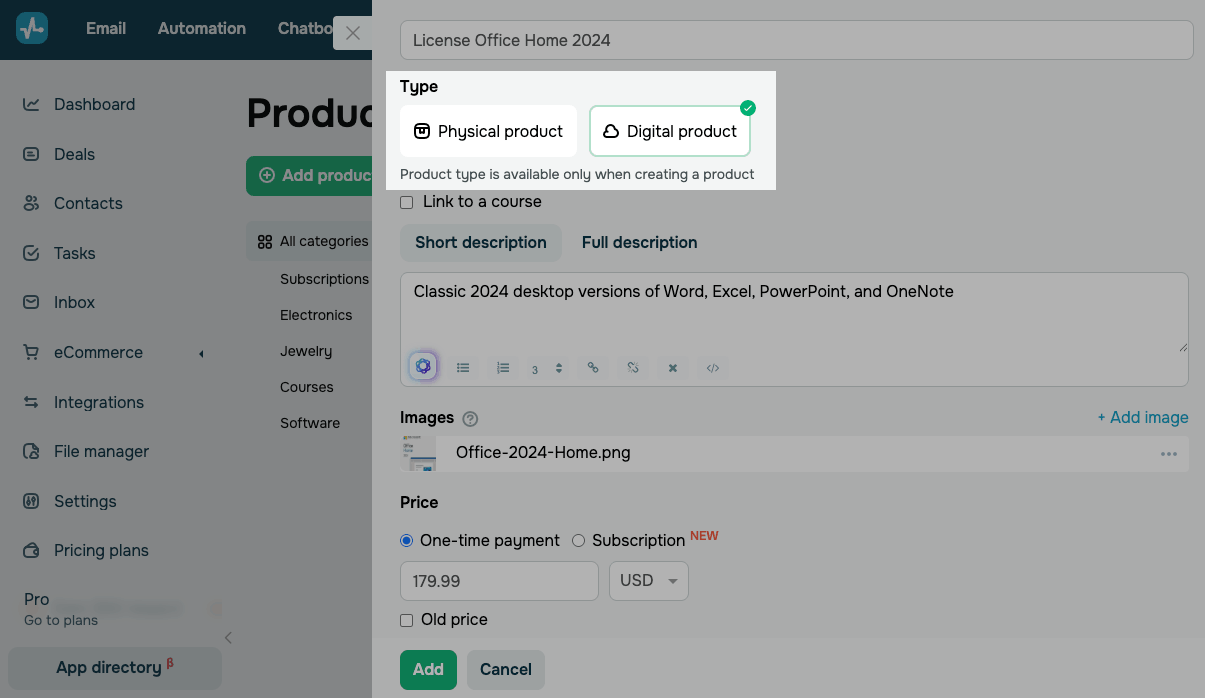
Add a name and description
At the top of the card, enter the name of your product or service.
A product name can contain up to 250 characters, including letters and numbers. To keep the name readable, consider the size of your product card when choosing it.
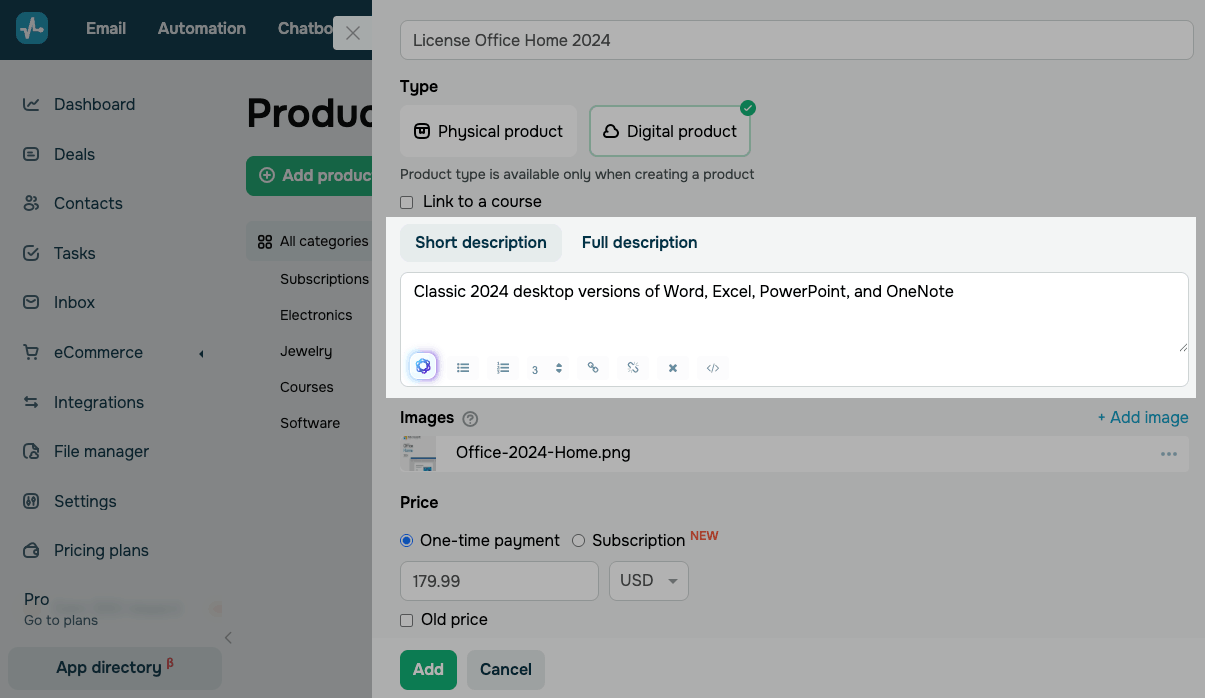
In the Short description and Full description sections, add a product description. For example, highlight the key attributes in the short description, and add more details, such as usage terms or system requirements, in the full one.
You can format the text or use AI to generate or improve your description. Click the AI icon in the lower-left corner of the description field.
Add images
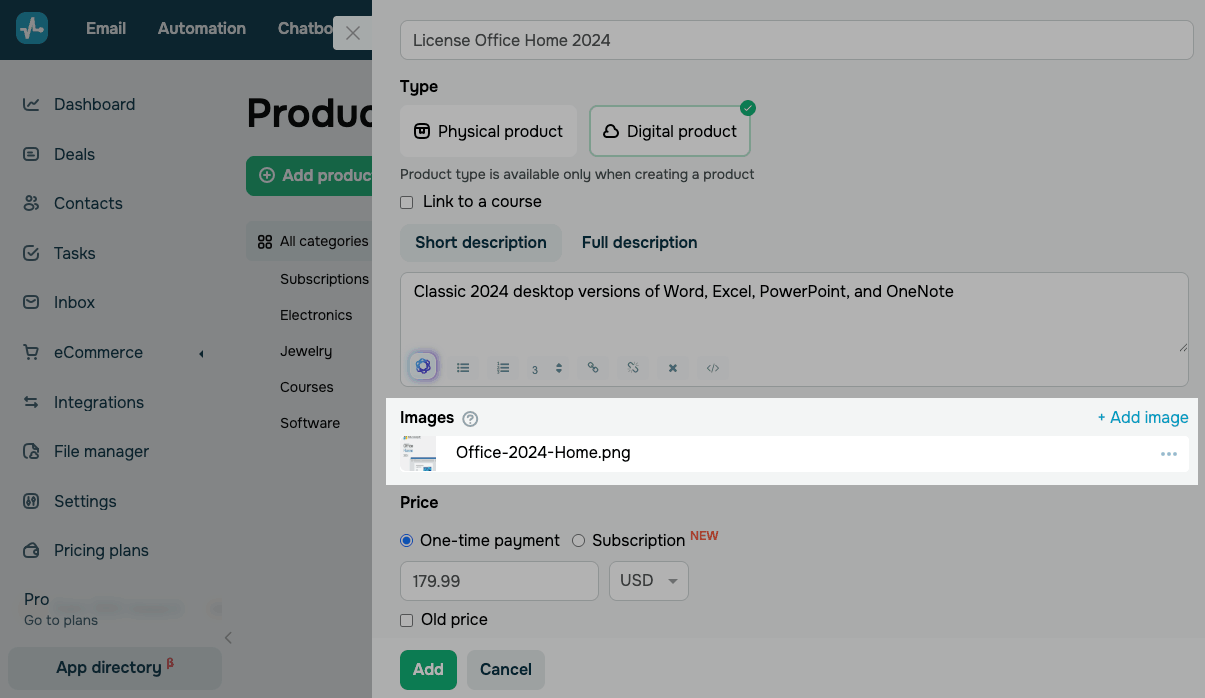
In the Images section, click Add image and upload or choose an image from the file manager.
The first image you upload is used as the main product image.
For optimal display in product cards, use 250 × 250 px images sized at up to 5 MB.
Set a product price
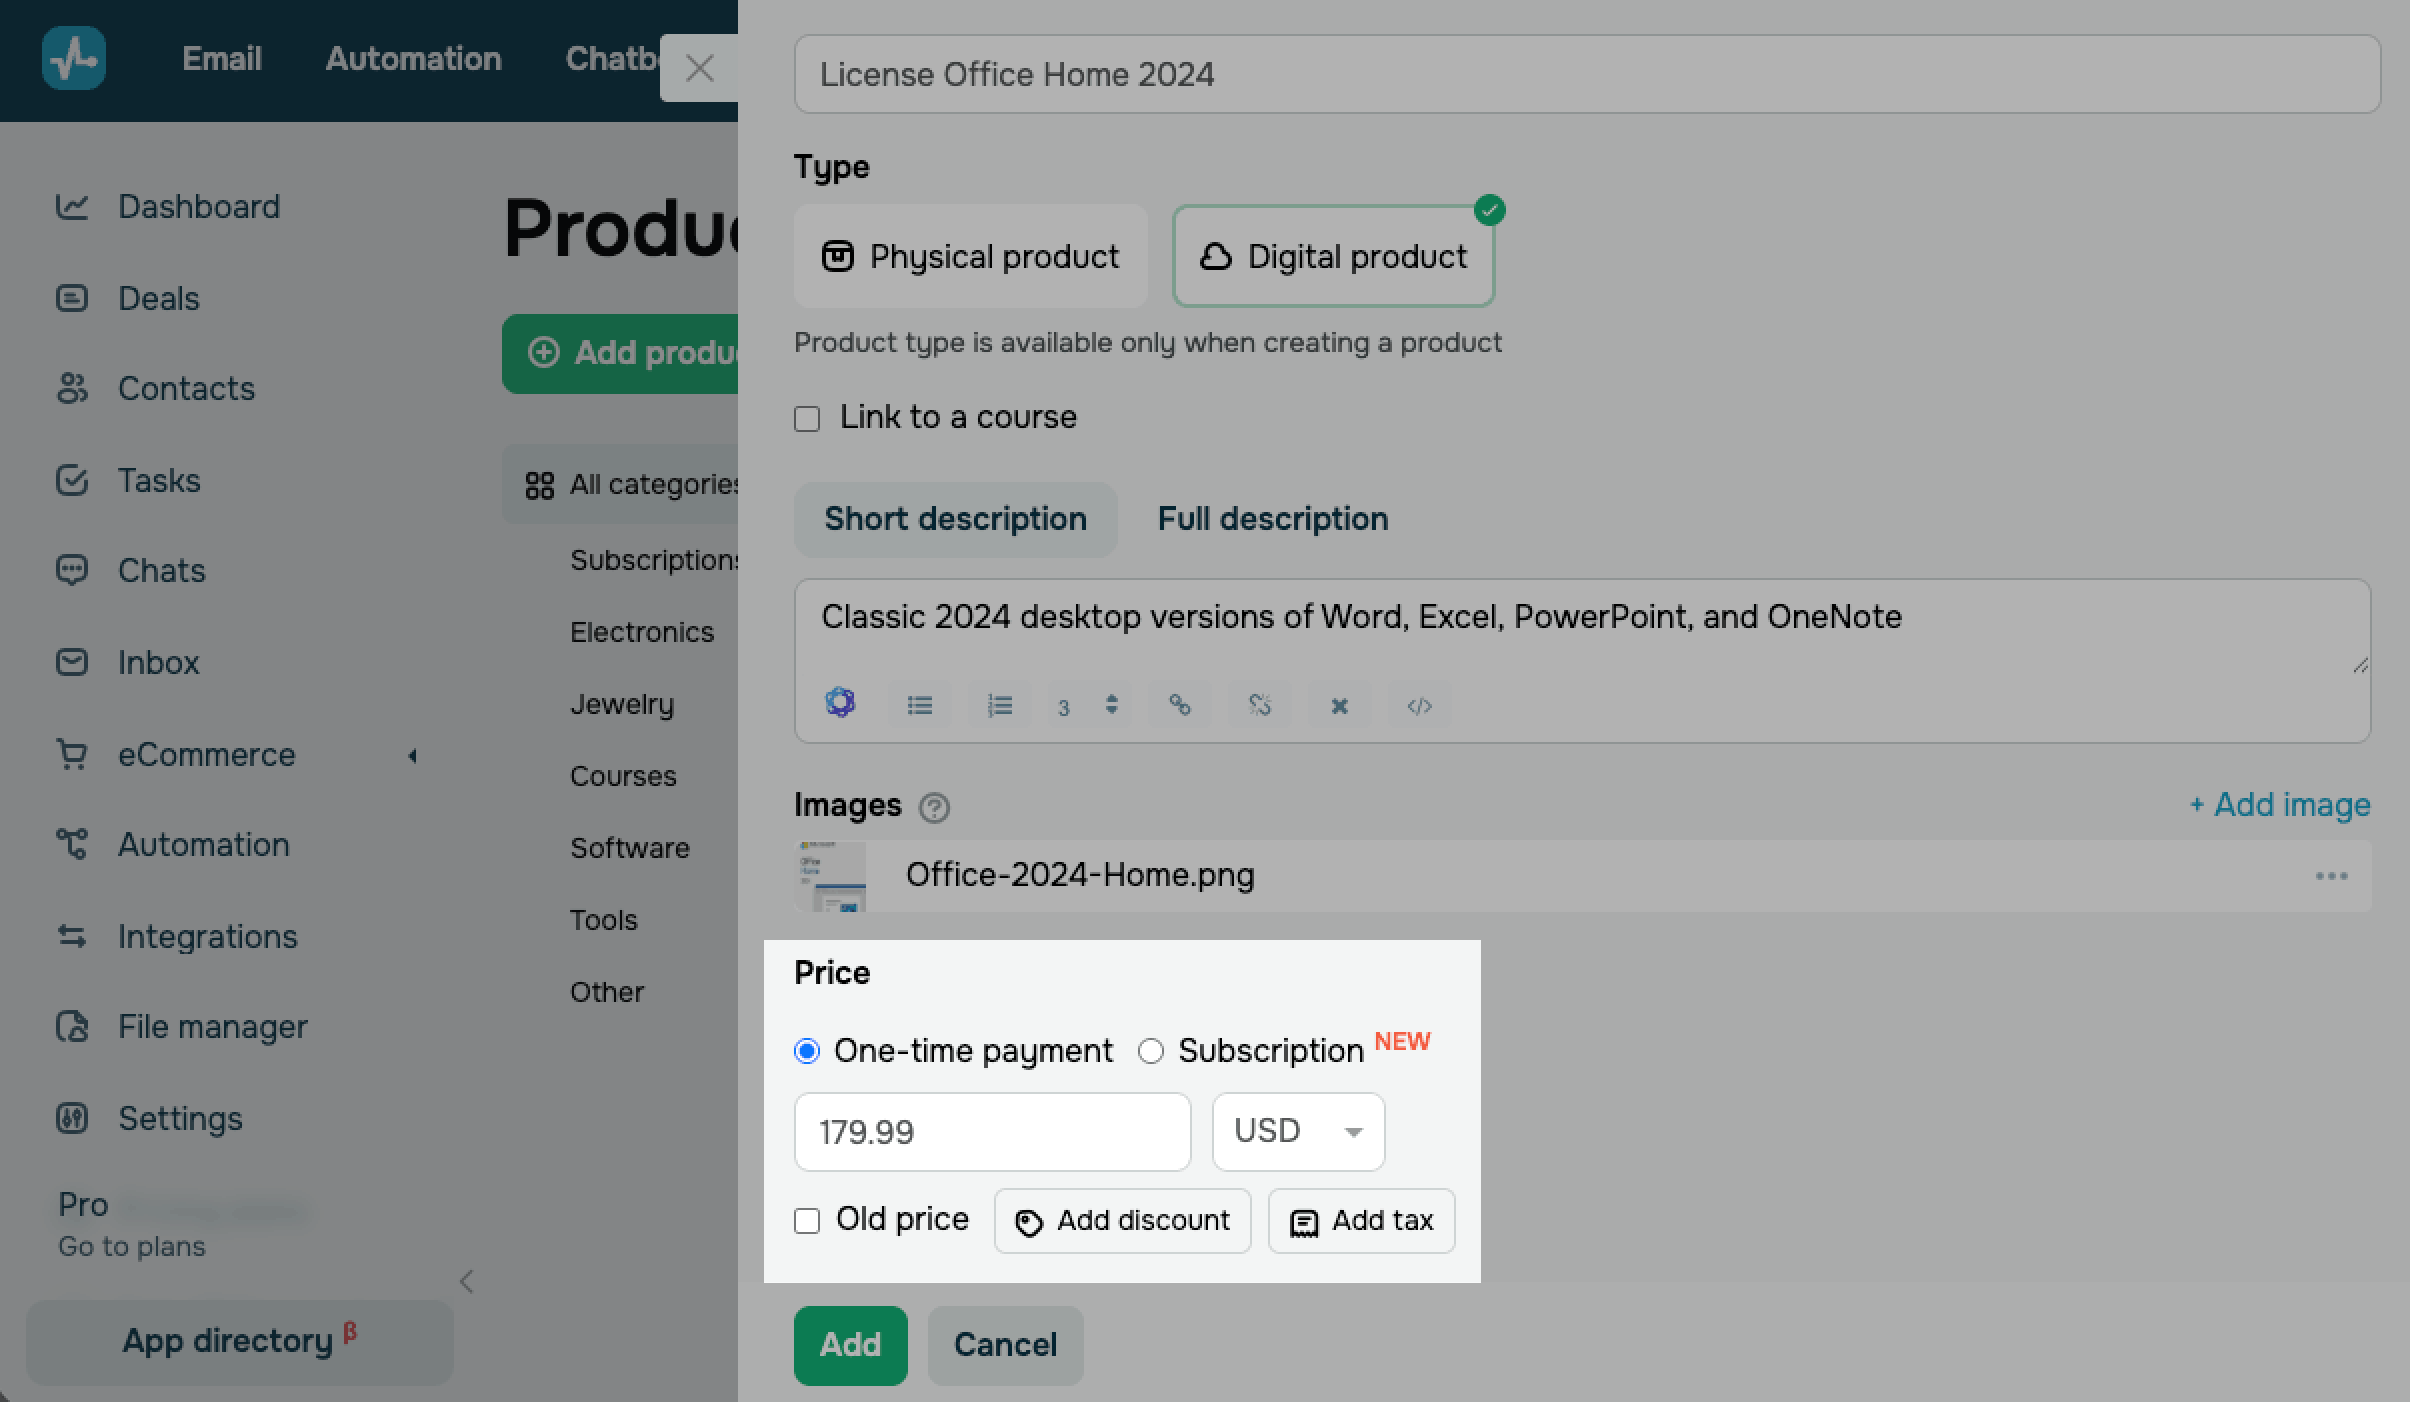
In the Price section, choose a payment model:
| One-time payment | Customers pay only once. Enter a price and choose a currency. |
| Subscription | Your customers are charged automatically on a regular schedule using their selected payment method.
Subscriptions are supported only by Wayforpay. |
To show a previous price, select the Old price checkbox and enter it. Your customers will see it crossed out next to the current price.
To give a discount on your product, click Add discount. Choose a discount type, select Percentage or Amount, and enter a value.
To limit how long your discount runs, select the Set a discount validity period checkbox and set the start and end dates and times. Click Add.
Your product list then shows the discounted price in the Final price column and the discount and tax values in the Discount and tax column.
To add tax to your price, click Add tax. In the window, choose a tax you created or No tax.
If your price already includes tax, select the Include in the product price checkbox. SendPulse shows the price with tax, the tax amount, and the price without tax. Click Add.
On your website, your customers see one final price. You see the price with and without tax in the deal.
Enter an SKU
In the SKU field, enter a unique code that helps you track and manage your product. The code can contain numbers and letters.
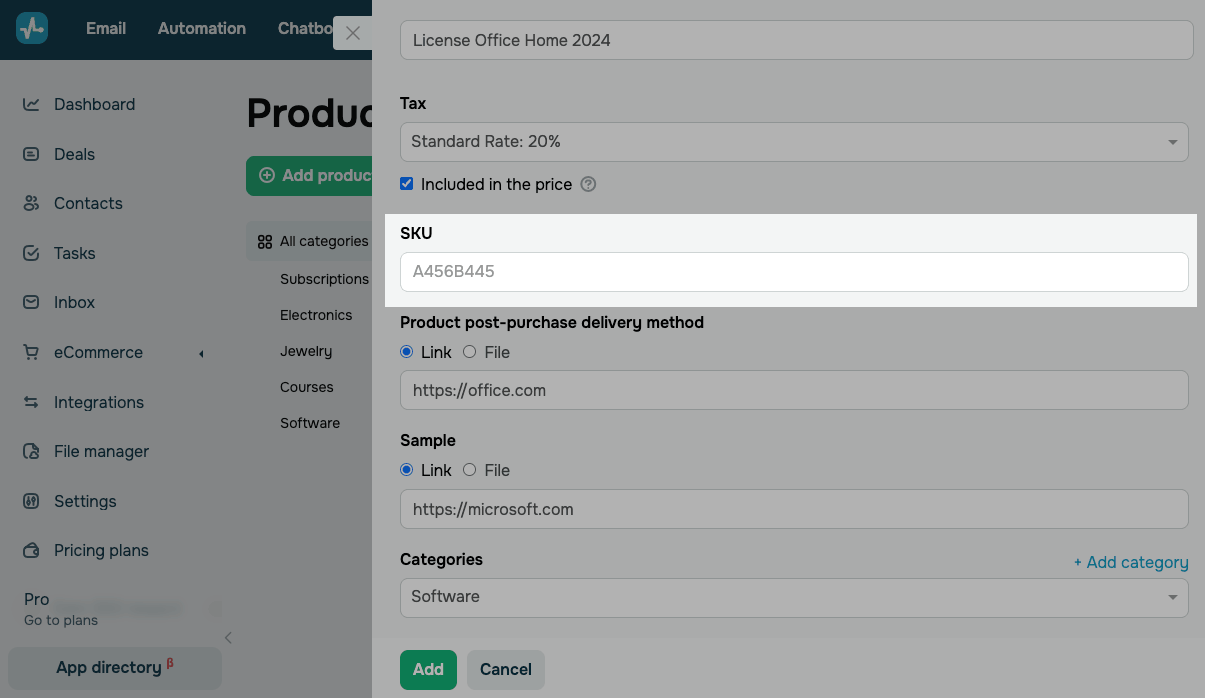
Set up a delivery method
In the Product post-purchase delivery method section, add the digital content your customers receive after payment. This is a required field.
This setting defines the form in which your customers receive the digital product they bought.
Choose a delivery method:
| Link | Paste a link to your product, such as a file, a download page, or a folder. |
| File | Click Select a file and choose a file in the file manager or upload a new one.
To update your file later, click the three dots next to it and select Replace file. The file manager supports files of any format, sized at up to 5 GB. Your storage capacity depends on your pricing plan. |
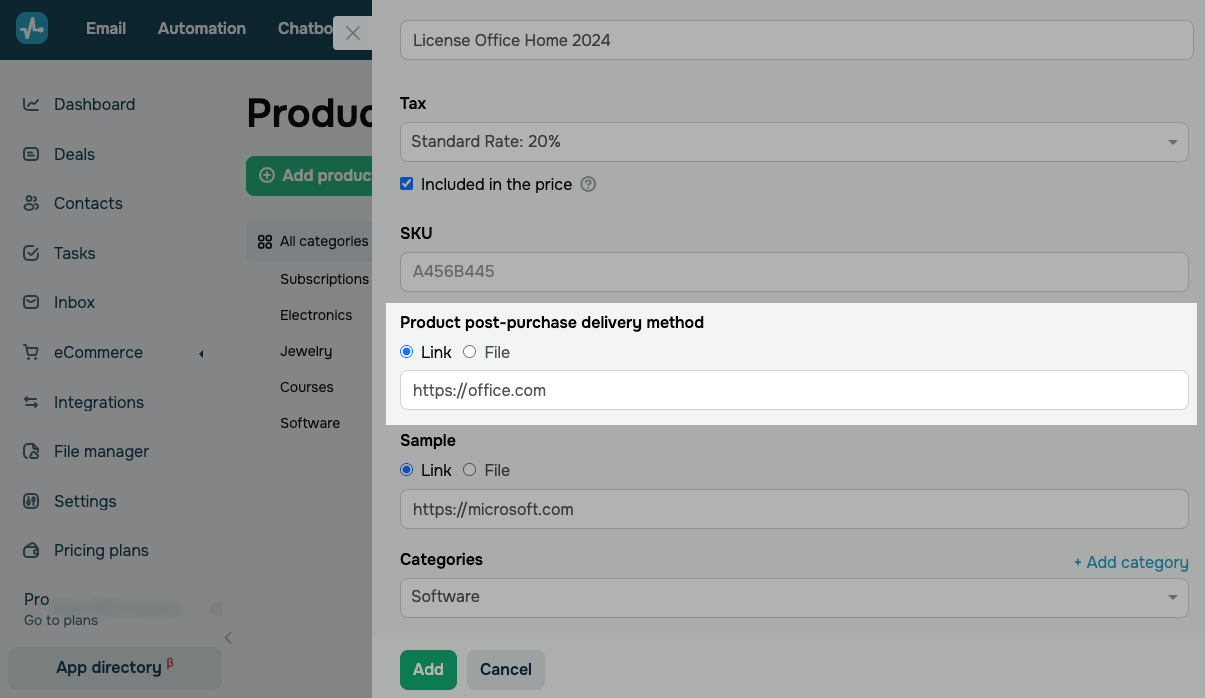
Your customer gets this link or file by email automatically after paying on your website.
Add a sample
Optionally, in the Sample section, add a free part of your product so that customers can try it before buying. For example, add the first chapter of your book, the first lesson of your course, or a demo version of your software.
Choose how to add your sample:
| Link | Paste a link to your sample. |
| File | Upload a file from the file manager. |
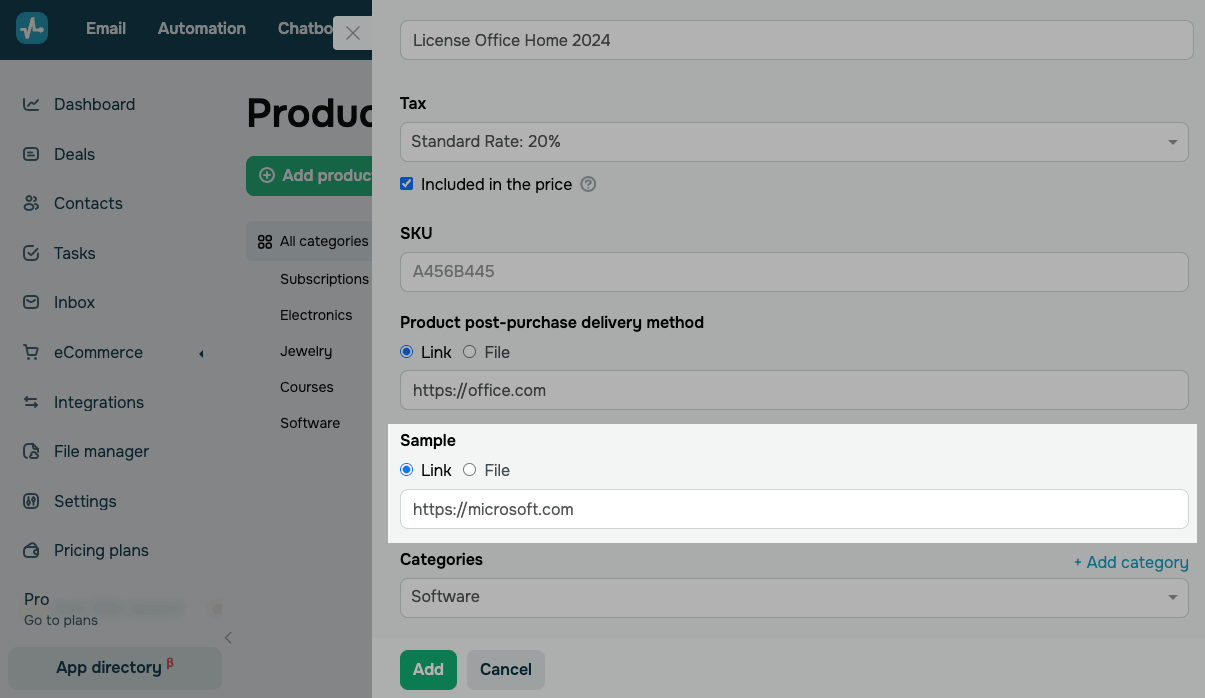
Select a category
Categories help you navigate your catalog and define attributes for template-based products. This is a required field.
In the Categories section, select an existing category.
To create a new category, click Add category.
Product categories are visible to your CRM team and users on your website.
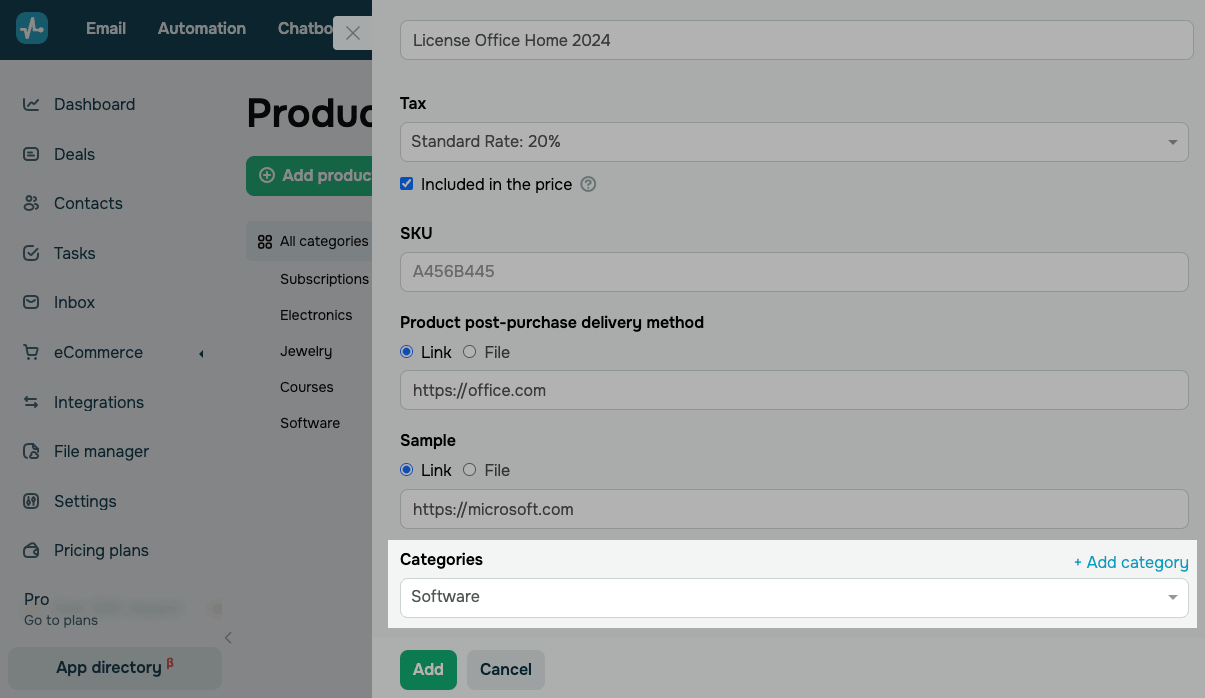
Set properties
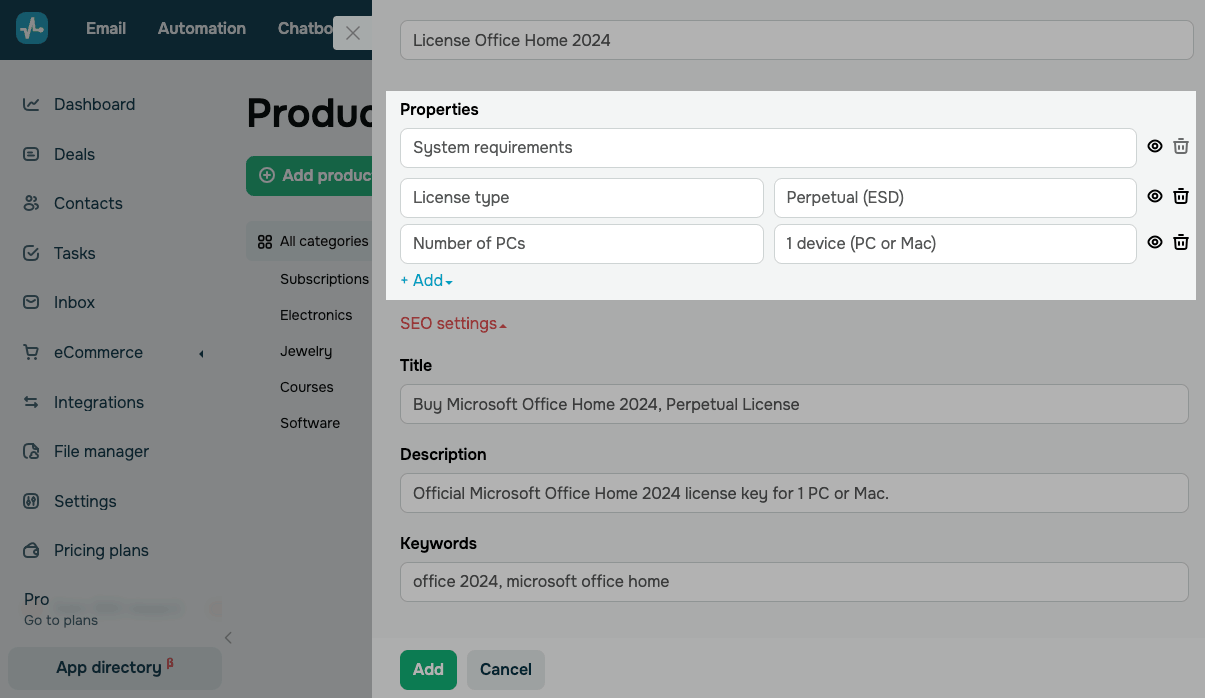
In the Properties section, you can add product attributes and their values. When customers expand the product card, they can select the option they need.
In each property, fill in the following fields:
| Attribute set name | Enter a set name to organize attributes of different types. |
| Property | Enter an attribute name, such as "License type" or "Number of PCs". |
| Value | Enter an attribute value, such as "Perpetual (ESD)" or "1 device (PC or Mac)". |
To add a new attribute or attribute set, click Add and select a relevant action.
Configure SEO settings
Optionally, add SEO metadata for your product.
If a product belongs to a category selected in your online store, SendPulse creates a dedicated product page for it using the link and metadata from these settings.
To learn how to add your store and choose categories for product pages, see Customize your online store.
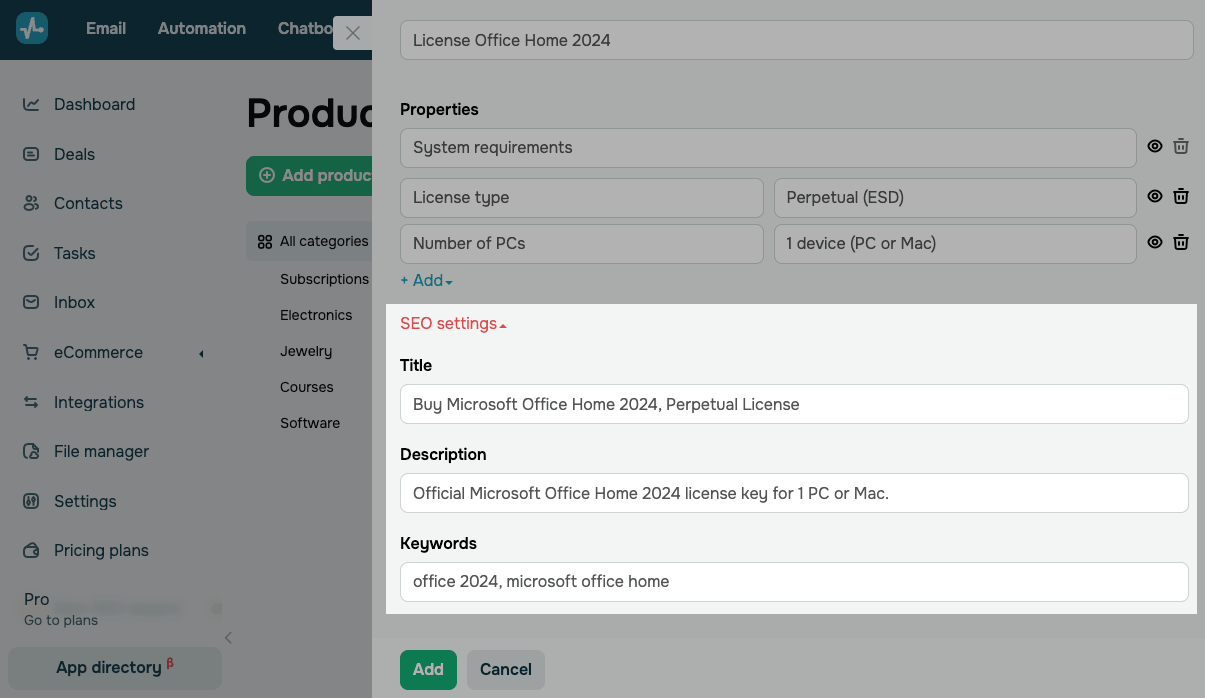
Expand the SEO settings section and fill in the fields:
| Title | Enter a page title with your product name and keywords. It can look like this: "Buy Microsoft Office Home 2024, Perpetual License". |
| Description | Enter a detailed product description that includes relevant keywords and benefits to attract users and search engines. |
| Keywords | Enter a list of keywords and phrases related to your product. |
To fill in the fields automatically, click Generate with AI. SendPulse will open a window with a ready-made prompt.
Edit the prompt to set the topic, language, or style of your metadata to match your business needs, or leave the default one.
Choose an AI model and click the generation button. AI will generate a title, description, and keywords based on your product name and description to fill in all three fields.
Edit any of them manually if you need to.
SendPulse provides up to 200 free AI requests across all tools. To track how many requests you have left or use your own AI account, add your API keys in your account settings.
Read more: Integrate ChatGPT with SendPulse tools, Integrate Claude with SendPulse tools, and Integrate Google Gemini with SendPulse tools.
Add integration fields
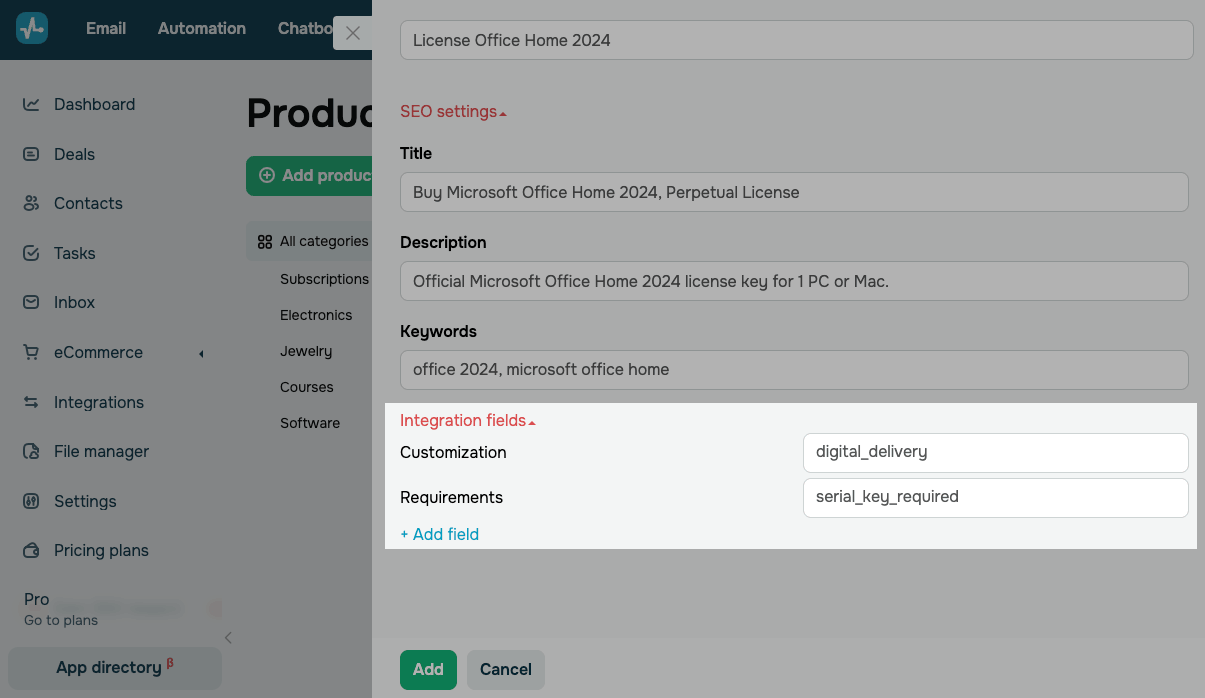
In the Integration fields section, you can add and fill in hidden product fields that pass metadata to integrated tools, such as payment providers.
To add an integration field, click Add field.
Integration fields are not visible to website visitors.
Once you have filled in the required product card fields, click Add.
Complete the setup
Once you create your product, it appears on the product list in the selected category under Products.
To sell the product, add it to the Product or Product catalog website widget or to the CRM Product chatbot element.
You can also create a flow in Automation with the Payment trigger, which starts after a product purchase.
Once the client pays, you can view the payment information in eCommerce > Payments.
 Last Updated: 07.07.2026





or