Customize your online store
Configure your online store settings to control how products are displayed, purchased, and processed on your website.
You can, for instance, connect the store to your website, choose a currency, add delivery options, and guide customers to the cart when they add a product to it.
Let’s talk about how to customize your online store settings.
Connect an online store
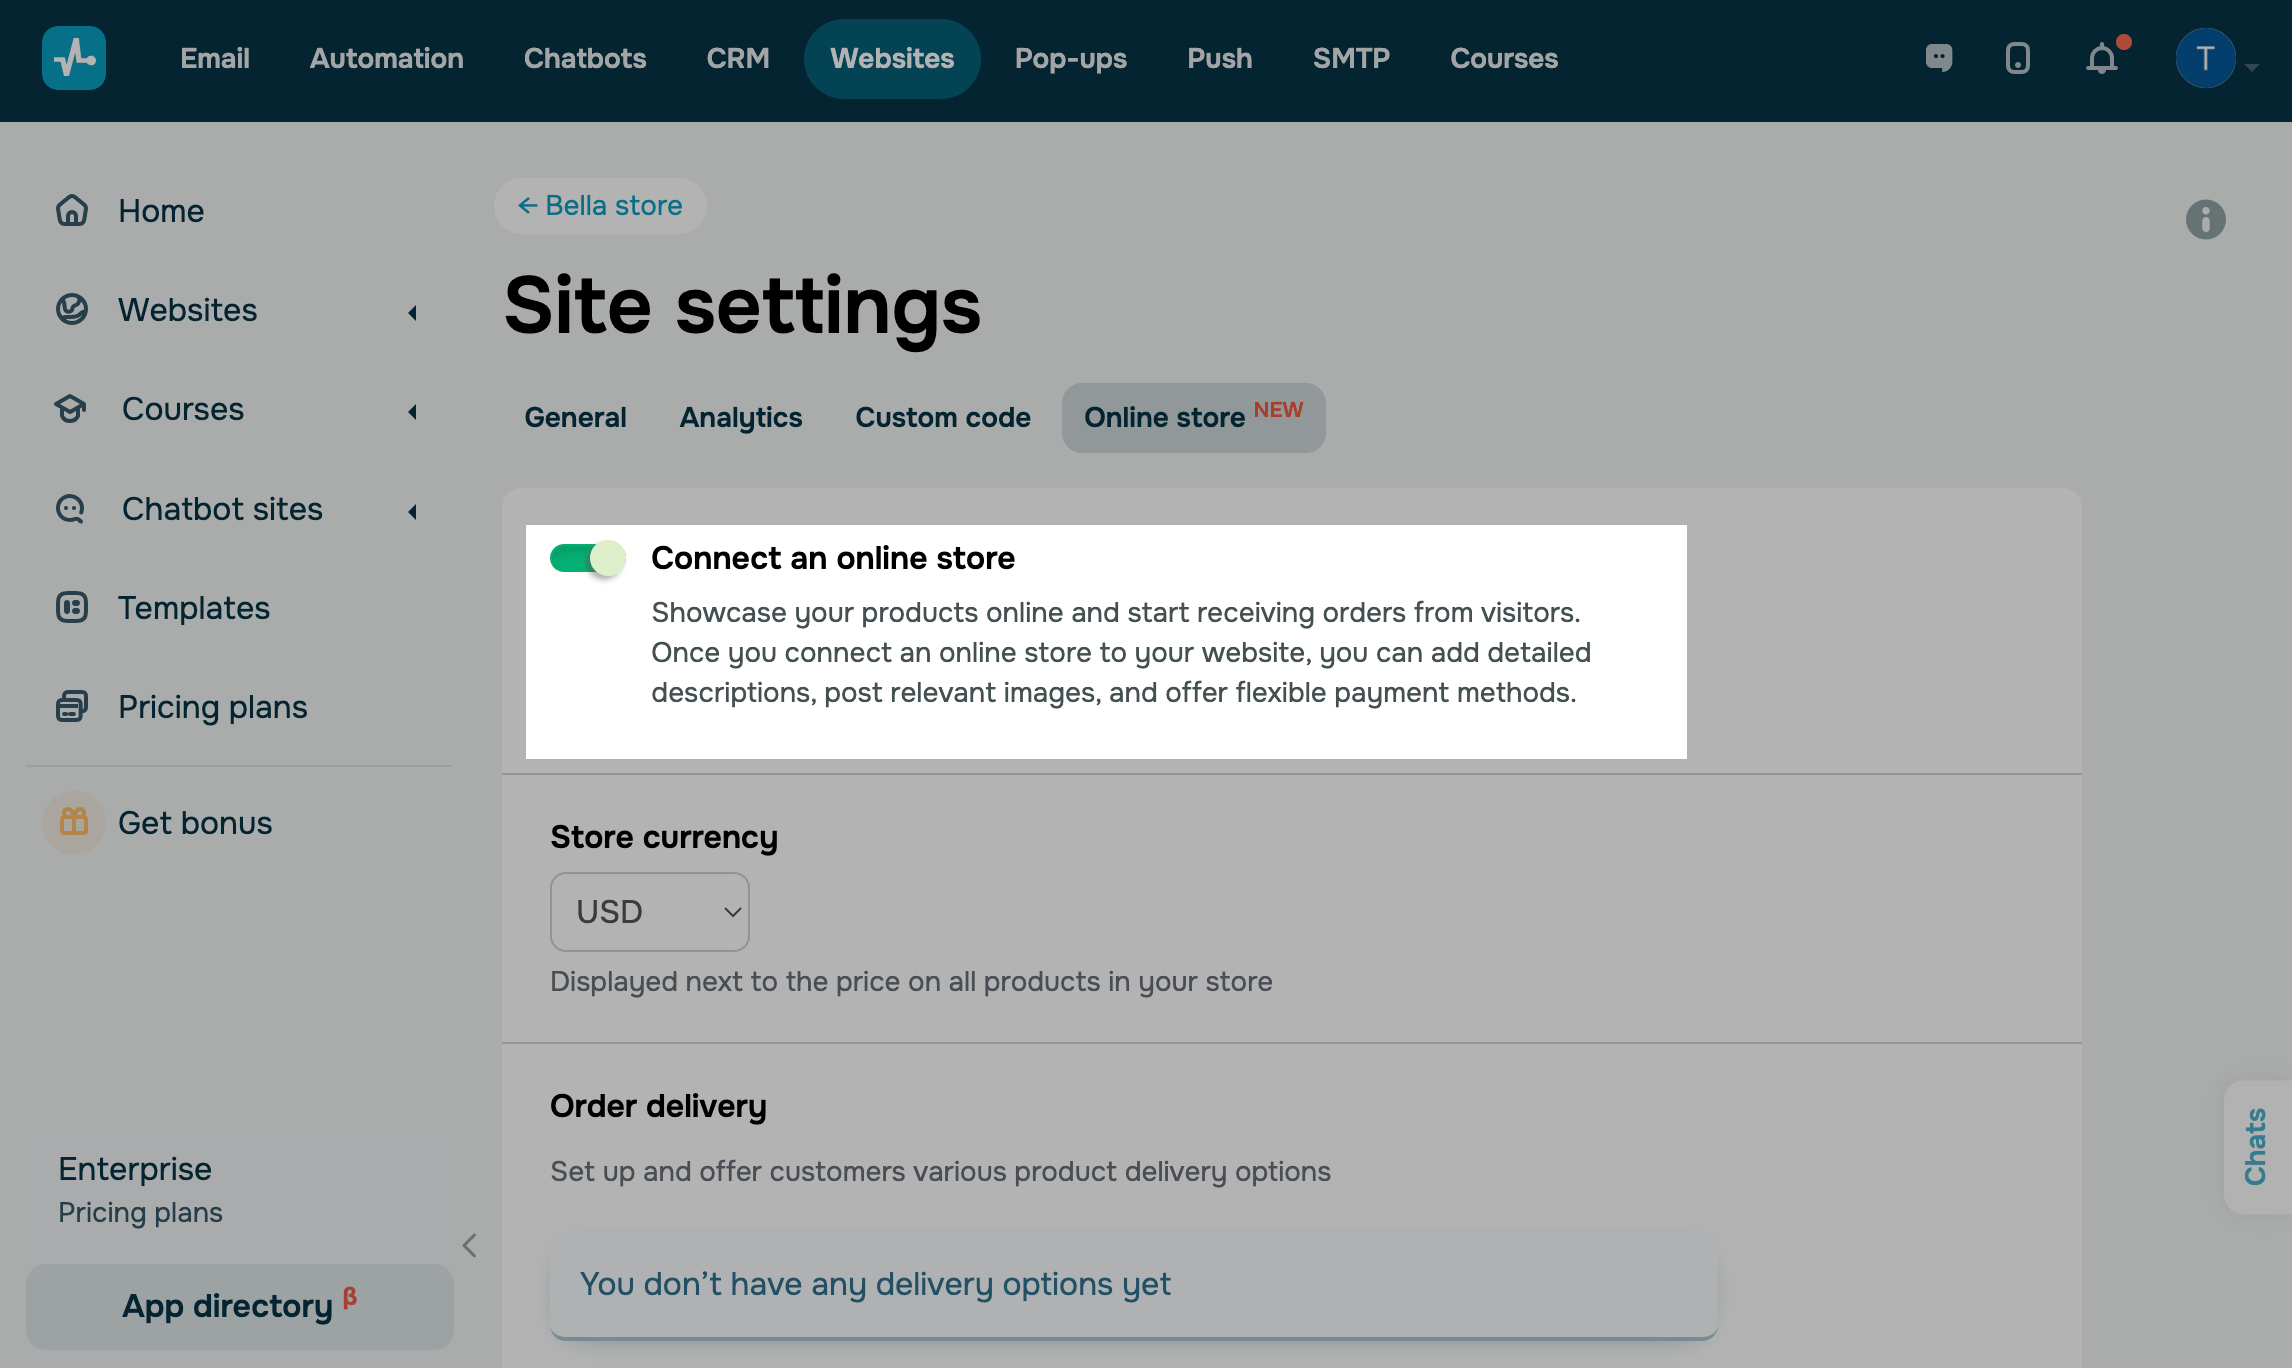
Go to your website settings > the Online store tab, and turn on the Connect an Online Store toggle.
Then, you will be able to add the Product widget, and a cart page will appear on your website.
Select a currency
In the Store currency section, select a currency that will appear in product cards and the cart.
Add a delivery option
Set up delivery methods in your online store to offer customers flexible options when placing orders.
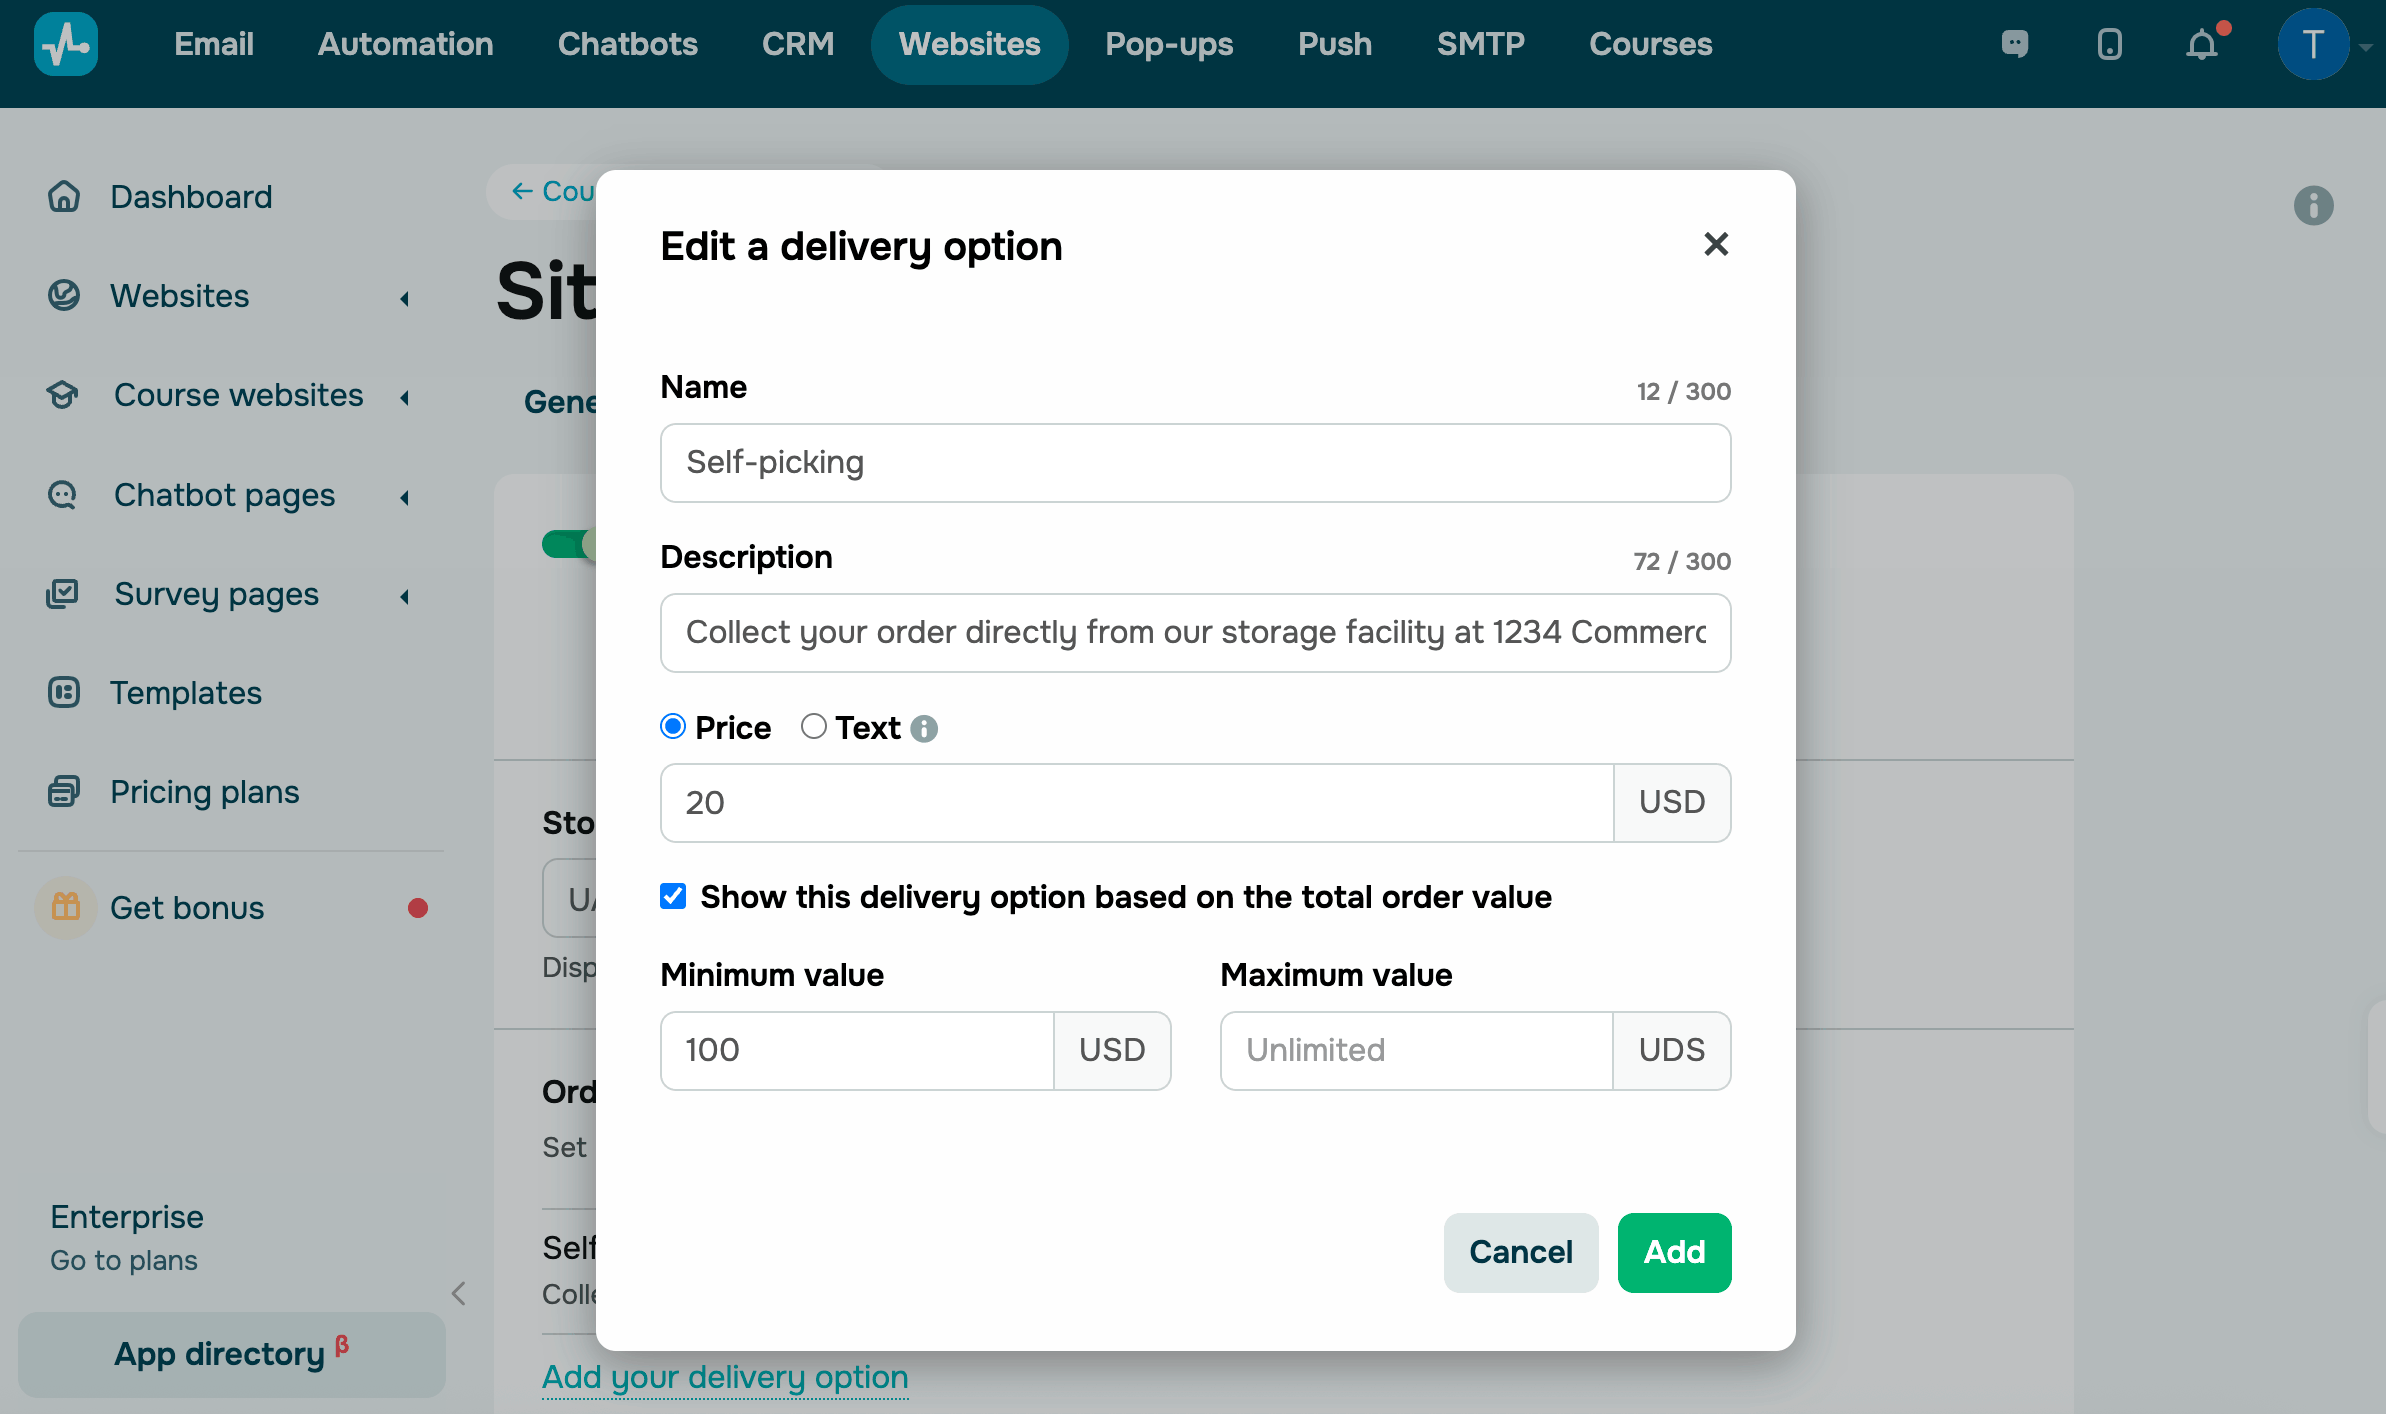
In the Delivery options section, click Add a delivery option and fill in the fields:
| Name | Enter a delivery option name. |
| Description | Enter a delivery option description. For example, if it's a pickup, you can include your warehouse address and required documents. |
| Pricing |
Choose how to charge for product delivery:
|
| Show this delivery option based on total order value |
Select this checkbox to show a delivery option based on the total order value. For example, you can add a free delivery option for orders over 100 USD. Enter the minimum and maximum order value — your delivery option will only appear for orders within this range. |
Once you add two or more delivery methods, you can rearrange them on your website. To do this, click and hold the icon to the left of a field name, then drag it up or down.
You can also edit or delete a delivery method. To do this, click the three dots next to it and select an action.
Redirect users to the shopping cart
You can redirect customers to the shopping cart when they add a product to it.
In the Shopping cart section, select the Automatically redirect to the cart after adding a product checkbox.
Configure auto-generated product pages
Pages for each product in your catalog are generated automatically.
Page content, URLs, and SEO metadata are pulled from product cards in your CRM catalog. When you change a product, its page updates automatically. Visual styles are managed in a single template and apply to every generated page.
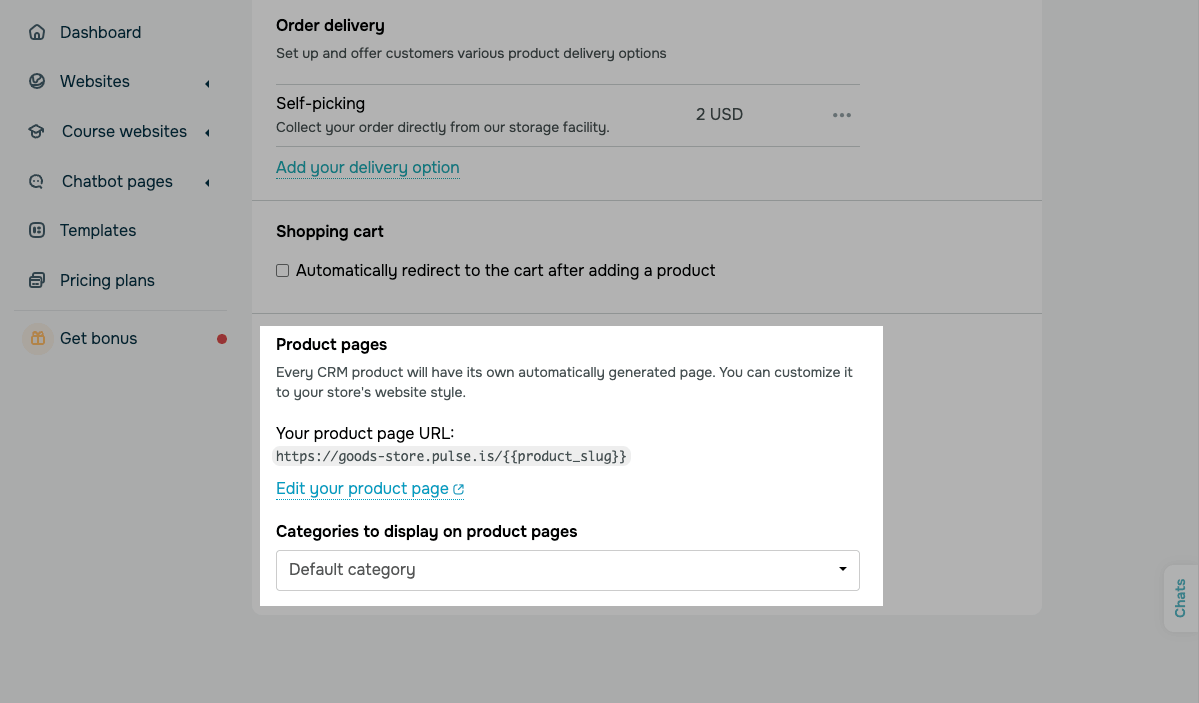
To edit a page, in the Product pages section, configure the following options:
| Your product page URL | Shows the link used for auto-generated pages, for example, yoursite.com/{{product_slug}}.
Slugs are generated using product names. You can edit the slug in CRM product cards. |
| Edit your product page | Opens the product page template in a limited version of the website builder.
Use it to set the visual style for every auto-generated product page. The Product widget is required and cannot be removed from the template. |
| Categories to display on product pages | Select one or more categories from your CRM catalog.
To manage the list of categories, go to CRM > eCommerce > Products. |
Once you configure the settings, SendPulse will create a page for every product in the selected categories. A new product added to a selected category later gets its own page automatically.
If a product is hidden in your CRM catalog, its page returns the website’s 404 page. If a product is deleted from the CRM system, its page is removed automatically on every linked website.
If a product is linked to multiple websites, SendPulse generates a product page for each one. These pages use the same SEO metadata, but their URLs differ based on each website’s domain.
 Last Updated: 23.10.2024



or