Generate payment links in CRM
You can create payment links in your CRM system and share them with customers. This will make their payment process more comfortable, and your accountants will have another tool for reporting.
In this article, we will talk about how to generate payment links and use them.
How to create a link
A payment link is a way to receive an online payment for a specific order via a created invoice. You can share it using a chatbot, email, or live chat.
Once a user clicks your link, they will be able to pay for their order.
Create a payment
You can create a payment link in your contact cards or deals.
In a contact
Go to the Contacts tab, and find a contact on the list. Open their card, go to the Payments tab, and click Create payment.
If you create a payment link using a contact card, a deal for the payment will be created during the payment process — all data will be saved there.
In a deal
Go to the Pipelines tab, and click the required pipeline. Open your deal at any stage, go to the Payments tab, and click Create payment.
Set up payment options
You can create a link that allows users to pay for your products or SendPulse-powered courses.
| Custom payment type |
Creates links for any payment in the CRM system. This type is selected by default. |
| EDU payment |
Generates course payment links. You can select only paid courses from your account. |
In the Payment description field, enter the payment information that your customer will see on your payment page.

In the Contact section, select contact details specified in your deal — name and email address. A payment record and its link will be added to this contact's card. The name and email address you entered in their CRM deal will not be displayed to the client during payment.
If you create a payment link in a contact card, this user’s data will be filled in automatically without requiring a manual selection.
Select a payment method connected to your account, and enter a payment amount.
Read about how to connect different payment methods in the Accept Payments section.
You can also limit your payment link validity. The value is set in days, and the minimum value is one day (24 hours).
Click Create.

Generate a link
Once your link is generated, you can copy and send it to your customer. To do this, click Copy — it will be saved to your clipboard.

To generate another link, click Create a payment, and follow the same steps.
What the payment page looks like to your customer
When a user visits your payment page, they will see the payment method you selected, the payment description you entered when creating your link, the payment amount, and the currency.
Your page appearance will depend on the payment method you have selected.

There will also be fields where your client needs to enter their credit card details, email address, and phone number.

How to view payment information
Payment status
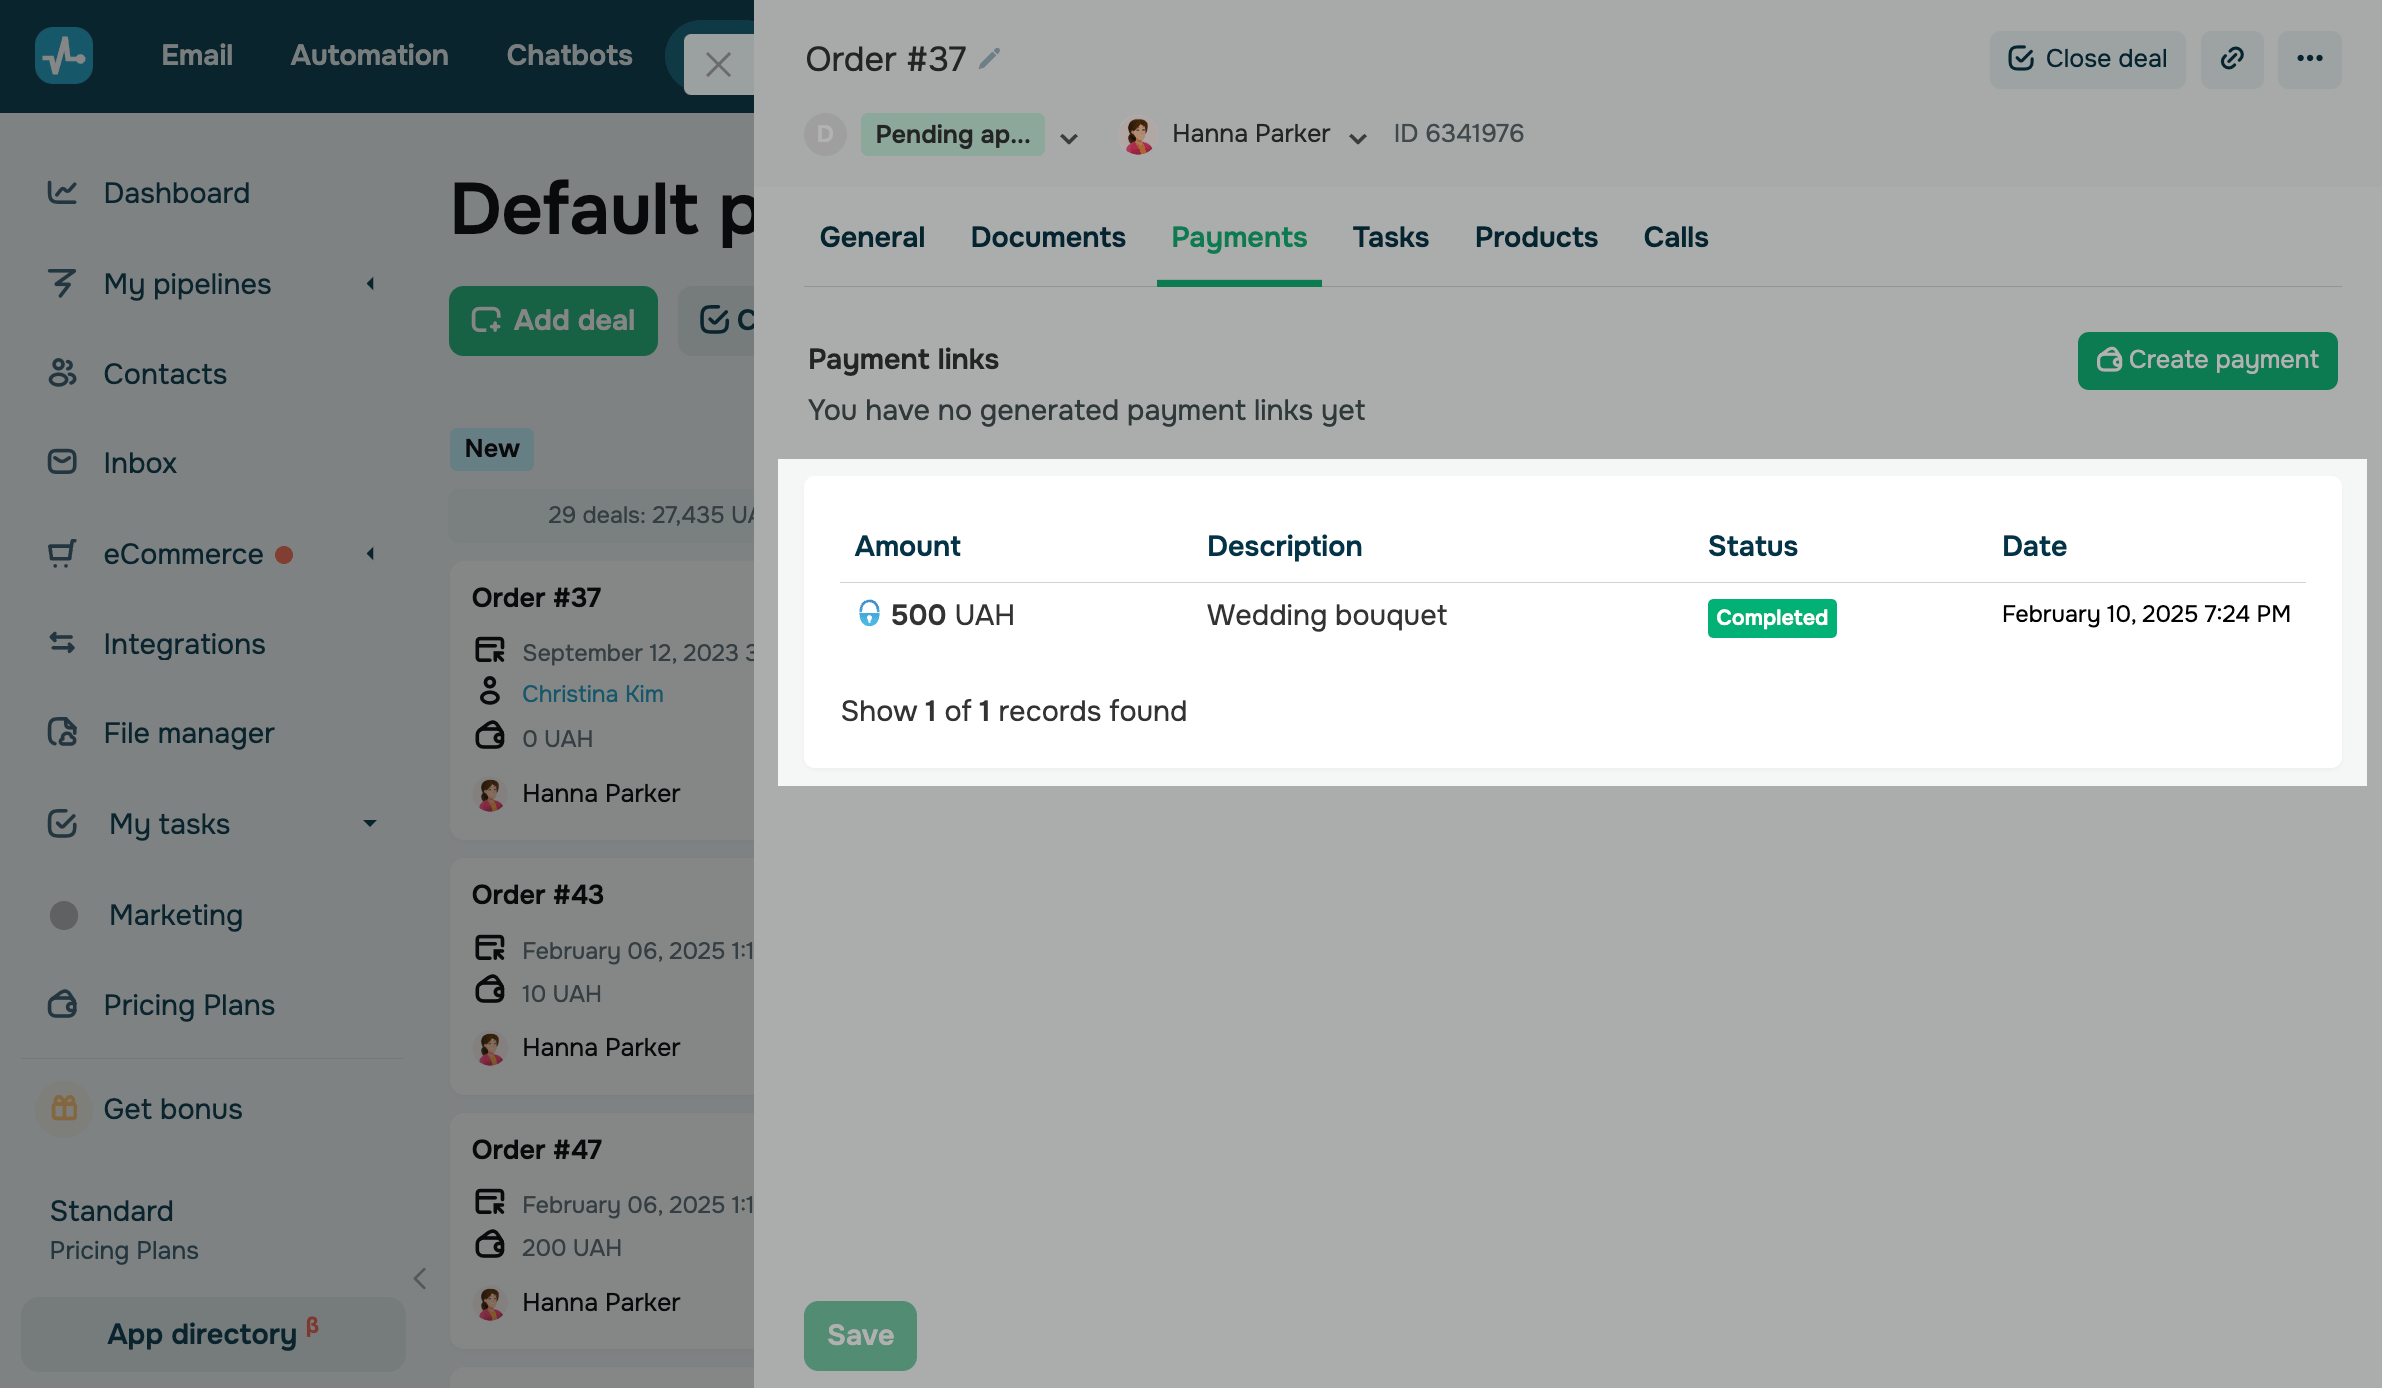
When a customer clicks your link, a payment record will appear in the Payments section. It specifies the payment amount, currency, description, method, and date and time. Records will be created as many times as a click-through is recorded.
You can view the payment statuses.

Manual confirmation
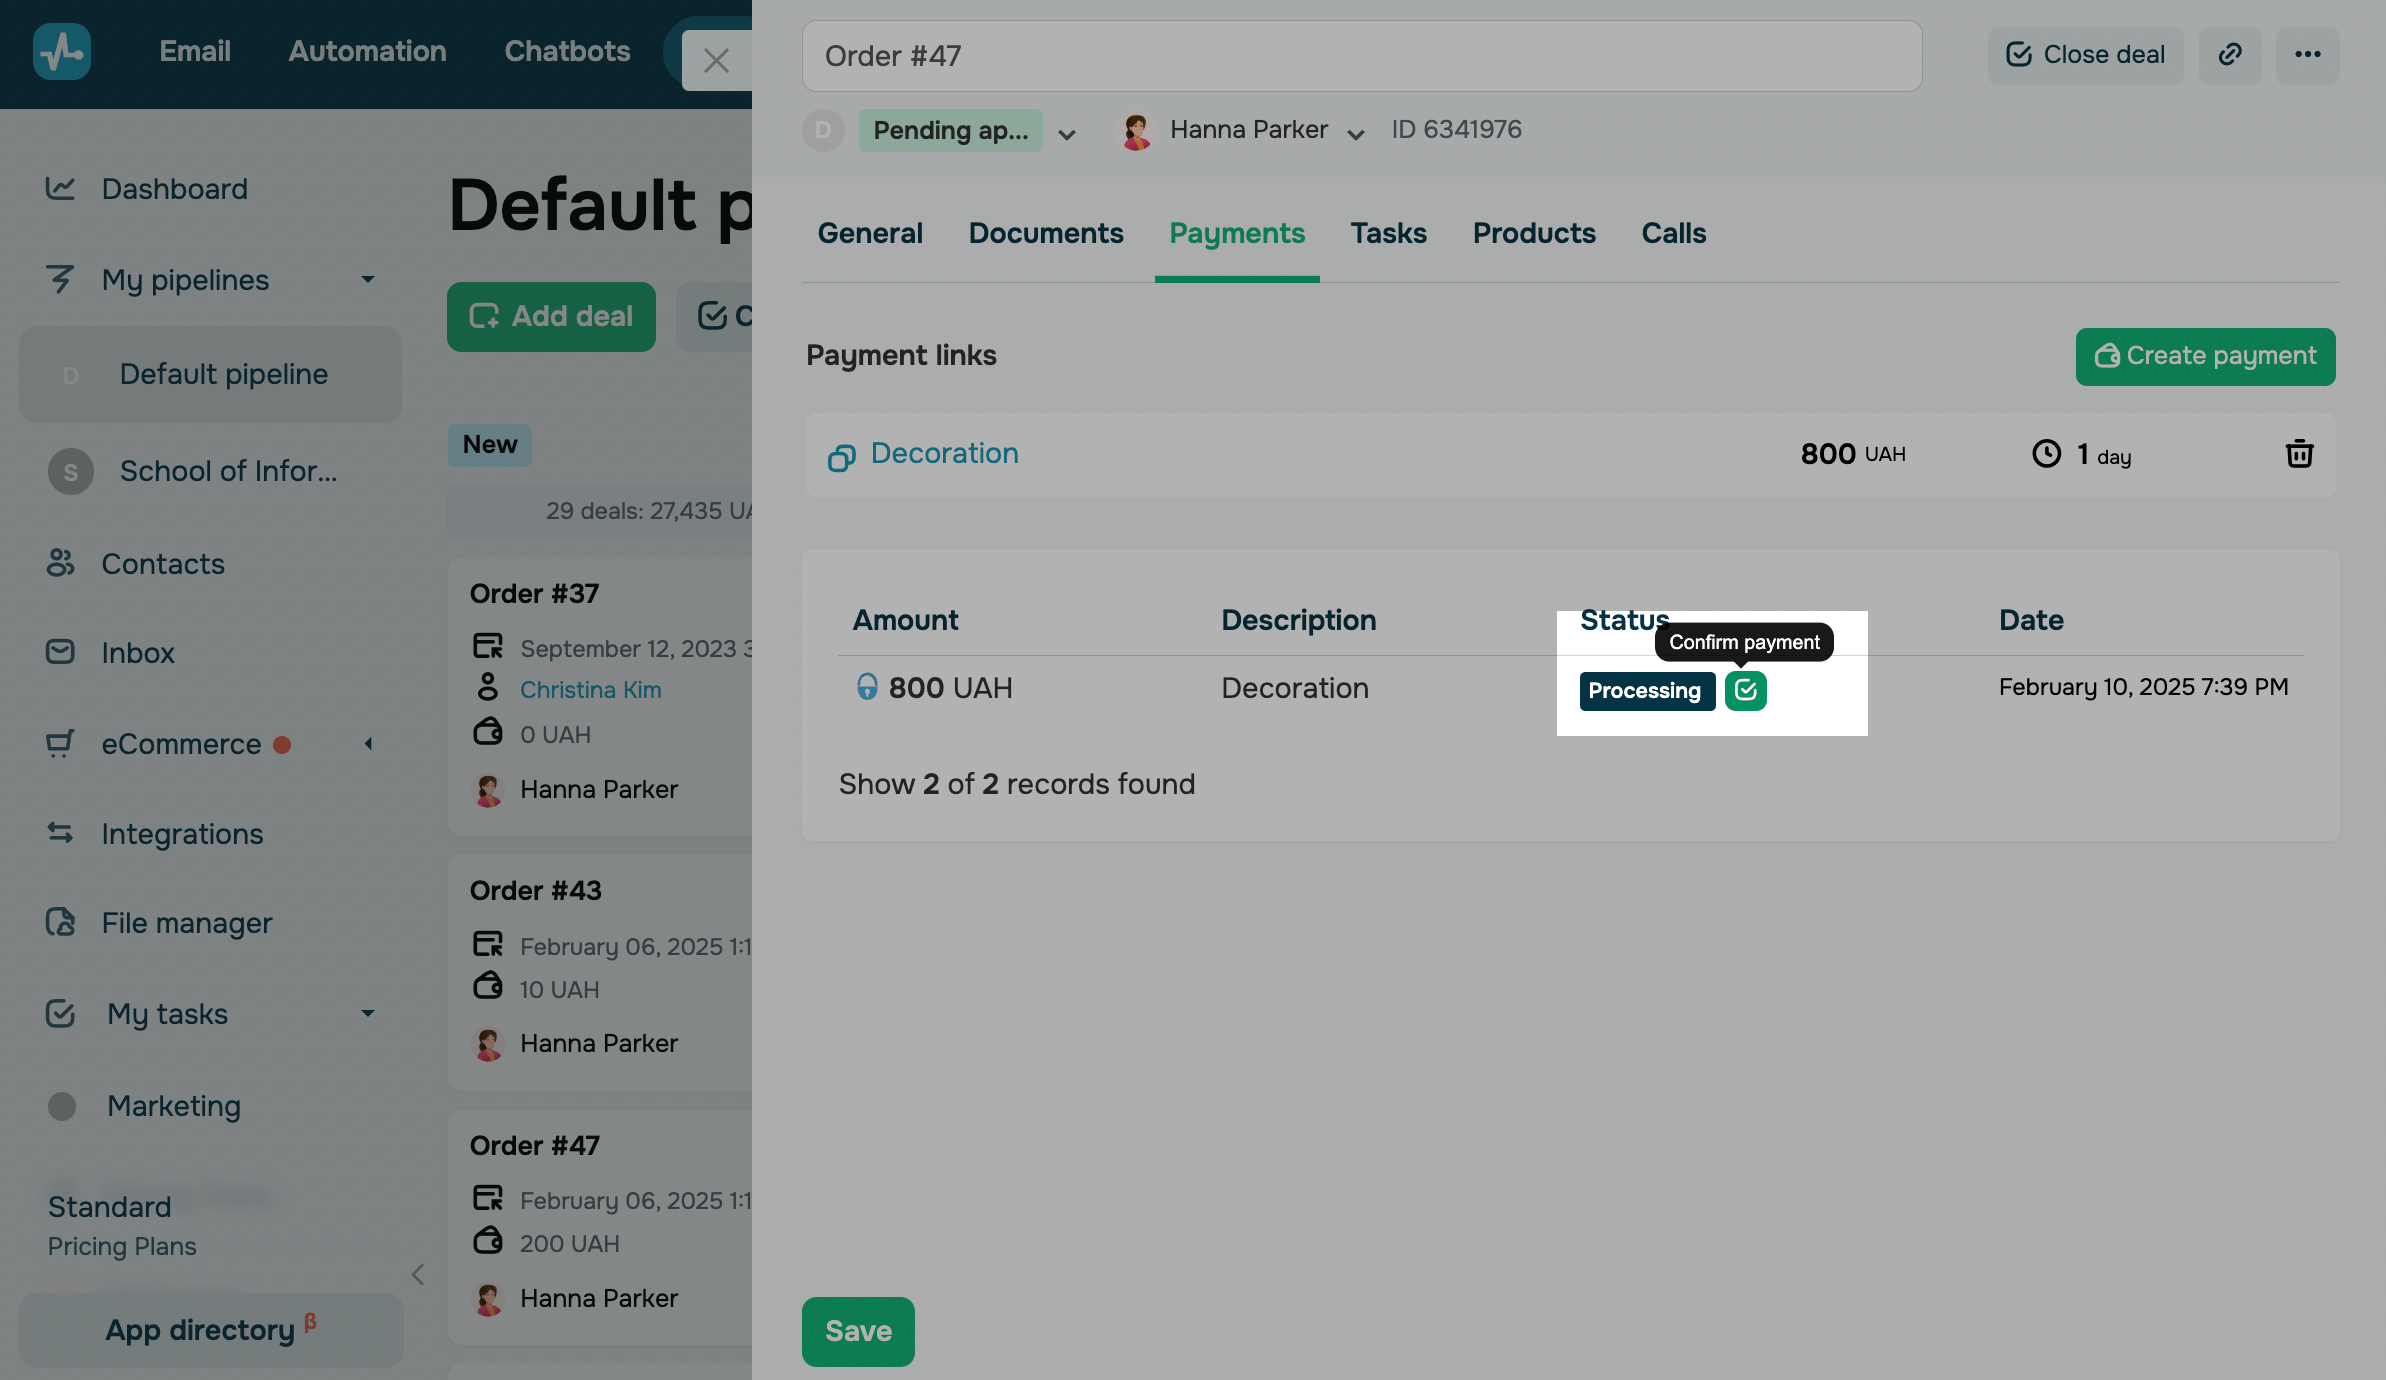
If a customer pays using alternative methods (for example, using your payment information in their online banking app) without following your payment link, you can manually confirm their payment.
Open their deal and go to the Payments tab. Click the green Confirm payment button next to the payment status.

The payment status will change to Confirmed by team member, and the payment will become completed in the Payments section.
How to manage payment links
If you have automated the process of transferring deals between stages based on payment status, your deal will be moved according to these settings once the payment is made through the generated link.
Read more: Customizing a pipeline.
You can remove your link if purchase details have been changed or a customer has not paid while your link was active.
You can click the trash can icon and delete an invalid link.
You can then generate a new link and send it to your customer. Click Create payment, and configure the same settings.
Last Updated: 07.08.2024
or