A360 event flow trigger
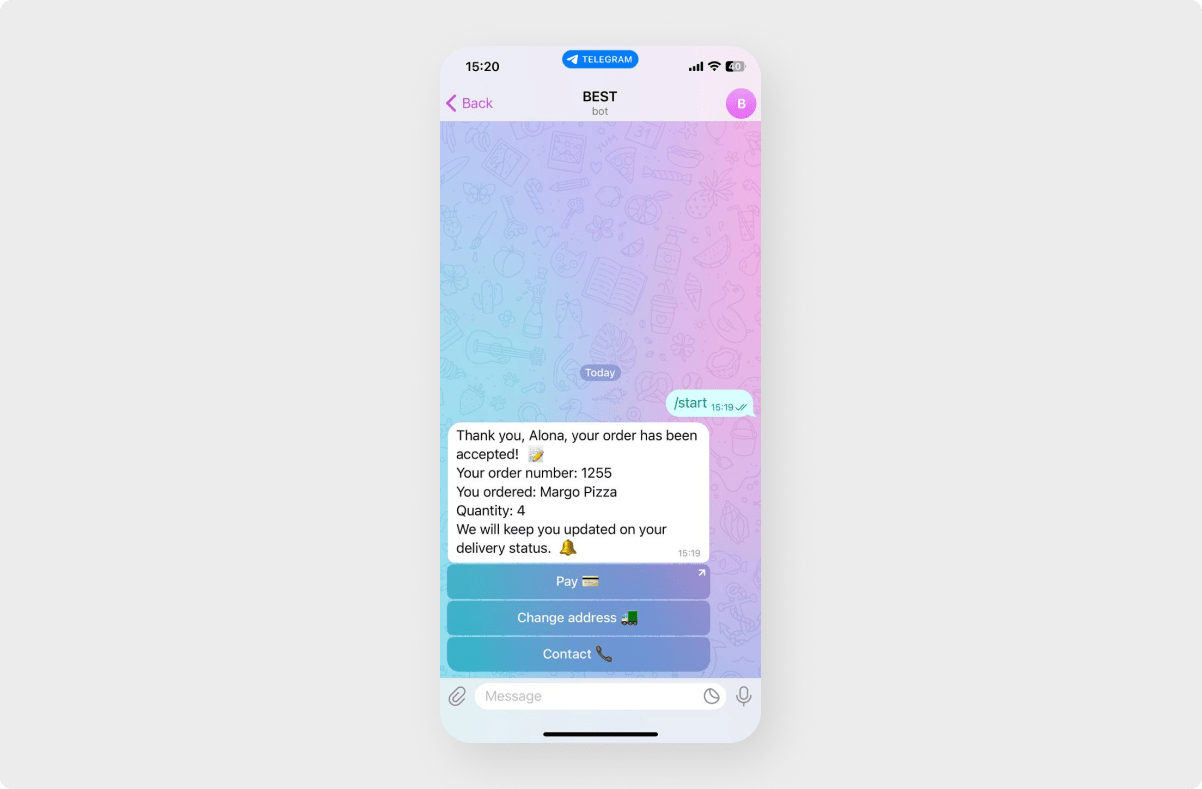
You can send a message to a user in a messenger with confirmation of their reservation or order: order number, quantity of products, name of each product, etc.
Create an event, launch it on your website by sending data to the desired URL, transmit a message, and develop a chatbot script for closing the deal.
If you are already using the SendPulse event system, now you can launch an event not only for email flows, but also bot flows.
The information in this article describes how to launch a chatbot flow by event using the A360 Event trigger in the chatbots section. To send a message, you need a bot ID and subscriber contact data or Contact ID.
To launch a chatbot by email or phone number of a subscriber using an A360 flow, read the article "Messenger" element in Automation 360.
Create an event
Go to Automation > Event Manager, and click Add new event.
To trigger a chatbot, you need to pass the chatbots_channel variable and identify your subscriber using one of two methods.
The chatbots_channel variable indicates the following communication channels: tg (Telegram), fb (Facebook), wa (WhatsApp), ig (Instagram), vb (Viber).
Method 1. Identification via the bot ID and contact data
To identify your subscriber using a first method, you need to pass the email, phone, or bot_id parameters.
How to to get your bot ID:
- copy the parameter from the address bar on your chatbot page.
- use these API methods: Get account info, Get a list of connected bots;
- find the
bot_idparameter in your webhook.
The email or phone variables indicate a user's contact details.
Note: the recipient must be subscribed to the chatbot using which you will send the message and have an email or phone number included in your chatbot's Audience. Read more about how to get additional variables: Messenger in Automation 360 and Adding or Updating Your Variable Value.
Method 2. Identification via the contact ID
To identify your subscriber using a second method, you need to pass the chatbots_subscriber_id variable.
How to get a Contact ID:
- find the
contact_idparameter in your webhook; - make sure the user follows the link where you added the {{contact_id}} parameter;
- use these API methods: Search contacts by tag, Search contacts by variable;
- copy the parameter from the address bar in the chat with the user in your account.
After adding all the required fields, click Add.
Copy the request URL and JSON data transfer format.
You will need to set up data transmission to the specified URL at the right time from your site: for example, after clicking on the "Order", "Confirm event" button, or after the user has left the site, leaving the order unfinished.
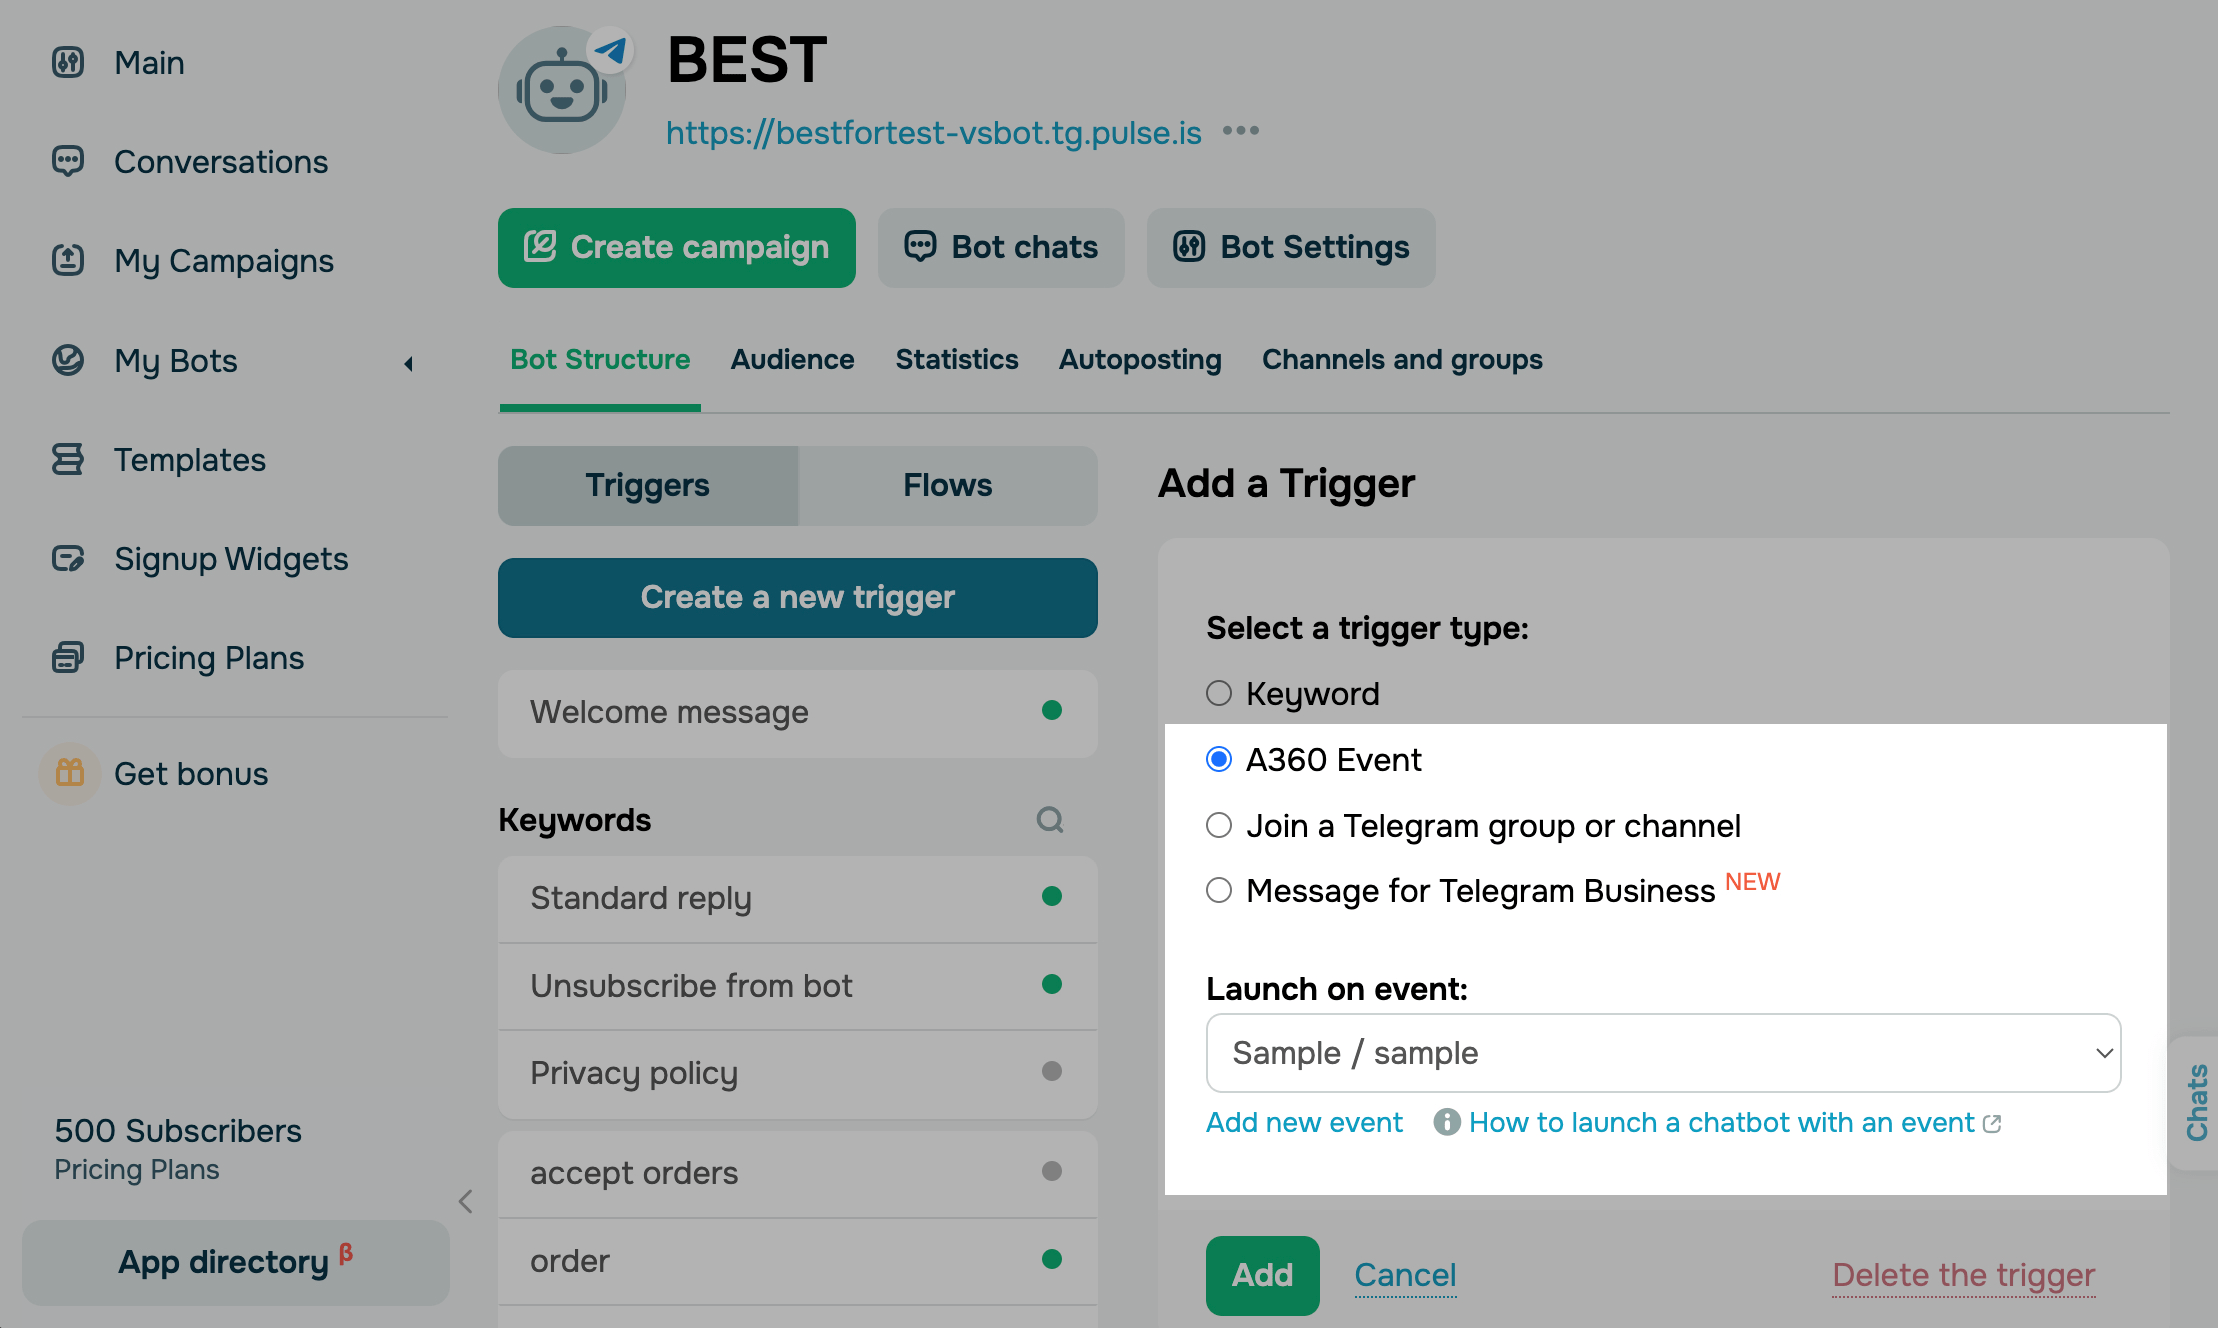
Create a trigger
Now you need to create a trigger that launches when an event is received.
Navigate to the Chatbots section, select a bot and click Create a new trigger. In the trigger type setting, mark A360 Event and select the created event that will be your trigger.
Connect the flow
Now you can connect the chatbot scenario. After creating a trigger, click Create flow to create a new one or Link an existing one.
You can bind any flow that is not connected to a trigger. All unbound threads are stored under the Saved Chains button.
Create a message
The variables that you receive through the event can be used in your message as a JSON path of the structure expression.
In the first start message, write the variables in the form {{$['somekey']}}, where you insert the name of your variable in place of somekey.
Note that data that you are not writing can only be used once in the next text element.
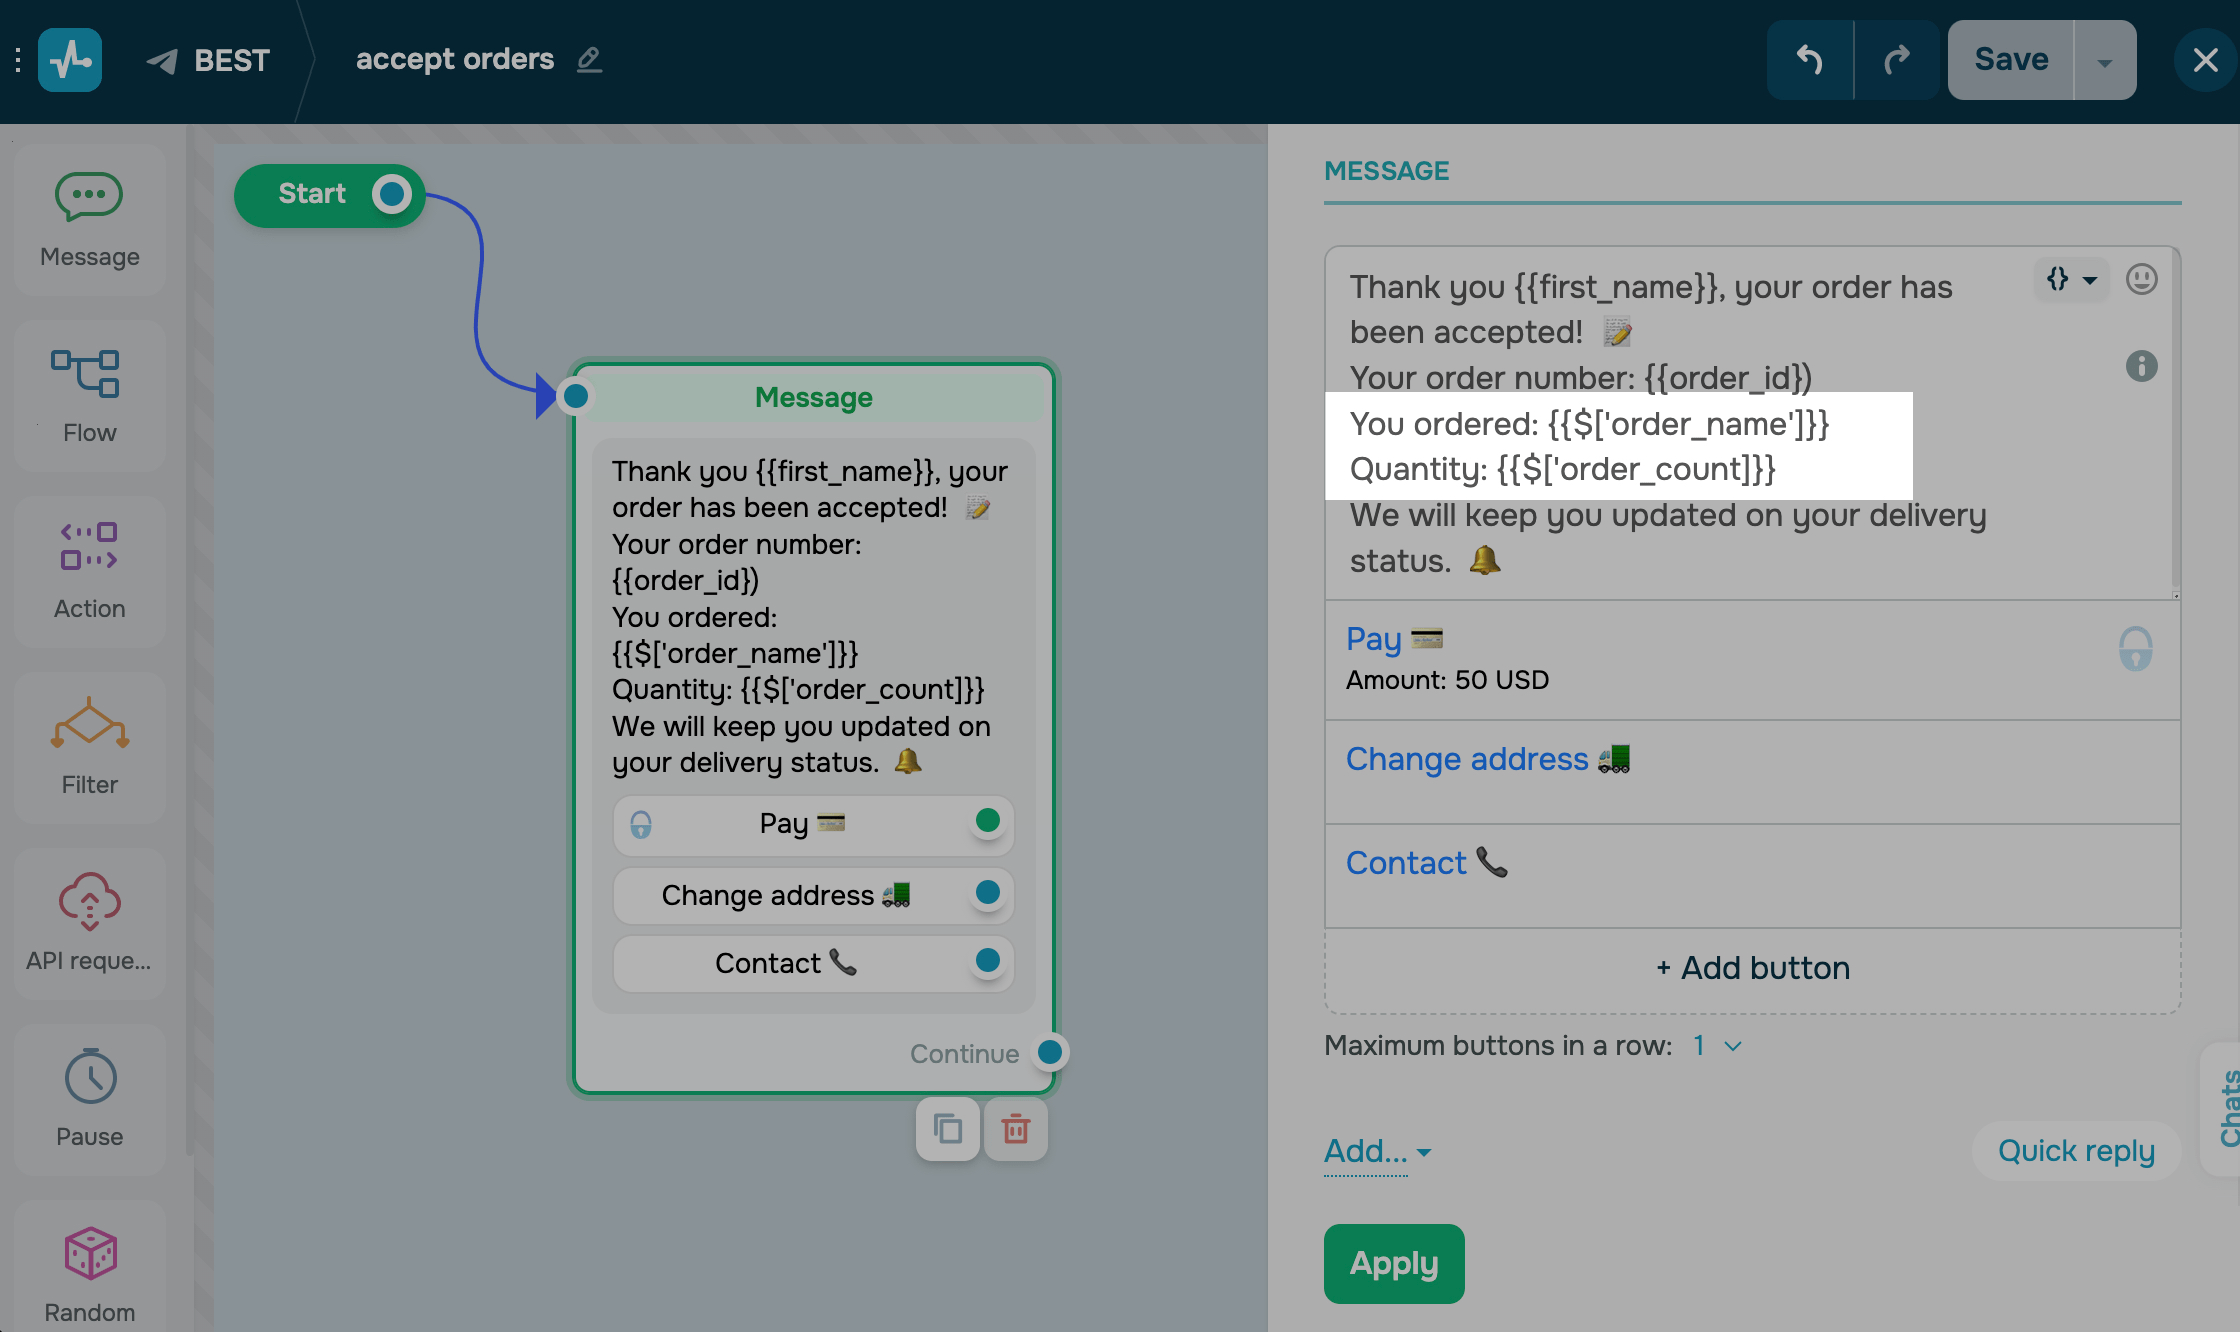
You can also add a button to the start element that will continue your scenario through the flow.
You can extend the scenario by adding the additional elements to it.
For example, you can add a button like "Leave a question," "Contact a manager," or details about the methods of payment and conditions for receiving products from your brand. Either ask the user for more data that you are missing, request the order status from CRM or send confirmation data to CRM, filter the received value, and build a flow scenario in accordance with the result.
Send the event
You can test receiving a message with data through the program. With the help of such programs, you can send data only in demo mode - it will not work for sending real data from your site. For real cases, the backend of the site is used with the operation of the site database in various programming languages and the sending of such requests is configured by the programmer.
For the tests, we will use Postman.
Add a link to the created event in the URL field. Select the request method POST.
Insert the transmitted parameters in the JSON format into the request body.
To send a request, click Send.
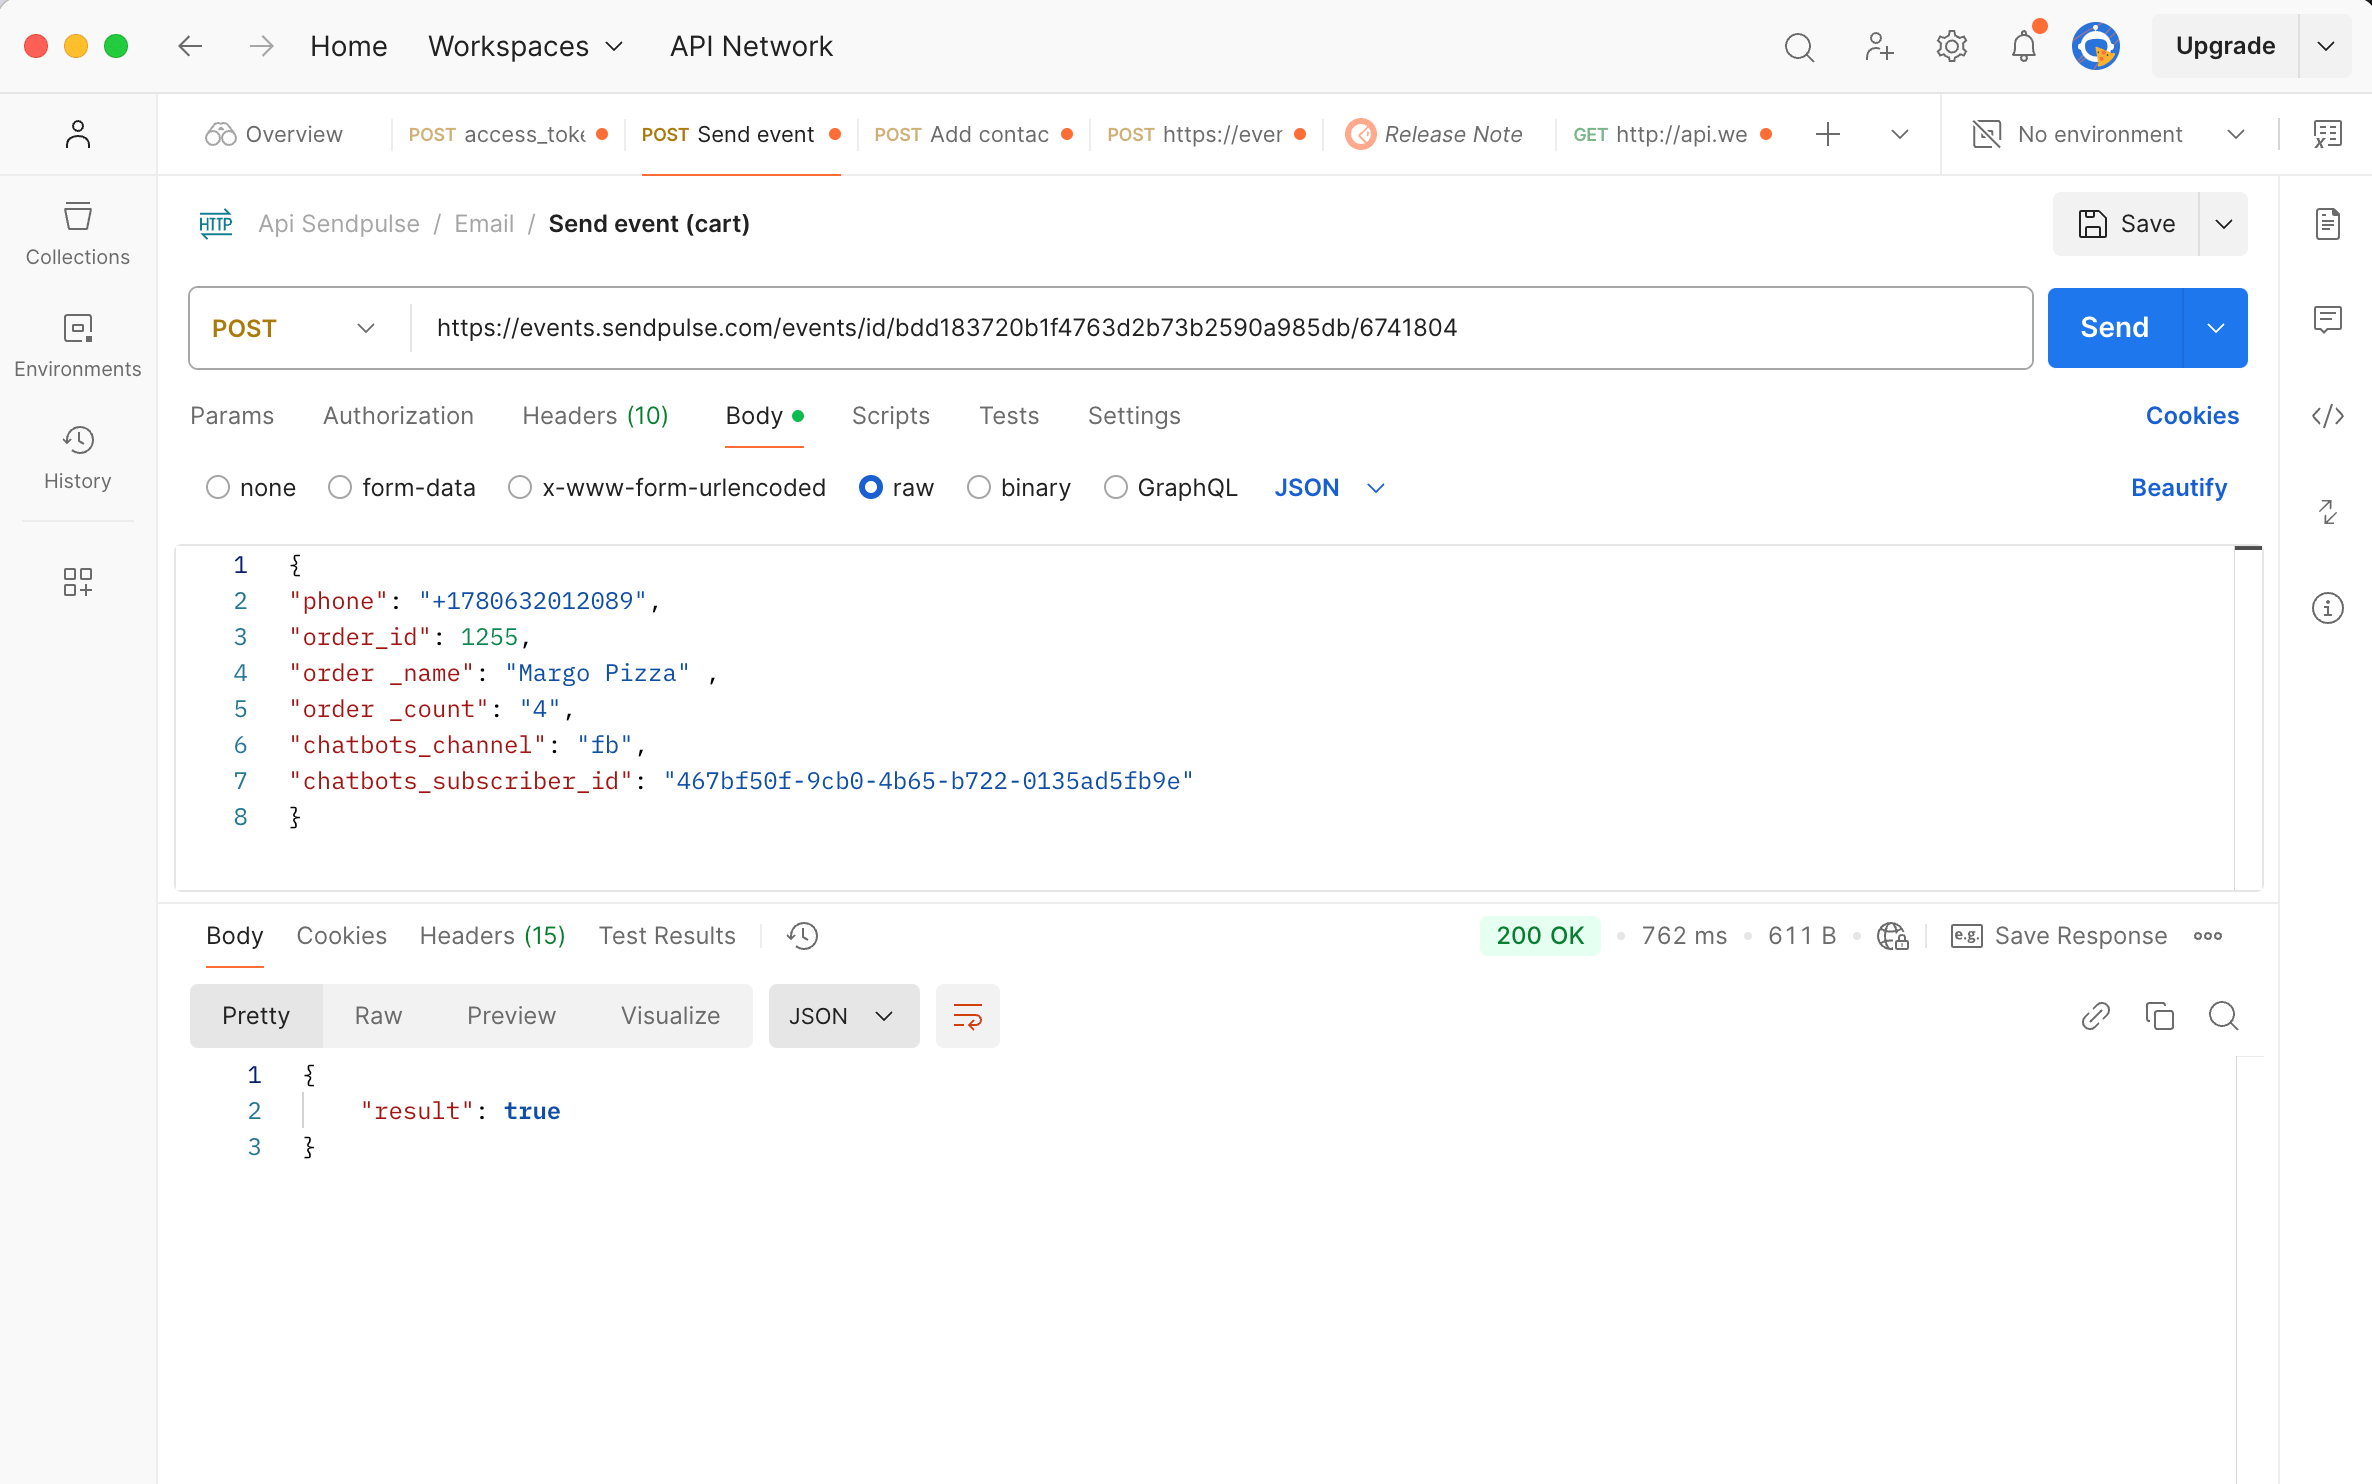
If your request was successful, you will receive a True response, and the subscriber will receive a message in the messenger you specified with the sent data.
You can check all received events in the event log.
You can see who the message was sent to and other statistics by clicking on the starting element.
Last Updated: 27.12.2024
or