Use chatbot builder elements
With SendPulse, you can create a chatbot that will greet your new subscribers, assist users, sell products, as well as collect and filter data and send it to you for further processing. All of your flow elements can be dragged to the working field by left-clicking on them.
In this article, we will talk about the elements you can add to your chatbot flow.
Start
Use Start to select the first element that launches your flow. To begin your flow with an element, connect it to Start.
For example, using the Filter and API Request elements, you can check the subscriber's data and personalize your communication by starting your flow only for those users who have or do not have the requested data or branch your flow and send different messages. Using the Random choice element, you can diversify your chatbot's auto-replies or create an A/B test.
To make an element a start element, connect the desired element to the Start.
To see which trigger starts your flow, click on the Start.
Message
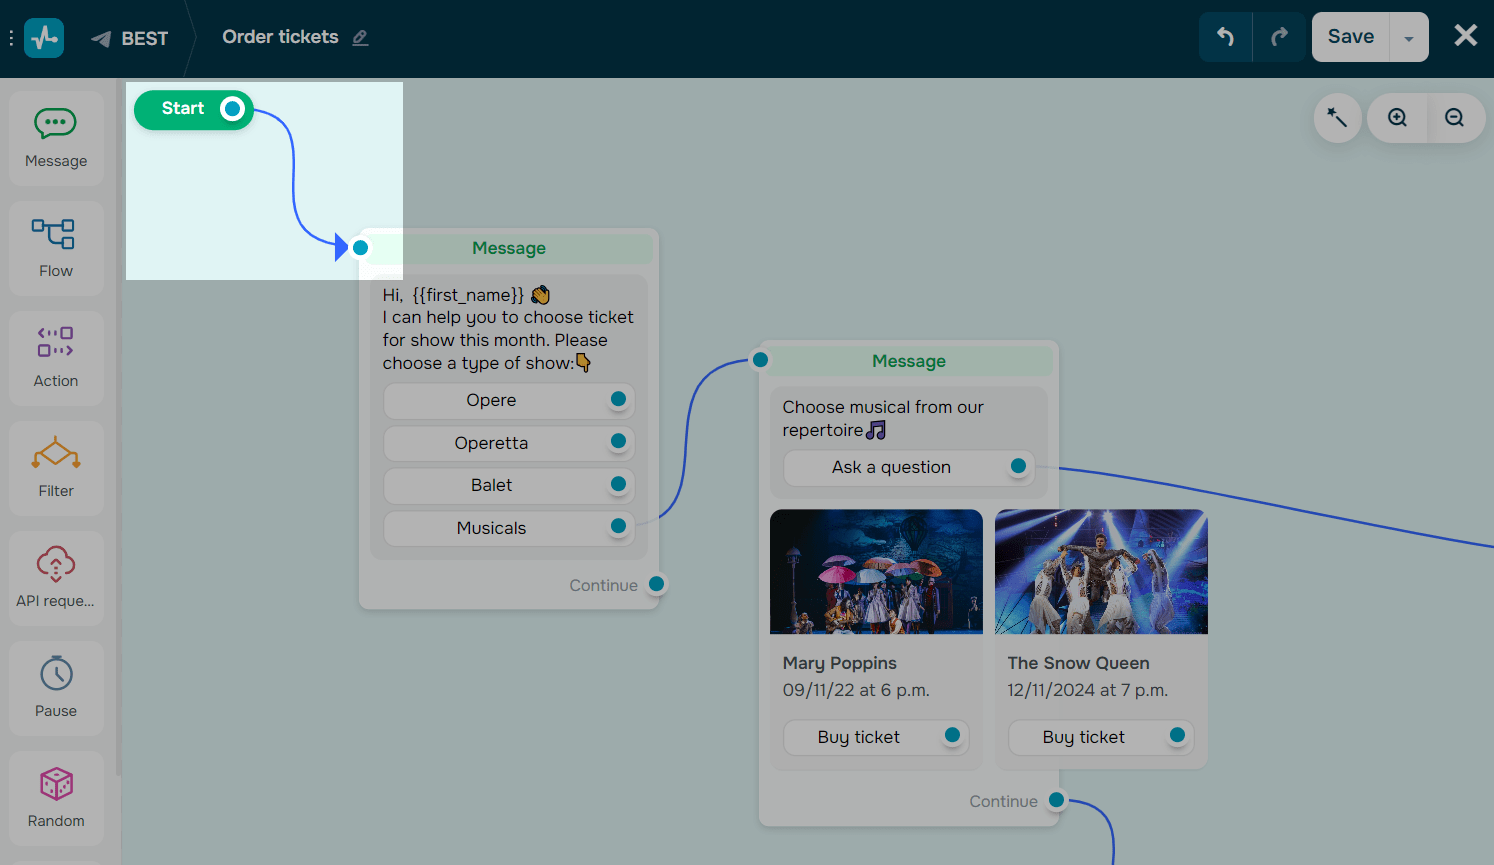
Use the Message element to create a message of any type and add various blocks to it: text, mediafiles, buttons, user data request, and so on.
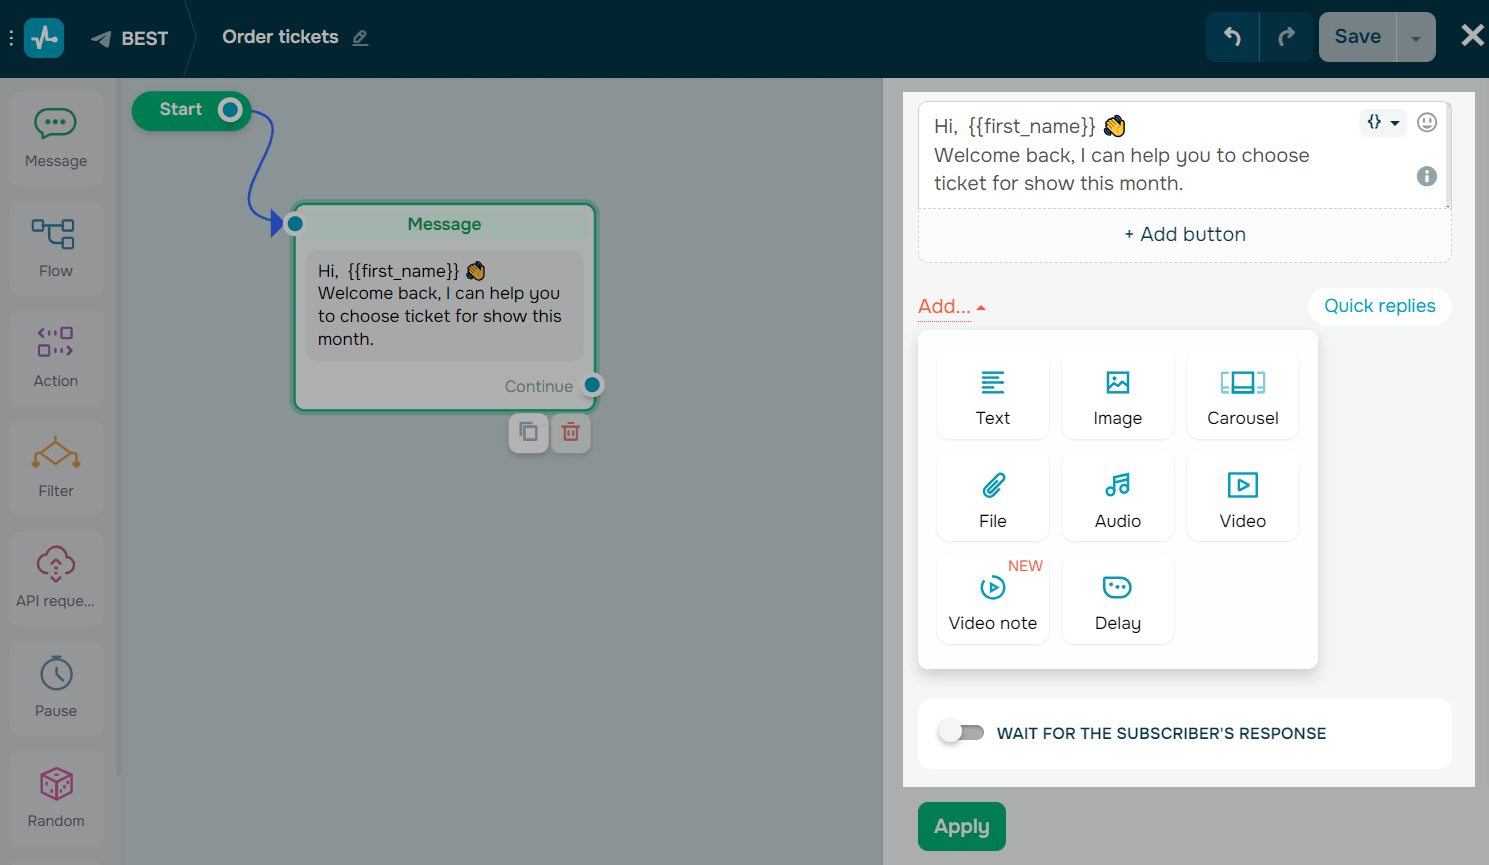
Text
Use the Text element to add text.
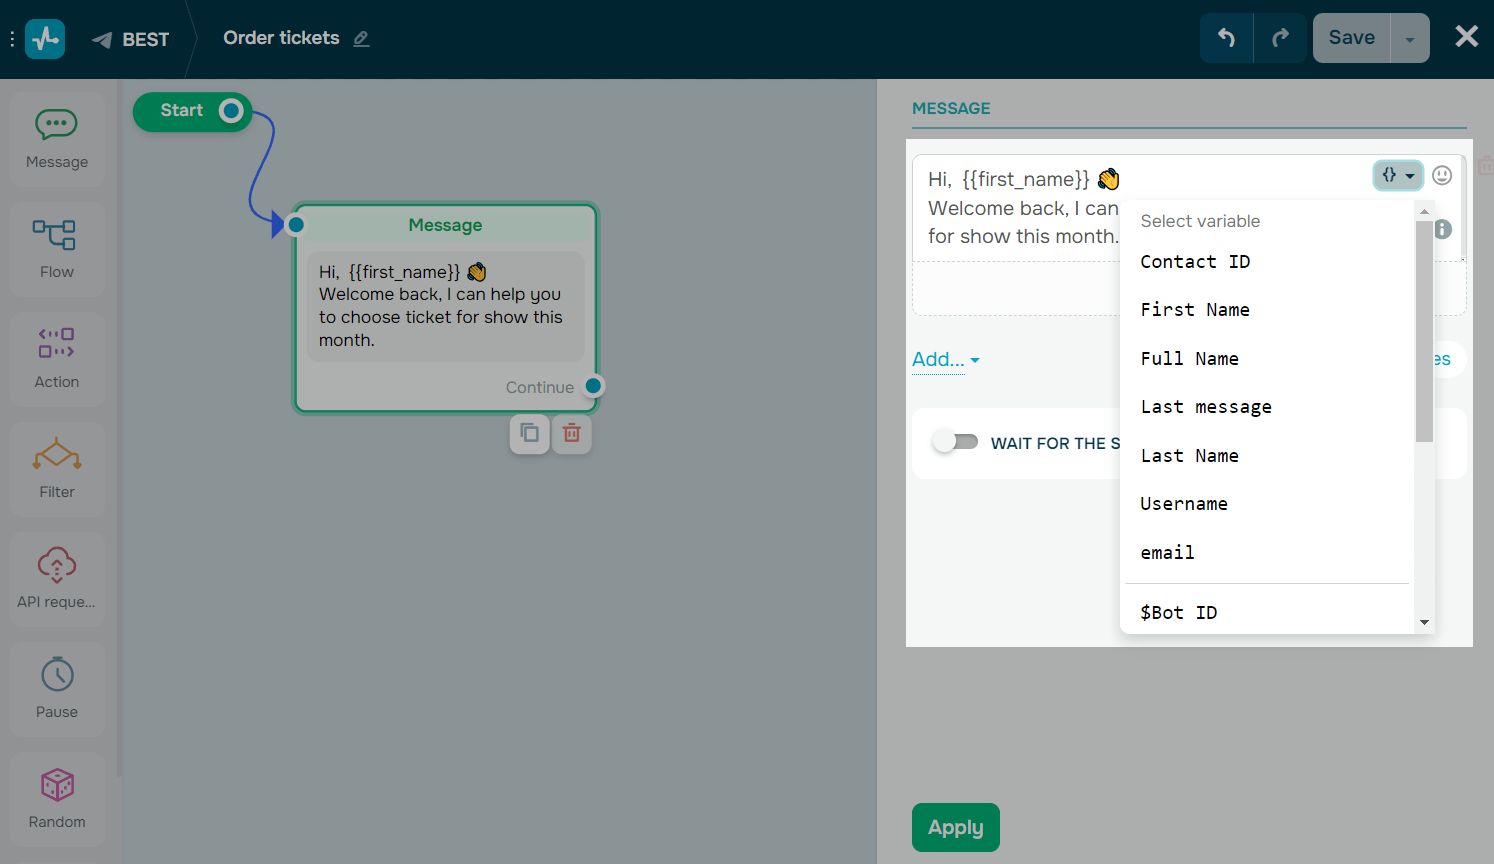
In the text field, enter up to 2,000 characters of your message text. You can add variables and emoji to personalize your message and format your text to highlight key points.
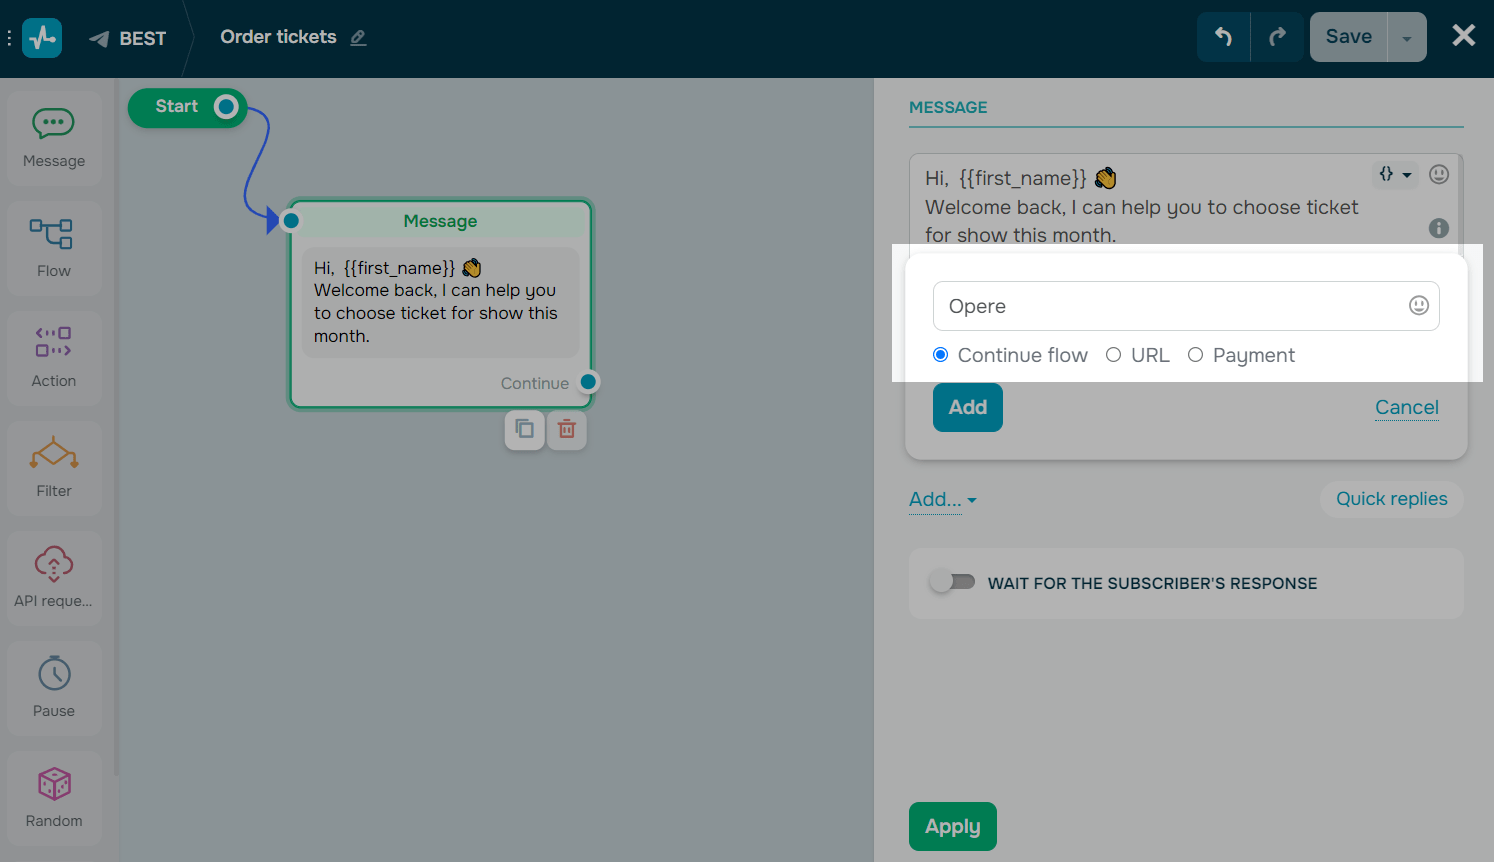
Buttons
Use the Button element to engage subscribers, set your chatbot scenario direction, add a link, and accept payments.
To add a button, click + Add Button. Select the type of button: Continue flow, URL or Payment.
You cannot add links of the URL type to your WhatsApp chatbot, but you can add links of the List type.
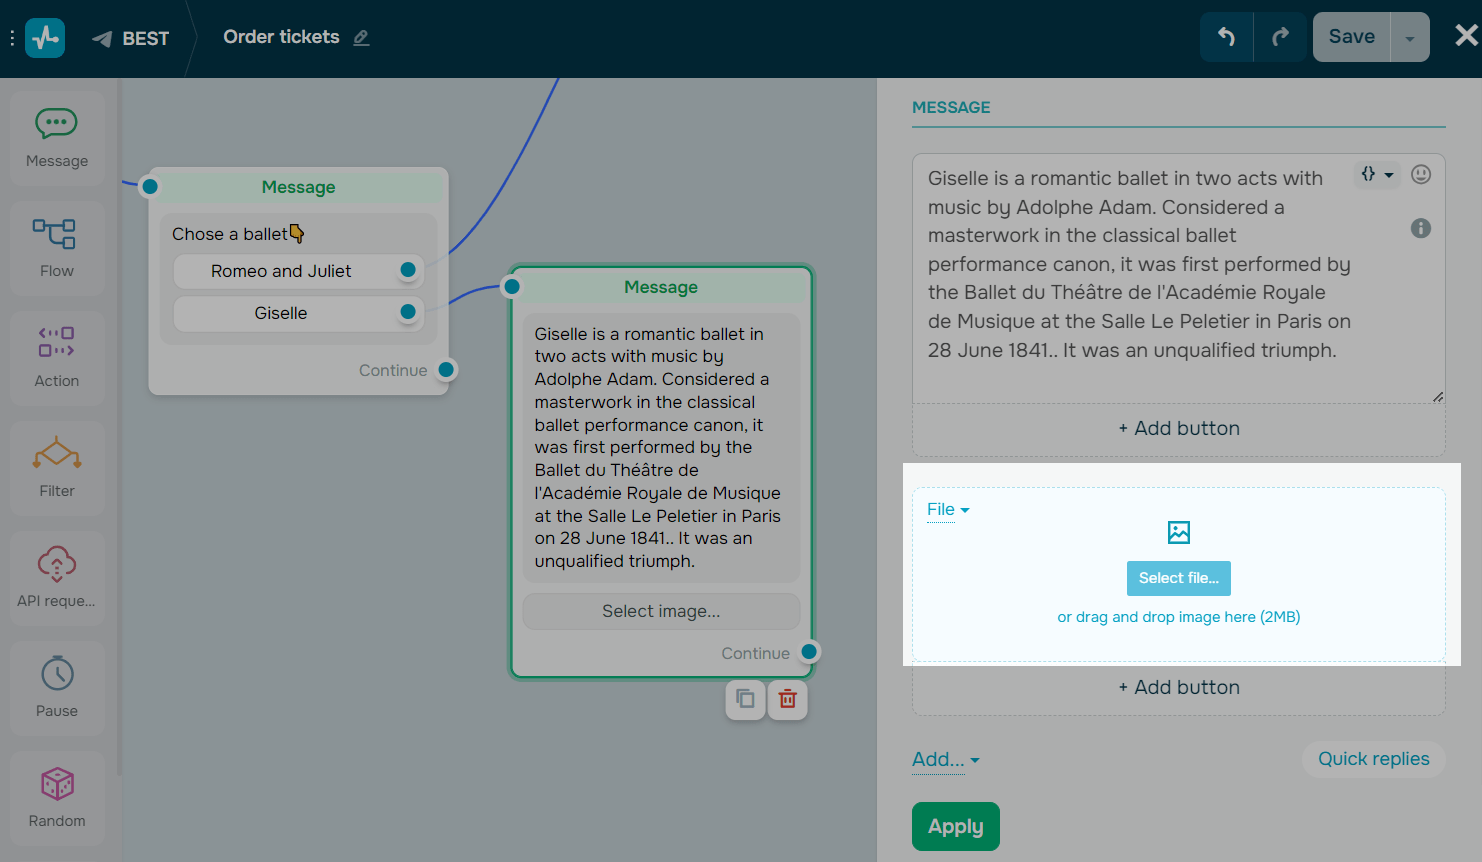
Images
Use the Image element to diversify your messages by using visual content that relates to your text.
To add a picture, click Add and select the Image element. Select how to add your image (as a file or link). You can also specify a dynamic path to the image link.
Carousel
Supported by Telegram, Instagram, and Facebook. You can also add the Product element to your WhatsApp chatbot.
Use the Carousel element to show up to 10 cards. You can add a title, description, image, and buttons of any type to your card.
Click Add, and select the Carousel element.
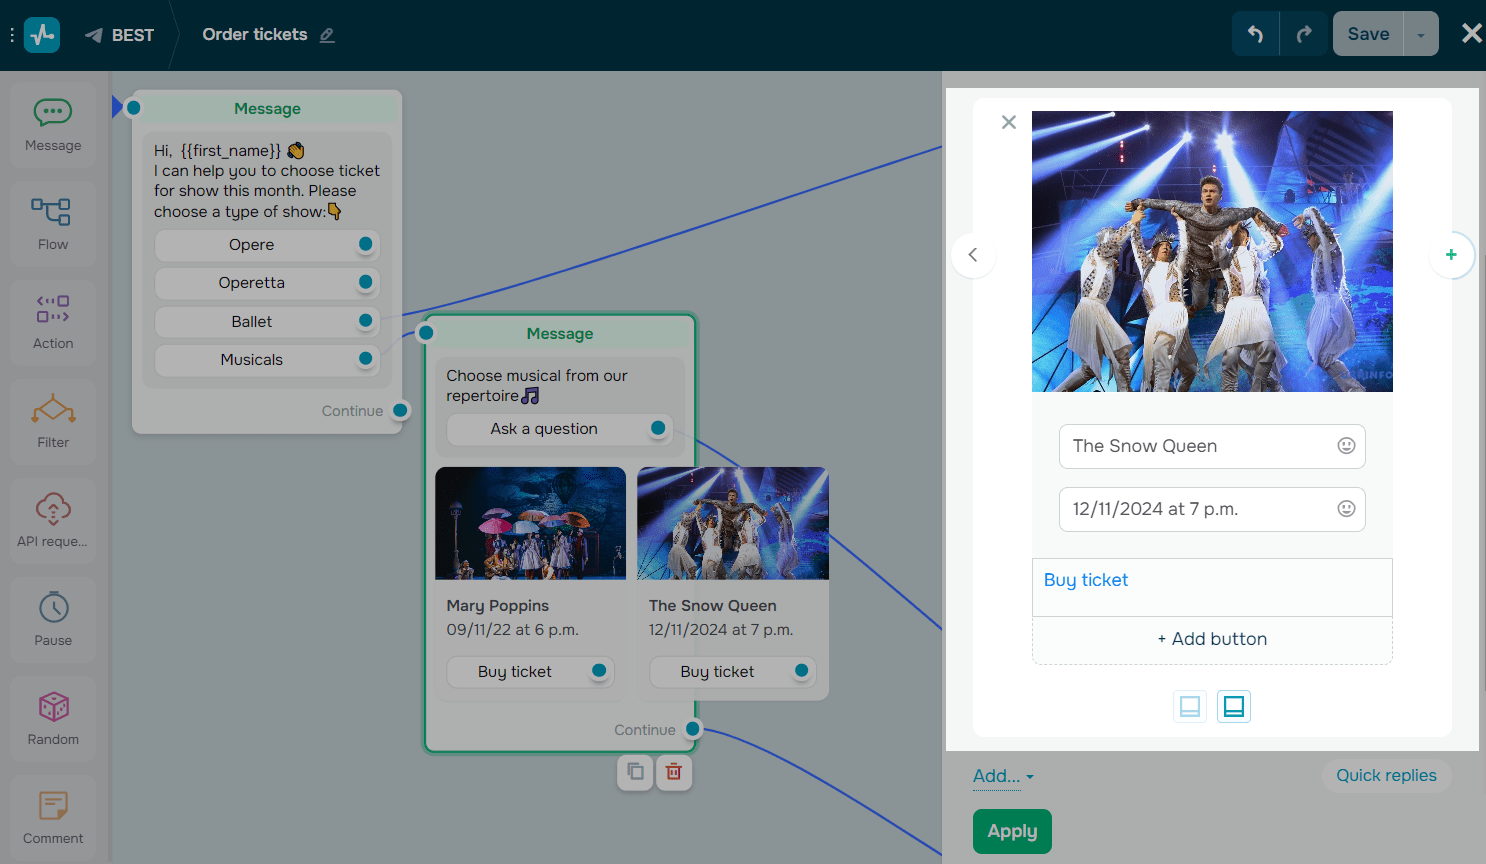
Telegram does not have the standard carousel functionality. Your carousel will be displayed as a single message with the right and left buttons that users need to click to see all your cards.
File
Supported by Telegram, Facebook, and WhatsApp.
Use the File element to add files of any format, except executable (.exe) files, up to 20 MB in size. Upload tickets, cards, checklists, instructions, or other files.
Click Add, and select the File element. Select how to add your file (as a file or link).
Audio
Supported by Telegram, Facebook, and WhatsApp.
Use the Audio element to send audio tracks.
Click Add, and select the Audio element. Select how to add your audio track (as a file or link).
You can also show your audio track as a voice message.
Video
Supported by Telegram, Facebook, and WhatsApp.
Use the Video element to send videos.
Click Add, and select the Video element. Select how to add your video (as a file or link).
Video note
Supported only by Telegram.
Use Video note to send short video messages. These videos are often recorded using the front camera to quickly address one’s audience. Your uploaded video will be cut down to 1 minute and displayed as a circle. You can add a file that’s up to 20 MB in size in the MP4 format.
Click Add, select the Video note element, and upload file.
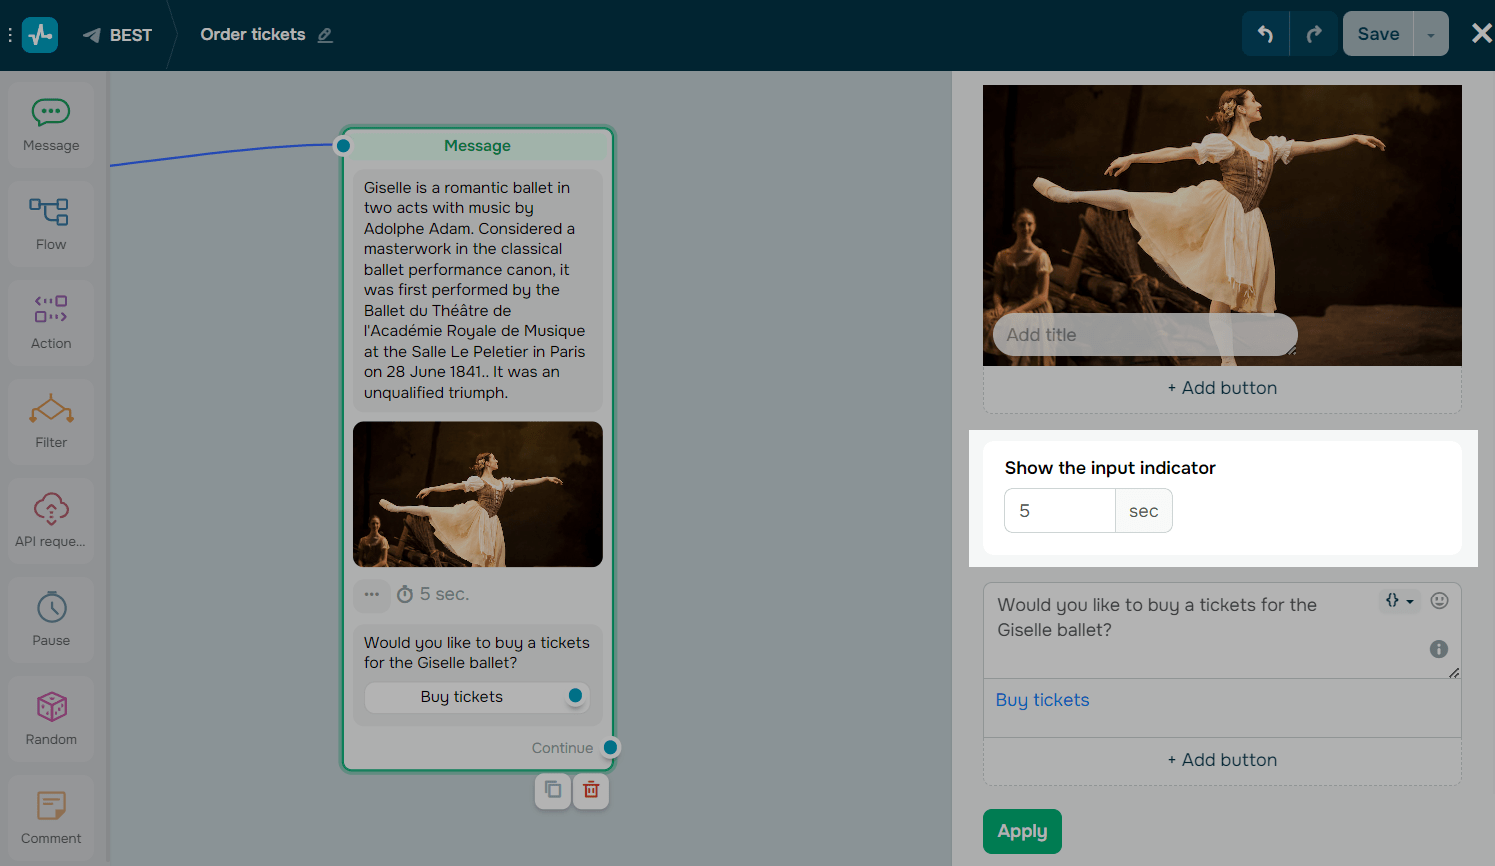
Typing
Supported by Telegram, Facebook, WhatsApp, and live chats.
Use the Typing element to break long messages into smaller passages of up to 4 lines each.
Click Add, select the Typing element, and enter a value in seconds — from 1 to 60.
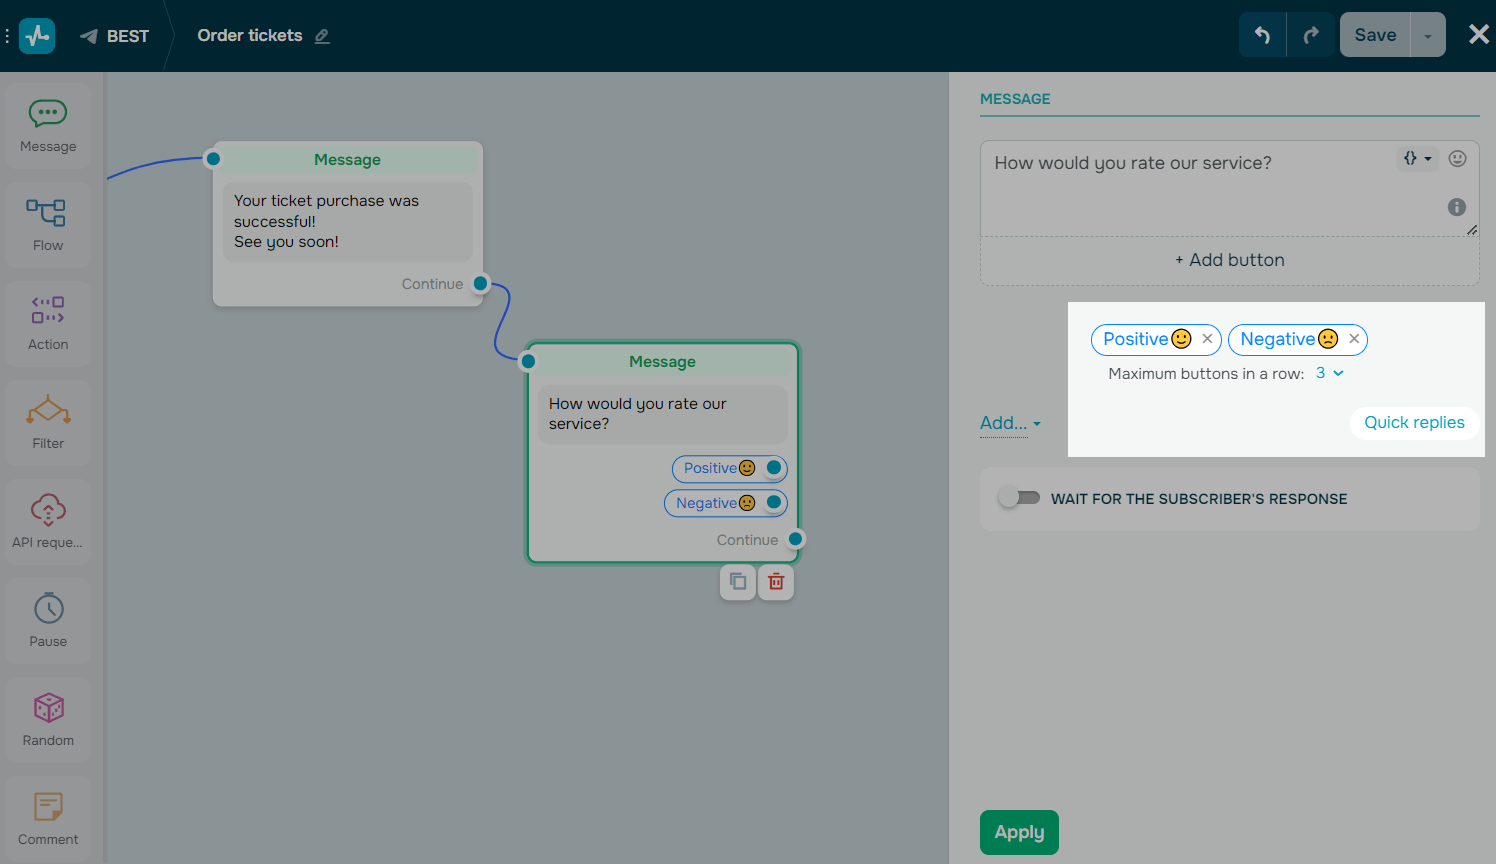
Quick replies
The Quick replies element appears as a keyboard menu and disappears when a user clicks it. You can use this element to branch your chatbot flow.
To add quick replies, click Quick replies in the editing panel of the Message element, and enter up to 20 characters of text and emoji as your button name. You can also add a variable to substitute dynamic values.
Waiting for the subscriber's response
Use the Waiting for the subscriber's response element to collect and save subscriber replies to variables.
Turn on the Waiting for the subscriber's response toggle. Select a validation type, type in a message users will receive if they enter invalid data, and select the variable to which you want to save the data.

You can also add quick replies so that users select from the options you offer instead of entering their own values.
Flow
Use the Flow element to simplify your bot’s structure and move your user to another flow.
To do this, add an element, then choose the Flow element and select the flow you want to link from the drop-down list. Use the search bar to quickly find your flow.
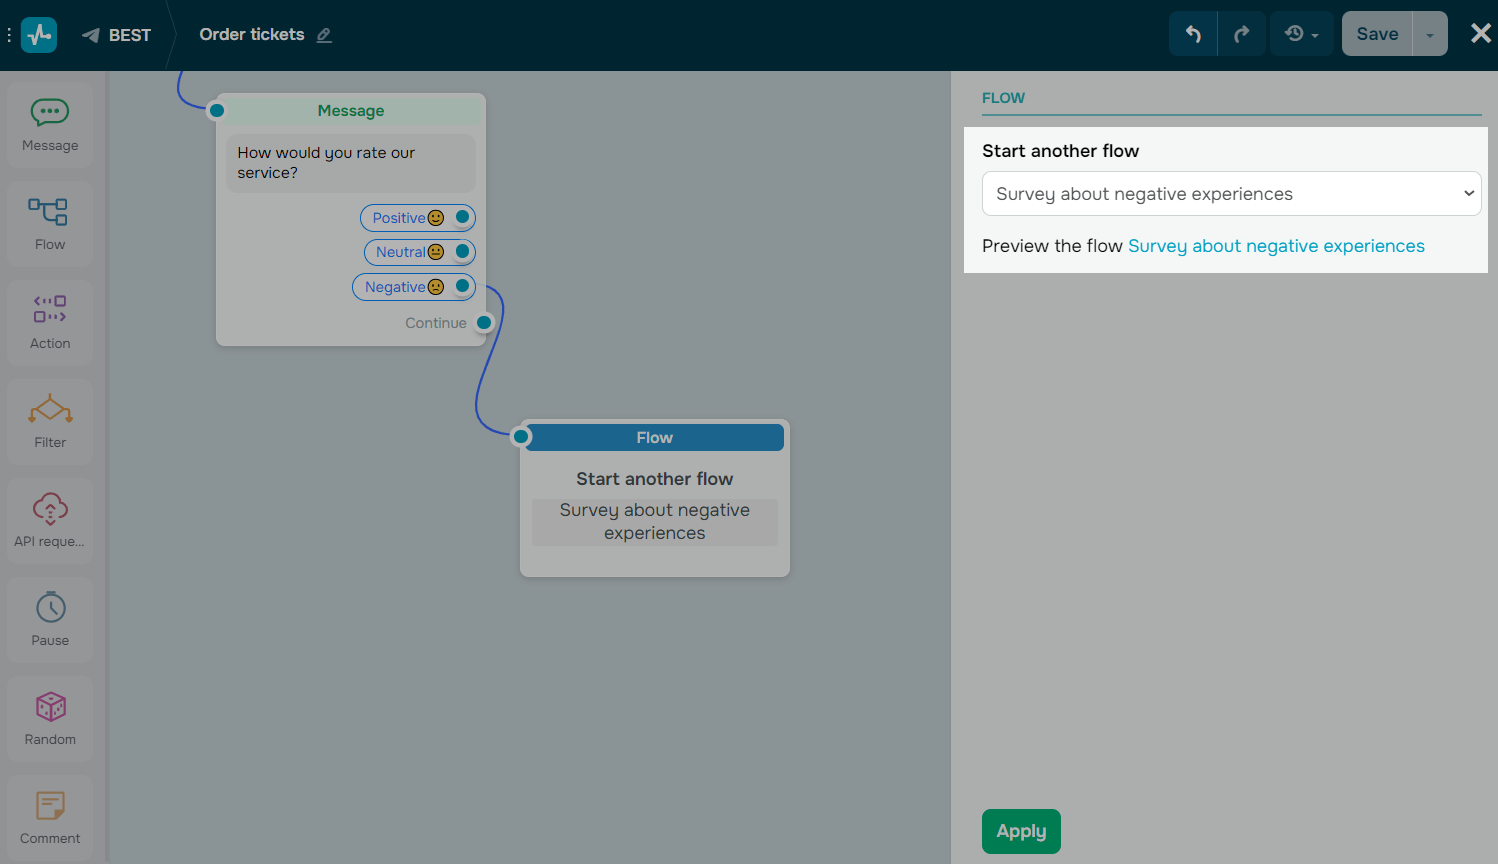
The Flow element will be the last element in this branch of your existing flow. You cannot link it to another element to continue the original flow.
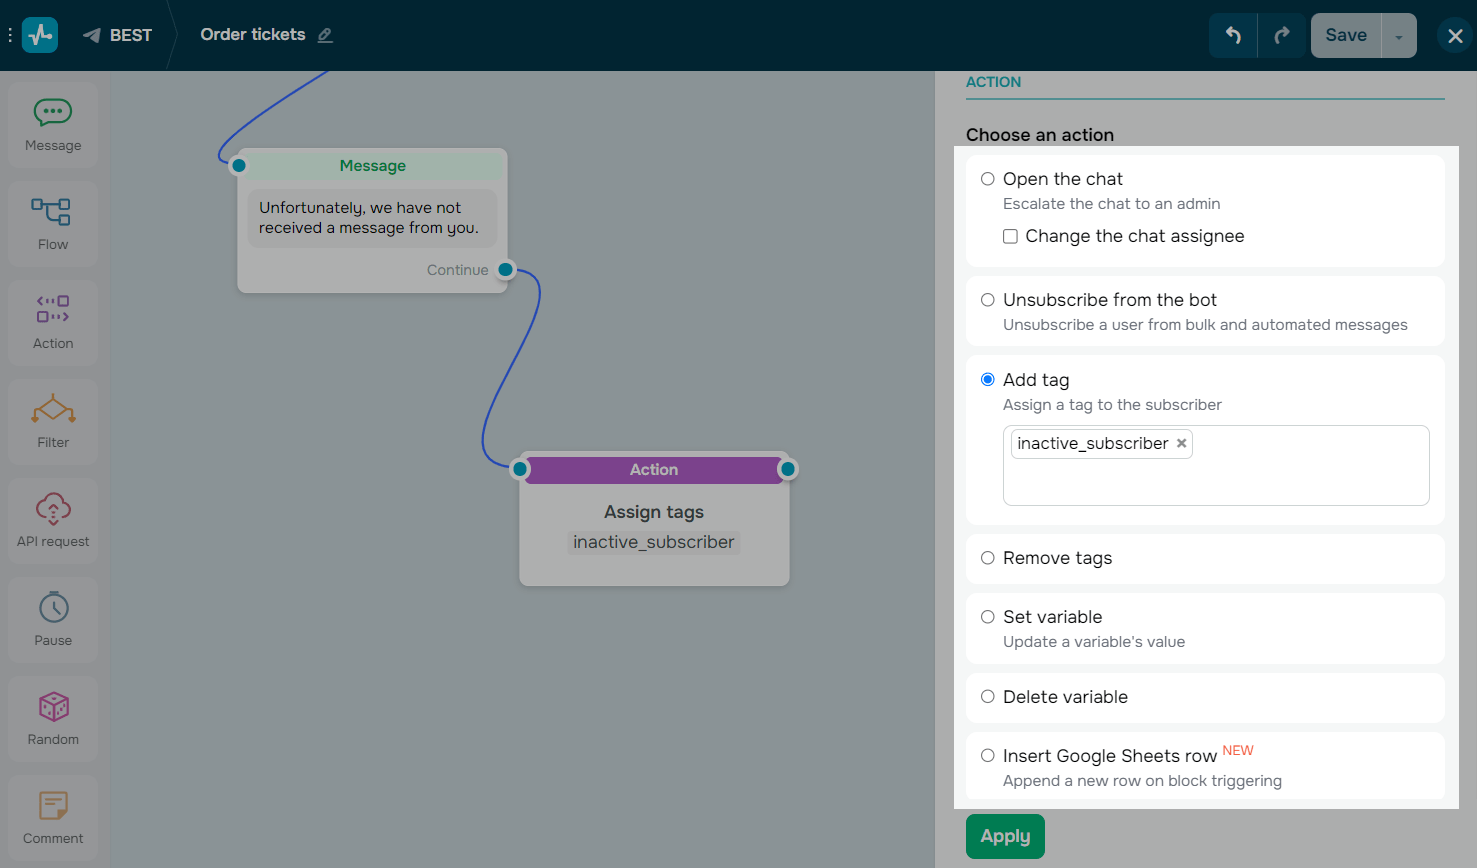
Action
Use the Action element to apply certain actions to a contact or its data. Select the element in the panel on the left and drag it after the block you're tracking. Then select what action you want to create. Some messaging apps allow you to use additional actions.
Filter
Use the Filter element to segment customers based on their personal data and previous messages received.
Select the Filter element in the left sidebar, and drag it after the element that will start your script branching.
Then select the condition itself. Some messaging apps allow you to use additional actions.
Combine conditions by adding the operators any or all, or add independent additional conditions.

After adding conditions, add the additional flow elements to each of the Filter element options if the condition is met (green dot) or not met (red dot).
API request
Use the API Request element to send requests to a third party server to create objects or retrieve data. Get data and use it in your chatbot messages.
You can save the received data to a variable or add it to a message as JSONPath.
Drag the API Request element to the workspace, connect it to the element, after which you want to retrieve data. Select the type of request and enter the URL to send the request to.
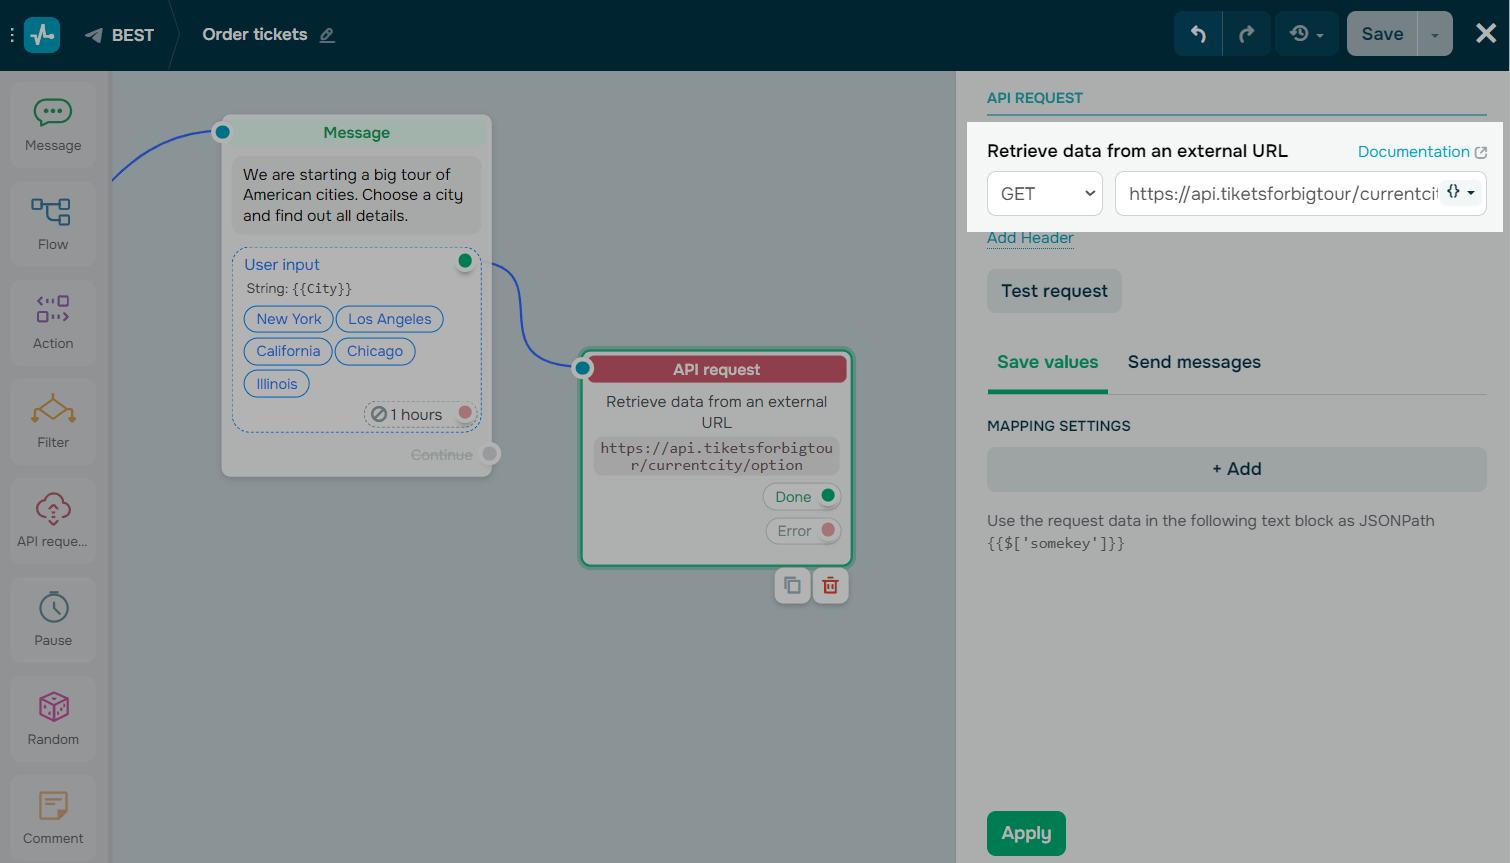
After testing the request and receiving a successful response, configure the mapping settings.
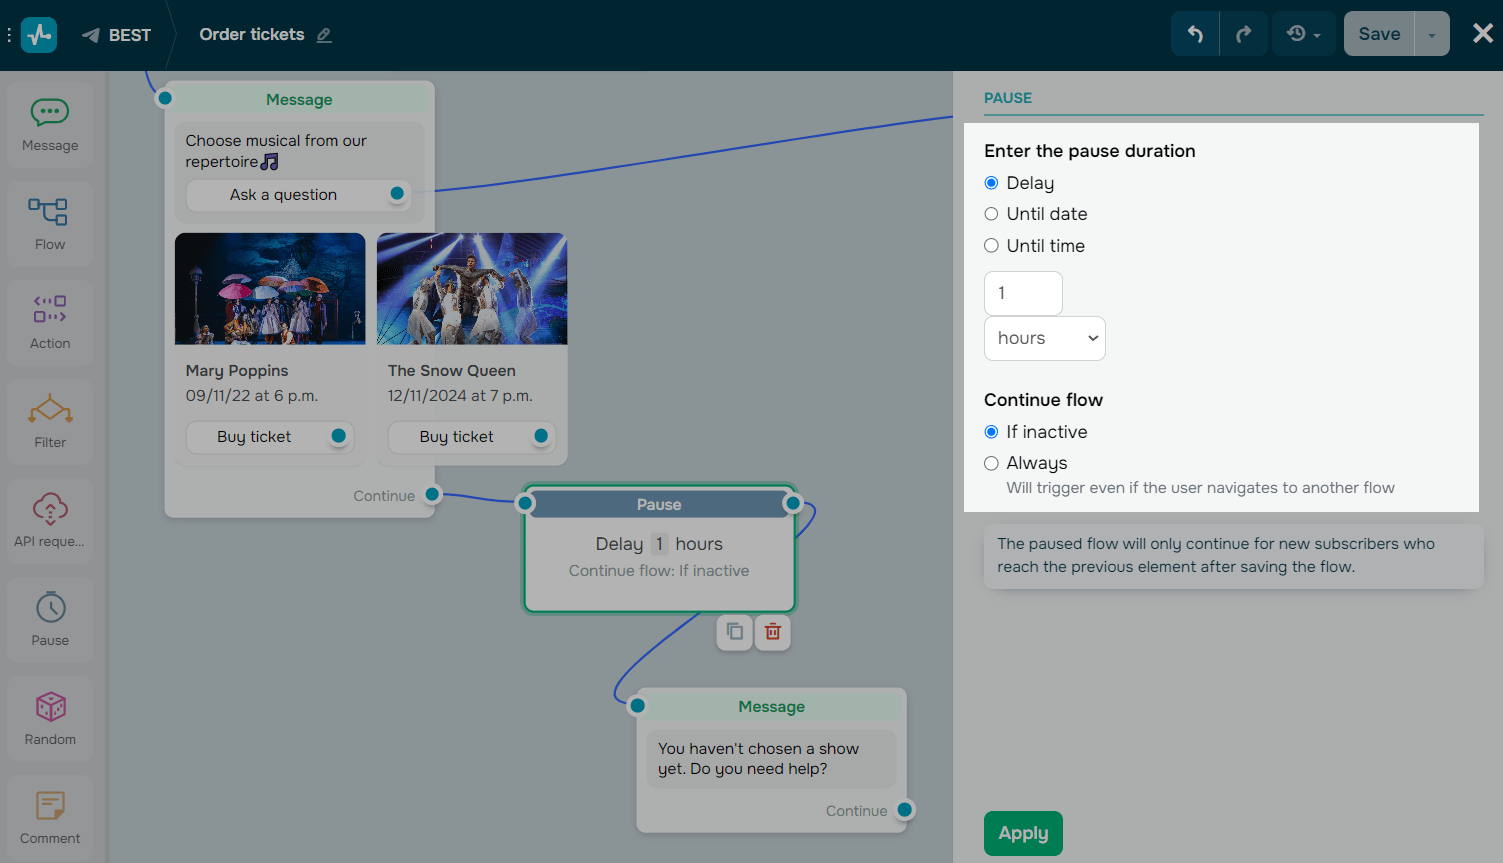
Pause
Use the Pause element to set up the period during which no automatic messages are sent to the subscriber. The pause can be set in minutes, hours, or days.
For example, you can use this option to indicate business hours or promotion hours.
Select the Pause element on the left, and edit it in the opened panel.
AI step
Use the AI step element to incorporate AI into your chatbot flows to analyze client needs and conversation tone, process user responses, and branch the flow depending on the goal completion progress.
Select the AI step element on the left, and edit it in the opened panel.
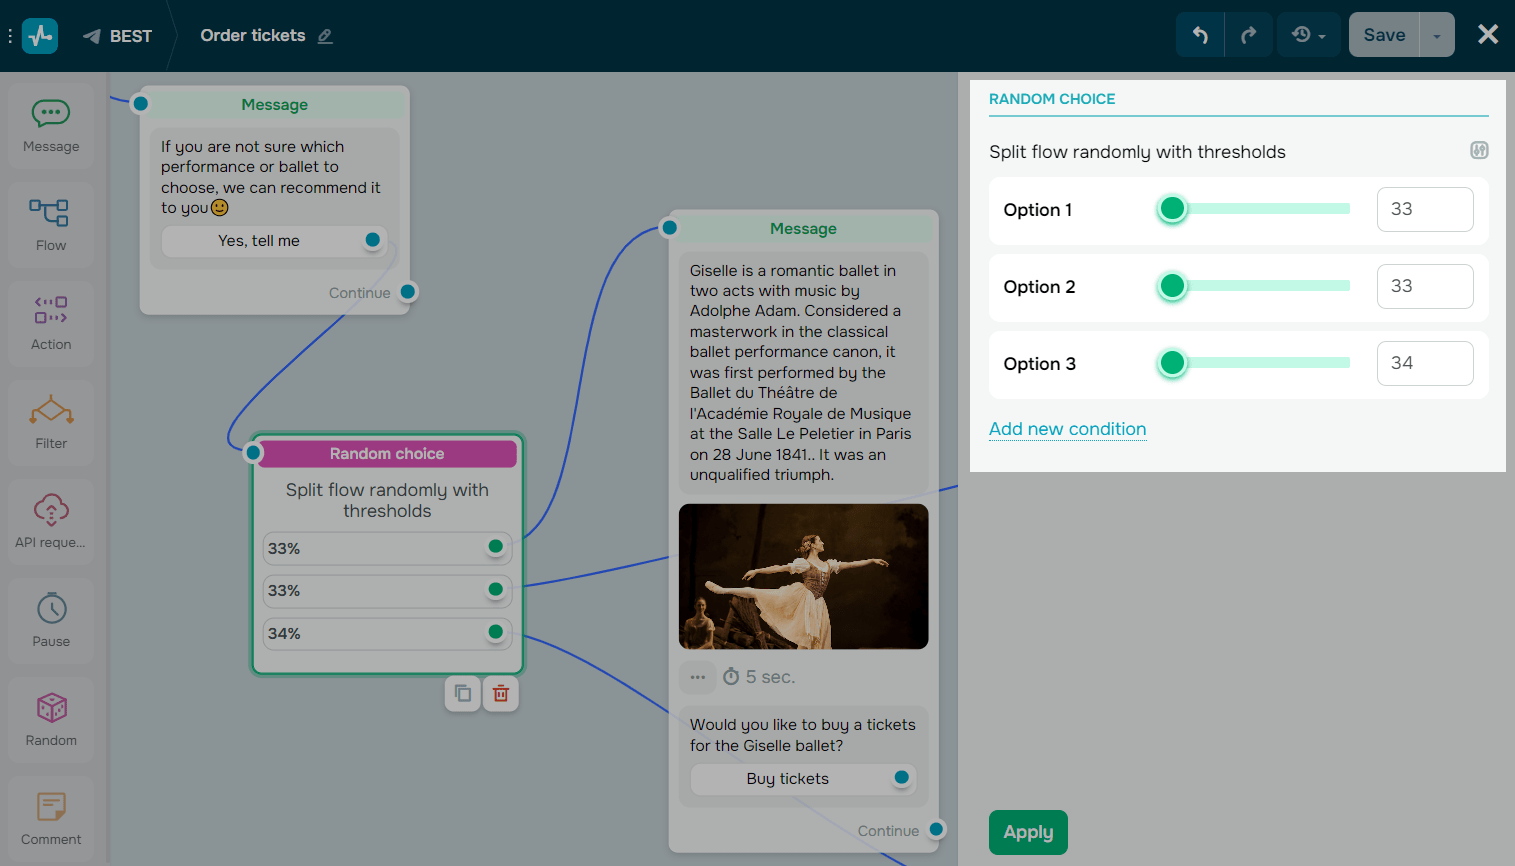
Random
Use the Random element to send elements from your chatbot script at random for A/B testing, creating quizzes, and more. You can customize the size of the recipient group for each option, send random information, and test different chatbot scenarios.
Drag the item Random element to the working area, connect it to the element you start branching the script from.
Repeat
Use the Repeat element to execute actions at specific time intervals to send payment reminders, recurring notifications, or other updates automatically.
Select the Repeat element on the left, and edit it in the opened panel.
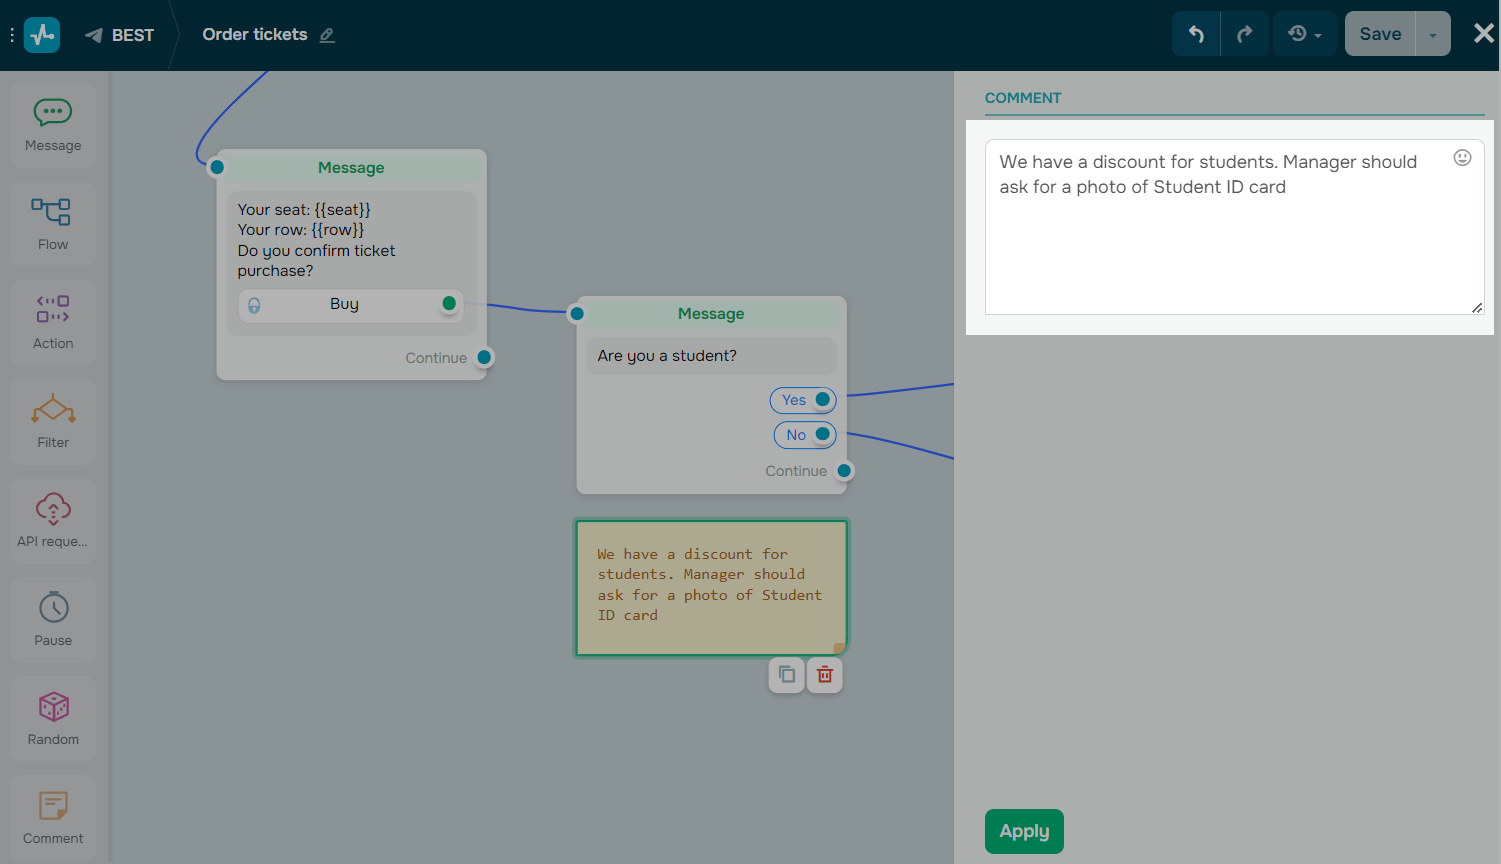
Comment
Use the Comment element to add comments about your flow performance for yourself or your team. Only you and other team members can see this element.
Drag the Comment element from the sidebar, and enter your comment text in the panel on the right. You can add up to 512 characters of text, links, and emoji.
Last Updated: 09.09.2024
or