The Condition element in chatbots
With the Condition element, you can branch your chatbot flow based on actions your users take on your website, app, or any other external system. This helps you build complex interactions where follow-up messages depend on what users do beyond the chat.
In this article, we will explain how to set up and use Condition in your flow.
Add the element
The Condition element tracks an event sent by your system through API. When a subscriber reaches the element, your flow waits for a request from an external system. Once the event is received, the flow continues.
Drag the Condition element to the workspace.
This article covers A360 Event, which is currently the only available condition. Unlike the A360 Event flow trigger, this condition continues the current flow instead of starting a new one to help you build specific interaction scenarios.
Configure data transfer
The Condition element generates a unique URL (SendPulse endpoint). The condition triggers when a request is sent to this URL. For the event to apply to a specific subscriber, the external system must also pass the chatbot subscriber ID.
You can identify a user on your website by subscriber ID.
Make a request
In the Continue flow after receiving data at URL field, copy the URL and pass it to your external system. Send a JSON request with event data to this URL.
In your request, you can use your chatbot's custom and global variables and edit them.
Apart from that, pass the subscriber ID using one of the following methods:
| Using request headers | Pass the ID in headers:
This method works best for requests sent from the backend. |
| Using the POST request body | Pass the ID as follows:
This method works best for requests sent from the frontend. |
To see the recommended data structure, click Example for sending requests.
To test your request and receive response data, click Listen to request now. If the request is successful, you will receive the response body.

Save data to a variable
Decide how request variables will be saved to chatbot variables.
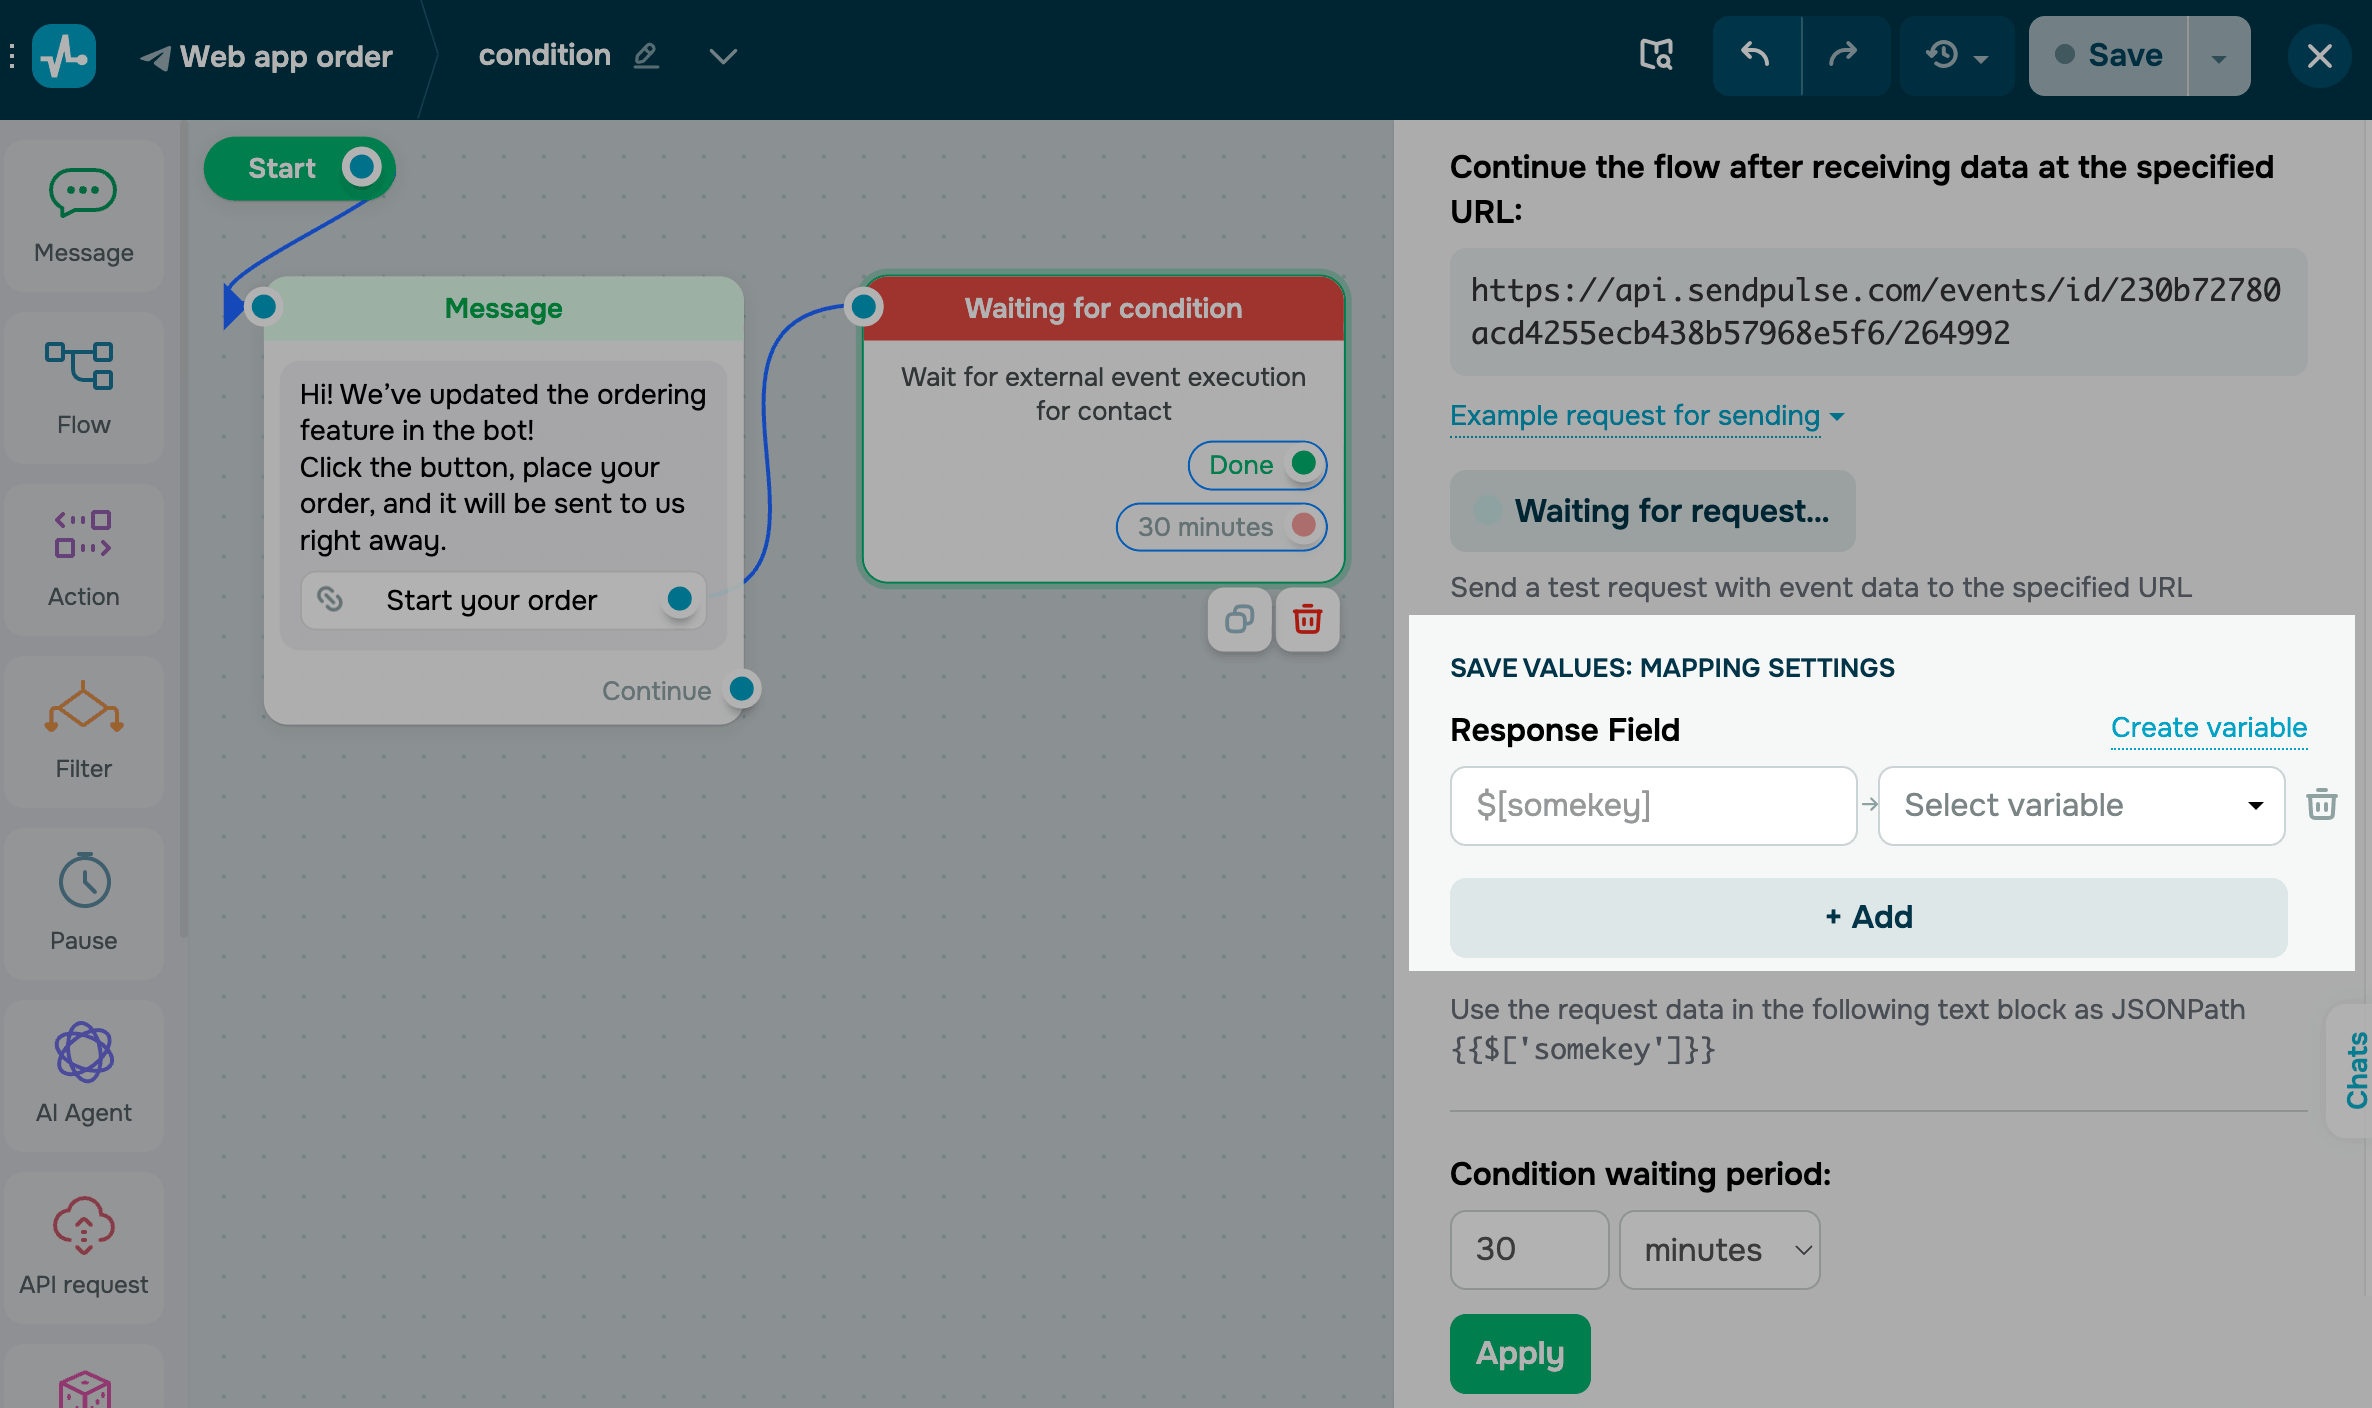
In the Save values: mapping settings section, click Add. In the Response field section, select the variable value on the left, and the chatbot variable to save it to on the right.
To add a new variable, click Create variable and enter a value.
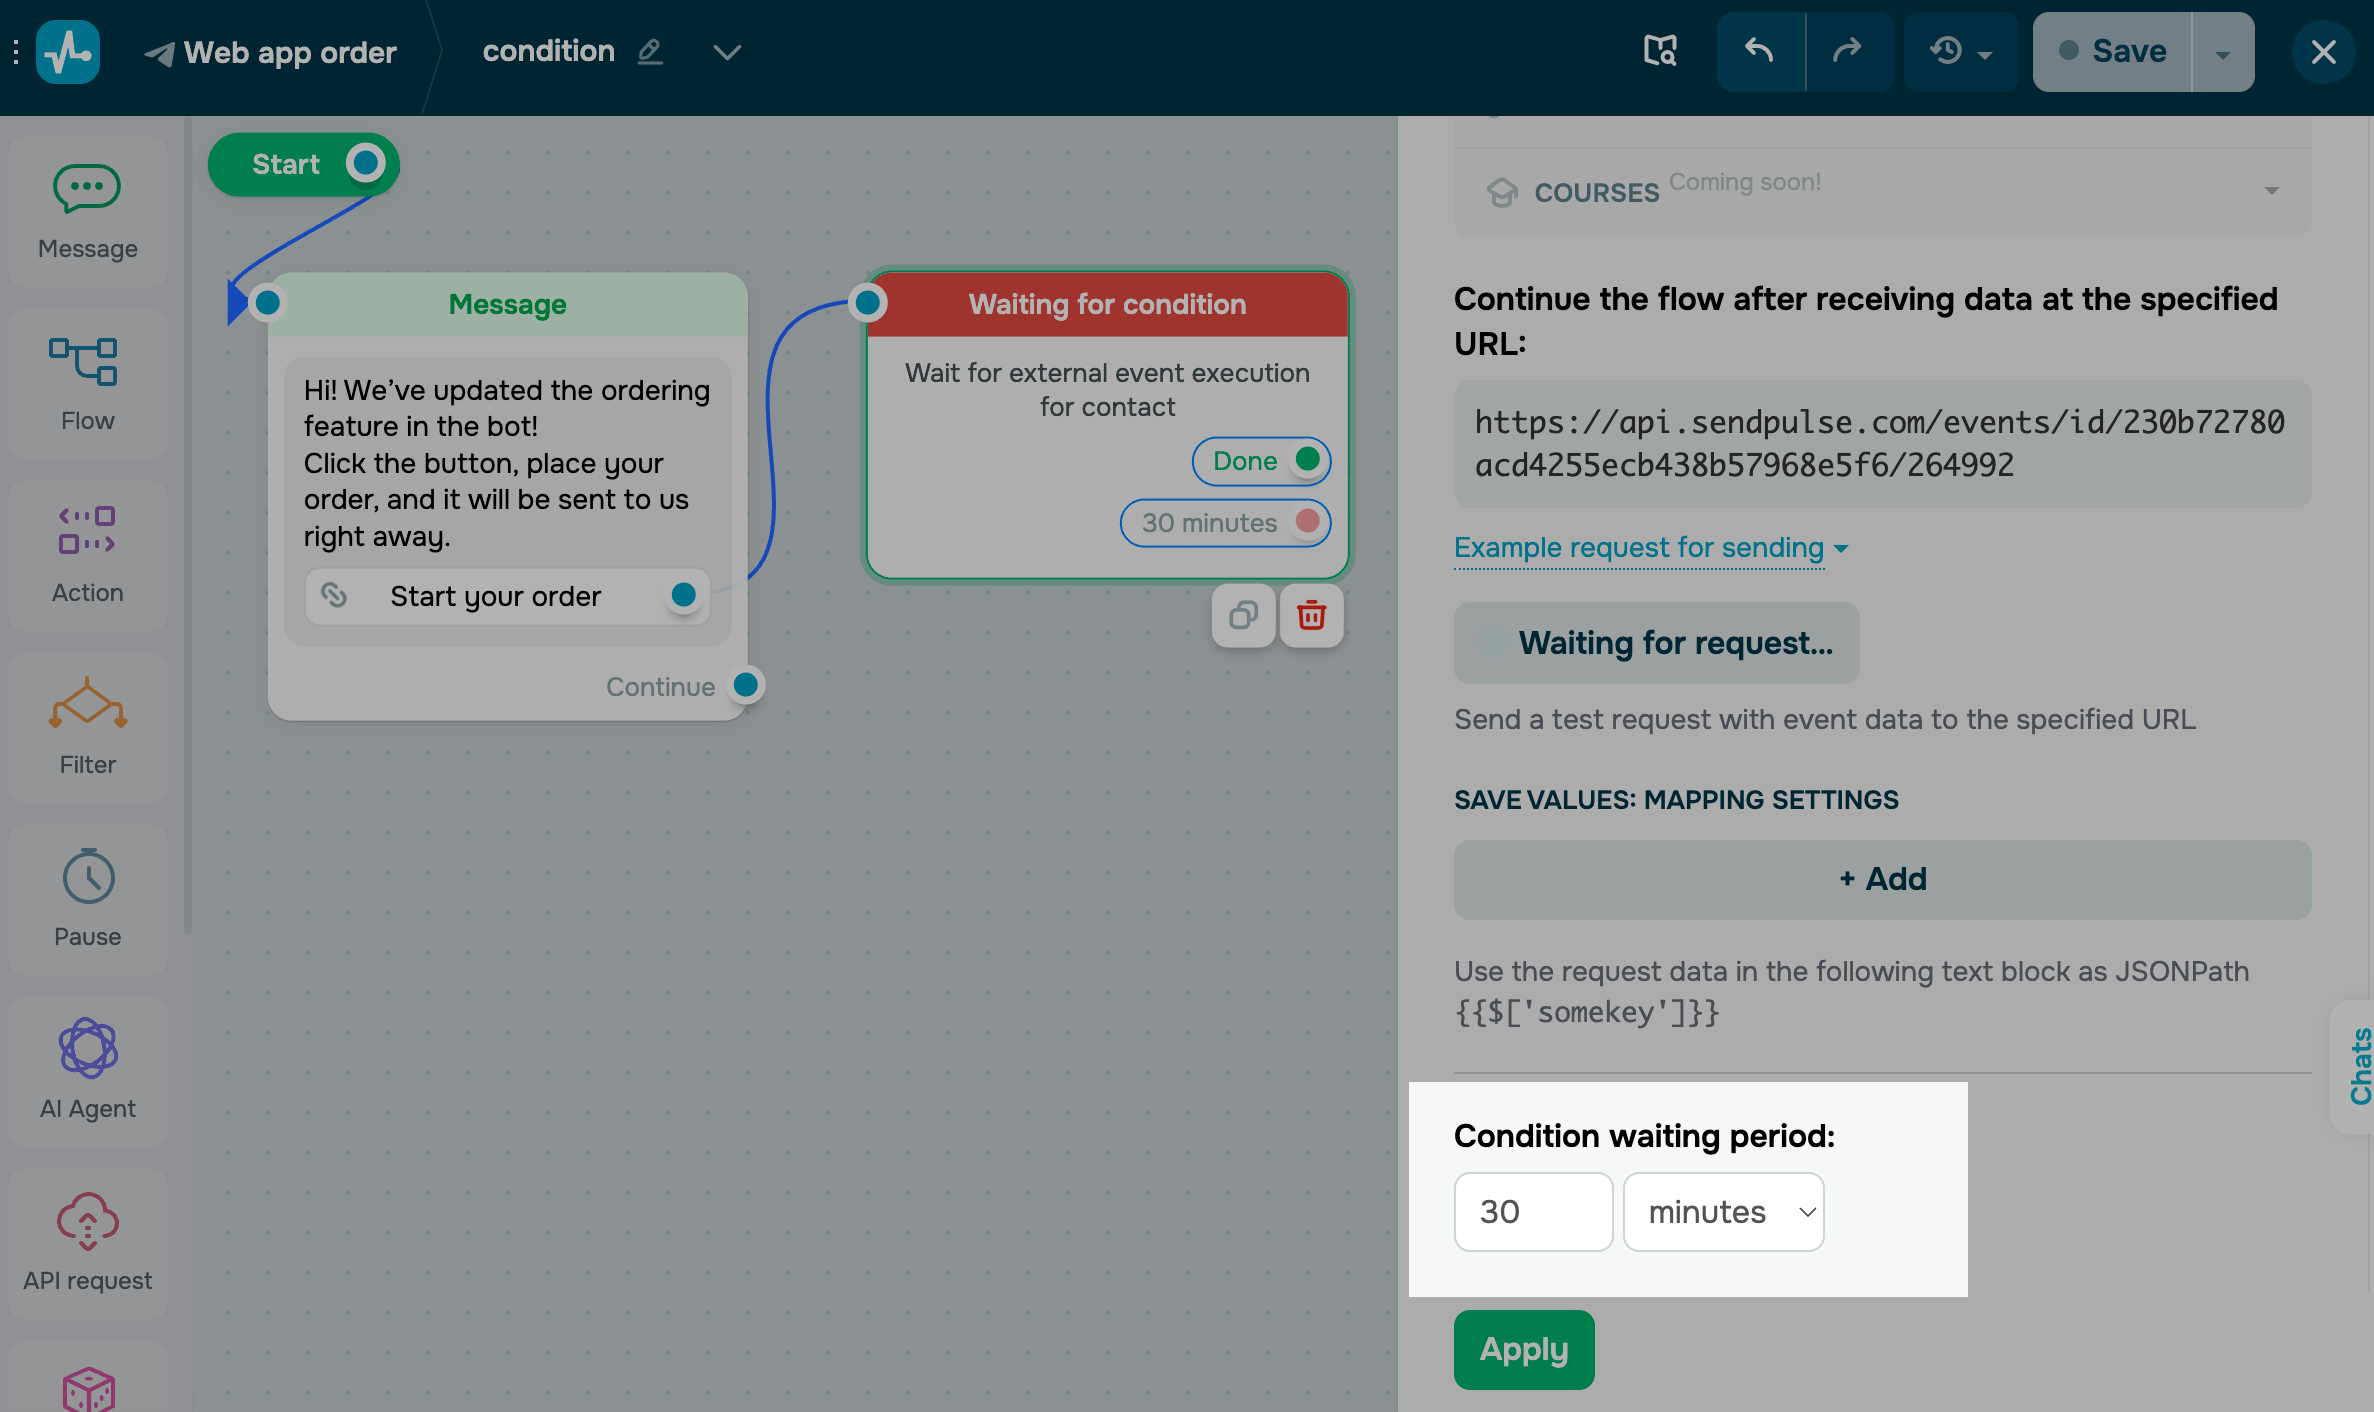
Set a condition waiting period
Select a timeframe during which the system will wait for the condition to be met.
The timer starts from the moment a subscriber reaches the Condition element.
Branch your flow
Next, you can branch your flow and add elements to each branch based on whether the condition is met:
| Done | The condition was met within the specified timeframe. |
| Not done | The condition was not met within the specified timeframe. |
Once the event is received, you can add other elements to your flow.

Example
Let's walk through an example of a Telegram store with a web app, where a chatbot flow continues after a user places an order on the website.
A subscriber opens the web app from the chatbot flow using a link that includes their subscriber ID as a parameter:
https://your-store/store-tg-app.html?contact_id={{contact_id}}This gives the web app access to the subscriber's ID.
You can view the app structure example.
When the user places an order in the web app, the system sends a POST request to SendPulse with the event data:
{
 "chatbots_subscriber_id": "XXXXXXXXXXXXXXXXXXXX",
 "order_items": [...],
 "total_amount": "650",
 "currency": "USD"
}
The request includes:
chatbots_subscriber_id |
Chatbot subscriber ID |
order_items |
Ordered products |
total_amount |
Total order amount |
currency |
Currency |
When SendPulse receives the event, it finds the contact with the matching chatbots_subscriber_id and continues the flow.
You can use the data points in other flow elements or save them to subscriber variables.
Last Updated: 23.03.2026
or