Create a multichannel subscription form
With SendPulse’s form builder, you can create a subscription form and embed it on your website or blog to build a subscriber base. Input fields, checkboxes, radio buttons, drop-down menus, media elements, and more will help you design a high-performing form.
Key benefits of the subscription form builder:
- You can add any layout element to your subscription form by simply dragging and dropping it.
- All elements are fully customizable, allowing you to adjust colors, styles, sizes, and other properties.
- You don’t need specialized skills or knowledge of HTML to create an effective and eye-catching subscription form.
In this article, we will talk about how to create a multichannel subscription form using SendPulse’s form builder.
Build a subscription form
A subscription form includes various elements (such as text fields, checkboxes, lists, and buttons) and section spacers.
Go to Email > Subscription Forms and click Create subscription form.
Select a form type
Choose a form type to get started. These options vary based on the default set of elements and placement on the page.
| Embedded | Adds a form to a fixed spot on your website. |
| Pop-up | Adds a pop-up form that appears after a specified time on your website. |
| Floating | Adds a form to a fixed spot that remains visible as users scroll through your page. |
| Fixed | Pins a form to the header, sidebar, or footer of your website. |
You can also select a ready-made form and edit it using the builder. If you need to add custom scripts and styles using an external editor, select Get HTML code without styles.
Select a mailing list
Select mailing lists to which collected subscriber data will be saved. You can choose from existing lists, create new ones, and select multiple mailing lists.
Click Go to builder to continue.
Add subscription form elements
In the builder, you’ll find elements you can use on the left sidebar. Your form template will appear in the center.
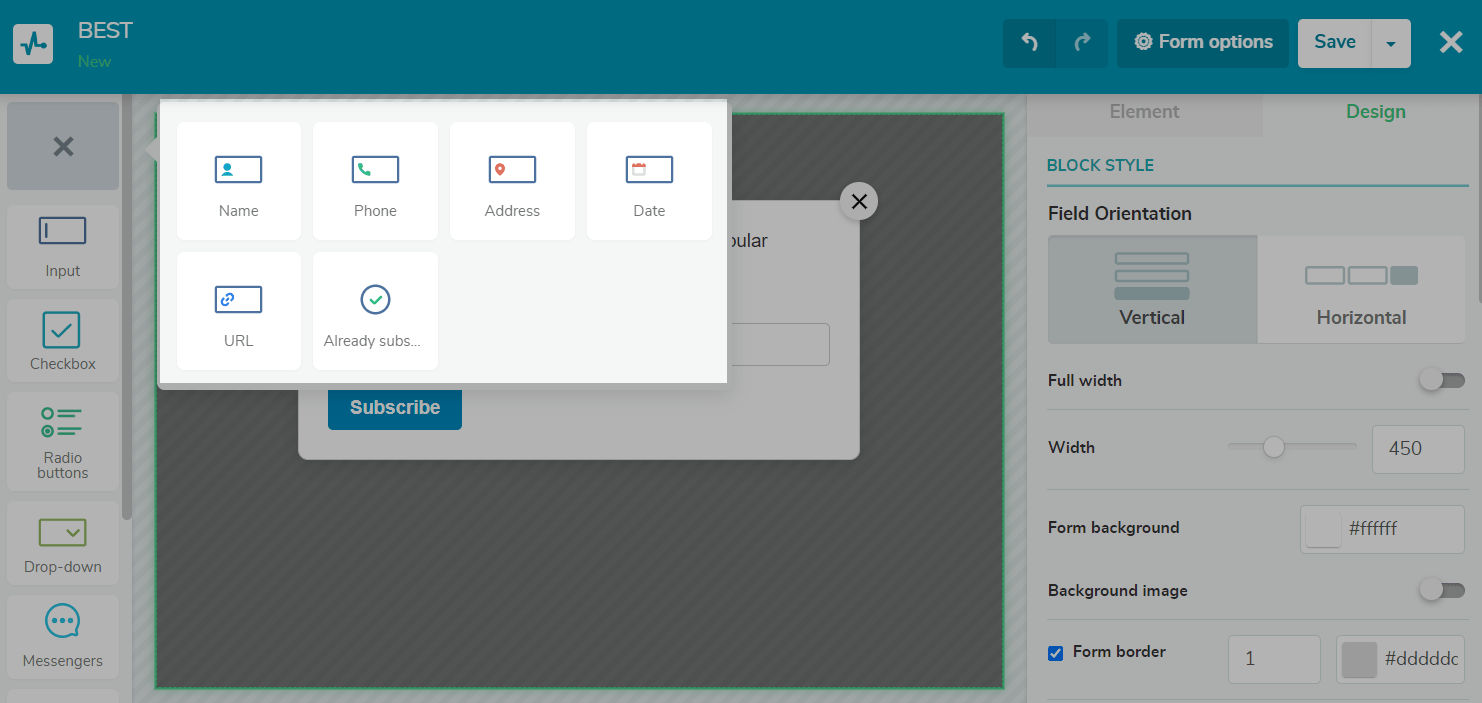
In the upper left corner, you can click the quick-add icon to use common form fields.
On the right, you can set up any selected element in the Element tab and adjust your form design in the Design tab.
Input field
This element adds an input field to your subscription form.
Set up your input field as follows:
| Input field label | Type in a field name. |
| Placeholder | Type in placeholder text to give an example of the expected data within your input field. |
| Bind to variable | Select a user variable from the drop-down list. Collected subscriber data will be saved to the selected variable. |
| Contact variable in CRM | If the Add subscribers to CRM toggle in form options is enabled, select a CRM contact variable from the drop-down list. Collected contact data will be saved to the selected variable. |
| Set as required | Turn on this toggle to prevent users from submitting your form until they fill in the field. |
Checkbox
This element allows users to select multiple options from a list. For example, a user can select the types of content they'd like to receive from you, such as news, discounts, contests, or event invitations.
Set up your checkbox as follows:
| Checkbox label | Type in a checkbox name. |
| Bind to variable | Select a user variable from the drop-down list. Collected subscriber data will be saved to the selected variable. |
| Set as required | Turn on this toggle to prevent users from submitting your form until they select the checkbox. |
If a user selects your checkbox, the system will record yes, and if not, it records no. Your collected data will be saved to the variable linked to your checkbox. Make sure to create this variable in your mailing list in advance.
Radio buttons
This element allows users to select from multiple options.
Set up your radio buttons as follows:
| Label of the radio buttons group | Type in a radio button group name. |
| Bind to variable | Select a user variable from the drop-down list. Collected data will be saved to the selected variable. |
| Options list | Add options and their values that will be saved to the selected variable. |
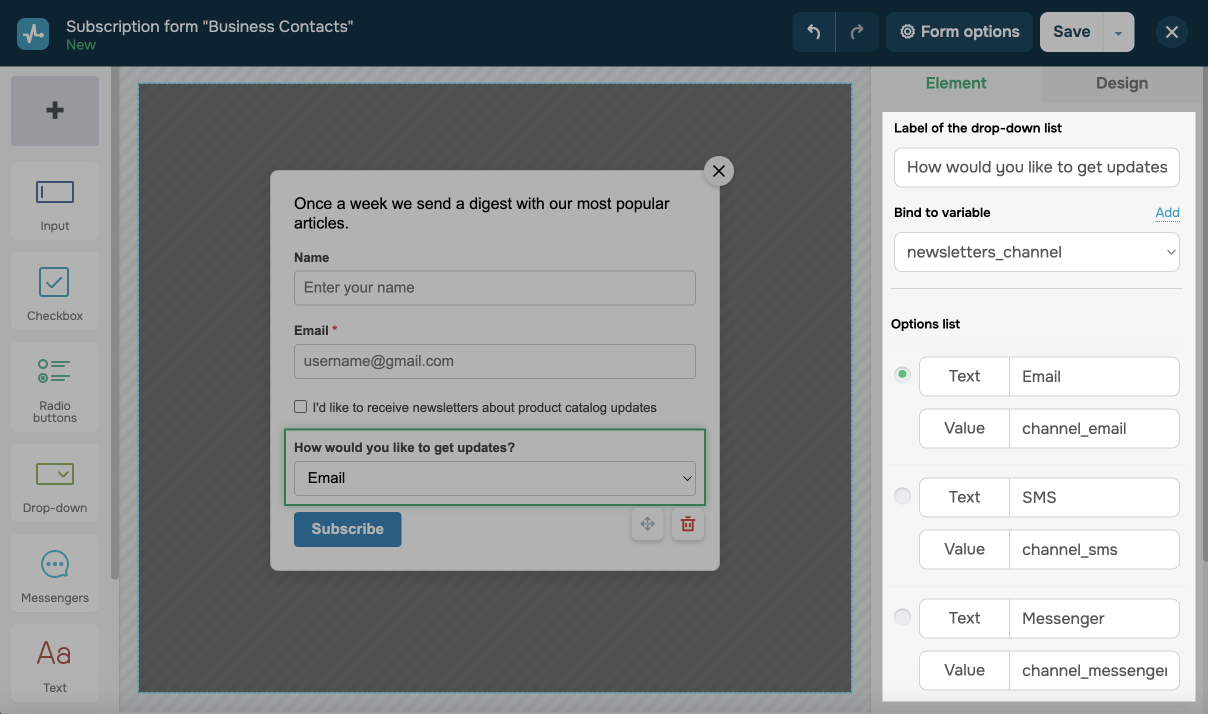
Drop-down list
This element allows users to select from multiple options and acts as a more concise version of radio buttons.
Set up your drop-down list as follows:
| Label of the drop-down list | Type in a drop-down list name. |
| Bind to variable | Select a user variable from the drop-down list. Collected data will be saved to the selected variable. |
| Options list | Add options and their values that will be saved to the selected variable. |
Messengers
This element adds social media buttons to your subscription form. Click Add a button, select a social media platform, and add a link to your profile. Select a button alignment: center, right, or left.
With Facebook Messenger and Telegram buttons, you can select a chatbot to which users will subscribe once they submit your form. Select a chatbot and its flow that will be triggered upon subscription.
Text
This element adds text to your subscription form. In the Element tab, you can select its font, adjust line spacing using the Line height setting, and format your text as follows:
| Text style | Select a text style: bold or italic. |
| Text color | Select a text color. |
| Insert/Edit link | Add a hyperlink to the selected text or type in hyperlink text.
Add text that will appear when hovering over your link, and decide if the link should open in the same tab or a new one. |
| Alignment | Set a text alignment: center, left, or right. |
| Font size | Select a text size. |
| Code | Access the source code of your text element. |
| Text orientation | Set a text direction: right-to-left or left-to-right. |
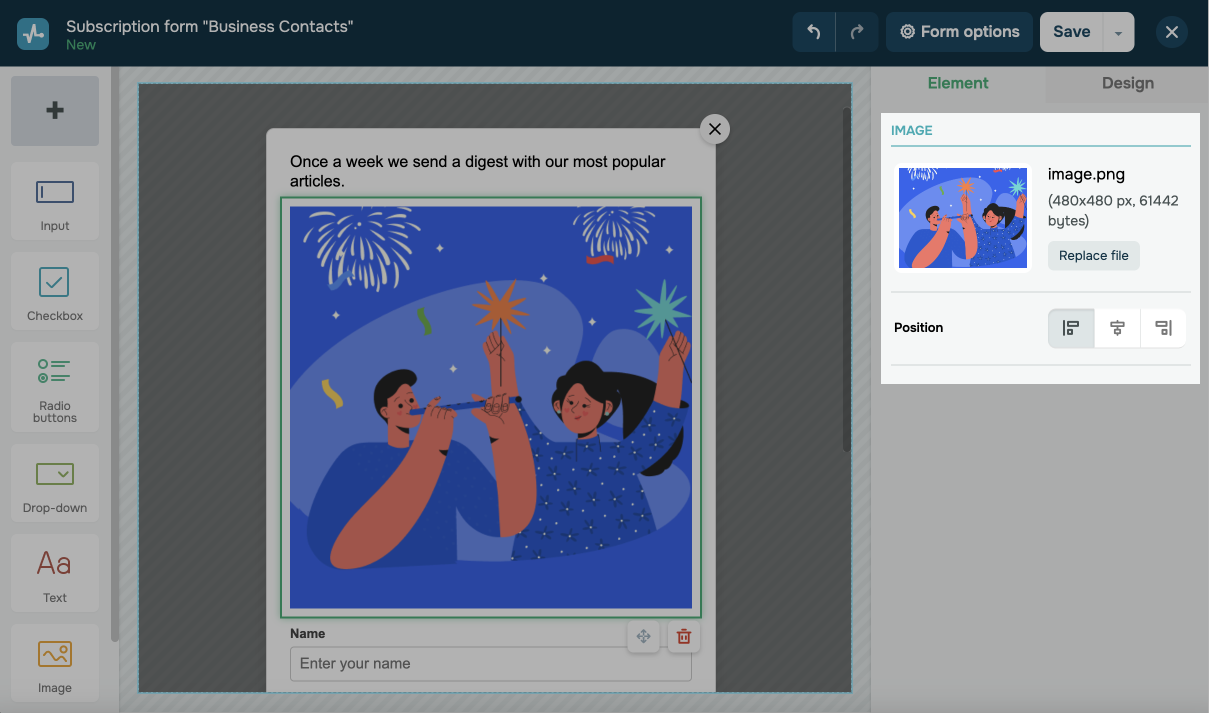
Image
This element adds images to your subscription form. In the Element tab, set an alignment: center, right, or left.
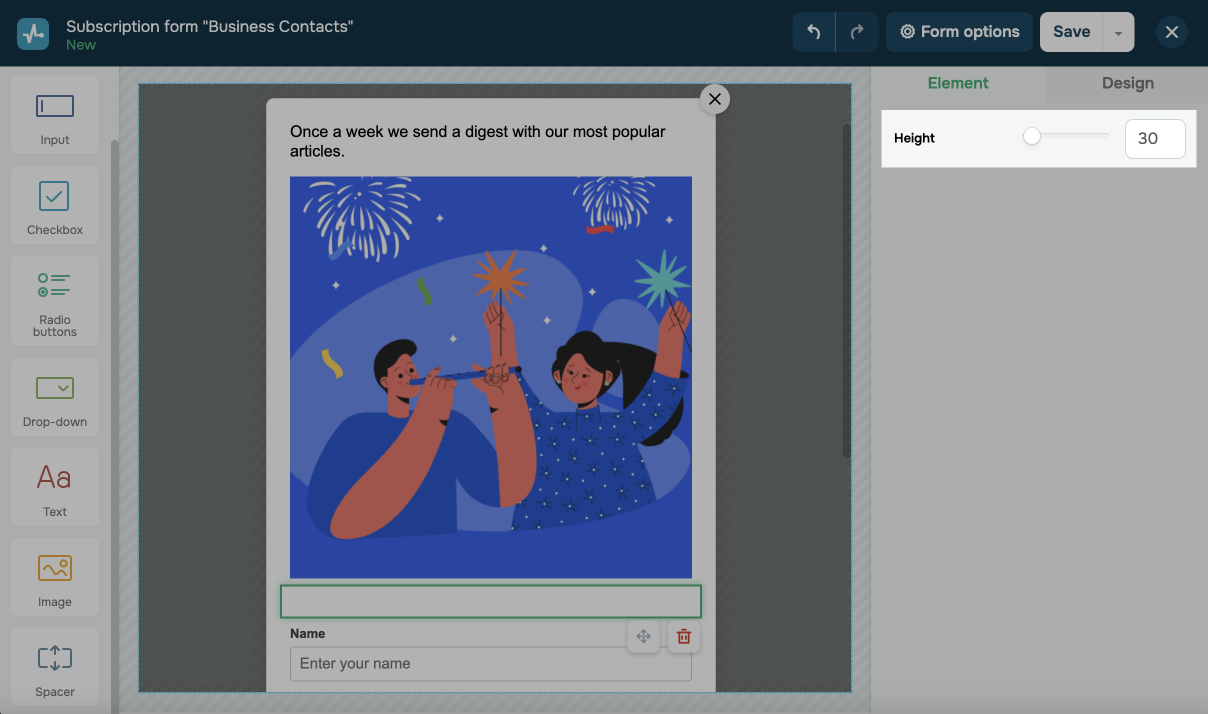
Spacer
This element spaces out your subscription form sections. In the Element tab, set a spacer height.
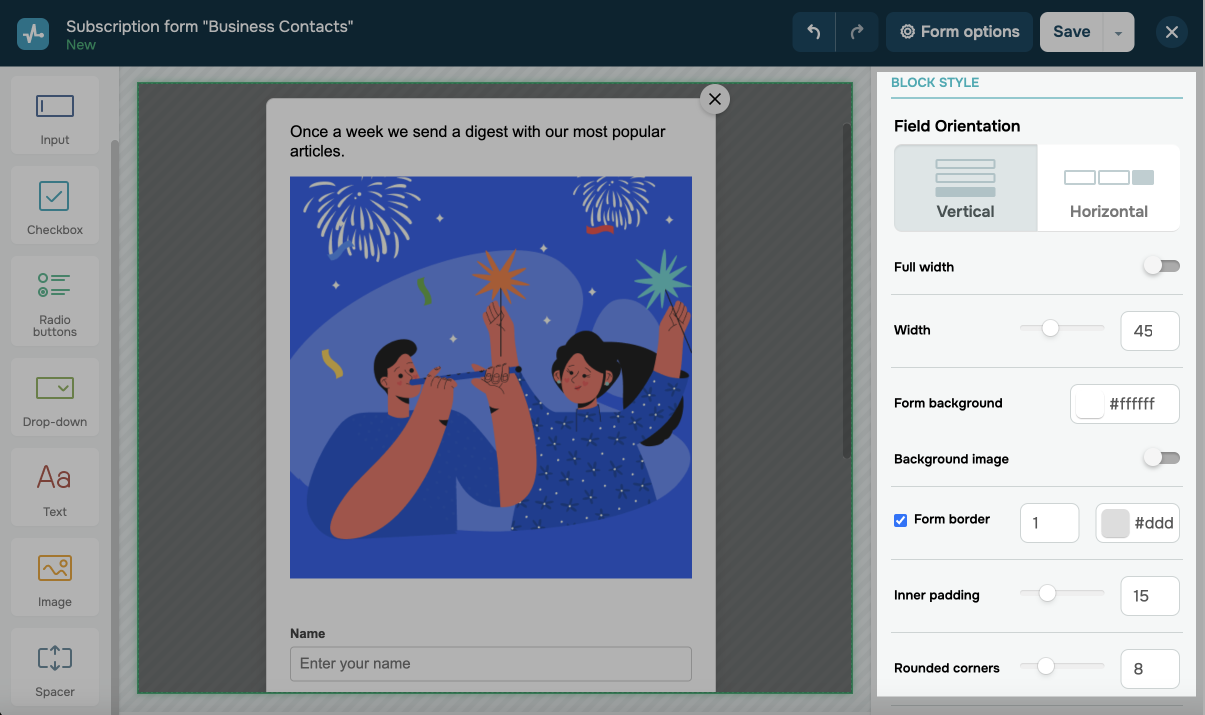
Customize your subscription form
You can adjust your subscription form by setting a background, rounding the corners, selecting the width, and more.
Customize your subscription form style as follows:
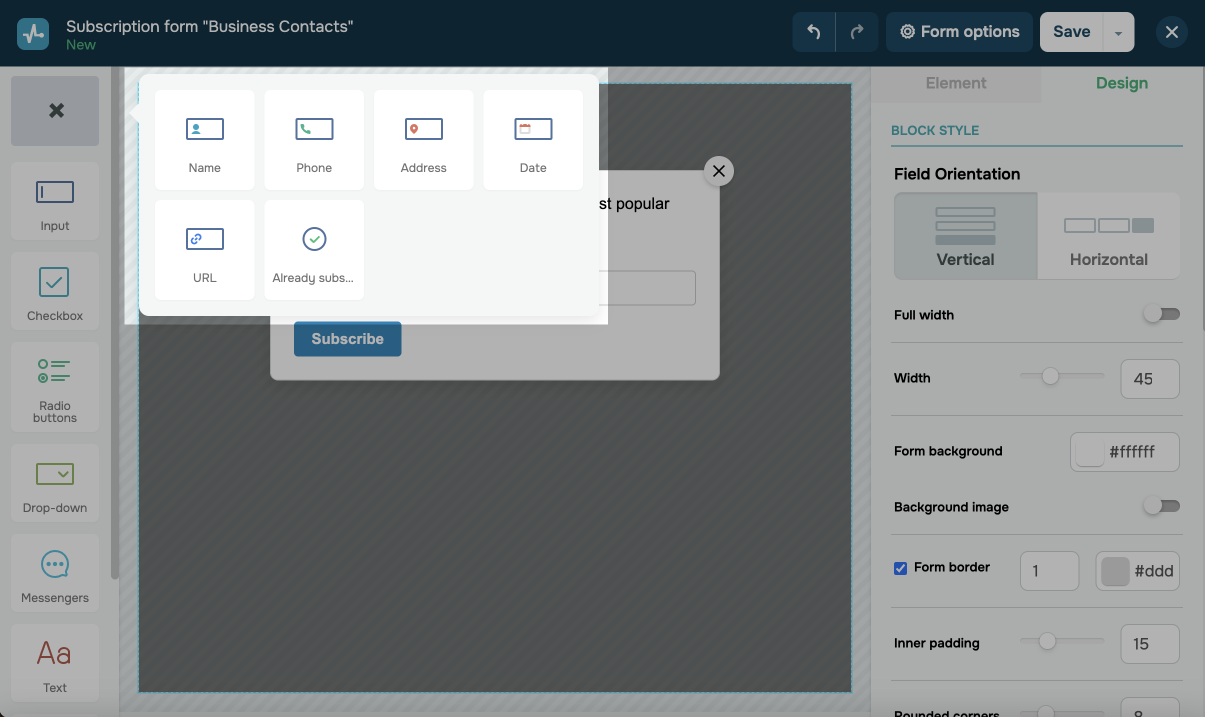
| Field orientation | Place your subscription form vertically or horizontally. |
| Full width | Turn on this toggle to stretch your form's background across the full width of the page. |
| Width | Set your form's width between 200 and 960 pixels. |
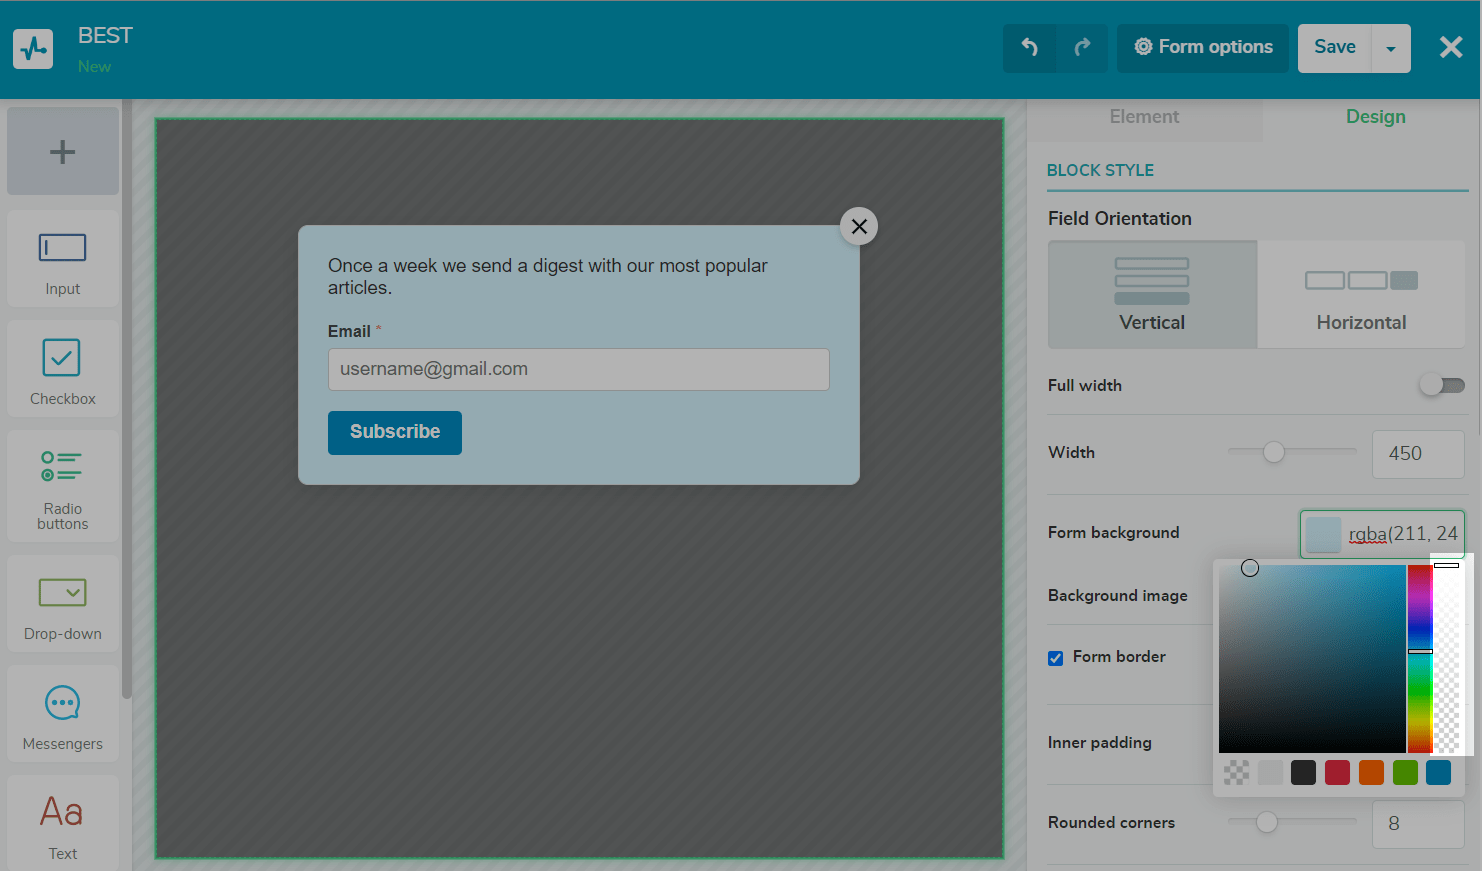
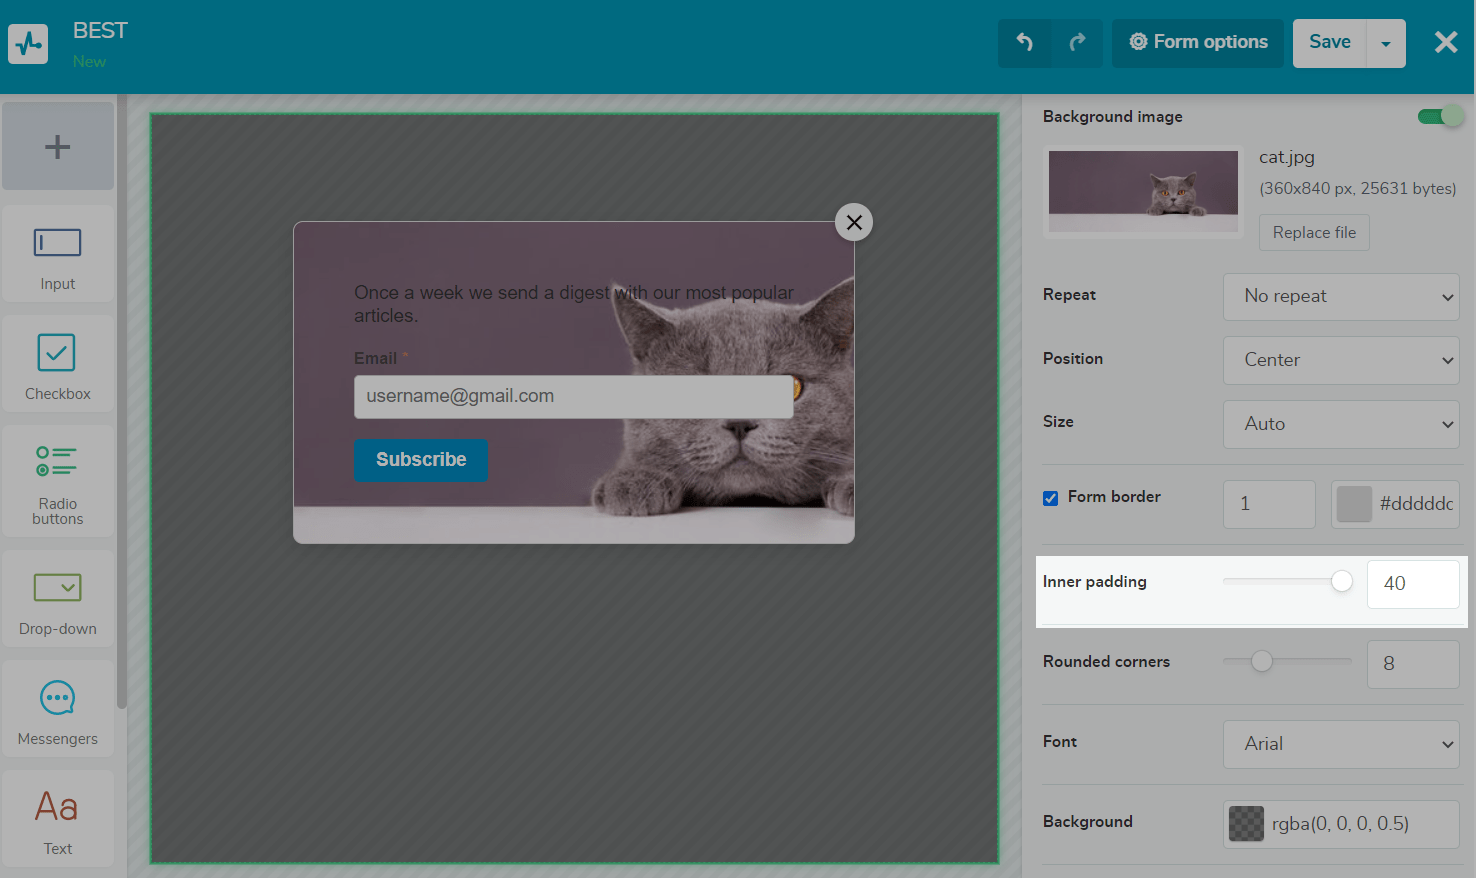
| Form background | Set a background color and transparency to match your website. |
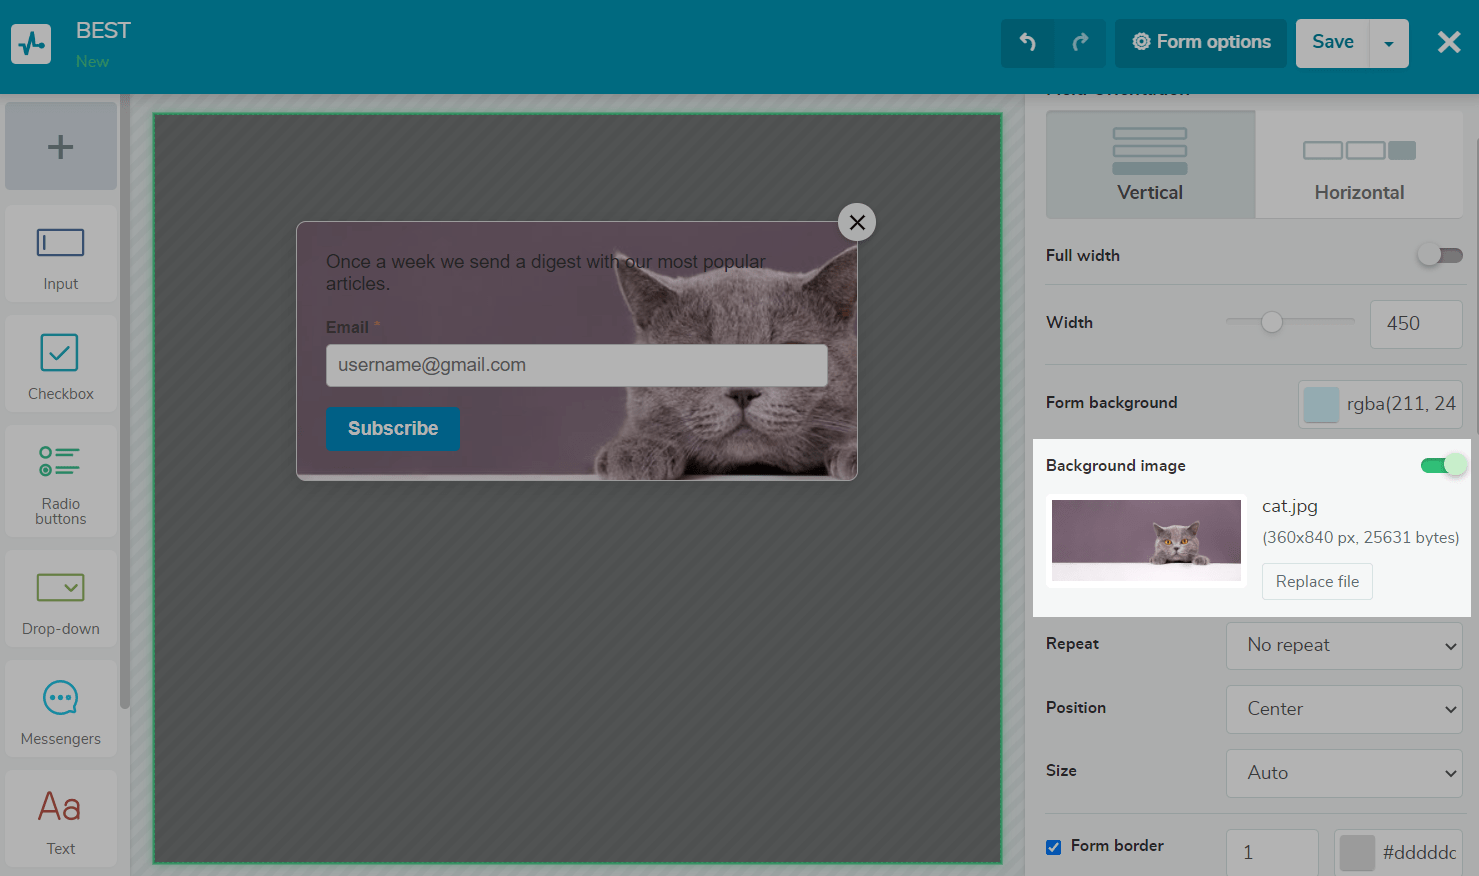
| Background image | Turn on this toggle to set a background image. Your image must not be larger than 496x600 pixels and 102 KB. |
| Form border | Set a border thickness and color. |
| Inner padding | Set a space between the element content and its border. |
| Rounded corners | Set a rounding value. |
| Font | Select a universal font for your subscription form text. |
| Background | Set a background color and transparency.
Applicable only to pop-up forms. |
| Show effect | Select a form animation: shake, scale in/out, fade, slide top/right/bottom/left, or rotate.
Applicable only to pop-up forms. |
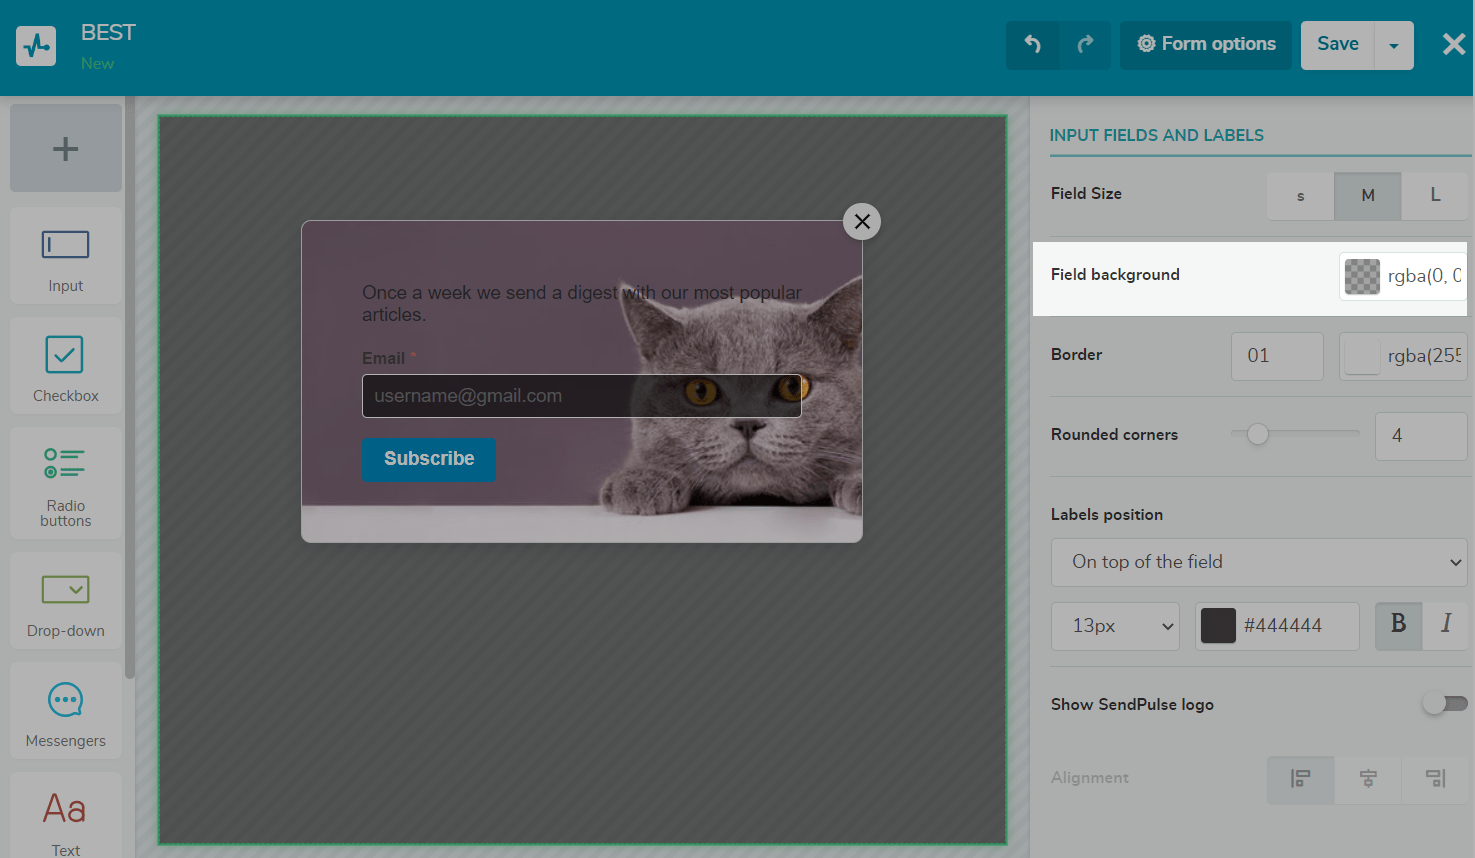
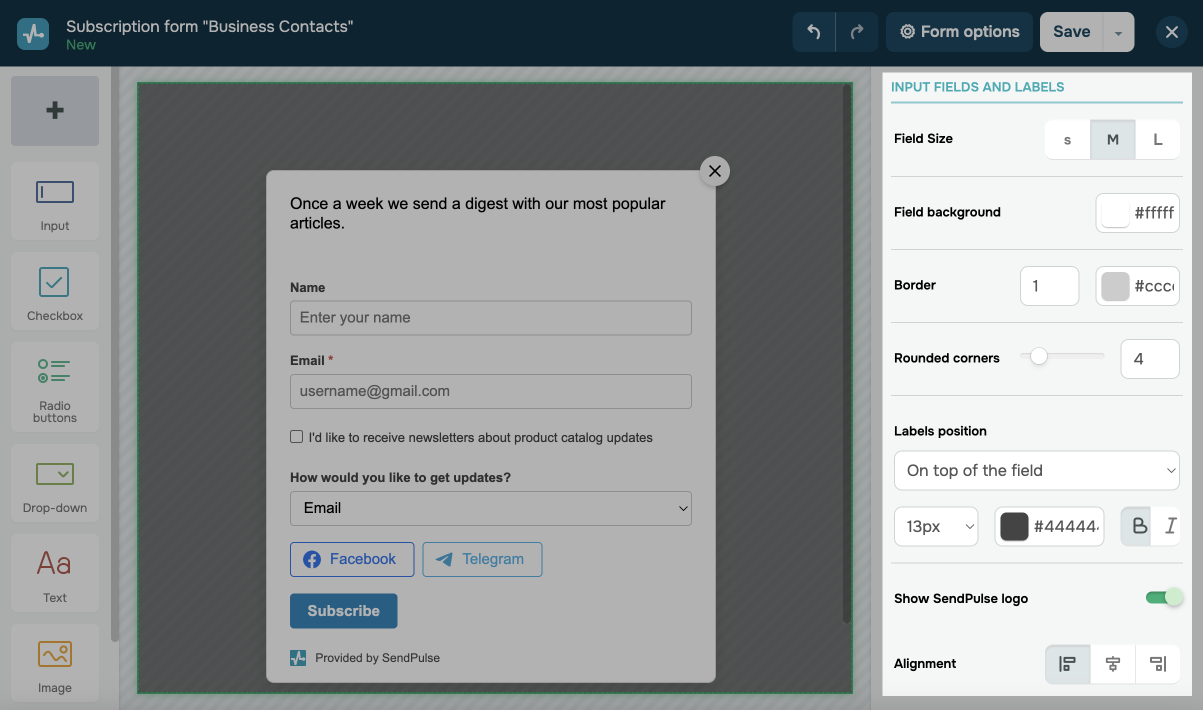
In Input fields and labels, customize your subscription form elements.
| Field Size | Select a field and element size: small, medium, or large. |
| Field background | Select a field background color. |
| Borders | Set a border thickness and color. |
| Rounded corners | Set a rounding value. |
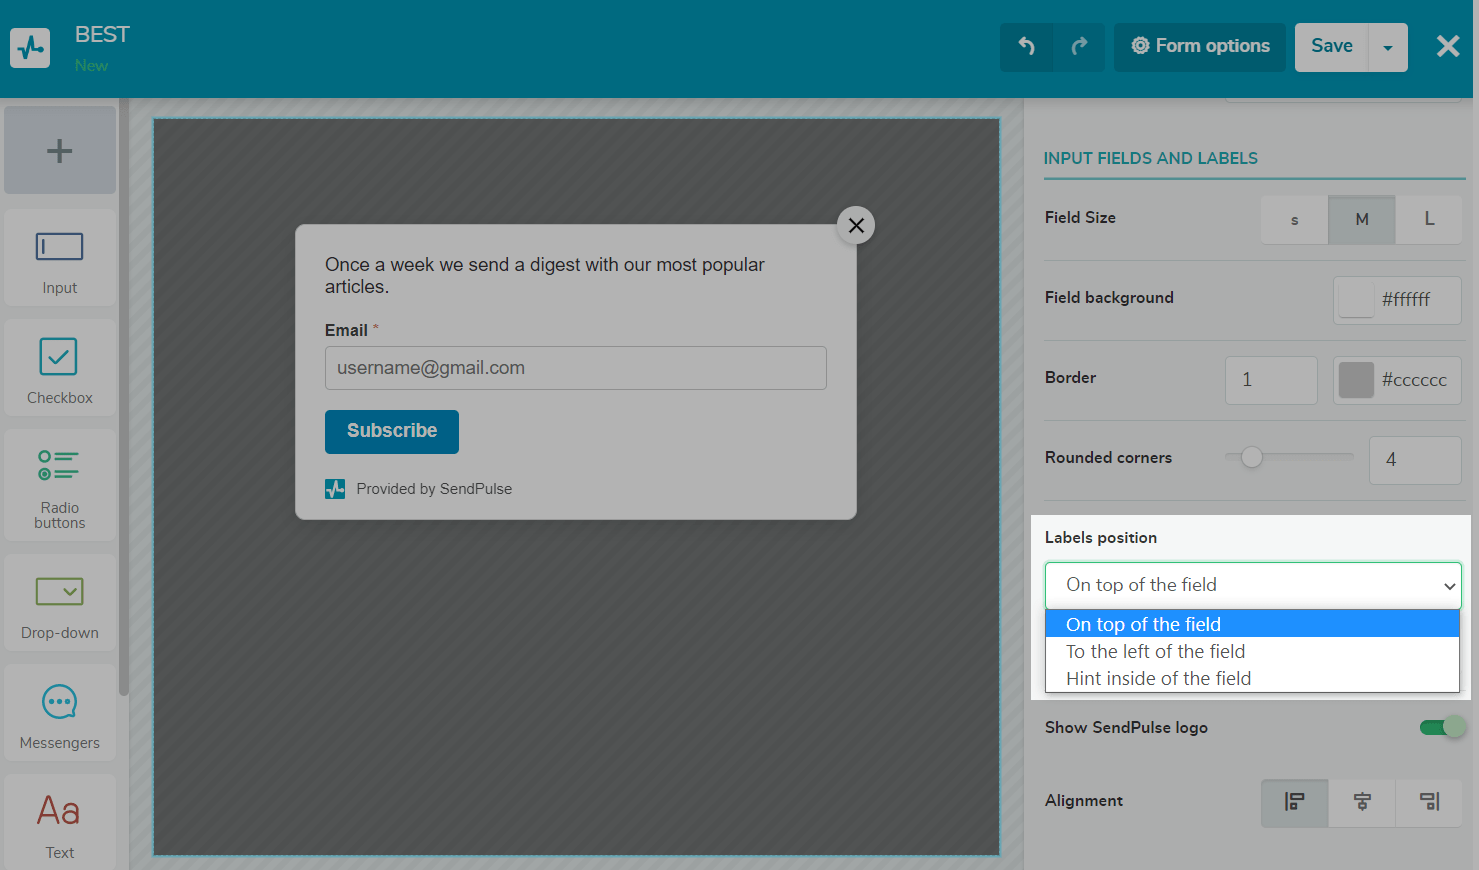
| Labels position | Select a field name position: on top of the field, to the left of the field, hint inside of the field.
You can also set your field names' font size and color and make them bold or italicized. |
| Show SendPulse logo | Turn on this toggle to show the SendPulse logo on your subscription form. |
| Alignment | Select a SendPulse logo alignment: left, center, or right. |
Set up form options
Click Form options to access advanced subscription form settings.
Form data and type
In this section, set up data transfer and select a subscription form type:
| Form name | Type in a subscription form name. |
| Mailing list | Select mailing lists to which collected subscriber data will be saved. |
| Add subscribers to CRM | Turn on this toggle to automatically transfer subscriber data to your CRM contact list. |
| Set tag(s) | Add tags to your subscription form to be able to easily find it on the list. |
| Websites for this form | Add your website domain. Make sure to include your subdomain as well. For example, if your website is hosted on www.example.com, include "www" in your domain name.
Providing an incorrect domain will prevent users from subscribing through your form. |
| This form is GDPR compliant | Turn on this toggle to add variables for data processing consent and use them in your form. |
| Error and notifications language | Select a language of error messages and notifications. |
| Form type | Select a form type: Embedded, Pop-up, or Floating. |
| Display condition | Decide how the subscription form will appear on your website. It can appear after a delay once a user visits your website.
The Hide on mobile option allows you to make your form invisible to mobile users. |
| Show again | Set the display interval to a few days to avoid showing your form again to users who closed it without subscribing. |
| Show on pages | Show your subscription form on all website pages or exclude specific pages. |
Subscription notification
A subscription notification will appear once a user fills in and submits your subscription form.
You can edit your subscription notification as follows:
| Text style | Select a text style: bold or italic. |
| Text color | Select a text color. |
| Insert/Edit link | Add a hyperlink to the selected text or type in hyperlink text.
Add text that will appear when hovering over your link, and decide if the link should open in the same tab or a new one. |
| Alignment | Set a text alignment: center, left, or right. |
| Font size | Select a text size. |
| Code | Access the source code of your text element. |
| Text orientation | Set a text direction: right-to-left or left-to-right. |
Opt-in settings
If you turn on the Enable double opt-in toggle, users will receive an email asking them to confirm their subscription. You can edit your sender email address, subject line, and email body using the editor below.
When setting up subscription confirmation emails, use a sender email address with a corporate domain. This will help your emails pass spam filters and make the sender recognizable to recipients.
You can also personalize subscription confirmation emails. To do this, insert variables into your email text as %name% or {{name}}. Make sure to create these variables in your mailing list and map them to subscription form fields.
Confirmation page
This is the page where new subscribers are redirected once they confirm their subscription.
Select an option: Show the default thank you page or Redirect to my own thank you page. If you have selected the latter option, add your website link.
To create a custom subscription confirmation page, go to Subscription Forms > Subscription confirmation pages > New Subscription Confirmation Page.
Analytics and statistics
In this section, you can enable subscription tracking in Google Analytics and collect tags.
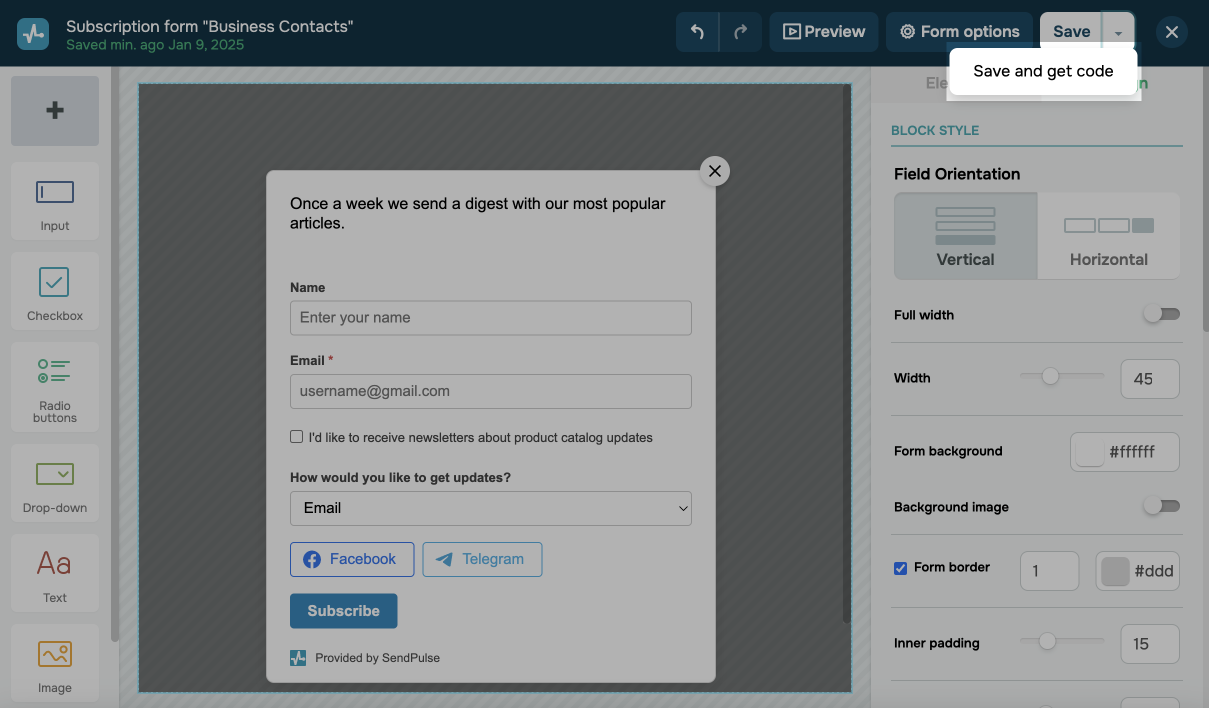
Embed your subscription form code
To place the subscription form on your website, you may need its code. To retrieve your form code, click the options button to the right of Save, and select Save and get code.
To allow users to submit the form, your website must include the Referer header that indicates the request source.
Add the code wrapped in the <body> tags to your website.
If you have a WordPress-powered website, you can add your subscription form using the SendPulse plugin. Alternatively, you can embed your form code using Google Tag Manager.
Validate subscriber data using reCAPTCHA
Captcha helps protect your mailing list from fake subscribers, which can prevent your emails from landing in spam. If your daily subscription count exceeds 100, reCAPTCHA will be triggered. Once the verification test is completed, users will be redirected back to the previous page within 10 seconds.
Last Updated: 15.04.2024
or