Create a custom subscription confirmation page
After a subscription or additional email verification, users land on a special page with a successful subscription notification. You can use this page to thank your subscribers and ask them to add your email address to their contact list so that your emails don't end up in their spam folders.
You can also use the opt-in page to encourage users to do more. For example, tell your subscribers when they will receive the first email from you, offer to pick up a gift, or redirect them to your website homepage.
With SendPulse, you can use the default subscription confirmation page or create a customized one based on your brand style.
In this article, we will talk about how to create a custom subscription confirmation page using SendPulse.
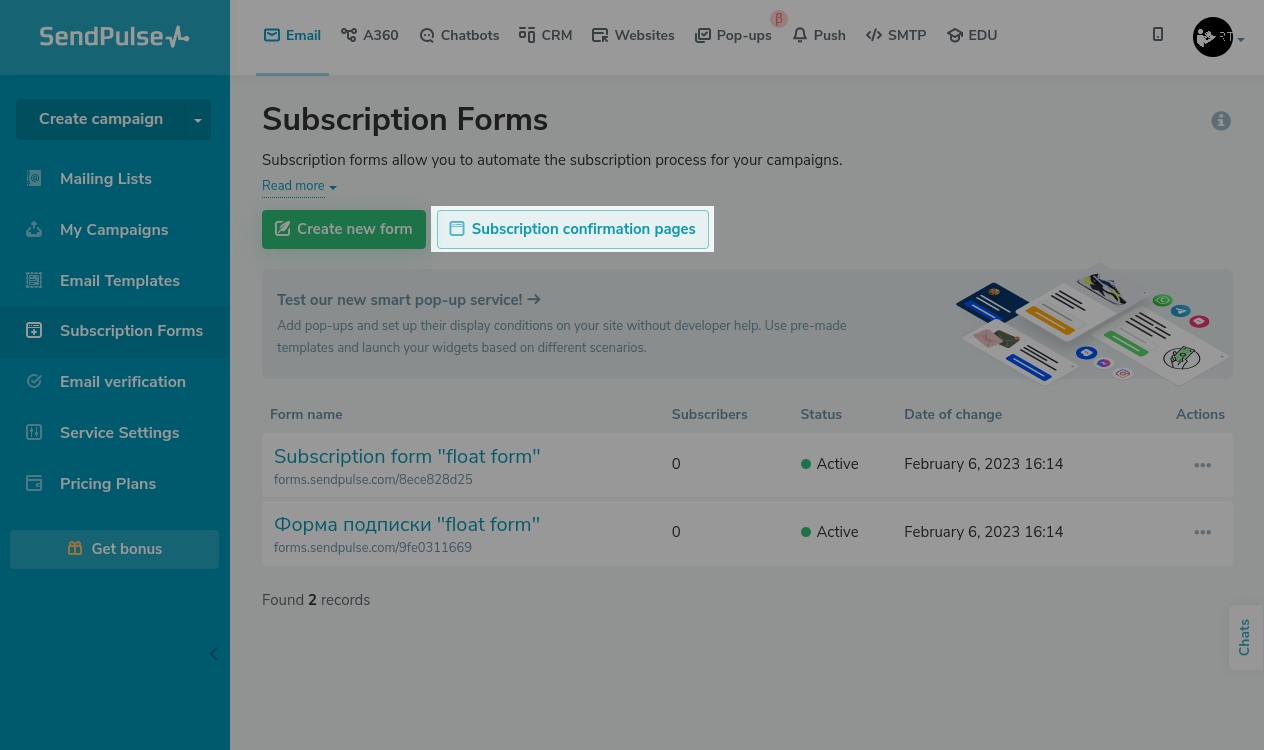
Add a new page
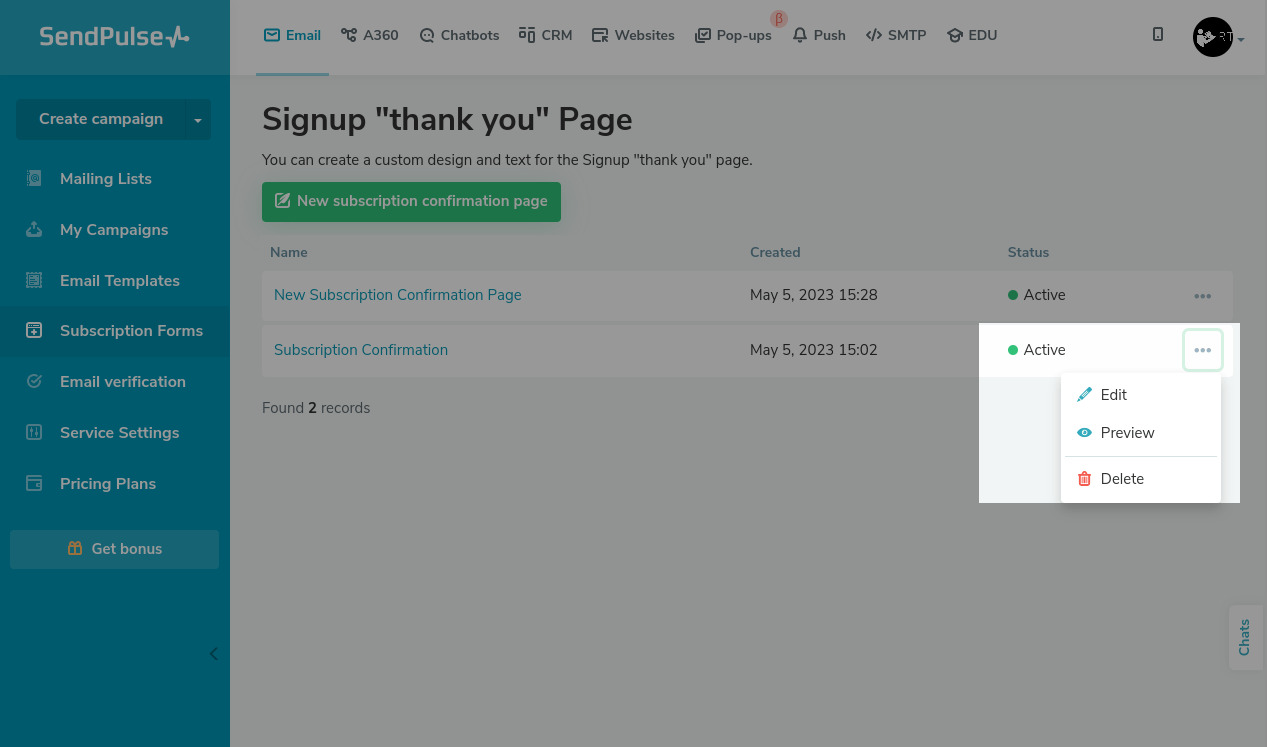
Go to Email > Subscription Forms, and click Subscription confirmation pages.
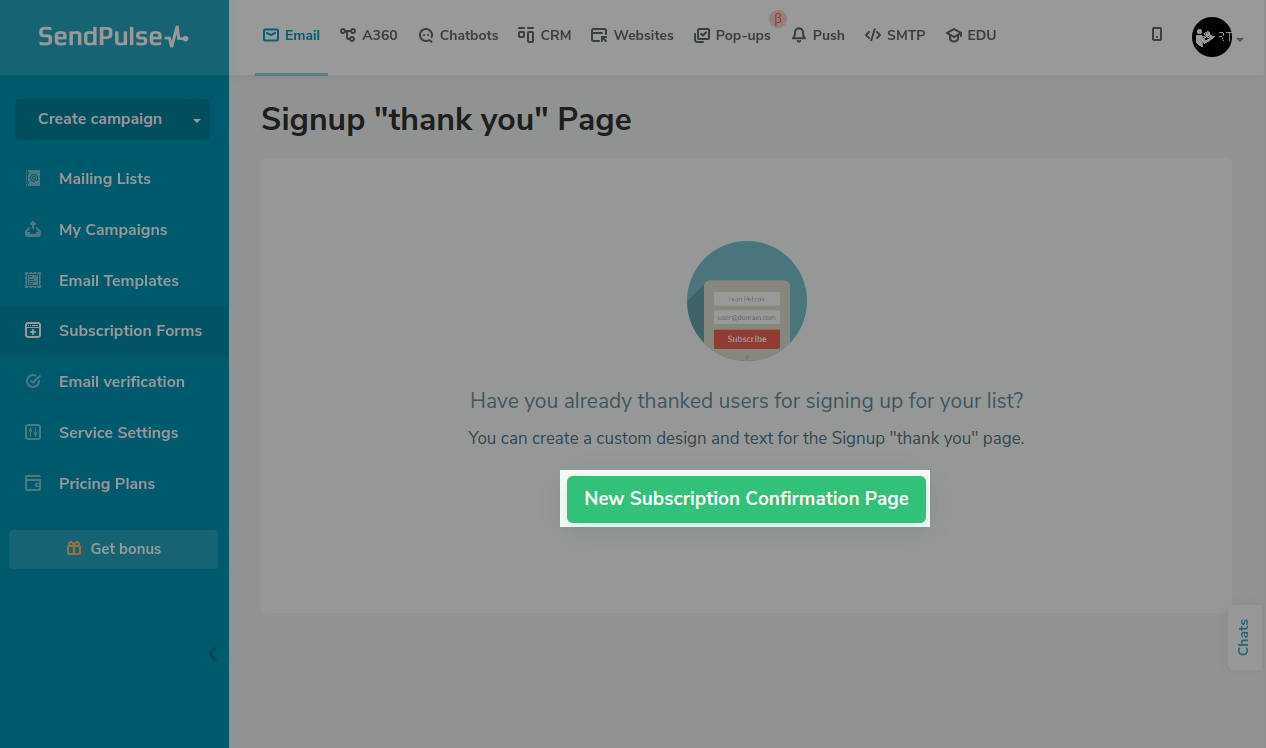
Click New Subscription Confirmation Page, and add a new page.
Add headers
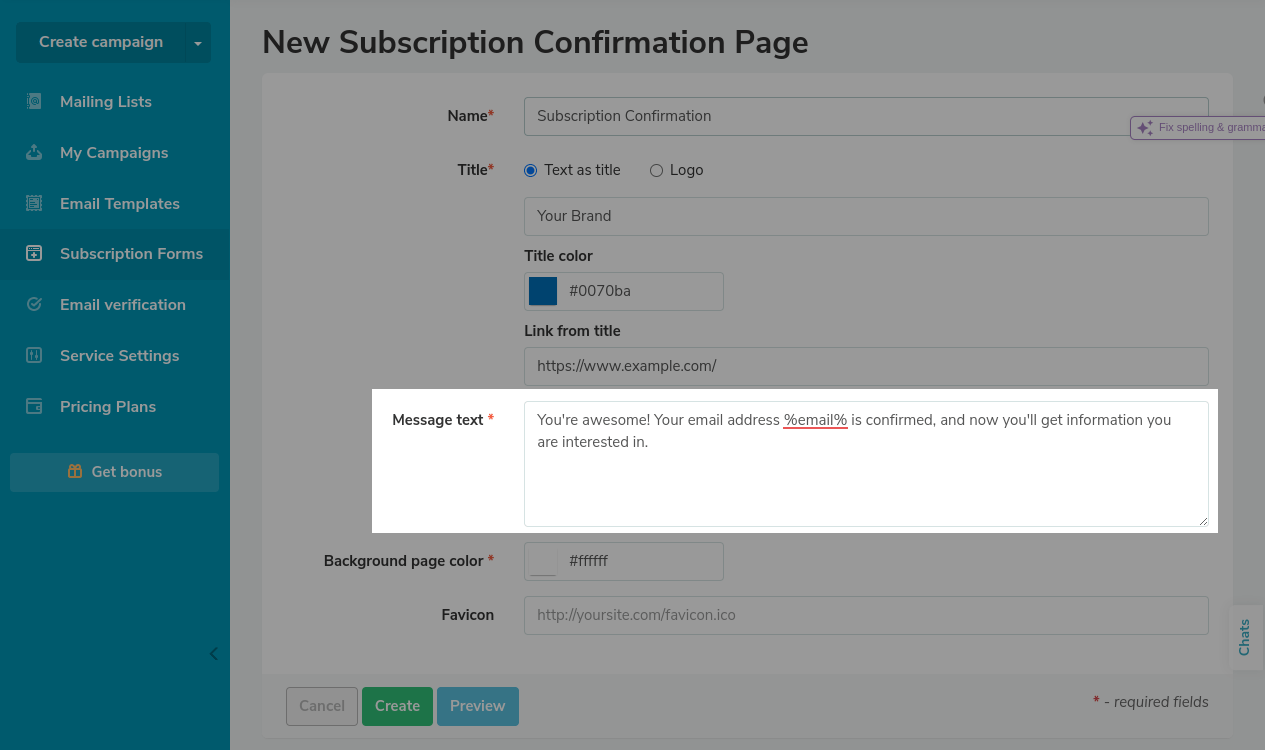
Specify your page name to be able to quickly find it in the list.
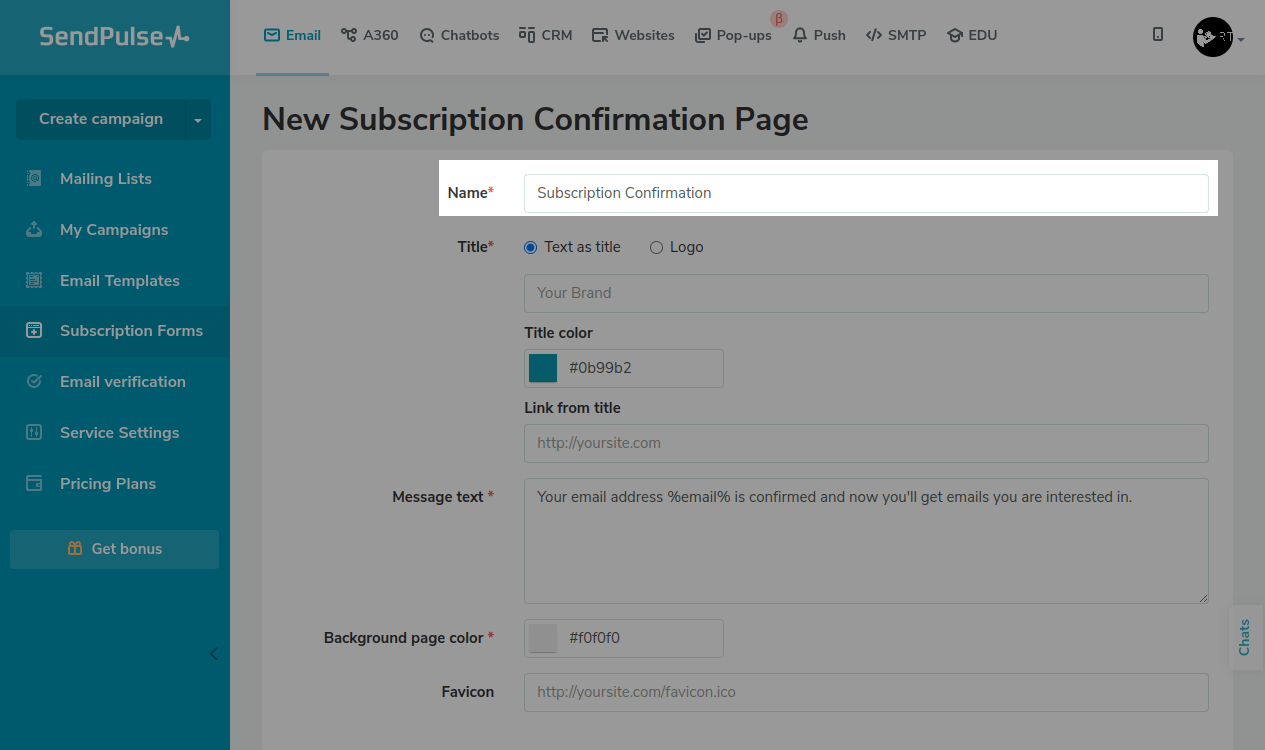
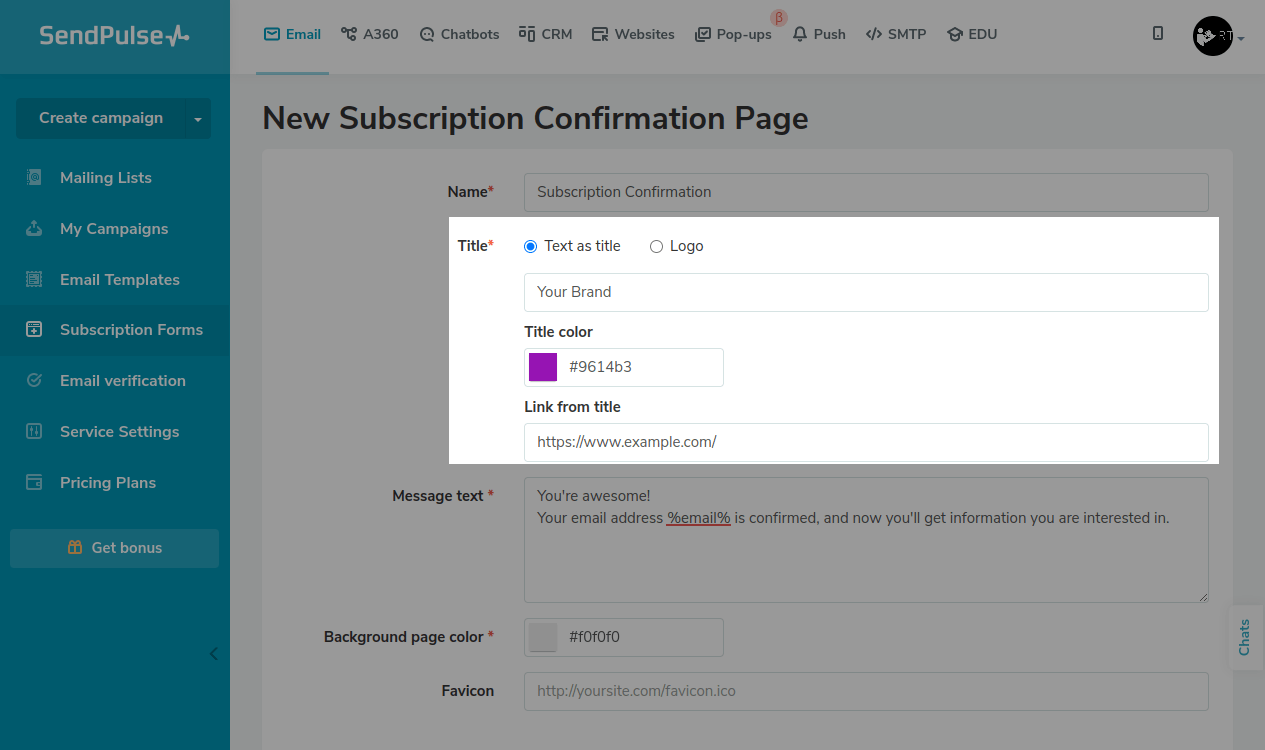
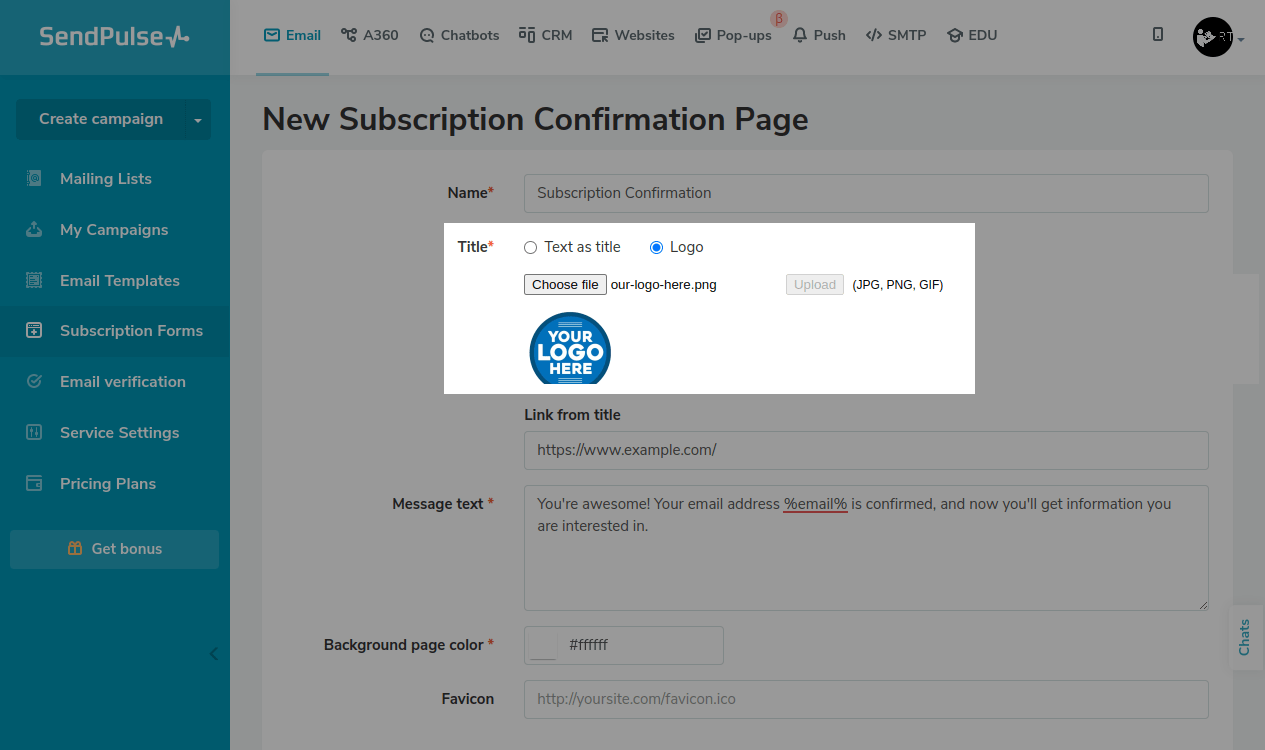
Specify the title you want to display on your page and in browsers.
You can add a text title, select its color, and link it to, for example, your website homepage.
You can replace the text with your logo. To do this, select the Logo radio button, select a file (JPG, PNG, or GIF), and click Upload.
You can also link your logo to another page on your website.
Enter your message text
Add your message text. You can use variables created in your mailing list and linked to your subscription form fields, such as %email%, %name%, and more.
Finish customizing
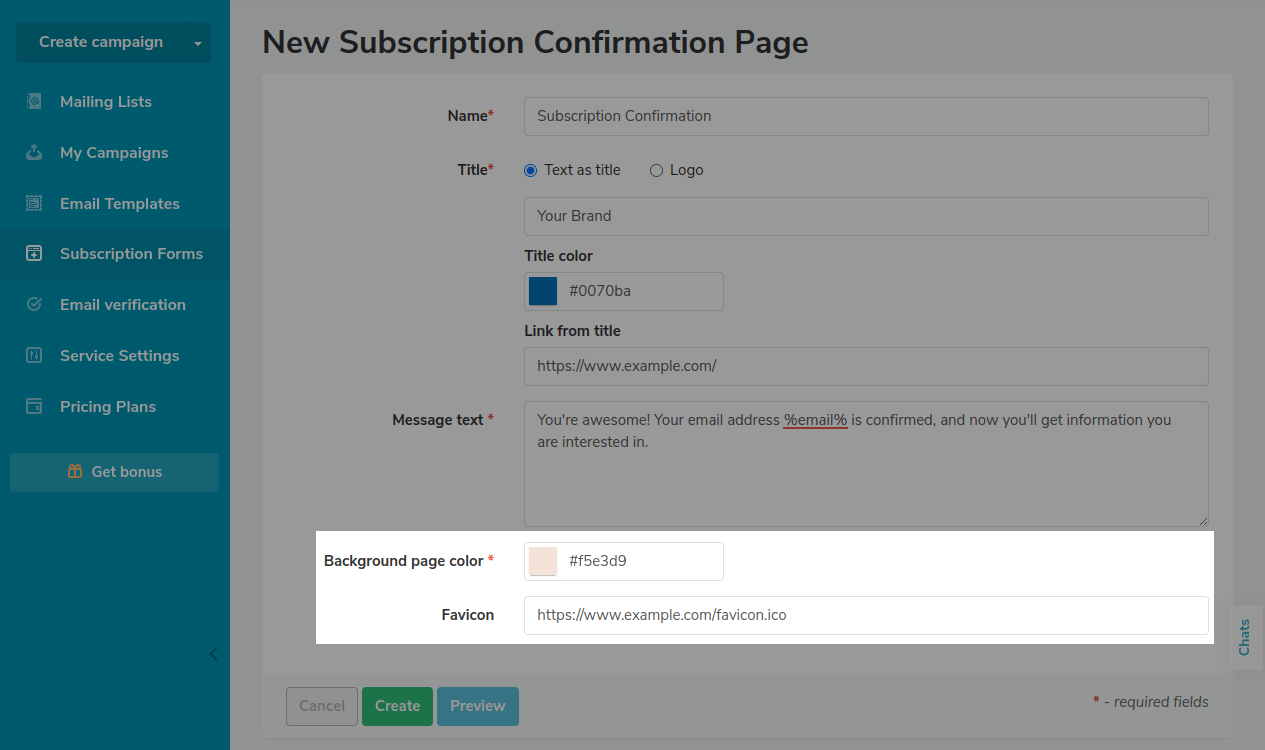
Set your page background color. You can choose it from the palette or type its hex code. You can also add a link to your favicon that will be displayed next to your page title in browsers.
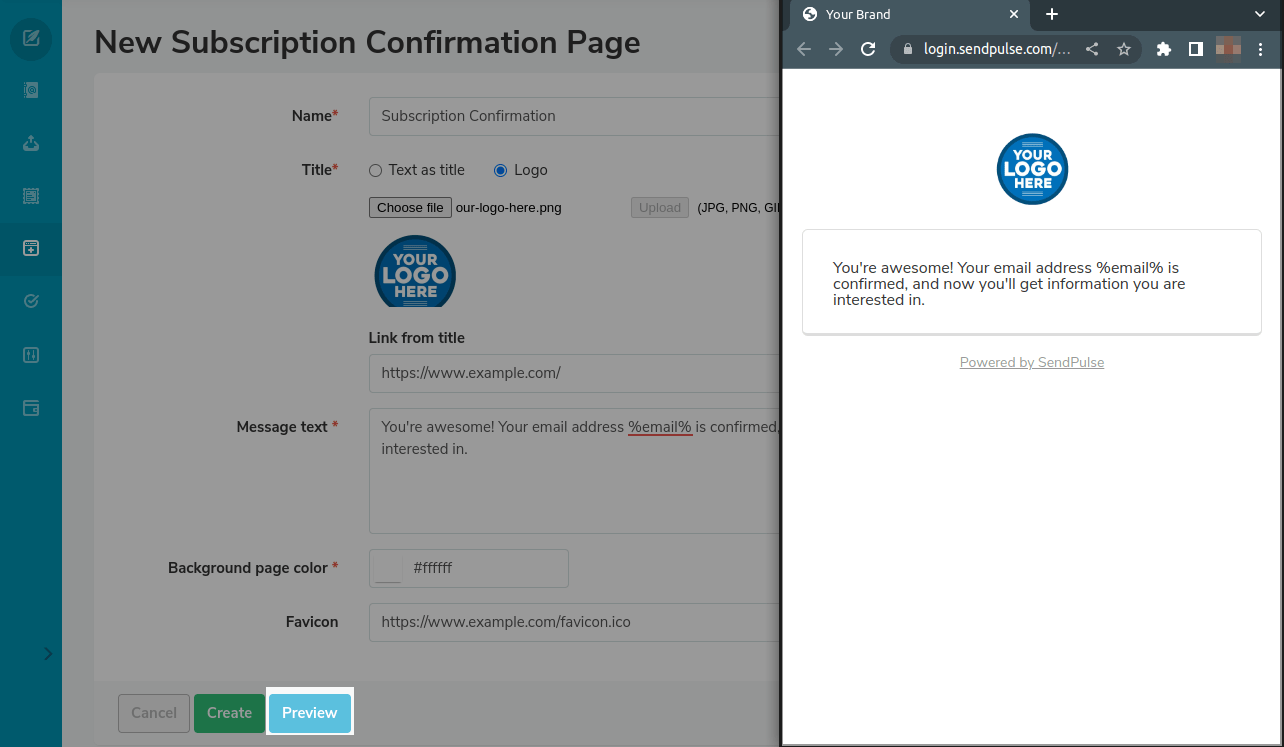
Click Preview to see what your subscription confirmation page will look like.
When you're done, click Create.
SendPulse moderates your subscription confirmation page every time you edit it. You can see its moderation status on the Signup "thank you" Page page.
Click the three dots icon next to the title to view or remove your page. You will be able to edit it once it passes the moderation.
Users will continue seeing the default subscription confirmation page until your custom page gets approved.
Link a Subscription Form to Your Custom Page
You will be able to link your custom confirmation page to the subscription form you created with the drag-and-drop form builder.
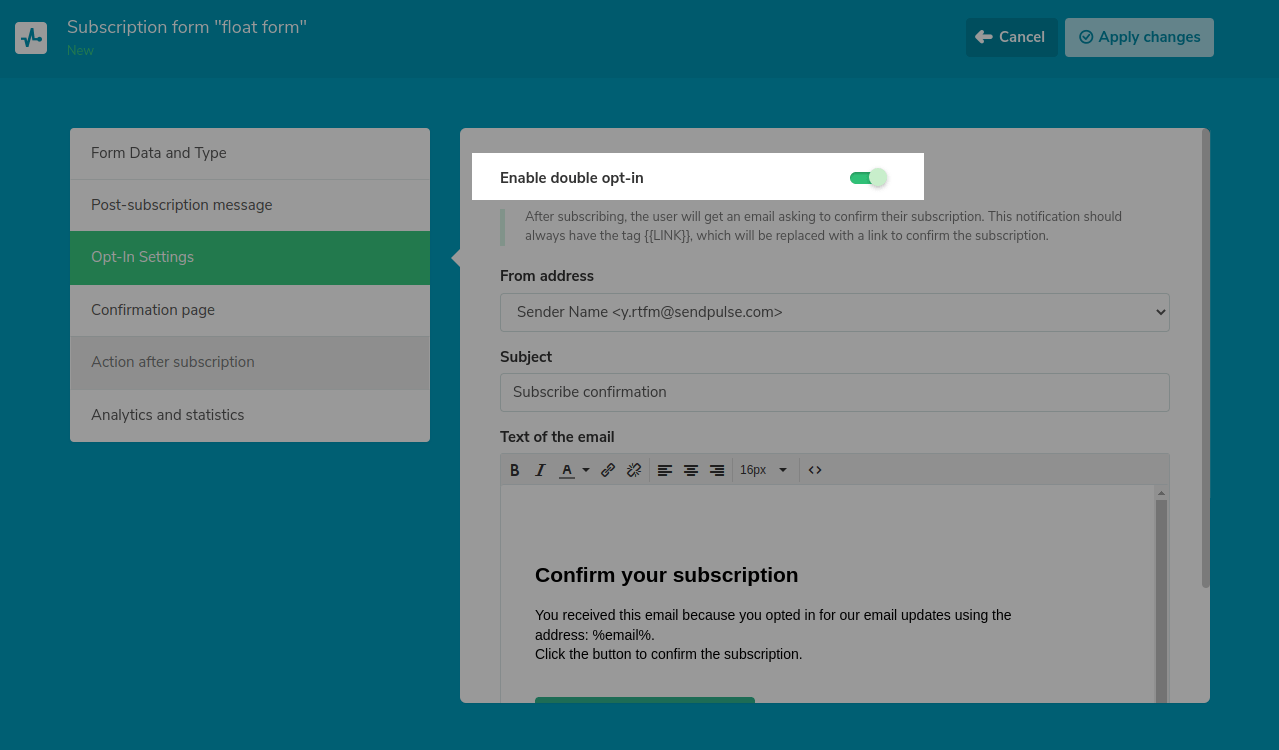
In the form builder, go to Form Options > Opt-In Settings, and turn on the Enable double opt-in toggle.
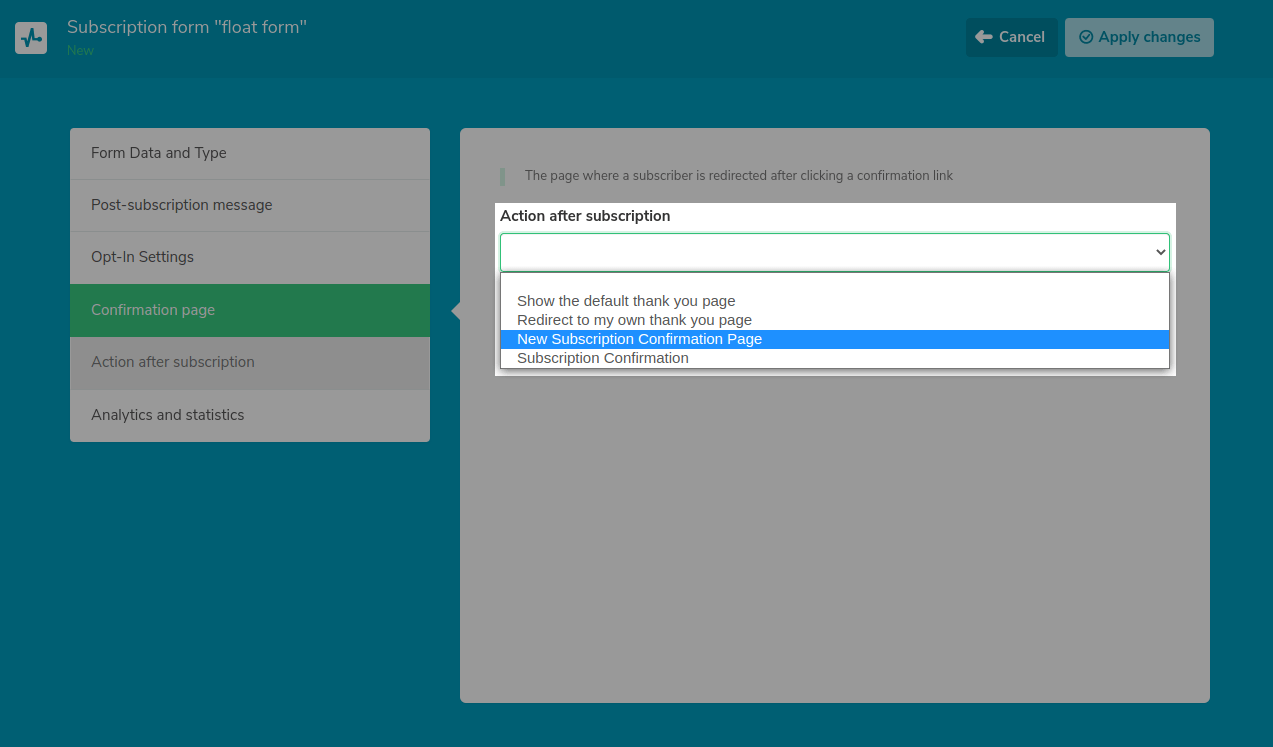
Afterward, the Confirmation page tab will become active, and you will be able to select a page from the Action after subscription drop-down list.
Last Updated: 05.12.2023
or