Send scheduled emails
Step 1: Create an Email Campaign
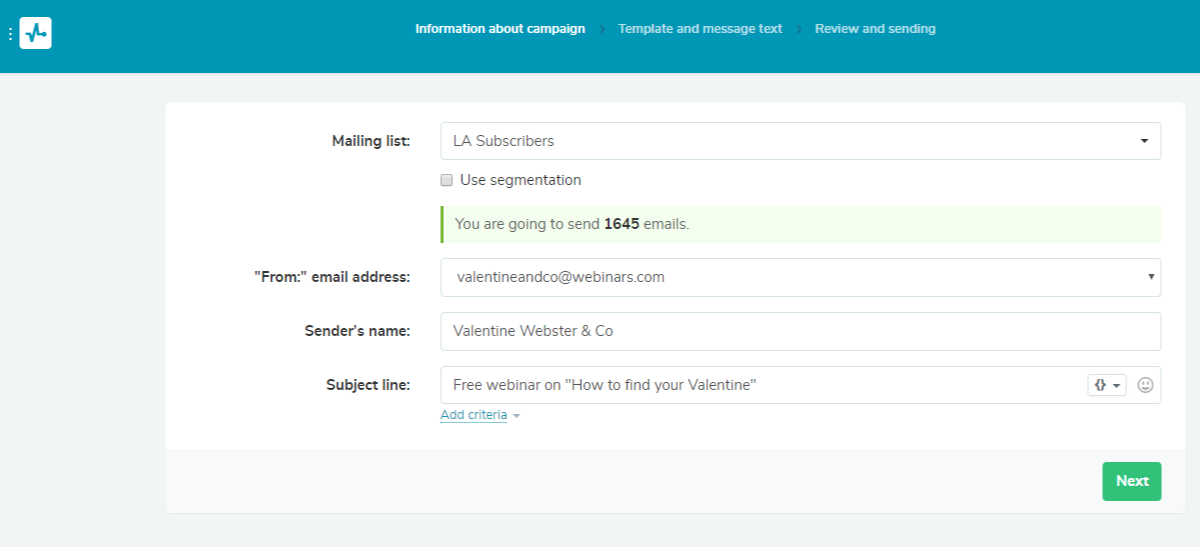
Fill in all the necessary details. Continue and use the drag-and-drop editor to create a structure. Add text and images into the elements. Click on “Save and continue,” and it will move you to the “Parameters check.”
Here are some deatailed instructions on how to create an email campaign.

Step 2: Set Sending Time
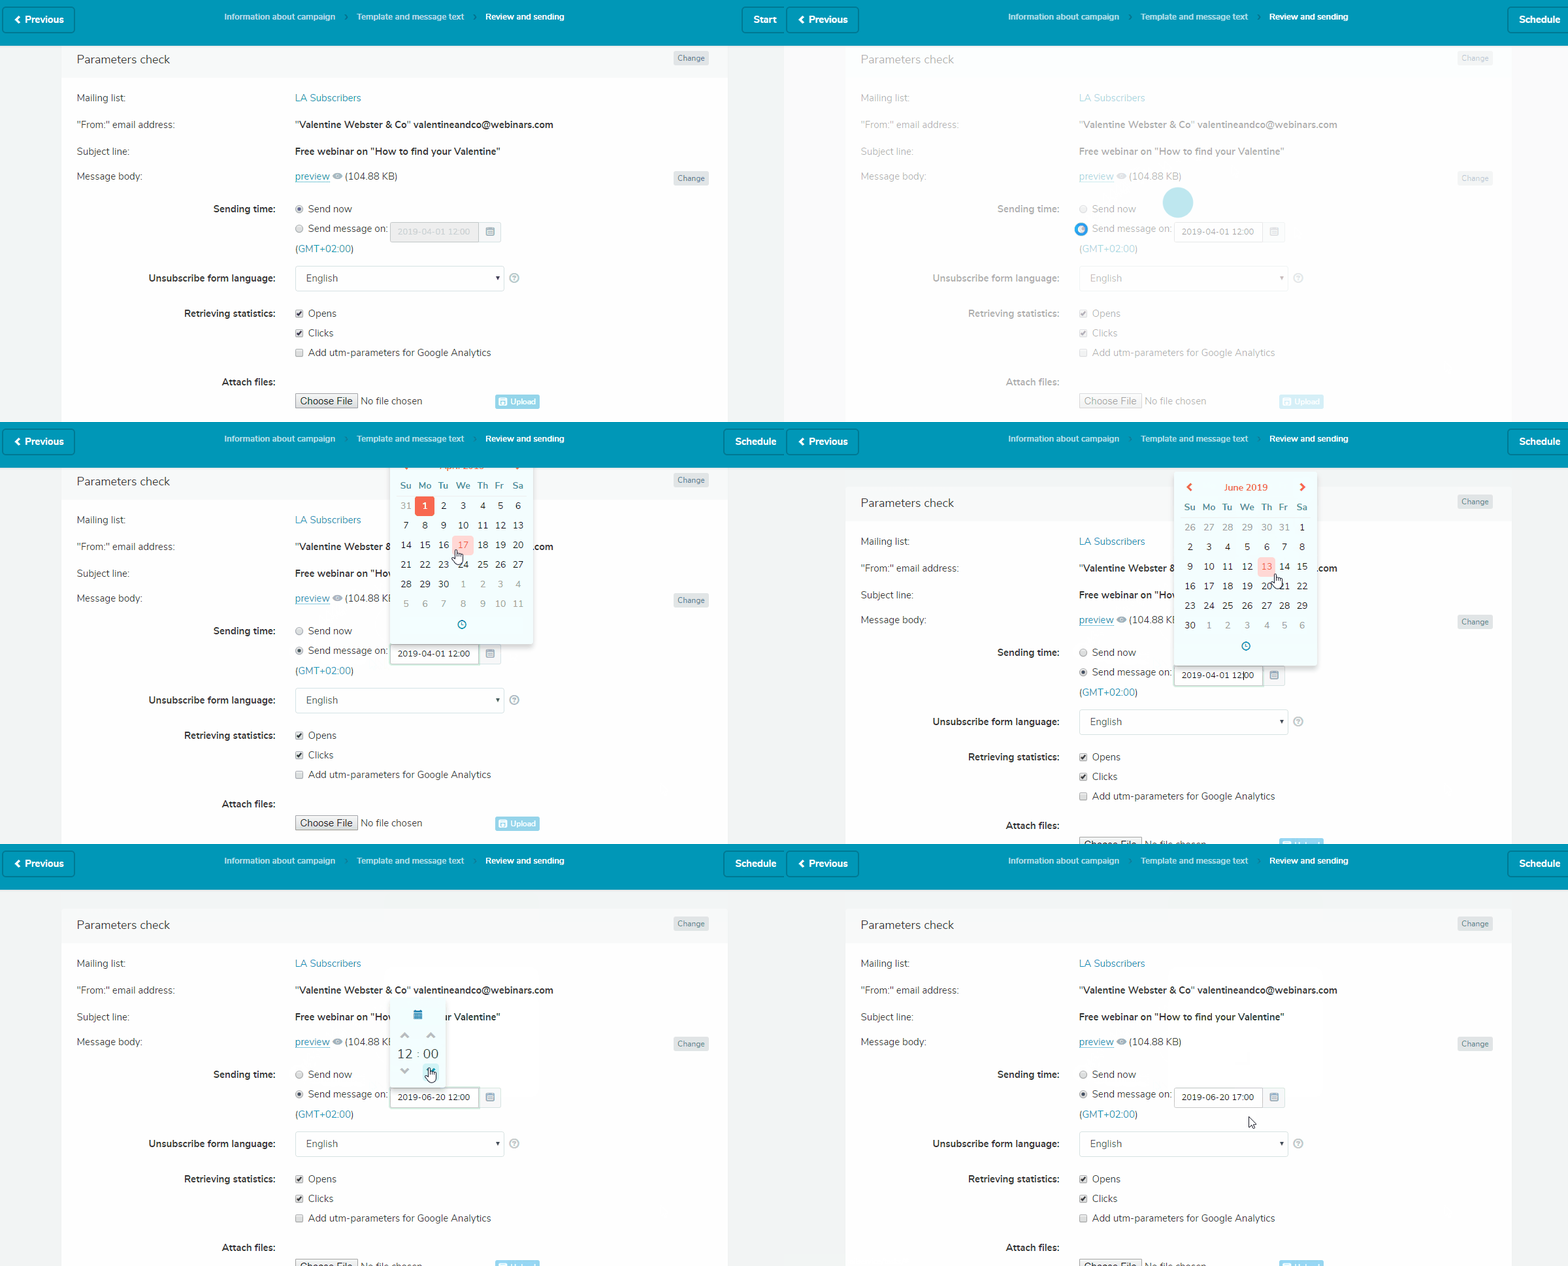
Decide when you want your campaign to be automatically launched. Click on “Send message on” and choose the date and time for sending.

Step 3: Set the Time Zone
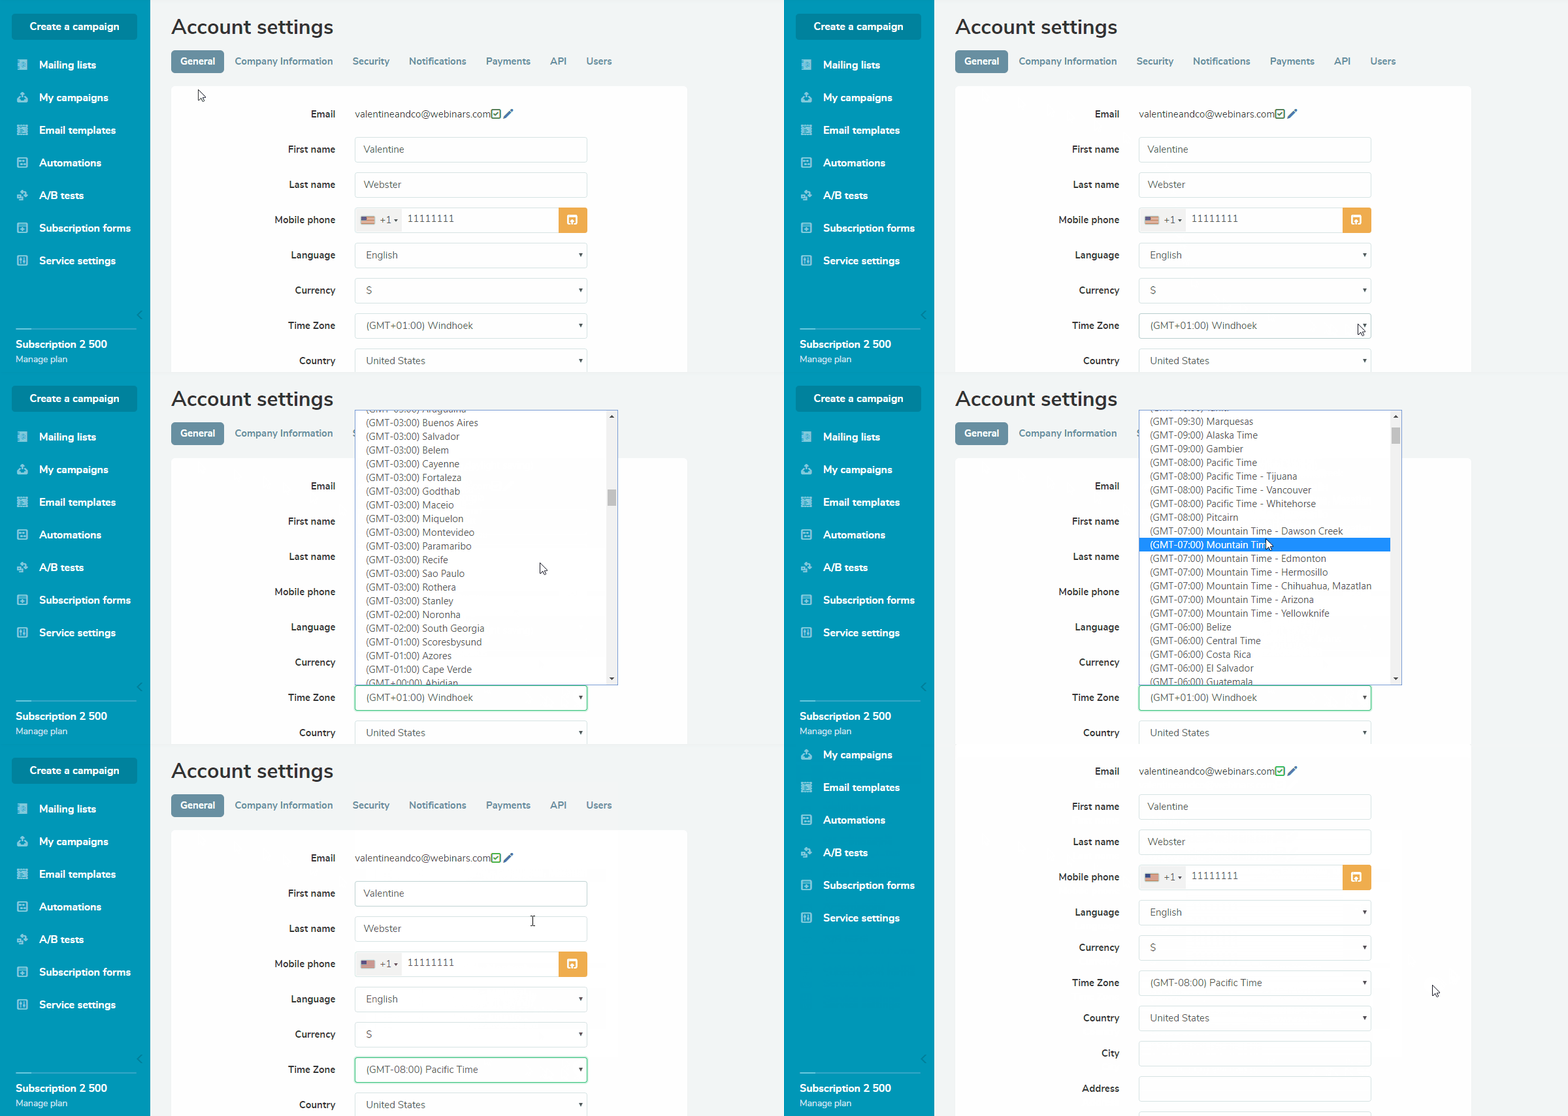
If you are sending an email campaign to people who are in another time zone, you need to change your time zone settings. Click on time zone information in parentheses under the “Sending time” options, and your Account settings will open in a new tab. Find the “Time zone” menu and select the desired time zone.

Step 4: Schedule the Email Campaign
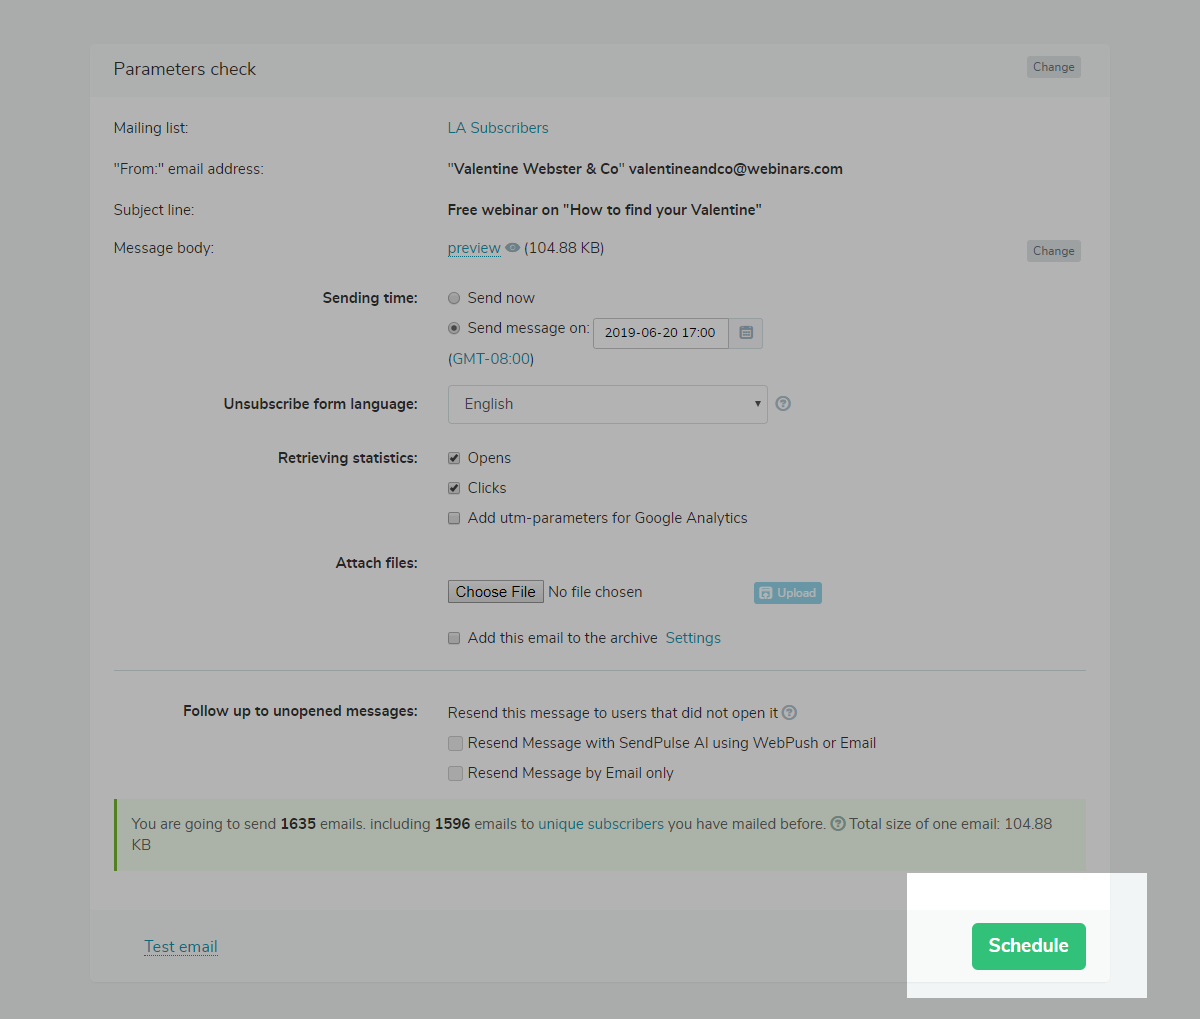
Fill in all necessary data. Click on “Schedule” at the bottom of the “Parameters check.”

Last Updated: 22.02.2023
or