Add an image generator to your chatbot using OpenAI tools
Image generation is an effective tool for sketching and personalizing your content. You can connect an AI image generator to a messaging platform and help customers visualize their requests.
SendPulse doesn’t have a direct integration with image generators in chatbots, but if they allow API access, you can connect them using the API request element in the required flow.
As an integration example for this article, we chose the DALL·E model from OpenAI.
Brief introduction to the DALL·E model use
The DALL-E model allows you to create your own images from text descriptions and generate one or more variants of a given image. You can use it to save time and effort, for example, when preparing drafts and sketches.
Here are a few business cases where the use of generated images can bring you benefits:
- Online stores: create unique product images and prepare sketches for individual customer orders.
- Marketing: illustrate promotional materials with unique pictures.
- Real estate: create interior design sketches and virtual tours of apartments and houses.
- Insurance companies: illustrate instructions for visualization of emergencies.
- Travel agencies: create visualizations of tours and trips.
The DALL·E Images API is under development and beta testing, so the generation speed is limited to 50 images per minute. If you need to increase the limit, please refer to the OpenAI Help Center.
Despite significant advances in image generation, AI models still cannot produce images of perfect quality. The generated images may not fully match given prompts or similar human-made images. However, the more detailed your text description is, the more likely you are to get a satisfying result.
Besides, the model works best with English prompts, and there may be errors or no response when interpreting prompts in other languages.
To find inspiration for prompts, we also recommend reading the general tips on how to work with OpenAI models: How to Connect GPT to Your Chatbot.
Get the prompt
Go to the Chatbots section. Create a new flow with an image generation request trigger, or select an existing one.
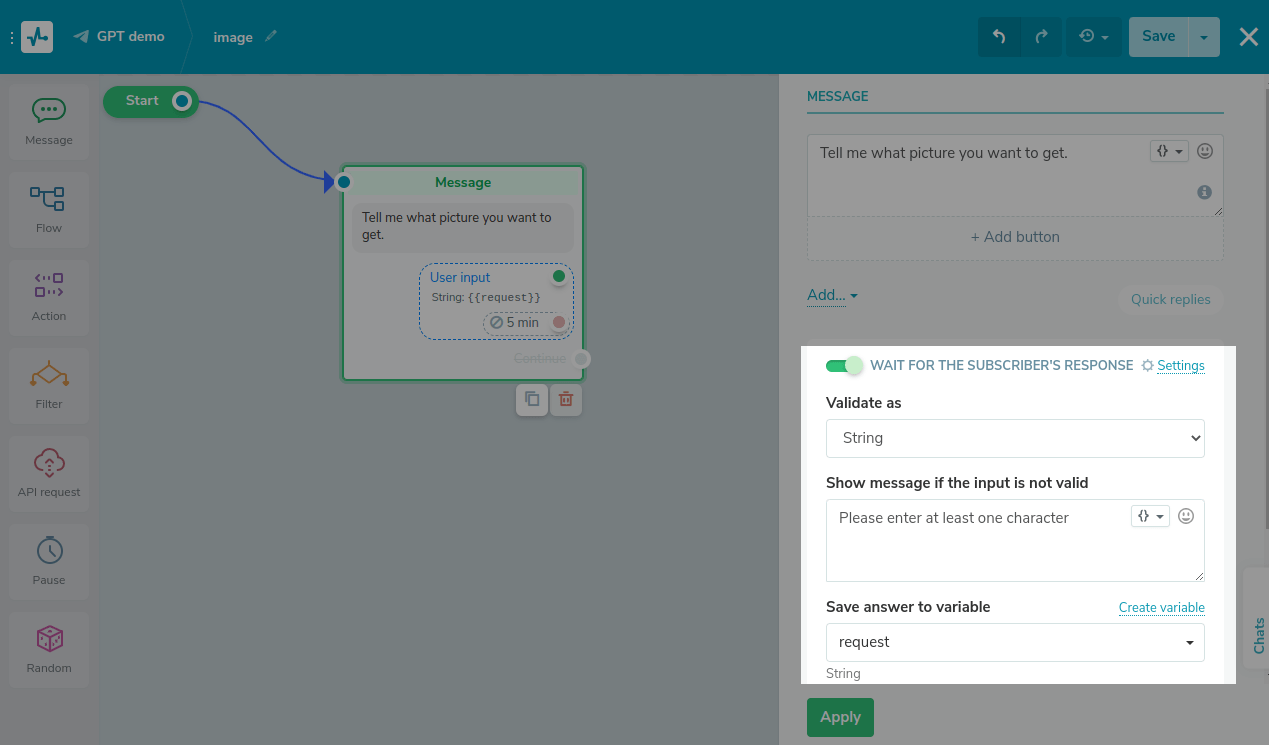
To request a user’s text description of an image they want, drag the Message element to the workspace. Turn on the Wait for the subscriber's response toggle, and choose a variable name to save the response (for example, request).
To process a text prompt, validate the response as a String.
Request the OpenAI API
Specify the API URL for image generation
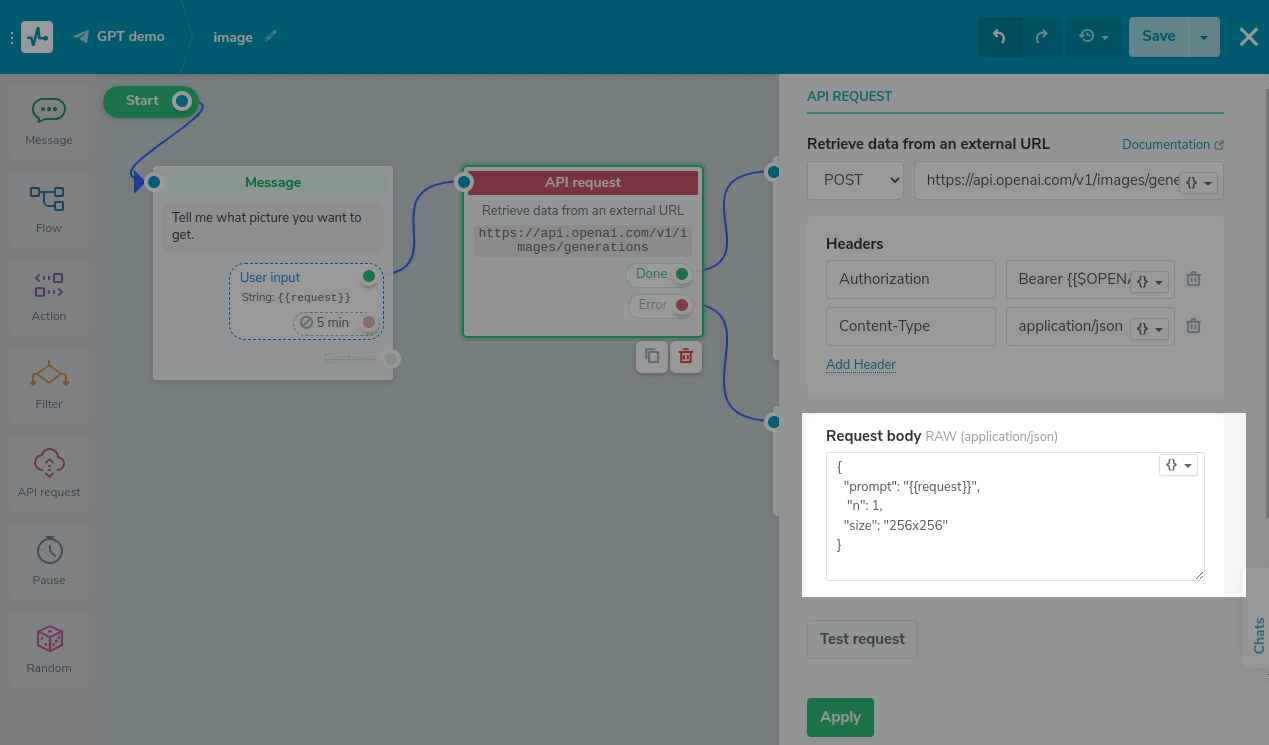
Add the API request element to your flow.
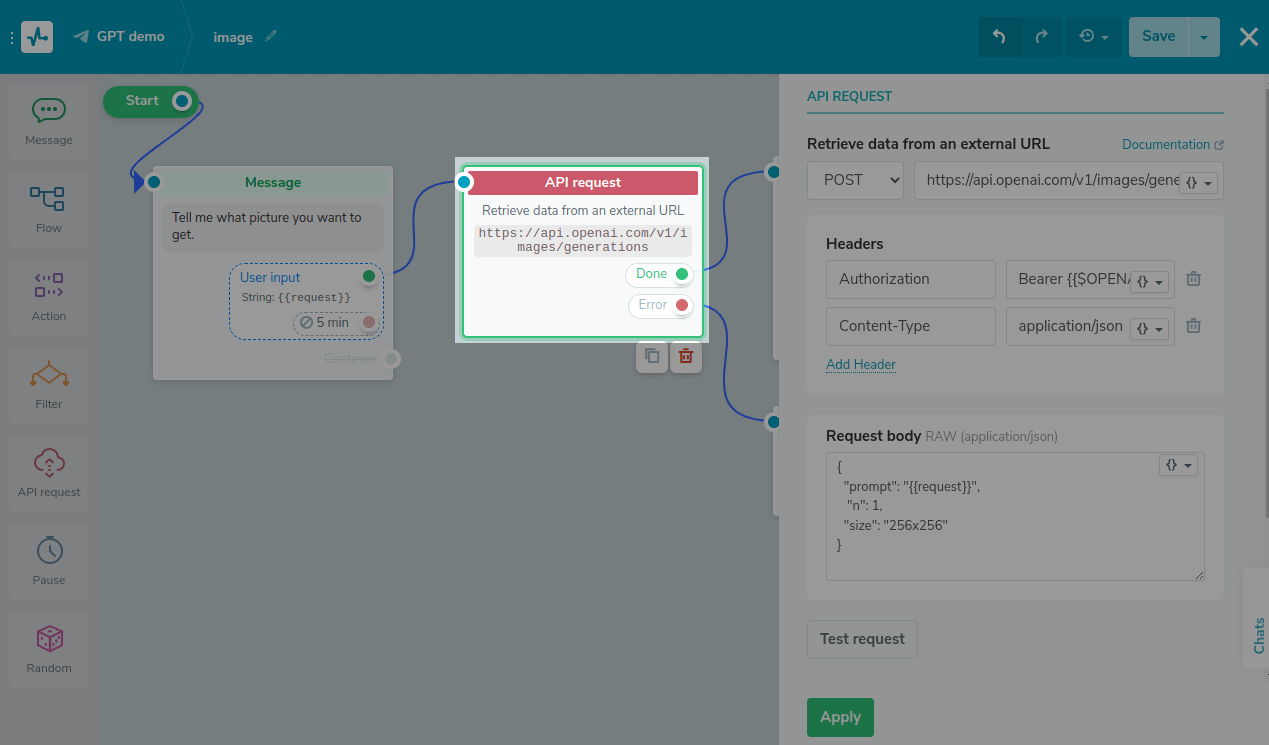
In the Retrieve data from an external URL subsection, specify the POST request method and the API URL.
To generate an image from a text description, use:
https://api.openai.com/v1/images/generations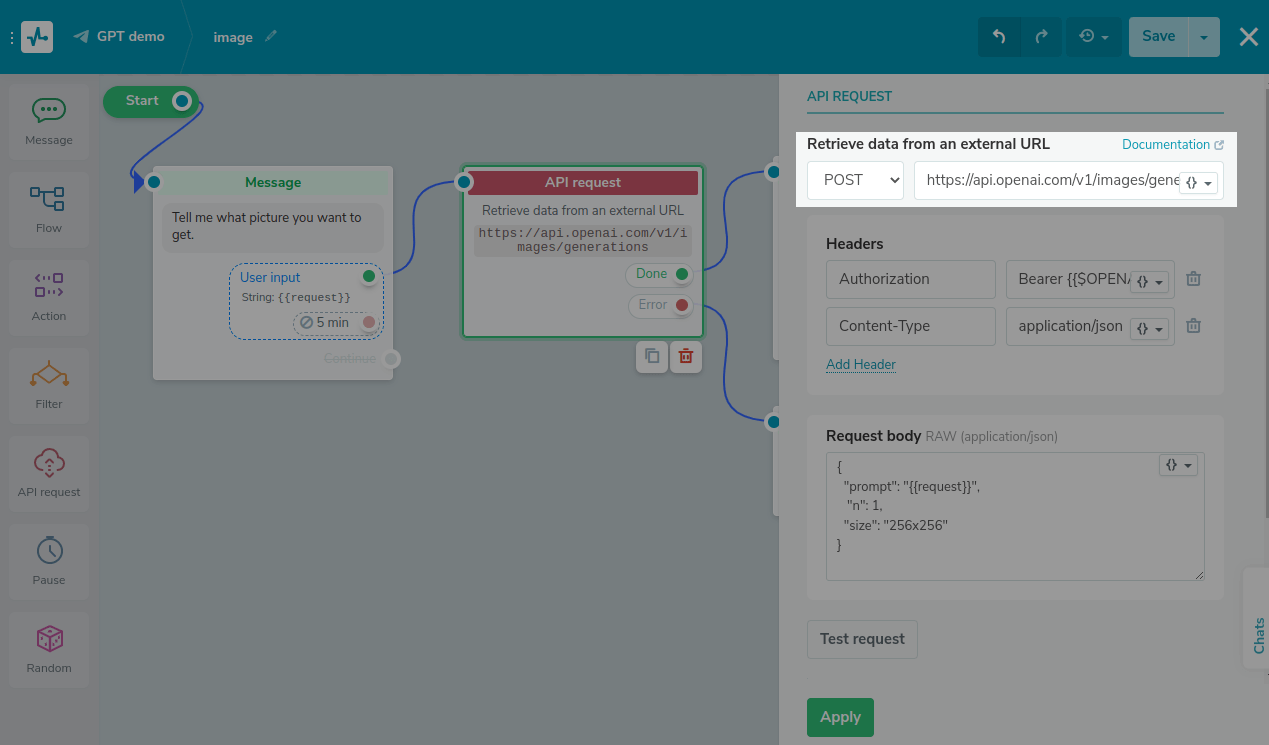
Specify the authorization method
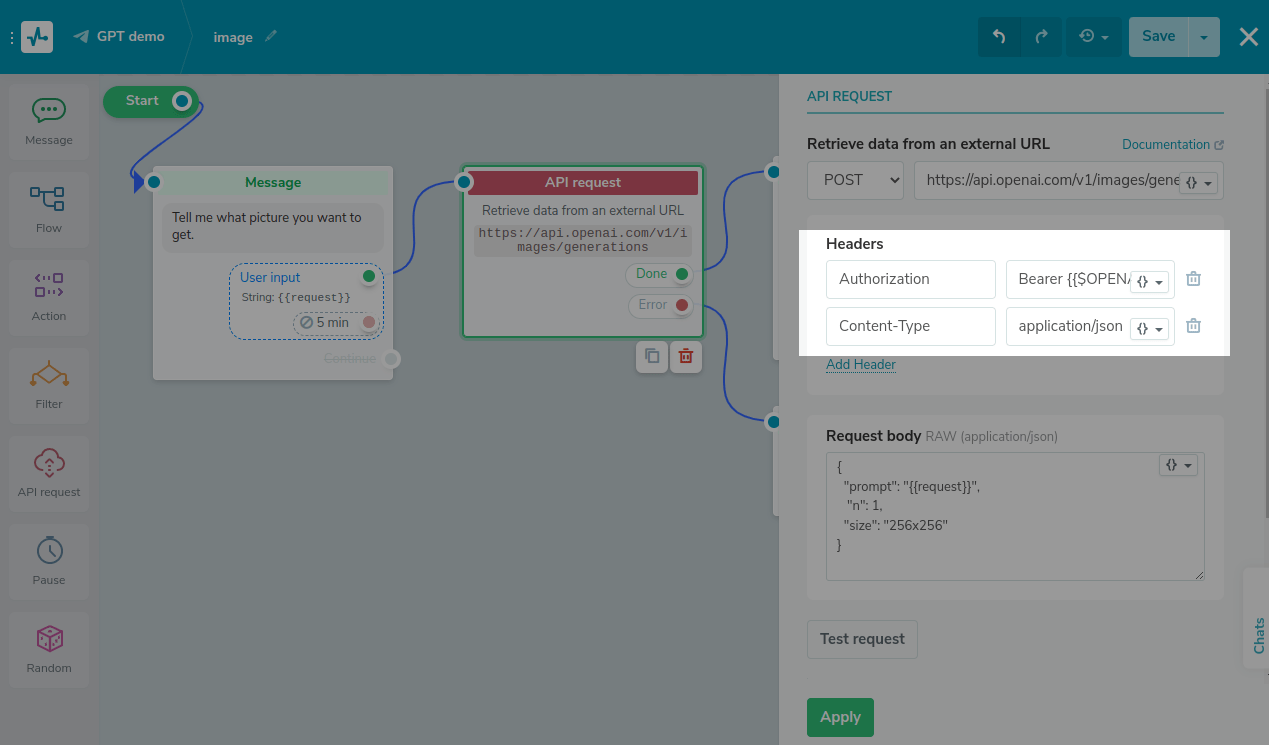
In the request header, add the authorization method and content type.
Authorization |
Bearer {{$OPENAI_KEY}} |
Content-Type |
application/json |
Where {{$OPENAI_KEY}} is a global variable from your chatbot's audience that stores the OpenAI API access key. You can also specify the key value itself in a string, but saving it as a variable makes it easier to reuse your key for other flows.
Add the request body
In the Request body subsection, you need to pass the received text description, the number of generated images, and their sizes.
Request body example:
 {
  "prompt": "{{request}}",
   "n": 1,
  "size": "256x256"
}
Where prompt is the received description saved in the chatbot audience variable (in our case, it’s {{request}});n is the number of generated images (transmitted as an integer from 1 to 10);
size is the size of images in pixels (the available options are 256x256, 512x512, or 1024x1024, though smaller images are generated faster).
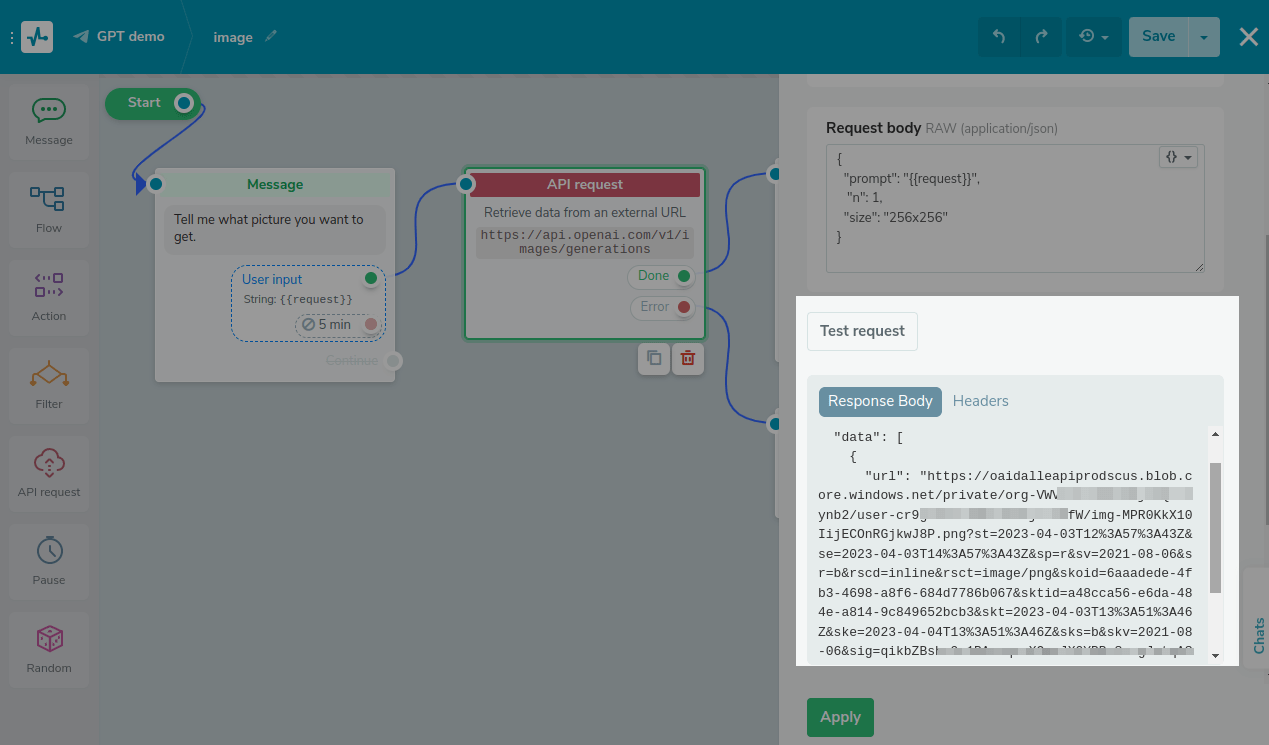
Get the image URL
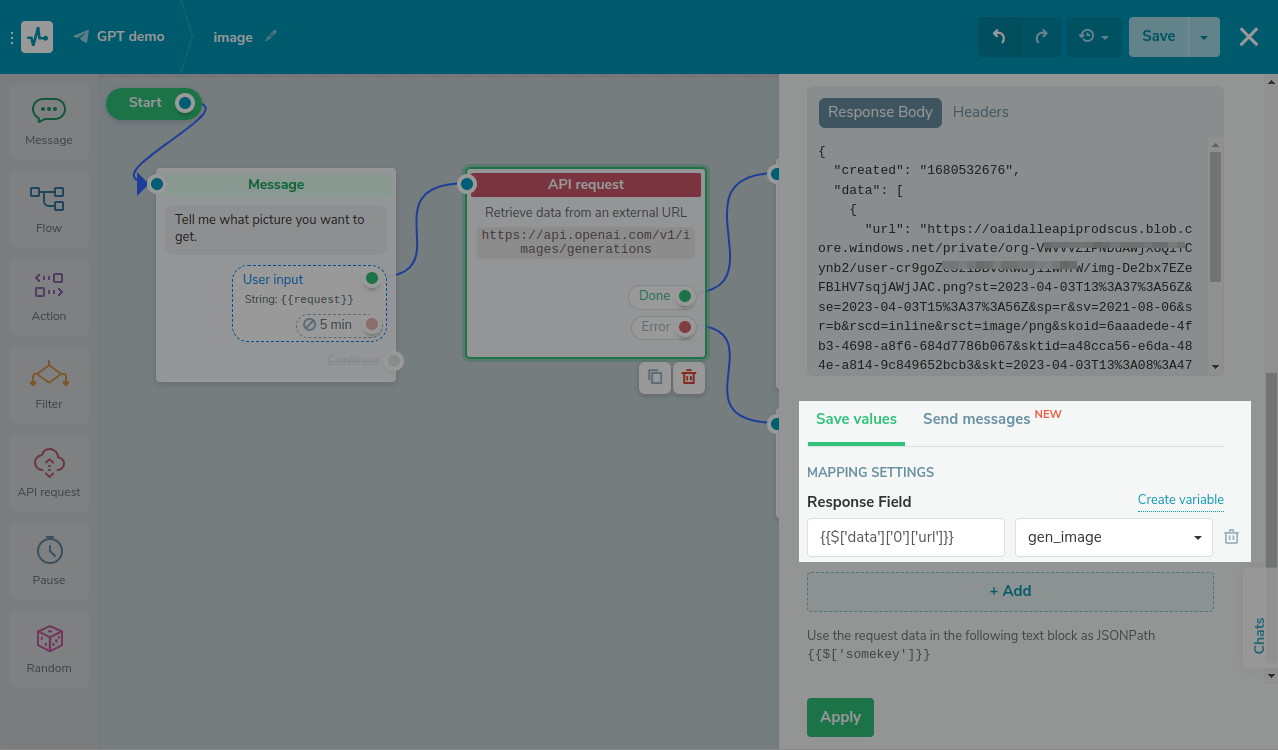
Submit a test request by clicking Test request. You will receive the generated image URL as a response.
Send the image
Without saving the image URL
If you show the generated image to the user in the next message, you can specify the path to it as a JSON Path expression: {{$['data']['0']['url']}}.
Please note that you can add the data you don't store but use via JSON Path only once in the next Message element. If you need to record the result, save its value to a variable.
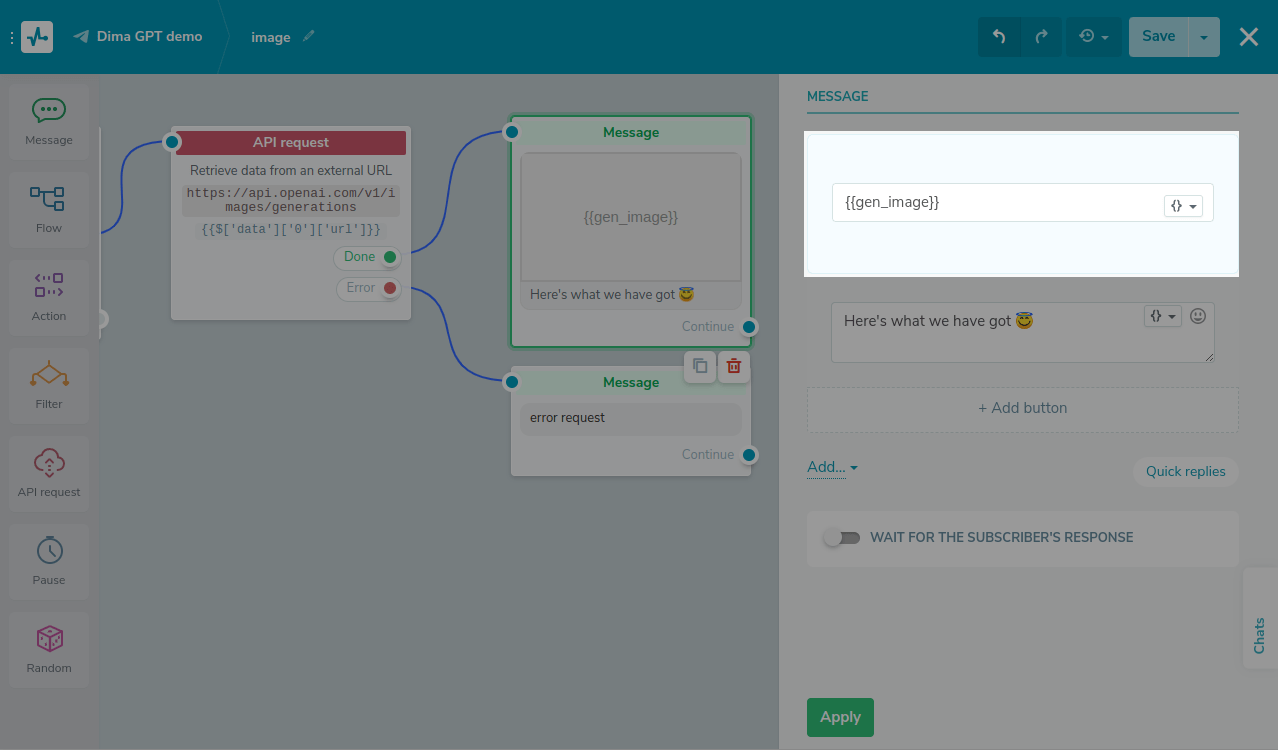
To do this, in the branch of a successfully processed request, add the Message element and the Image element, and select Image URL as an image source.
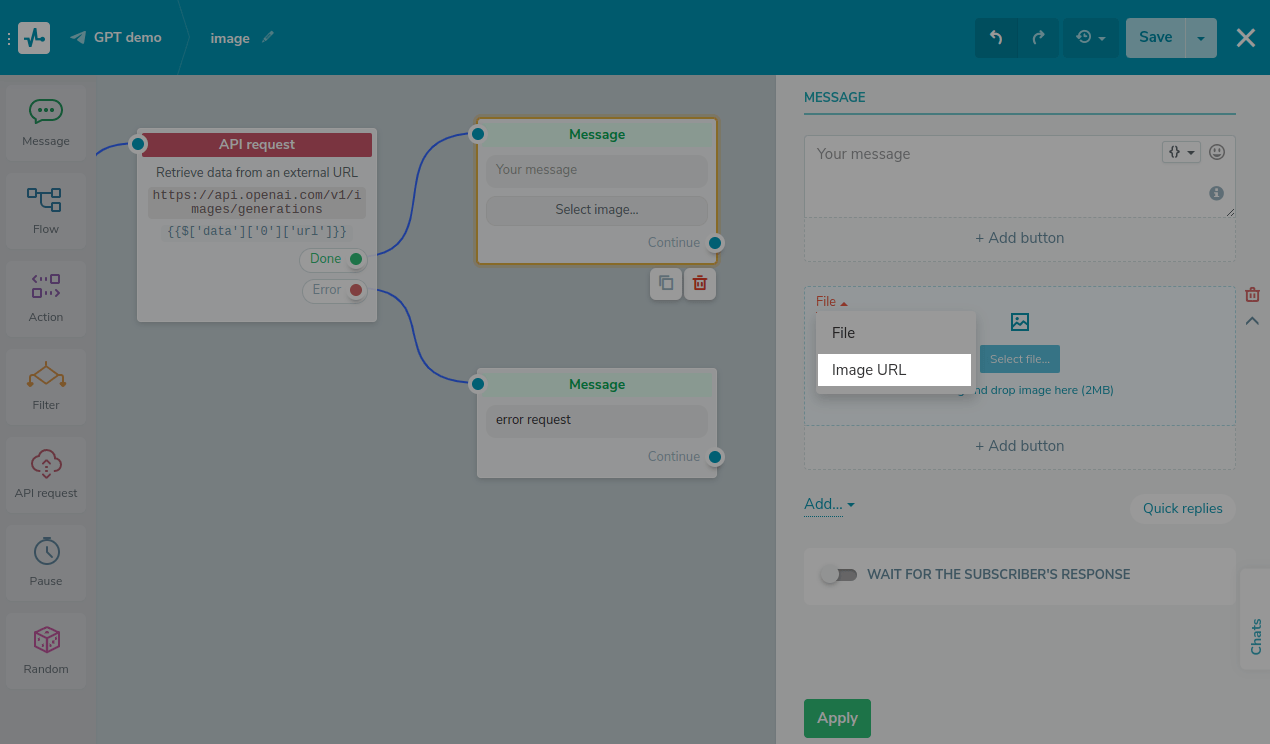
Enter your JSON Path expression in the URL input field.
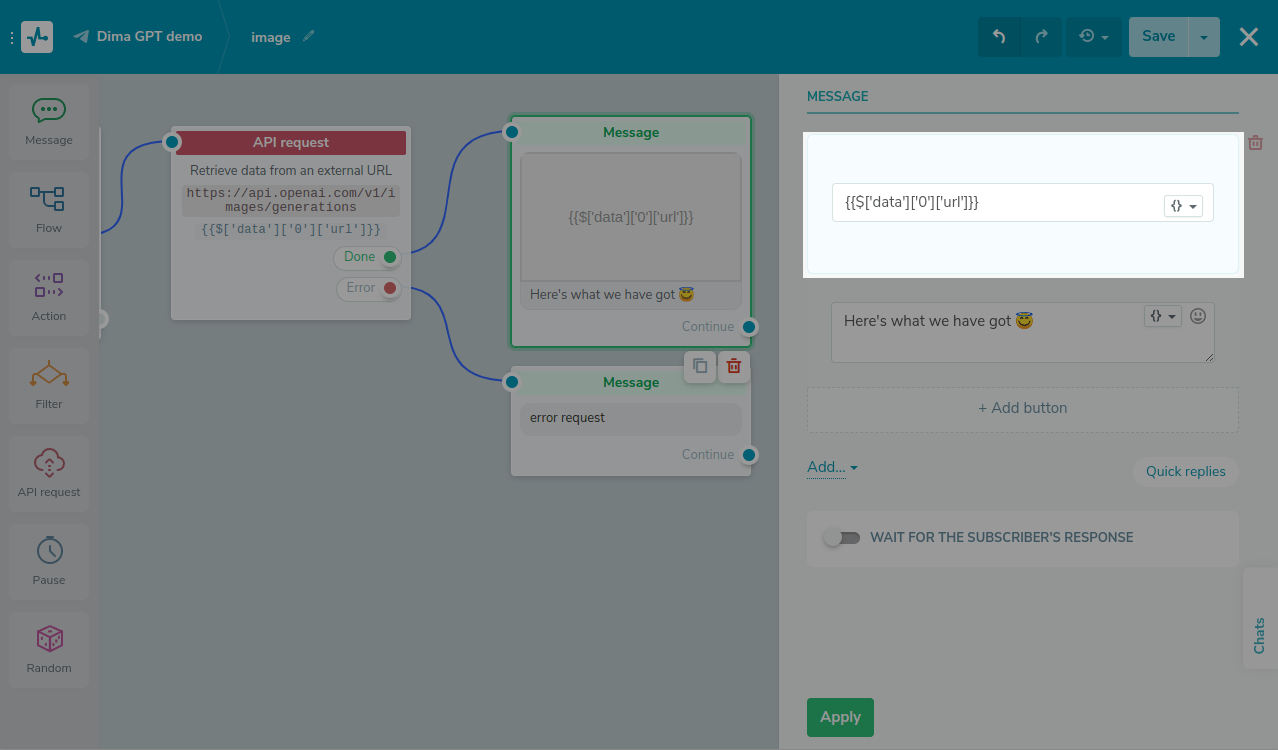
You can also add a caption to your image and other elements to the message.
Saving the image URL
If you plan to add other elements between sending the request and delivering the image or use the received URL later, you can save it to a variable in the chatbot audience with the URL type.
Then, to send the image to the user, you can specify the variable name where the URL is stored in the Message element.
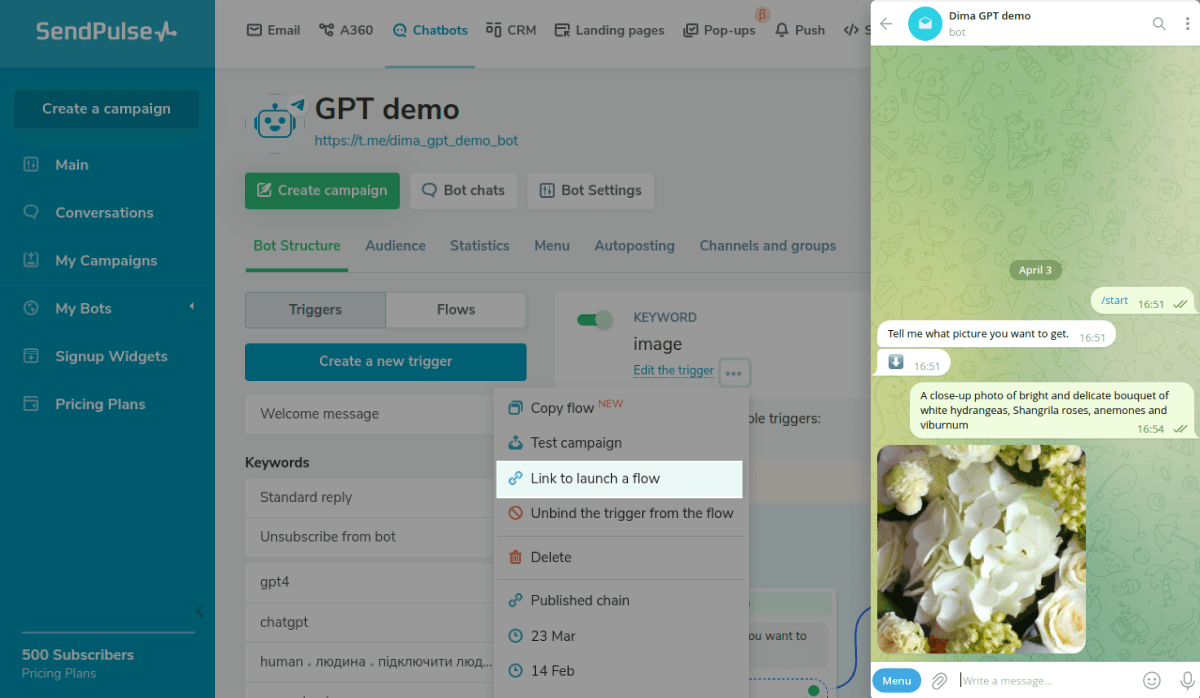
Test the flow
Save and launch the resulting flow to see how the user interaction will go.
Last Updated: 27.12.2024
or