Create a custom user role
User role permissions allow you to allocate access rights to improve your teamwork and ensure data security. With SendPulse, you can use the existing roles or create a custom one with the specified permissions and access rights.
In this article, we will talk about how to create a custom user role.
Choose a template
You can create a role based on an existing one or from scratch.
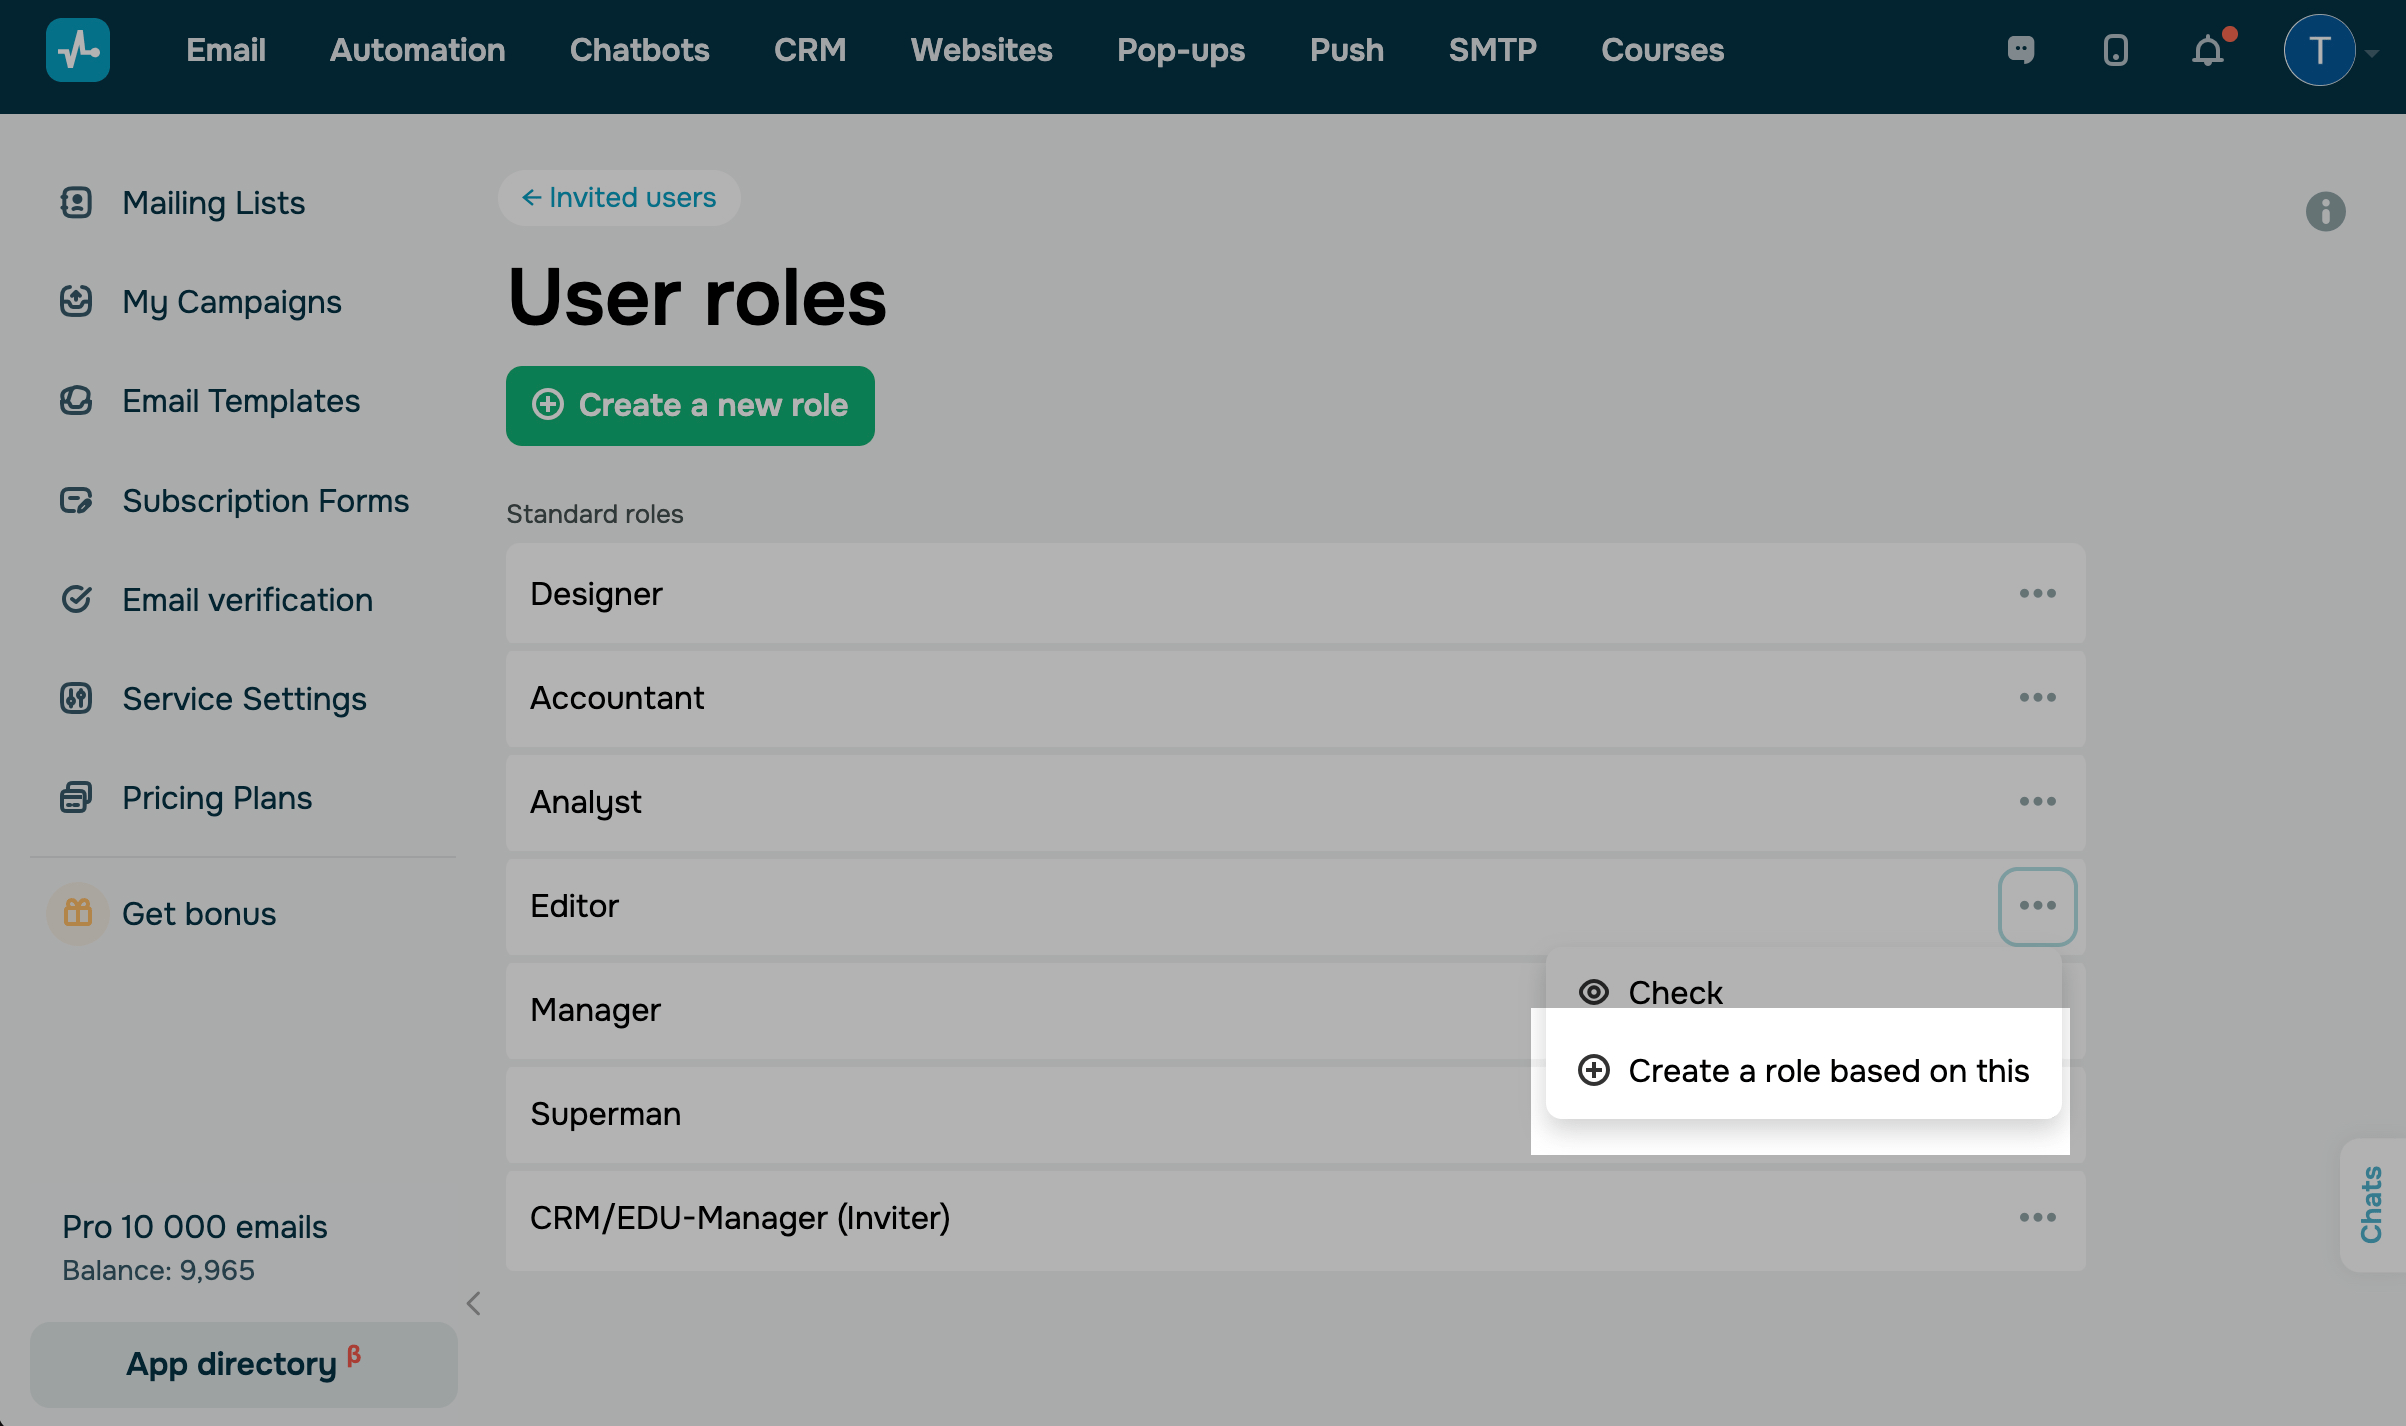
Existing user role
You can use a standard role that meets your needs and then add more features or restrict access.
Go to Account settings > Team > User roles, and click Create a role based on this next to the required role.
New user role
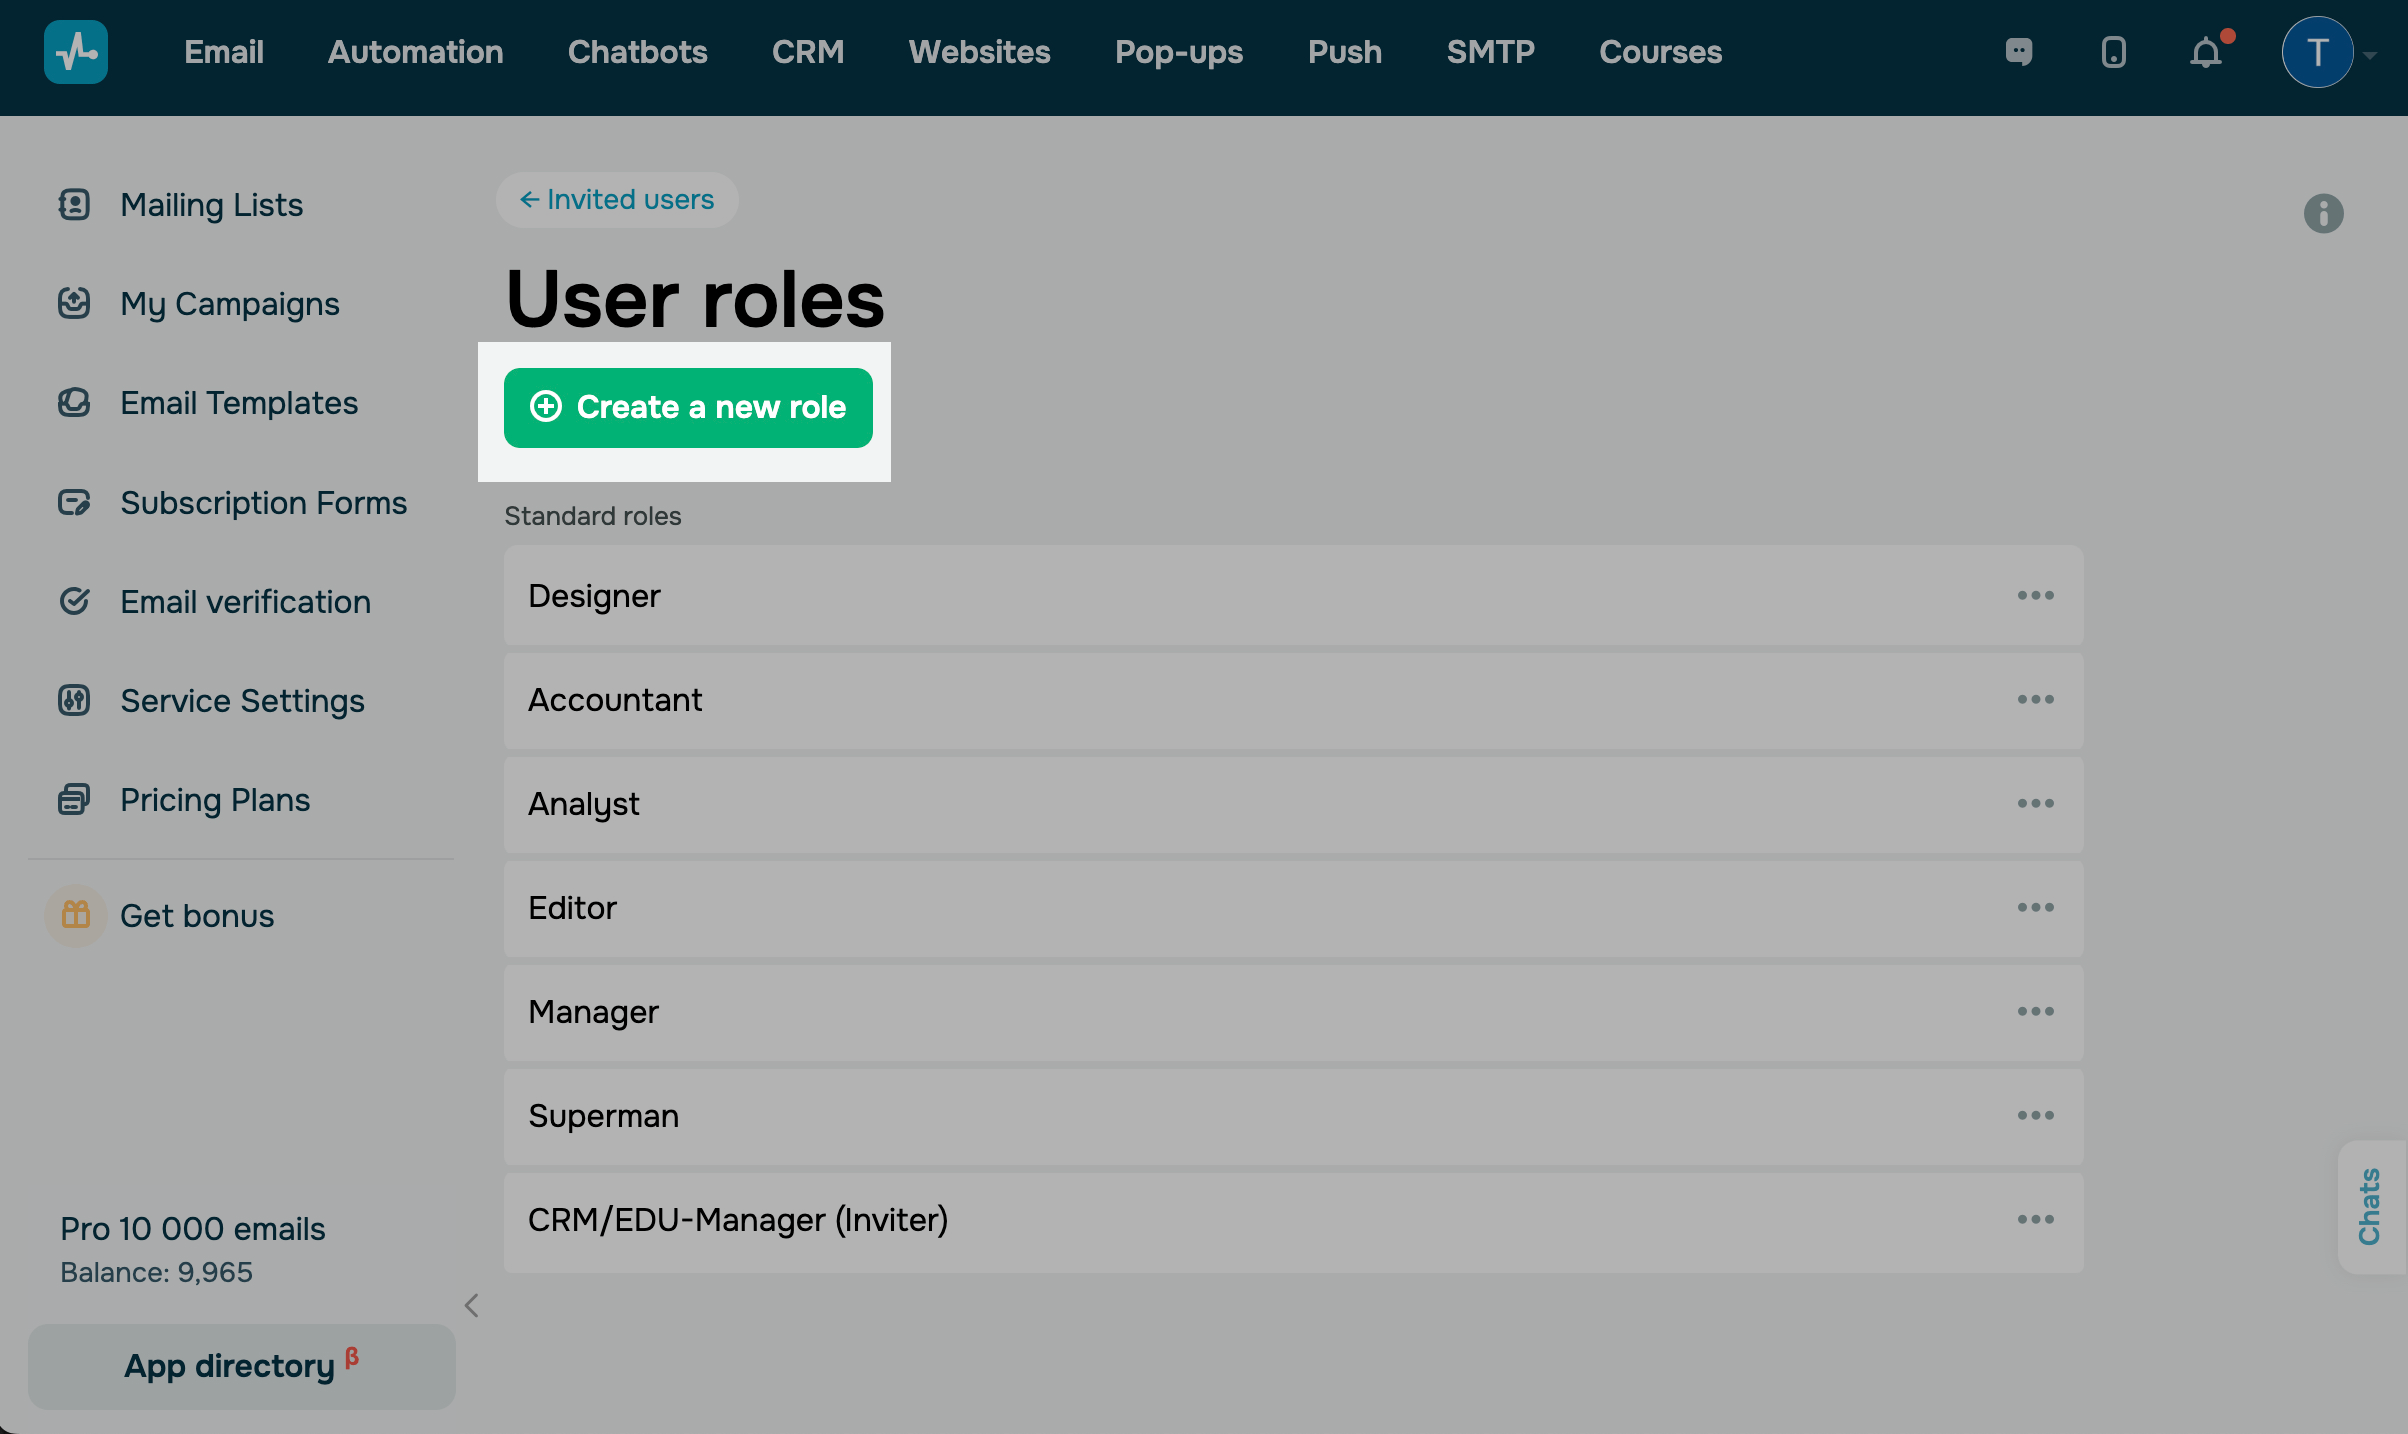
If you cannot find a suitable role in the list of standard user roles, you can create a new one with custom permissions.
In the User roles tab, click Create a new role.
Enter a user role name
Create a name for your new user role. Make sure to not name it like one of the standard user roles to avoid confusion and be able to find it quickly.
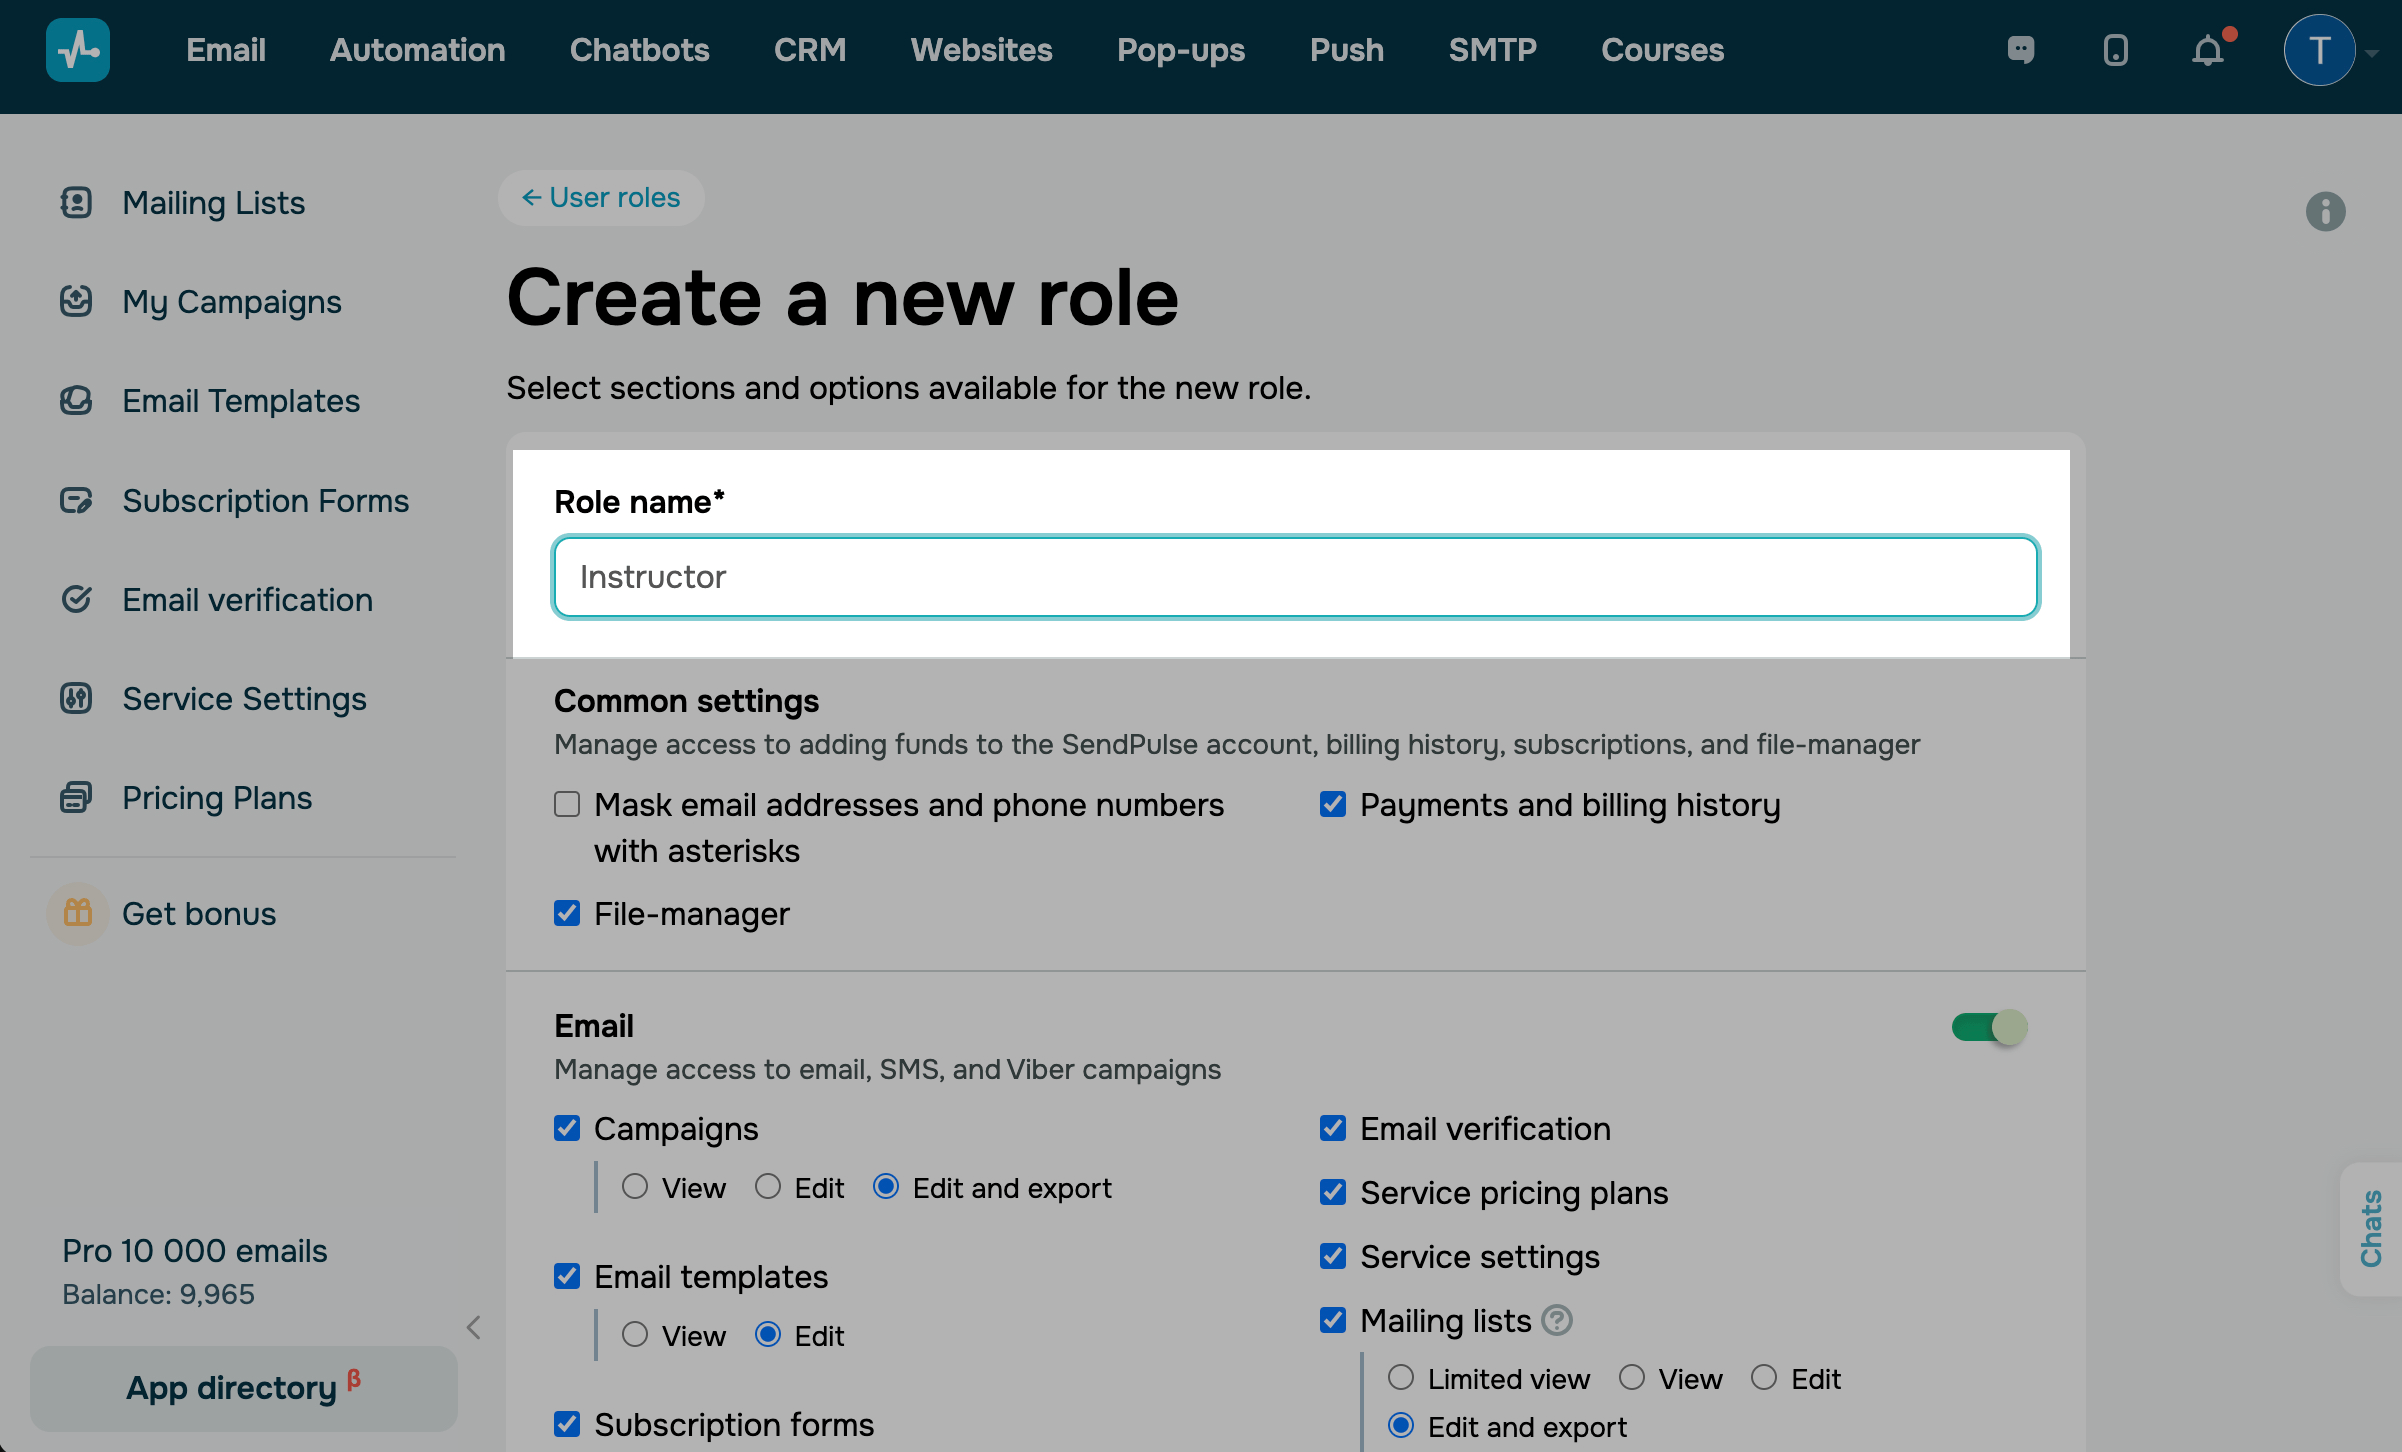
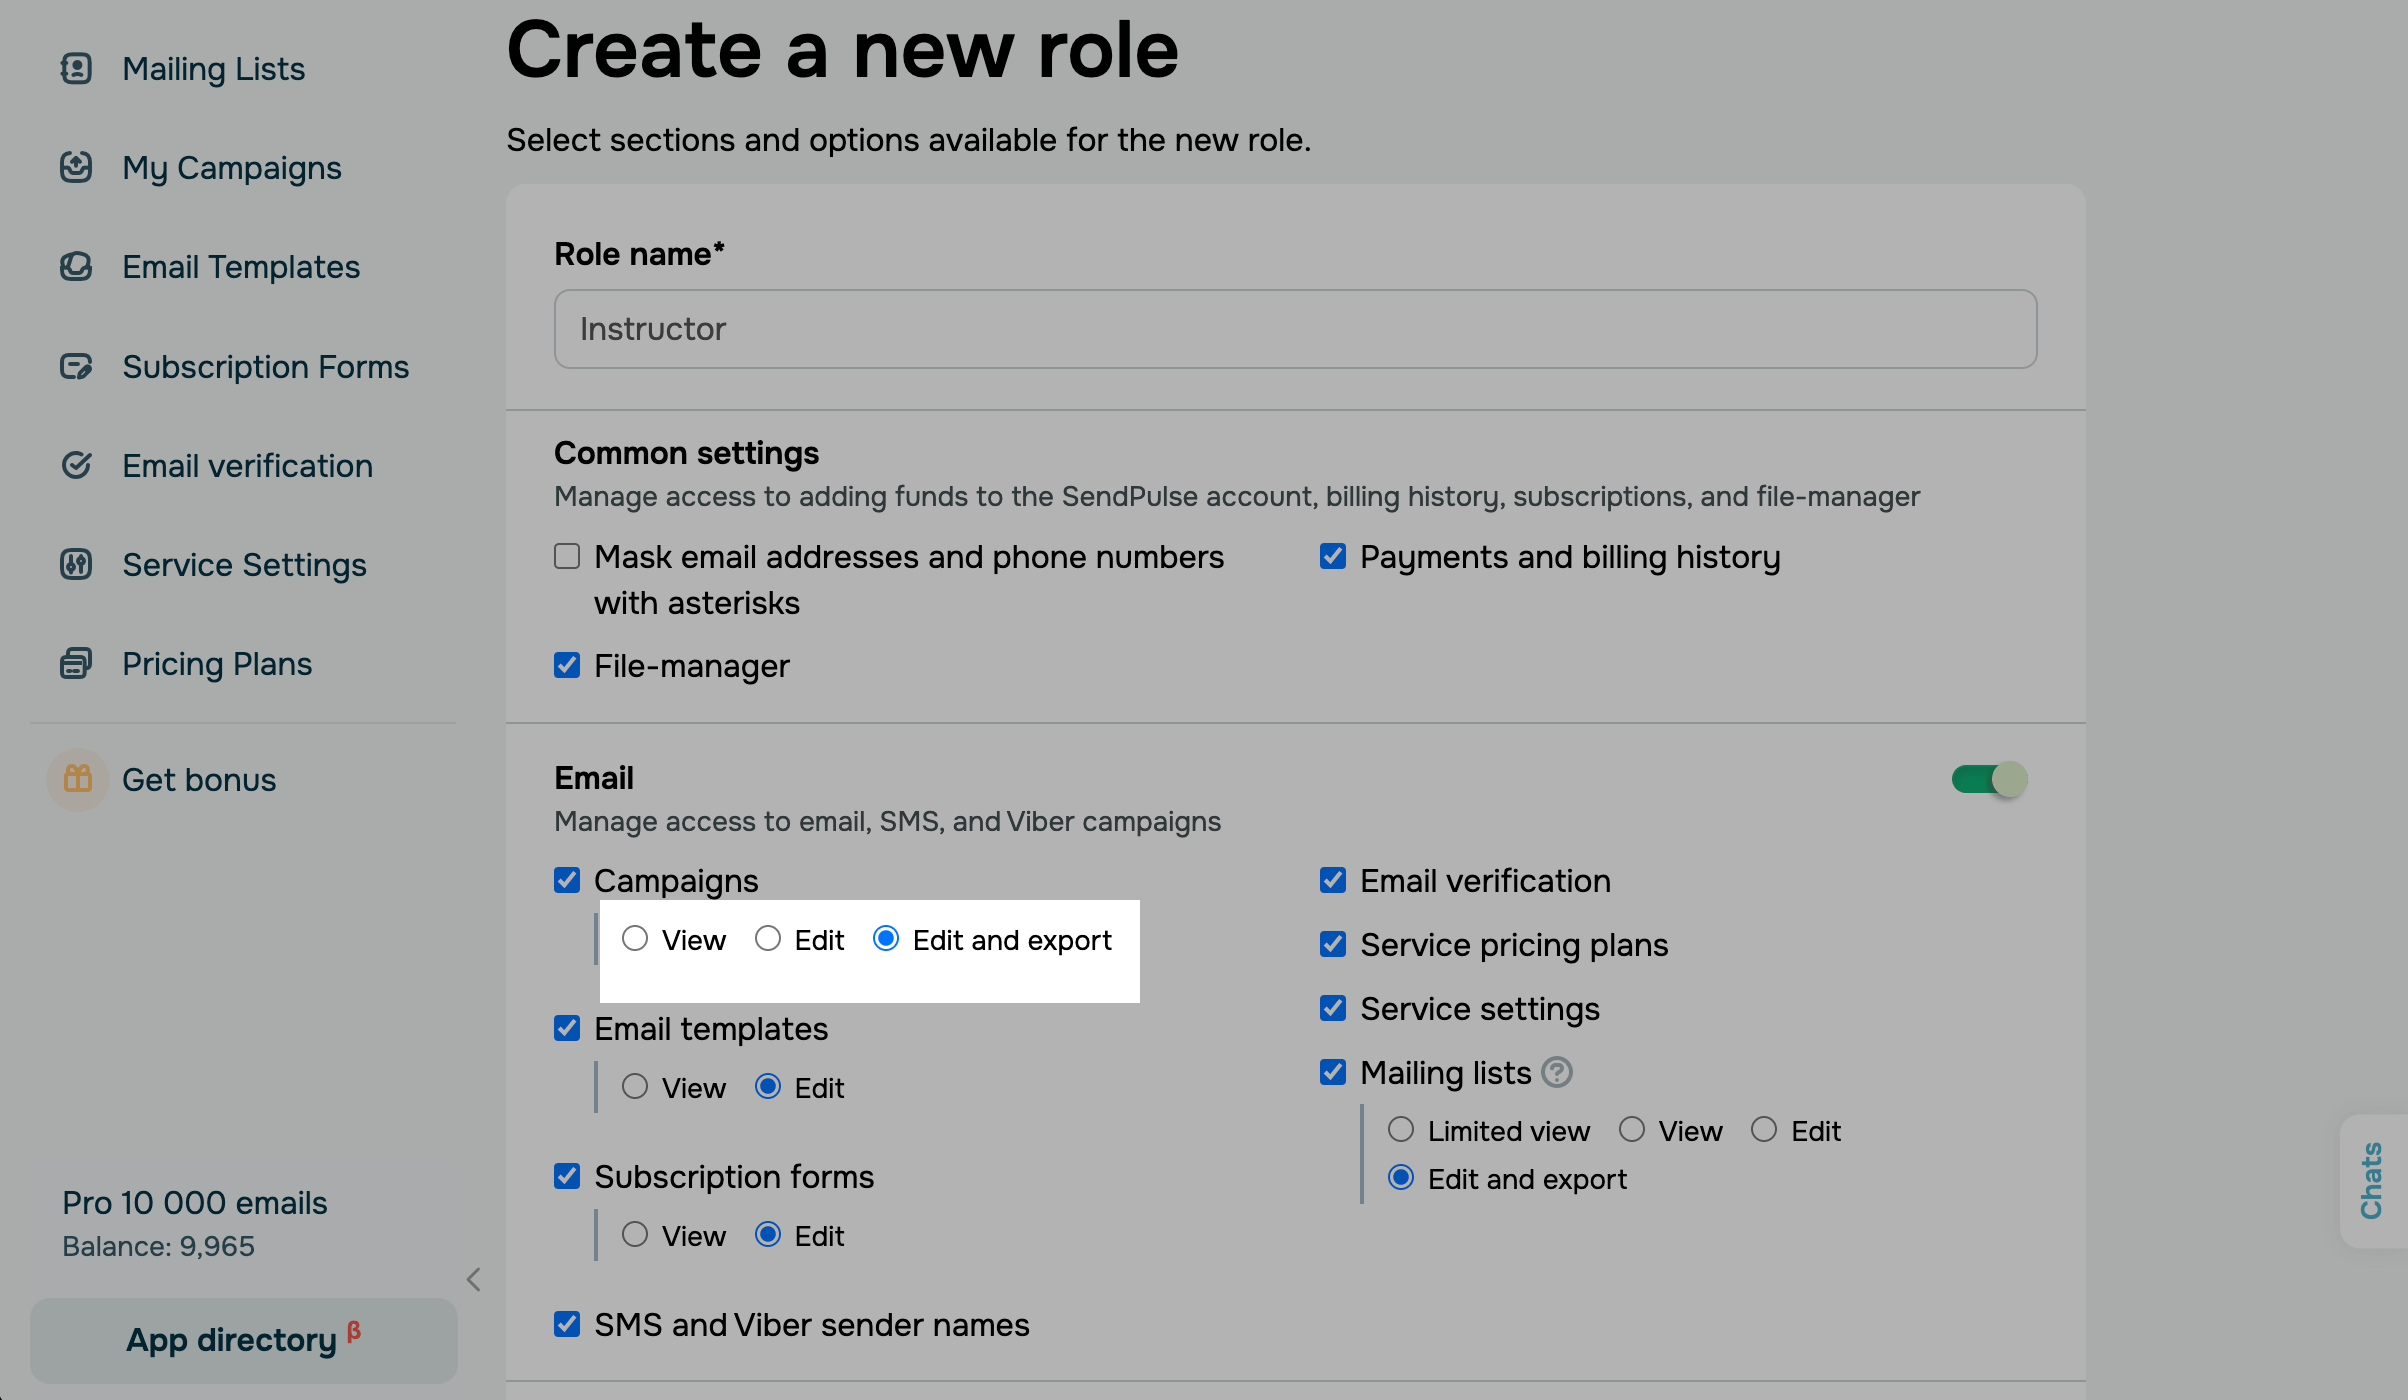
Define your user role permissions
You can restrict access to an entire service and to its specific features.
Provide access to services
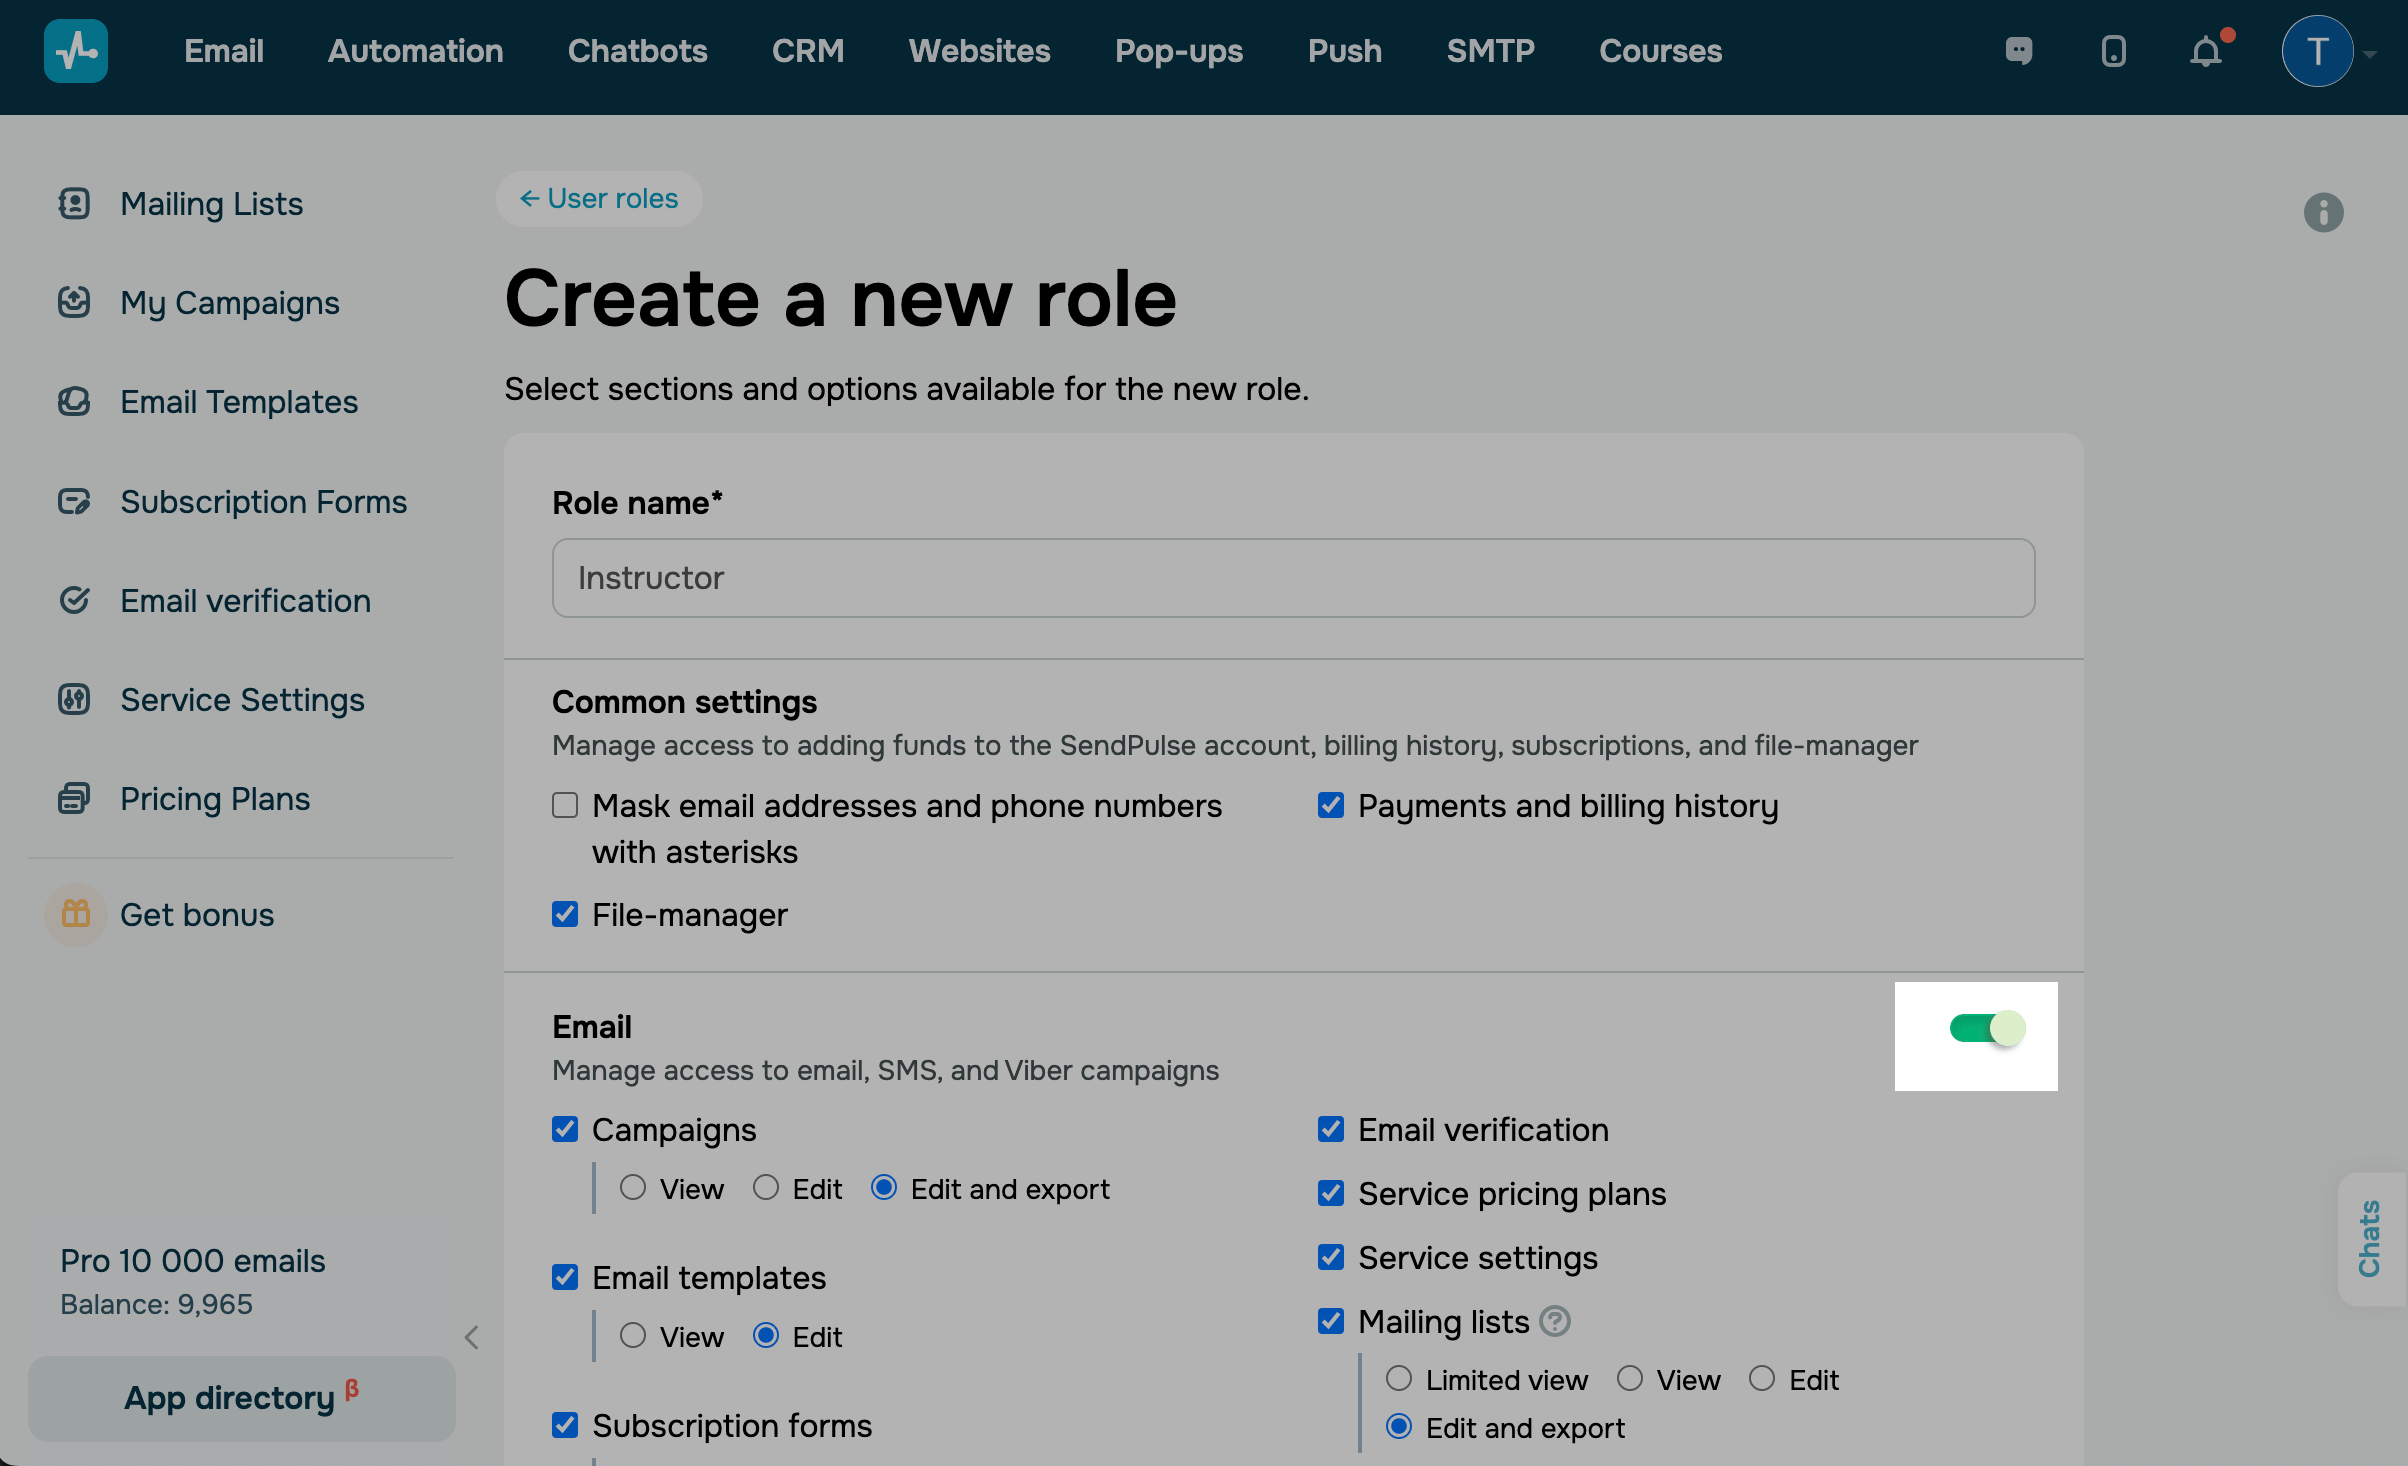
To select which services you want to provide access to, turn on the toggle next to the required service.
SendPulse is a platform that offers 9 marketing and sales automation services, including our bulk email service, SMS service, Viber campaign service, Automation 360, chatbot builder, CRM system, website builder, pop-up service, web push notification service, SMTP service, and online course builder.
Select features
Choose the service features you want to provide access to.
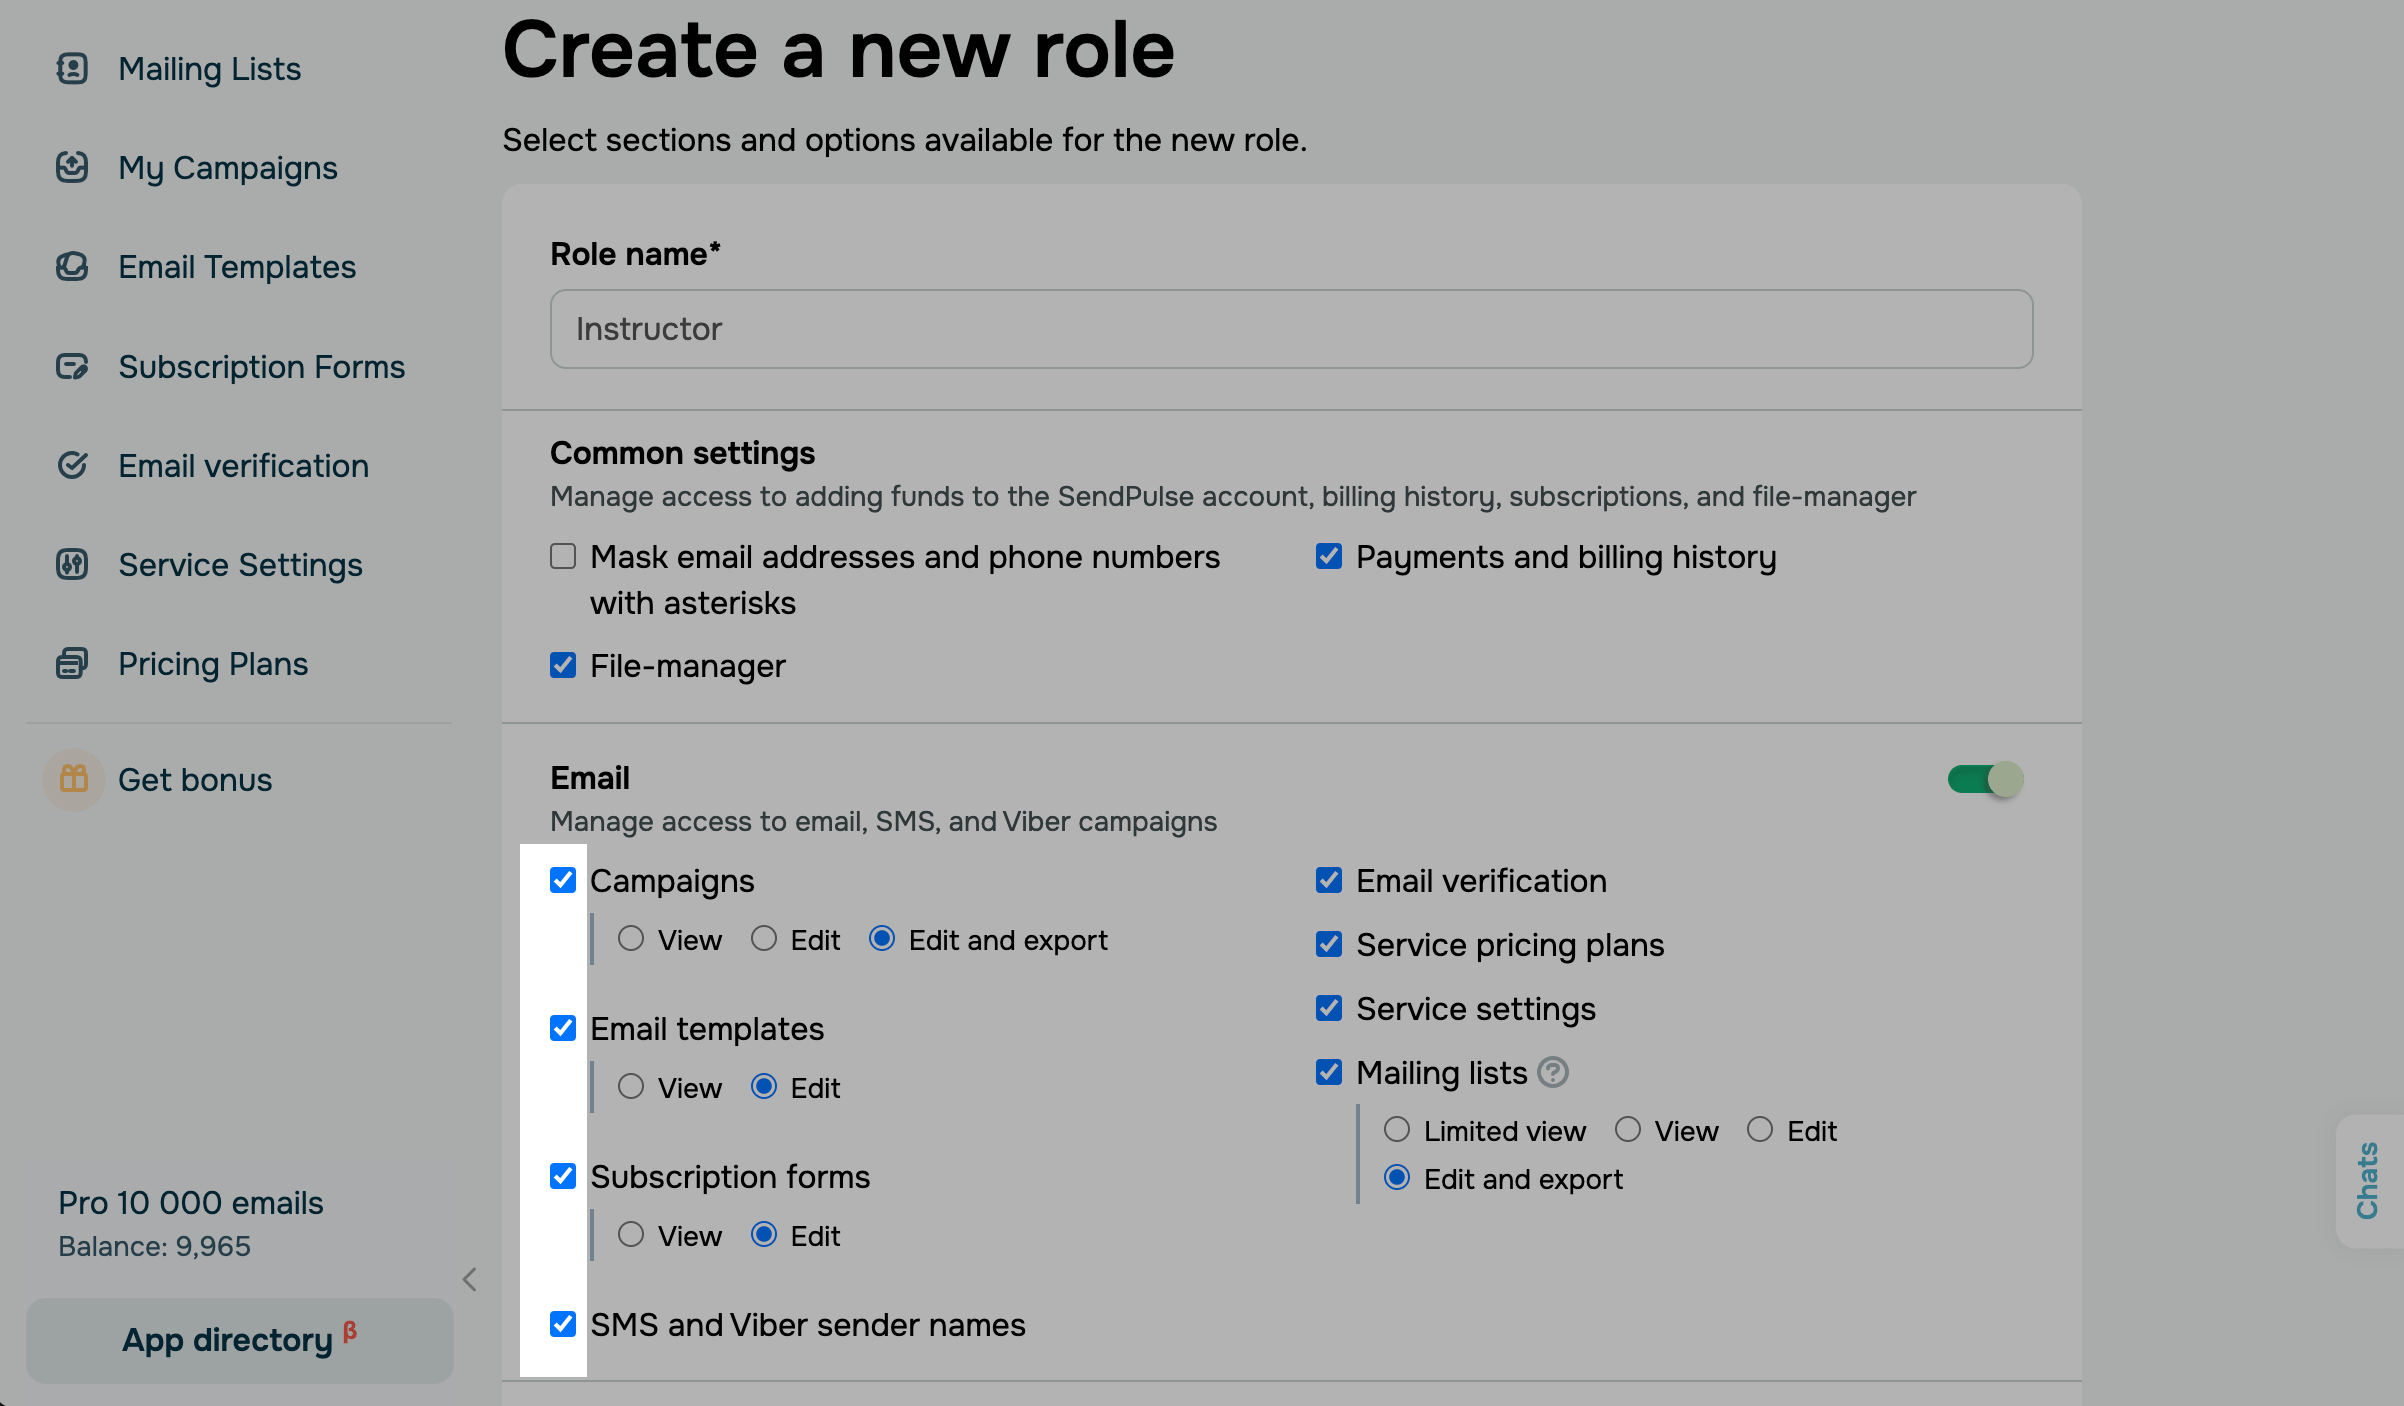
For some features, you can also customize the access rights.
| View | View a list of already created elements1 without the ability to edit, create, or delete them. |
| Limited view | View only a certain piece of information or functionality. In each service, these are separate elements1. |
| Edit | View and edit selected elements1. |
| Edit and export | View, edit, delete, and upload files and data. |
| Edit and export reports | View and edit data and download reports. |
| Create | View and create new elements1. |
| Update | View and edit elements1. |
| Delete | View and remove elements1. |
1Depending on the service, the elements can be email campaigns, email templates, mailing lists, subscription forms, automation flows, events, deals, pipelines, tasks, task boards, contacts, integrations, websites, website pages, web push campaigns, SMTP statistics, online courses, and certificates.
You can see more details about the sections you can access in the table below.
When inviting a user with a custom role, you can select elements that will be available to them and define what they can do with them.
| General settings | |
| Agency Area | Access to the Agency Area.
Limit access to agency clients and their accounts. |
| Mask email addresses and phone numbers with asterisks | Access to mailing lists in the Email section.
Allows you to limit access to subscribers’ email addresses and phone numbers. |
| Payment and billing history | Access to the Accept Payments section and SendPulse pricing plans in the My Orders, Billing History, My Subscriptions, and Add Funds sections.
If you limit access to payments, users will not have access to the Payments section in their account settings. |
| File manager | Access to the file manager.
Allows users to view, download, and delete files in your account's shared storage. |
| Campaigns |
Access to the My campaigns section. Manage SMS, email, and Viber campaigns. View: viewing the list of scheduled and sent campaigns and statistics. |
| Templates |
Access to the Email Templates section. View: viewing custom and standard email templates. |
| Subscription forms |
Access to the Subscription Forms section. View: viewing created subscription forms. |
| SMS and Viber sender names |
Access to the From address tab in the email service settings. Viewing, editing, adding, and deleting email addresses from which email, SMS, and Viber campaigns are sent. |
| Email verification |
Access to the Email verification section. View verifications and start verifying recipient email addresses and mailing lists. |
| Service pricing plans |
Access to the Pricing Plans section. View the current email service pricing plan and switch to another one. |
| Service settings |
Access to the Service settings section. Adding sender email addresses, configuring campaign archives, subscription tools, authentication, design, and setting up integrations and AMP technology. |
| Mailing lists
from the list of selected ones3 |
Access to the Mailing lists section. Limited view2: viewing the list of mailing list names without viewing contacts. |
|
1Some features' settings are interrelated. When you allow users to edit campaigns, you automatically provide access to template editing.
2If you select the Limited view option, you will not be able to allow users to export campaign reports. 3When inviting a user, you can specify which mailing lists you want to give them access to. |
|
| Automation | |
| Flows |
Access to the Automations section. View: viewing the list of previously created flows. |
| Flow start |
Access to the Automations section. Starting and pausing previously created automated campaigns. |
| Events |
Access to the Events Manager section. View: viewing the list of previously created events. |
|
1Some features' settings are interrelated. If you allow users to launch flows, you also provide access to the flows themselves. |
|
| Chatbots | |
| Conversations and audience
from the list of selected ones* |
Access to the Chats and Audience sections View: viewing conversations and contacts in your bot audience. Editing: replying to subscribers in conversations; adding, editing, and deleting contacts and their data in your bot audience. Edit and export: the above-mentioned and exporting contacts from the Audience tab with variables in the CSV format. |
| Campaigns
from the list of selected ones* |
Access to the My campaigns section. View: viewing scheduled and sent campaigns. Editing: creating, editing, and deleting scheduled campaigns. Edit and export: the above-mentioned and exporting campaign results with contacts in the CSV format. |
| Creating bots and editing bot settings |
Access to the Bot management and Bot Settings sections. Connecting new bots and changing bot settings: creating menus, global variables, and tags and connecting webhooks and integrations. |
| Triggers and flows
from the list of selected ones* |
Access to the Bot Structure and Templates sections. View: viewing the structure of created flows, triggers, and statistics of user interaction with your flow. Editing: creating, editing, and deleting flows in the flow builder; creating, enabling, and disabling triggers. |
| Change tariff |
Access to the Pricing plan section. Viewing your current pricing plan and switching to another one within the chatbot builder. |
|
1When inviting a user, you can specify which bots you want to give them access to. |
|
| CRM | |
| Deals1 |
Access to the My pipelines section and deal management. View2: viewing the list of created deals and their data. |
| Pipelines
from the list of selected ones1 |
Access to the My pipelines section and pipeline management. View2: viewing the list of available pipelines and their data. |
| Tasks1 |
Access to the My tasks section and task boards. View2: viewing the list of created tasks and their data on an available task board. If you assign a task to a user with limited access to tasks, they won't be able to see it. |
| Task boards
from the list of selected ones1 |
Access to the My tasks section and task boards. View2: viewing boards and all their tasks. When assigning a created role to a user, you can restrict their access to specific task boards. |
| Contacts |
Access to the Contacts section. View2: viewing the list of contacts and blocked students. |
| Integrations |
Access to the Integrations section. View2: accessing the list of configured and available integrations. |
| Companies | Access to Contacts > Companies.
View2: viewing the list of created companies and all their data. |
| Products | Access to eCommerce > Products.
View2: viewing created products, categories, and their data. |
| Payments | Access to eCommerce > Payments.
Viewing all payments and their data in the CRM section. |
| Pricing plans | Access to the Pricing plans tab.
Viewing the current pricing plan and switching to another one in the CRM section. |
|
1Some features' settings are interrelated. For example, if you give access to deals, you must also give access to their pipeline. Similarly, allowing access to tasks requires selecting their task board. 2When you give users access to an element, you automatically allow them to view it. 3When you allow users to create elements, you automatically allow them to update them. You can also allow them only to update elements without creating them. |
|
| Websites | |
| Websites and bio link pages |
Access to the Websites section for website and bio link page management. View1: accessing the list of created websites and bio link pages. |
| Website pages1 |
Website page management. View1: accessing the list of website pages available to the user. |
| Service pricing plans |
Access to the Sites pricing plans section. View the current website builder pricing plan and switch to another one. |
|
1Some features' settings are interrelated. If you allow users to access website pages, you also need to provide access to the website itself. |
|
| Web push campaigns | |
| Added websites |
Access to the My websites tab for website settings management and viewing statistics. View: accessing available websites. |
| Automations |
Access to the Automation section. View: accessing created automations. |
| Service pricing plans |
Access to the Push Notification Plans section. View the current web push notification service pricing plan and switch to another one. |
| Transactional mailings (SMTP) | |
| Service settings |
Access to the SMTP settings section. Viewing settings to send emails via SMTP. |
| Statistics |
Access to campaign statistics. Downloading campaign error reports and viewing campaign history and recipient lists. View: viewing campaign history and errors. |
| Service pricing plans |
Access to the SMTP Pricing Plans section. Viewing the current SMTP pricing plan and switching to another one. |
| EDU | |
| Courses
from the list of selected ones1 |
Access to the Courses section. View: viewing the list of existing courses, their status, and the number of enrolled students. |
| Certificates |
Access to the Certificates section. View: viewing the list of existing certificates. |
| Service pricing plans |
Access to the Pricing Plans section. Viewing the current EDU pricing plan and switching to another one. |
| Push notifications | Access to the Push notifications tab.
View: viewing sent web push notifications. |
| Course content
from the list of selected ones1 |
Access to course content, including sections, tests, and lessons.
View: viewing course content. |
| Promo codes | Access to the Promo codes tab.
View: viewing promo codes. |
| Students
from the list of selected ones1 |
Access to the Audience tab and the list of course students. |
|
1When you allow users to create an element, they will be able to update it by default. That is, you can allow them only to update elements, but you cannot allow them only to create them. 2When inviting a user, you can specify which courses you give them access to. |
|
| Pop-up service | Access to the pop-up service.
Managing settings, creating and editing pop-ups, and viewing leads and statistics in the Pop-ups section. |
Once you select all the necessary permissions, scroll down, and click Save. Your custom role will be listed in the User Roles section. You can edit or delete it.
Assign a role to a user
You can invite a new user or assign your custom role to an existing user.
When inviting a user, you can restrict their access to individual elements, including mailing lists, chatbots, pipelines, task boards, websites, and courses.
If you want to invite a new user, go to the Team tab, and click Invite a new user. Specify their contact details, and in the Role field, select your custom role from the drop-down list.
If you want to assign a role to an existing user, in the list of users, click the three dots next to their name, and select Edit. Then select the required role from the list.
Last Updated: 26.09.2024
or