Connect Facebook pixel to your site
You can connect Facebook pixel and track traffic on your site or bio link page to get additional statistics for analysis.
Facebook Pixel allows you to track and analyze website visitors from social networks in order to re-interact with them. For example, catch up with those who went to the landing page and left without doing anything. Based on the analysis of audience behavior, you can optimize ads for a desired goal or conversion and customize the Facebook and Instagram advertising algorithm.
In this article, we will talk about how to find pixel data and the settin up analytics.
How to create a Facebook pixel
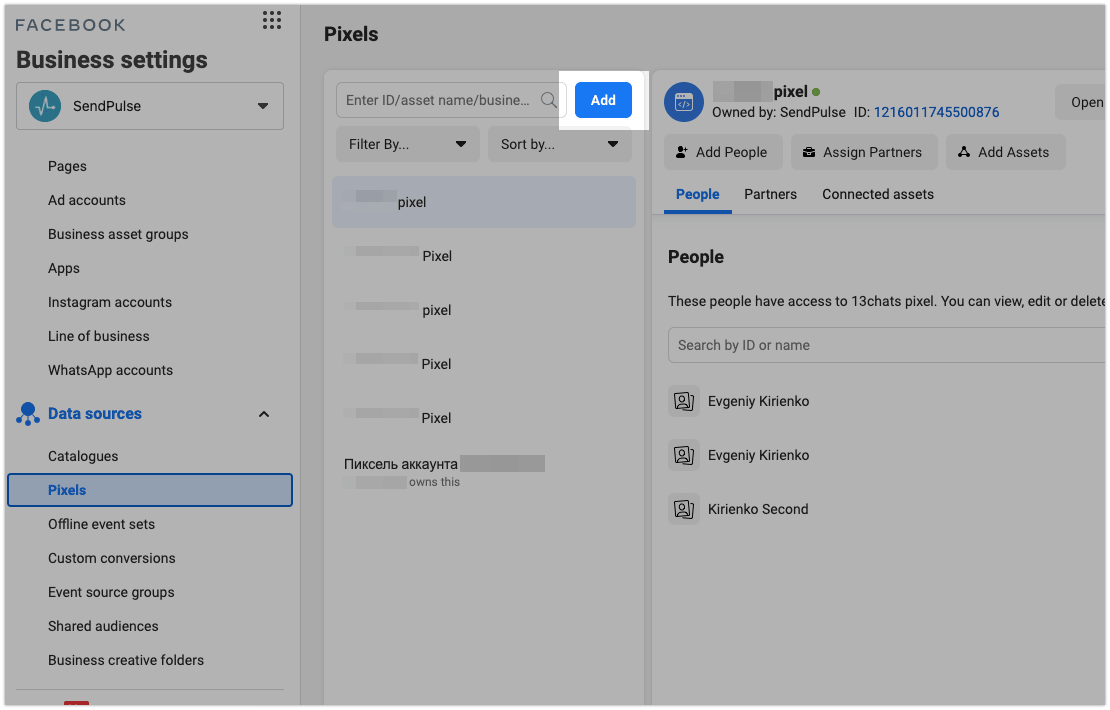
Go to Business Manager > Data Sources > Datasets & pixels.
From the menu above the list of pixels, click Add.
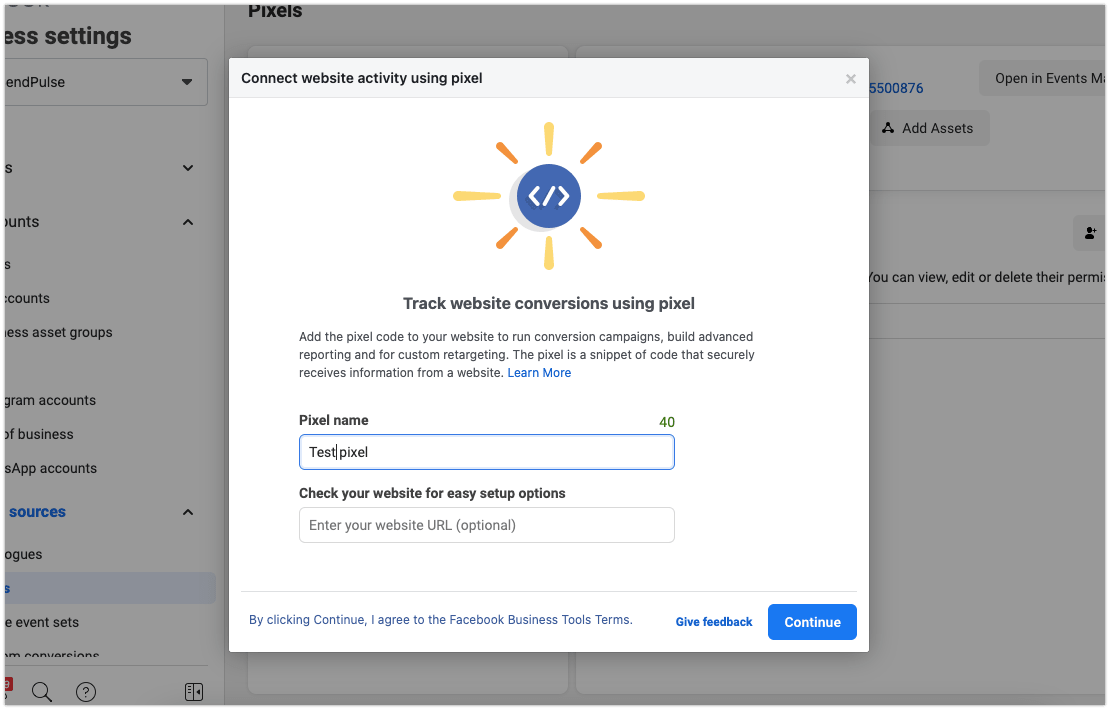
In the window that appears, enter a name for your pixel and click Create.
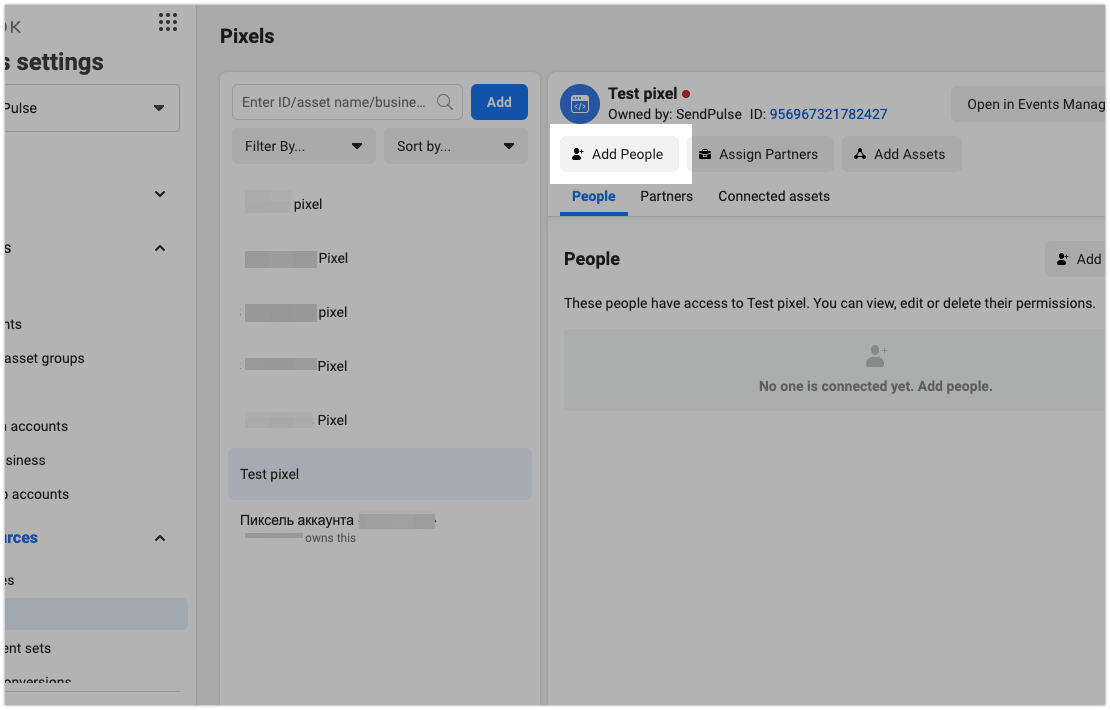
Next, you need to add users to your Business Manager and open the pixel to the ad account. To do this, go to the People tab and click Assign people.
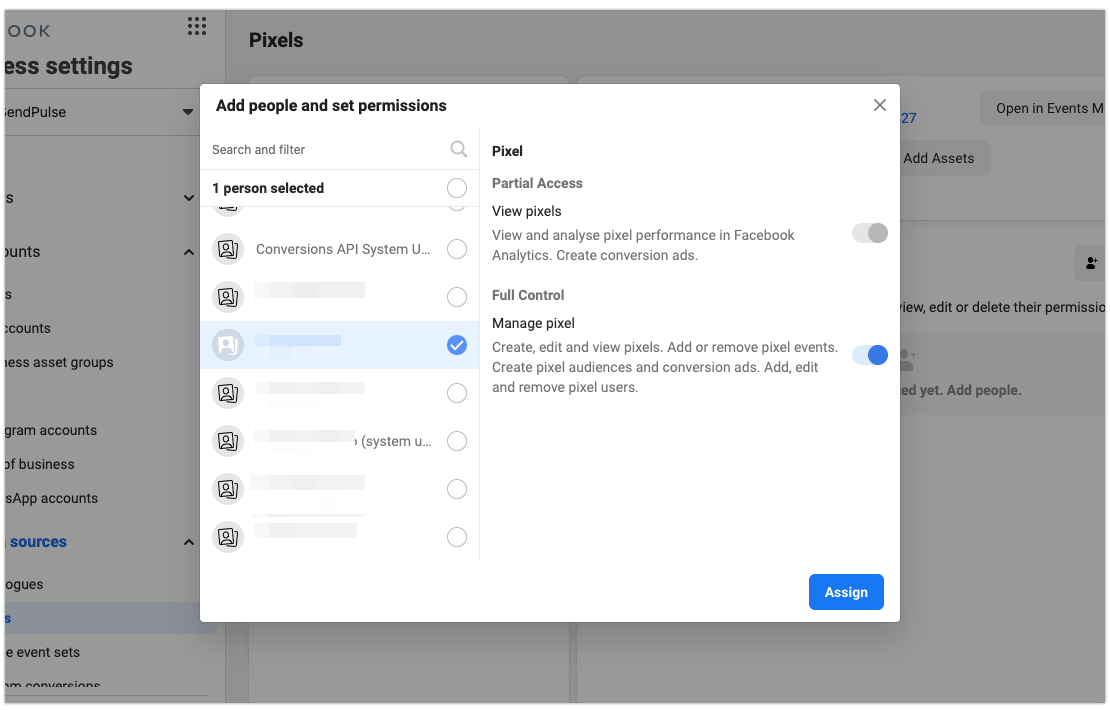
Select the users you want, specify pixel control rights, and click Assign.
 Afterward, you need to enable pixel access for an ad account. To do this, go to the Connected assets and click Connect assets.
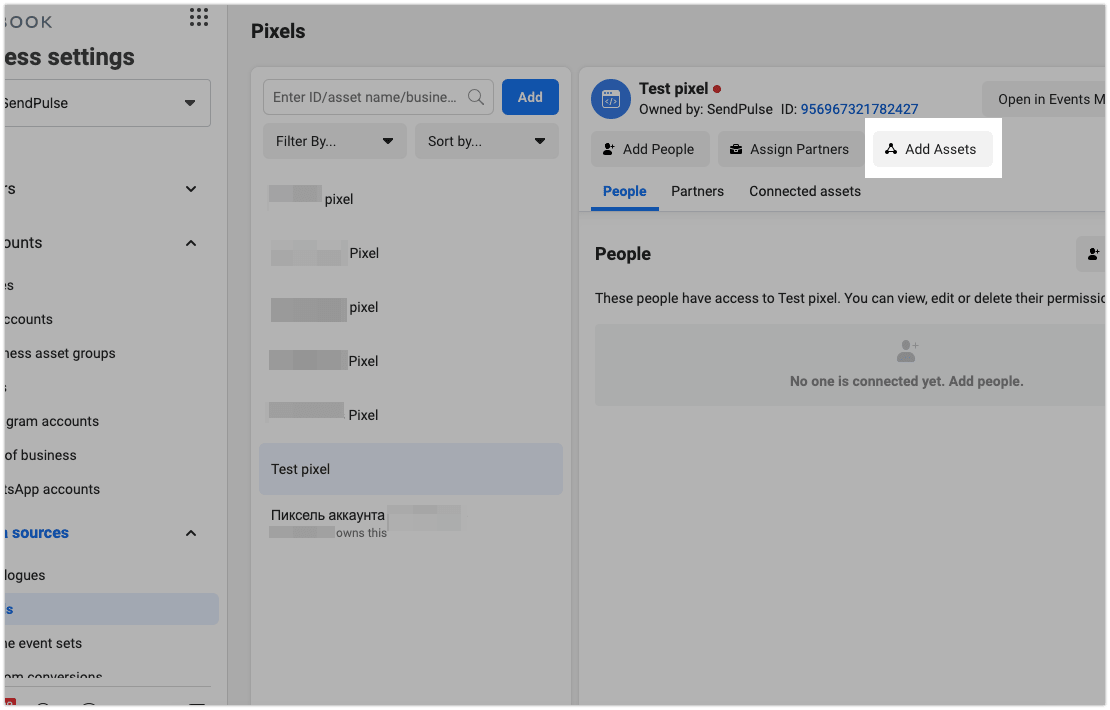
Select the desired ad account, specify pixel management rights, and click Add. The pixel can be accessed in the selected ad account.
Your pixel is ready to be added to your SendPulse landing page.
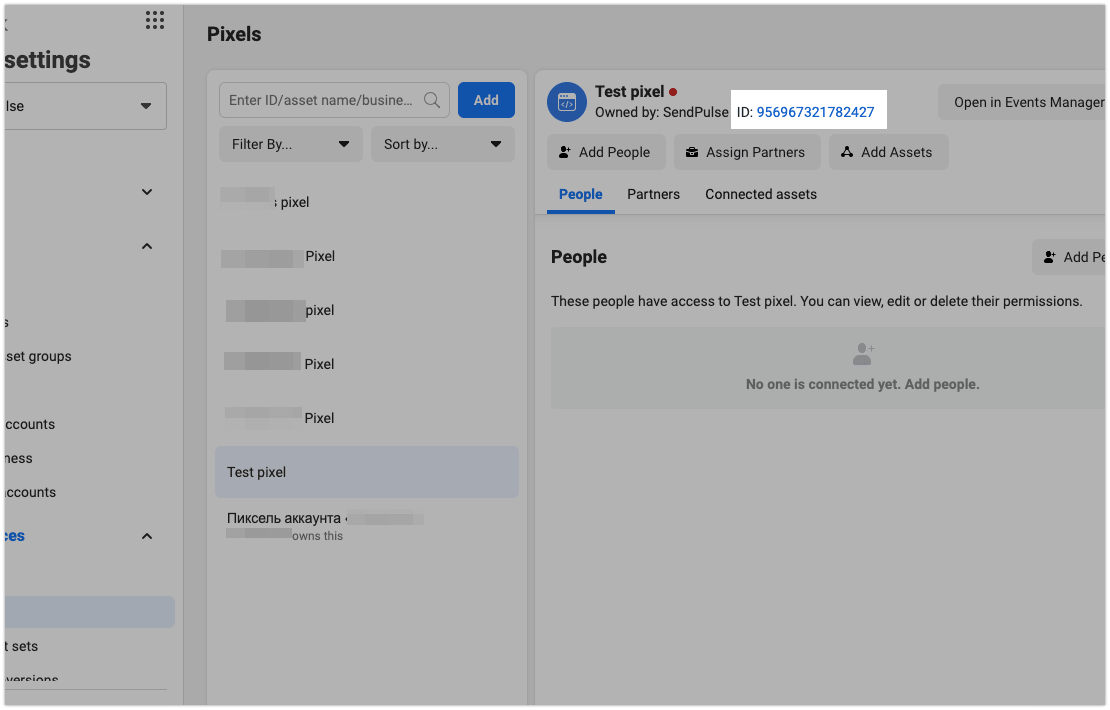
How to get the pixel ID
Select the pixel you need and copy its ID (a set of 15 digits) by clicking on it.
To send cart events to pixel, get your API secret as well.
Open the Settings tab, and in the Set up direct integration section, click Generate access token.
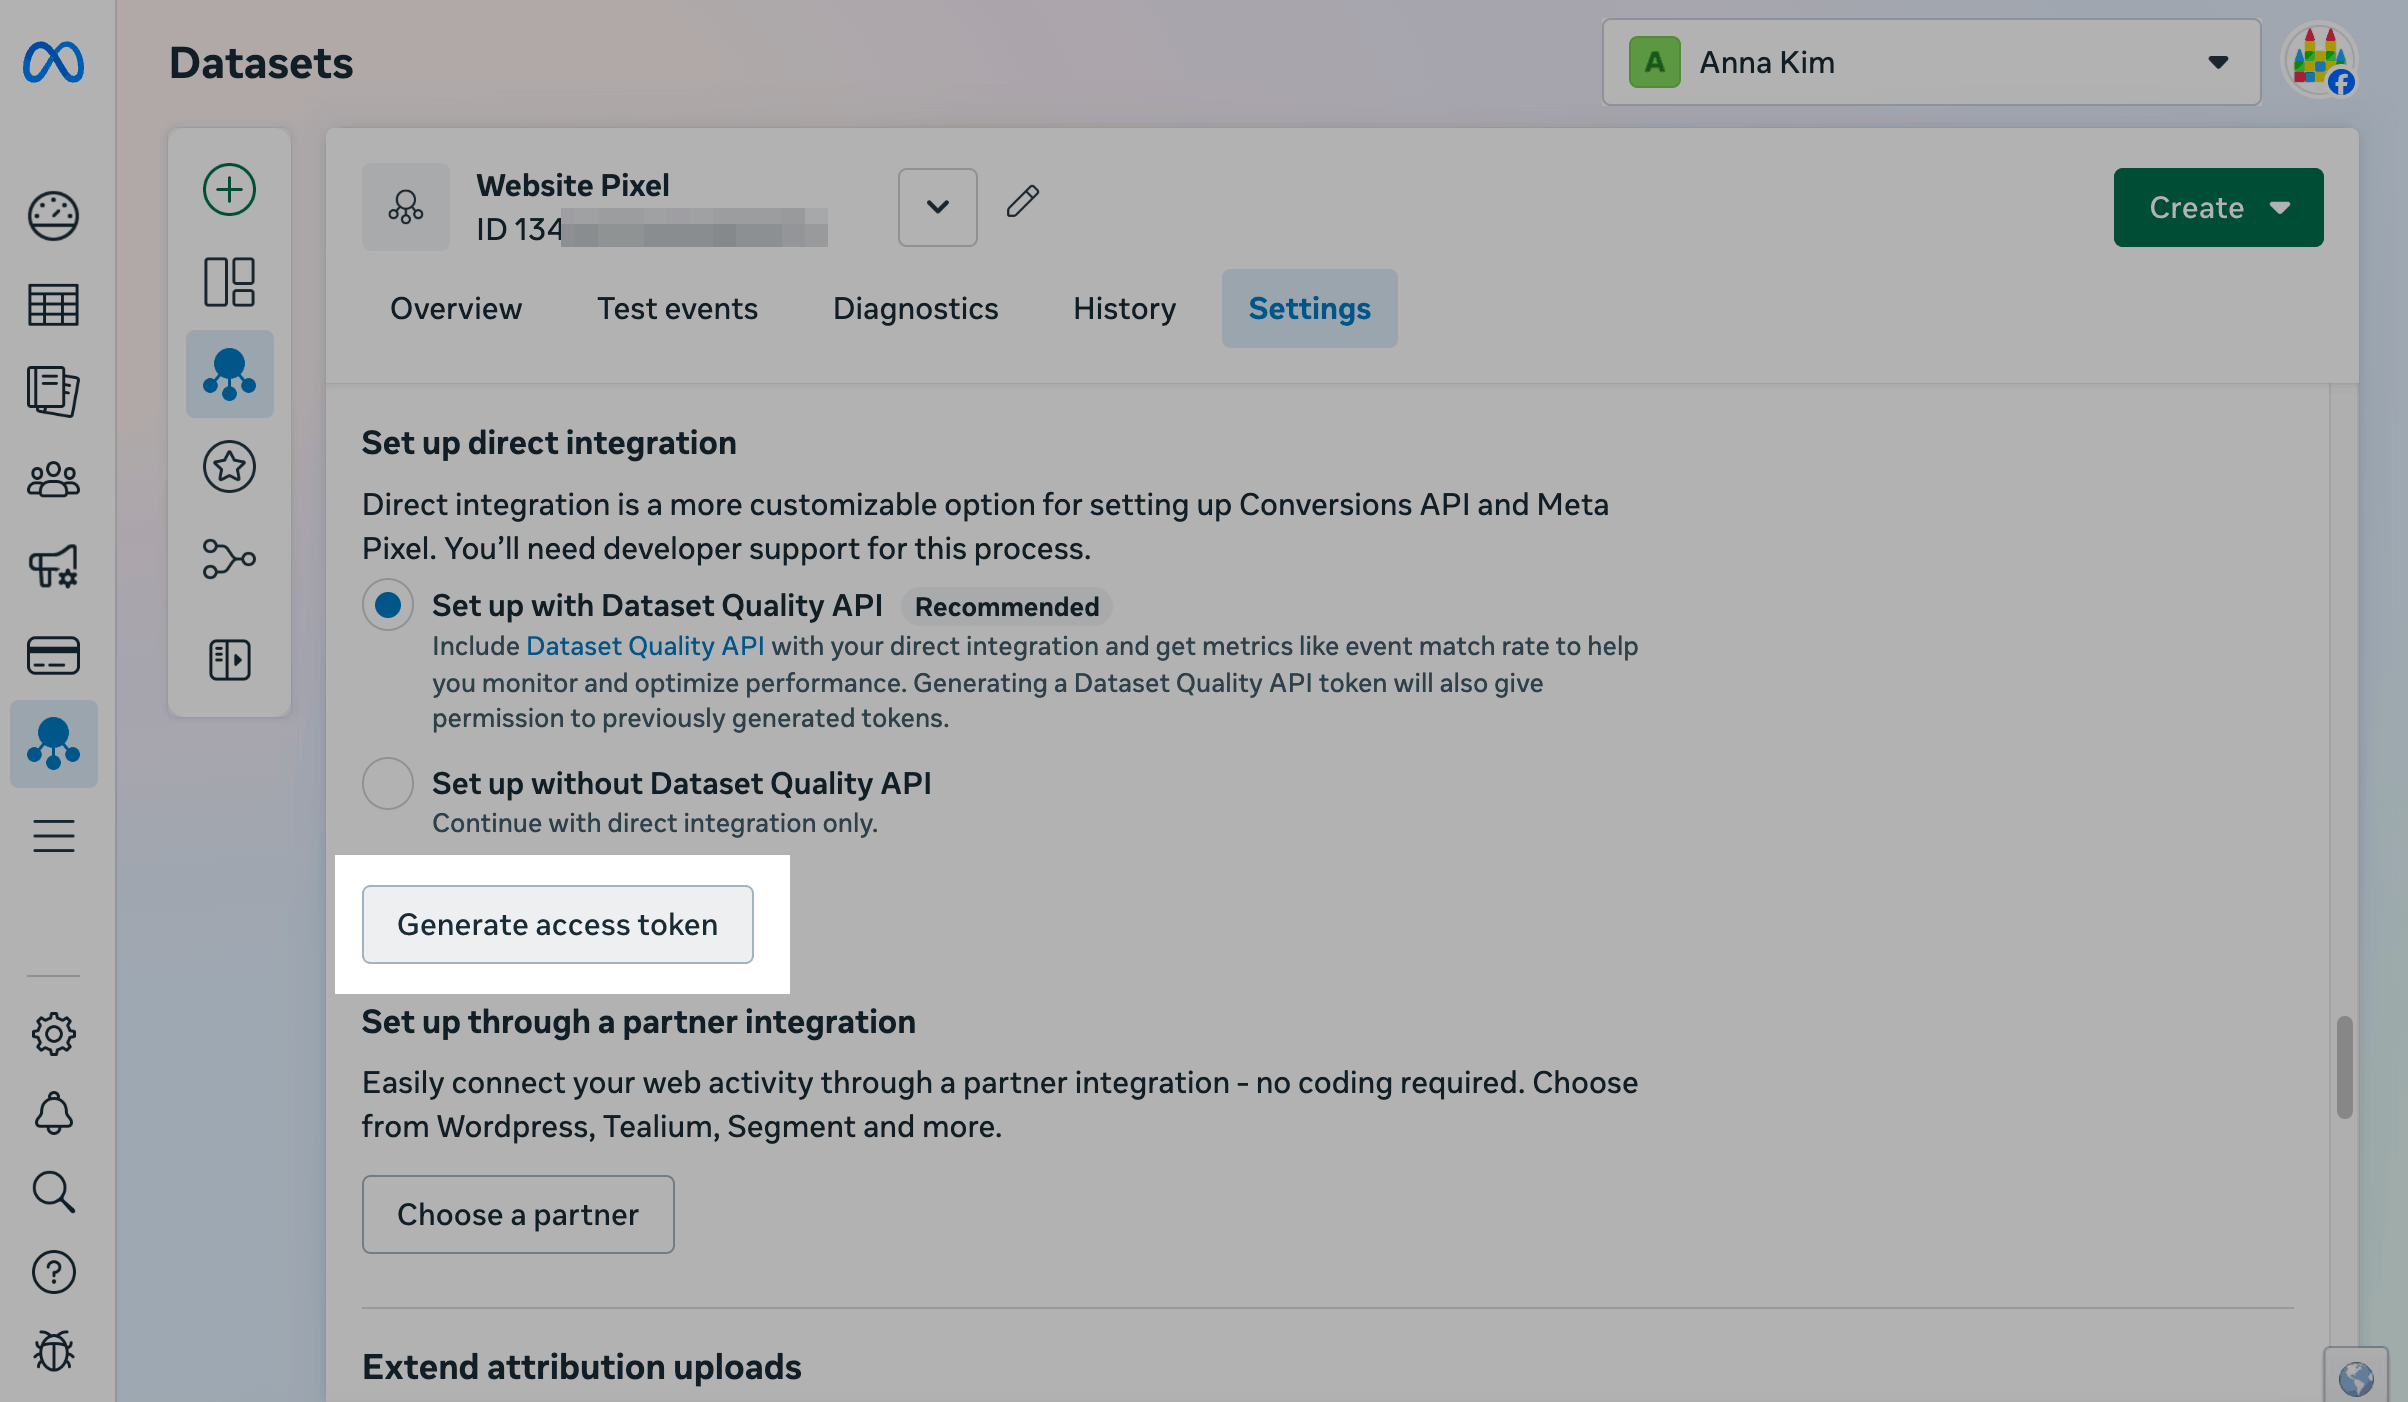
Copy the token.
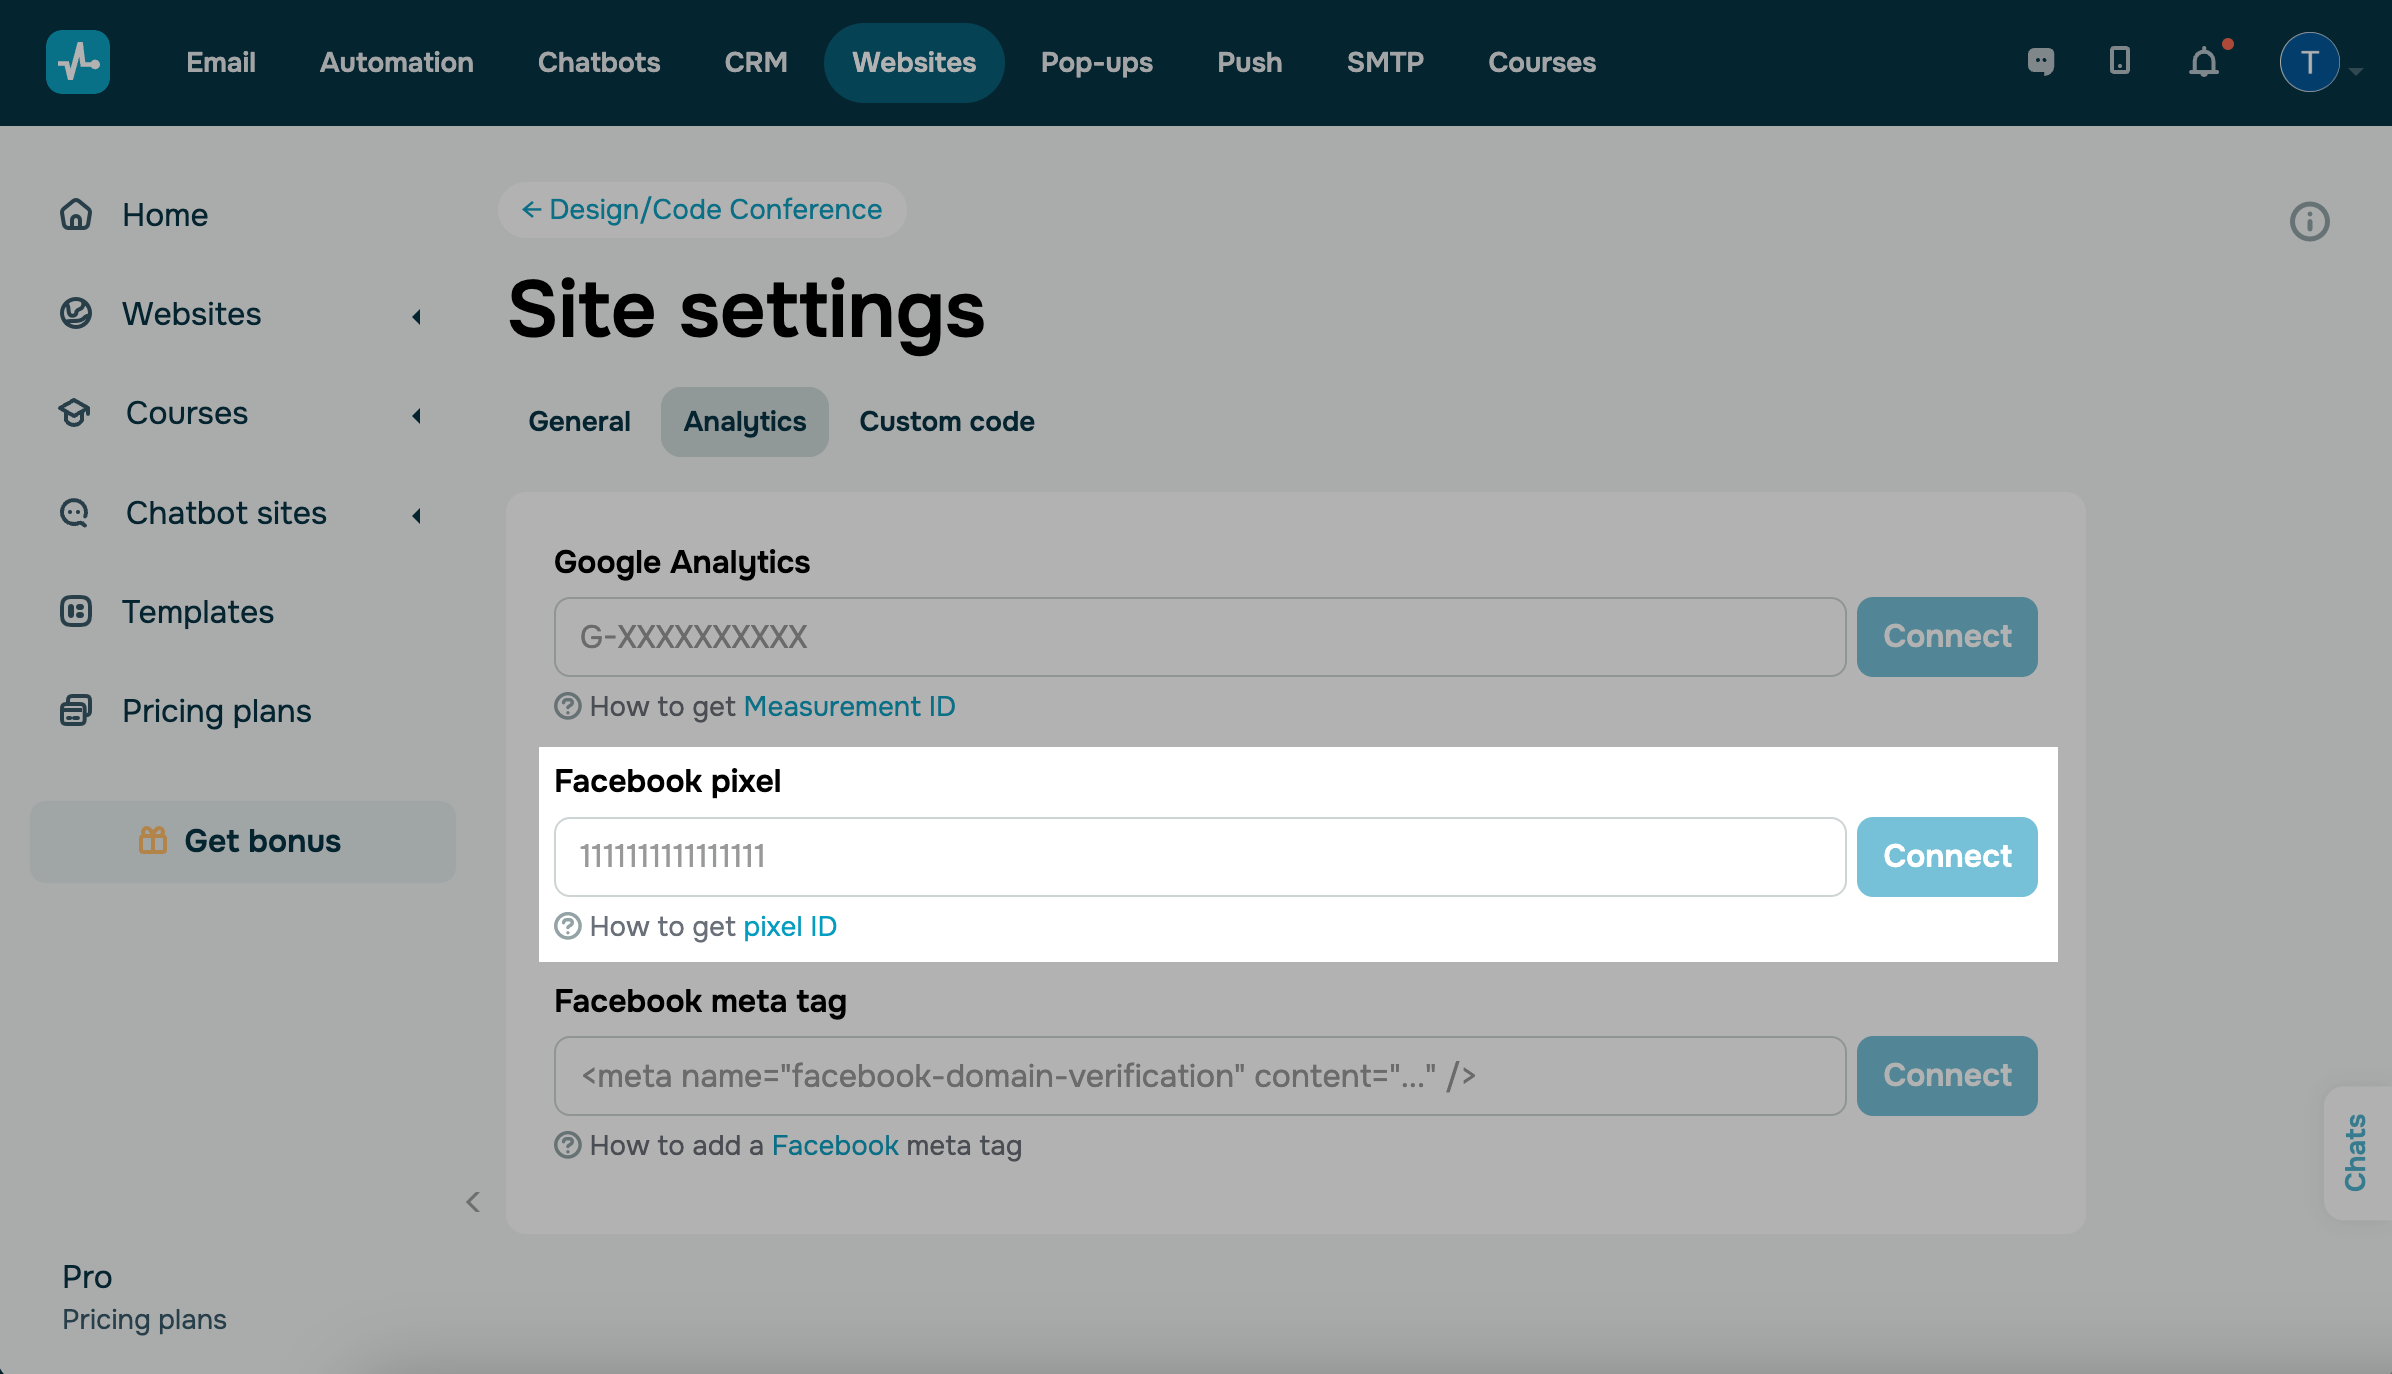
How to insert an ID into SendPulse
Go to the site or bio link page settings in the Analytics tab. Next to the Facebook pixel, enter the ID and click Connect.
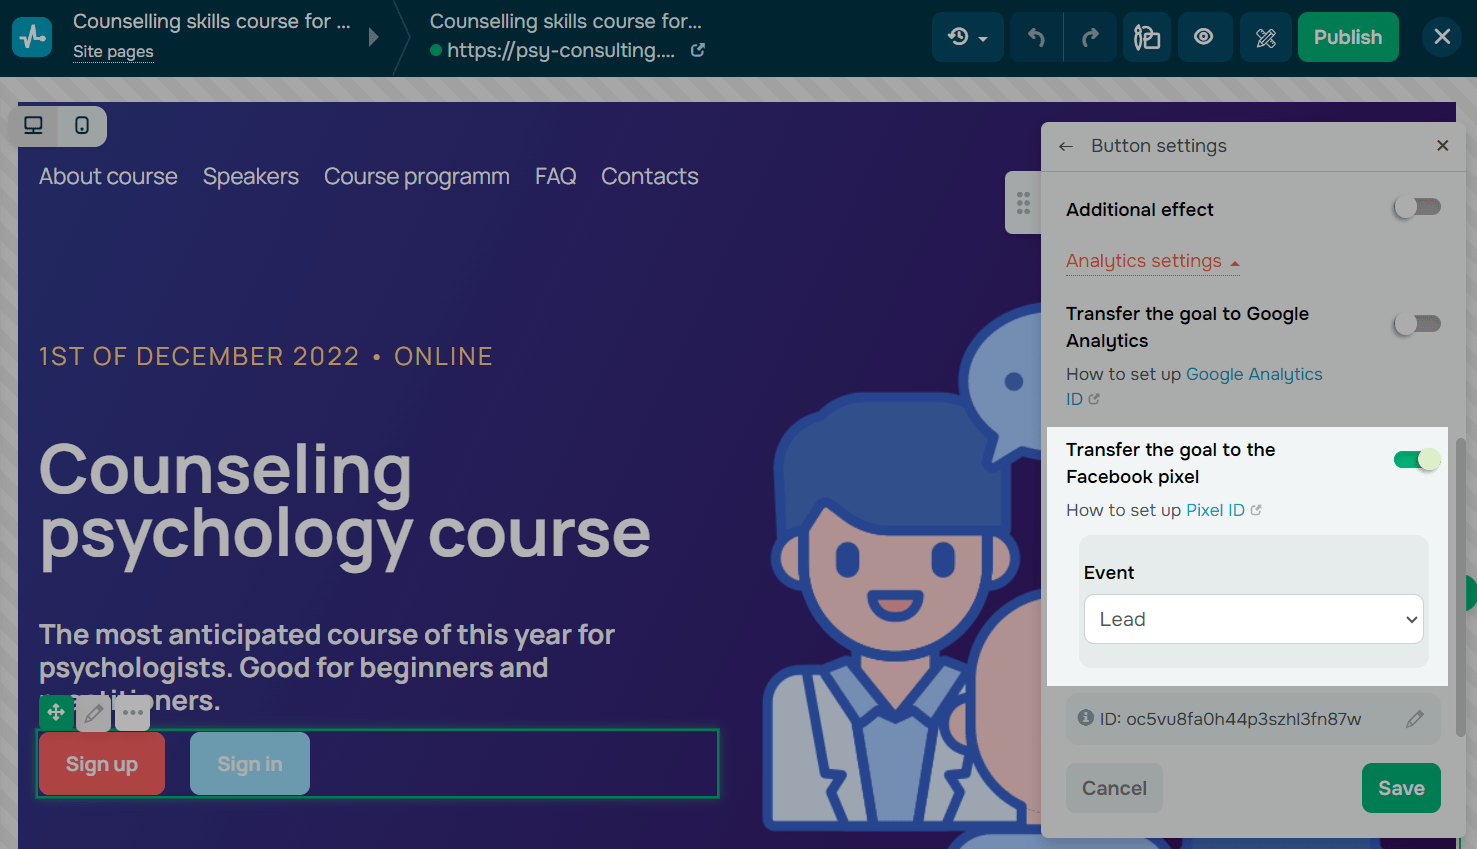
How to transfer goals to Google Analytics
Once you connect your ID, you can transfer goals from the following widgets: Subscription Form, Course Authorization, Payment, and Button. With bio link pages, you can transfer goals from the Payments, Button, and Form elements.
A goal is a specific user action taken on a website (conversion), for example, clicking a button, making a purchase, or entering personal data.
Go to the website builder, find or add the required widget, and click Analytics settings on the widget settings panel.
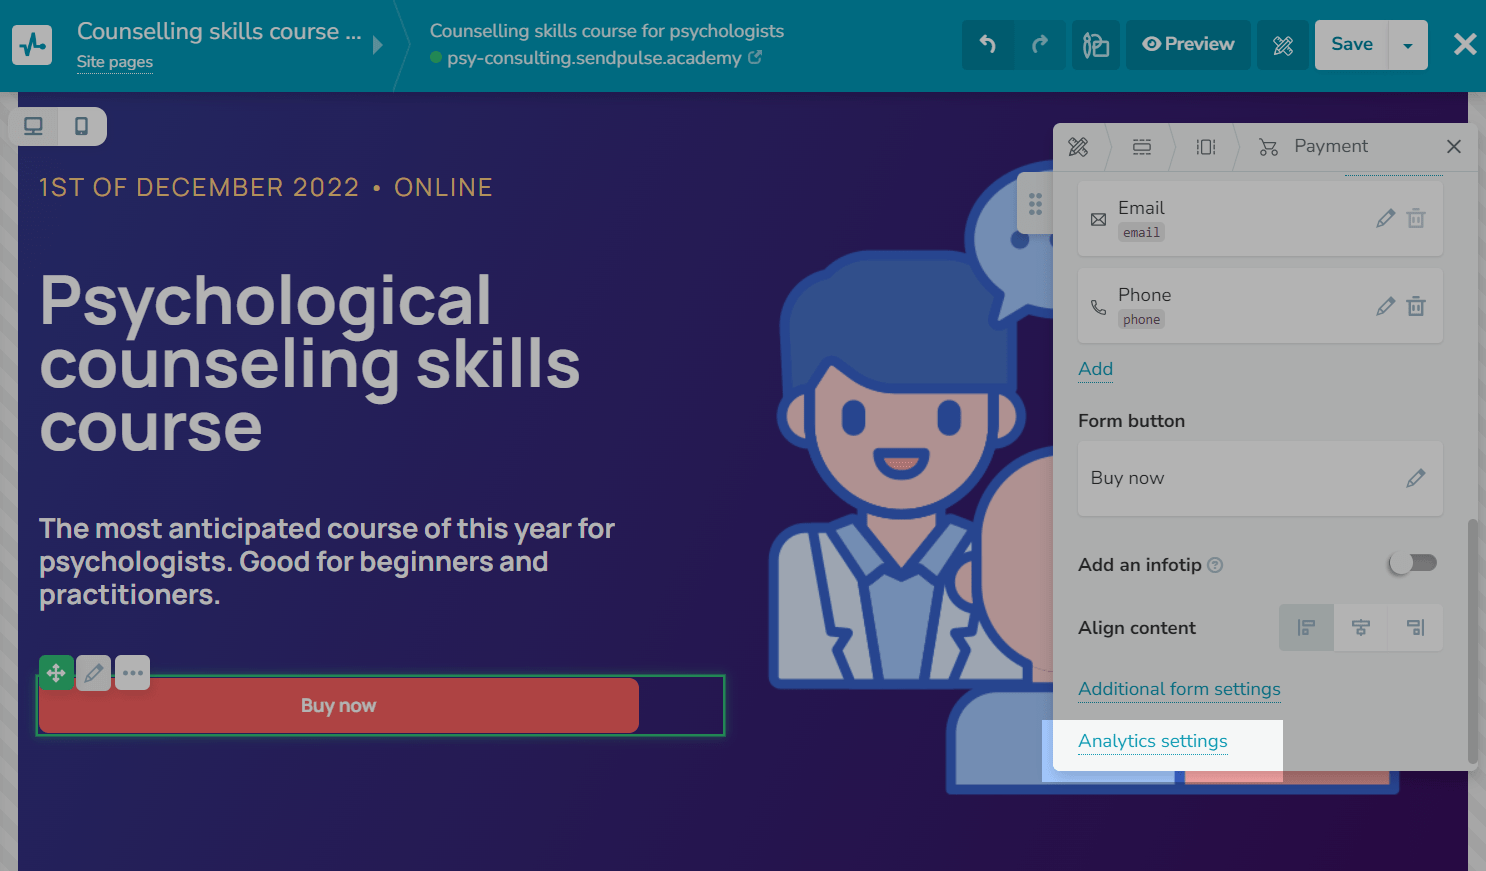
Turn on the Transfer the goal to the Facebook pixel toggle, and select an event from the dropdown list.
By default, every widget has a preselected event.
| Form |
The Lead event captures form submissions using the |
| Payment |
The Purchase event captures purchases using the following parameters:
|
| Course login | The CompleteRegistration event captures course enrollments using the complete_registration parameter. |
| Product |
The ViewContent event captures product card views using the following parameters:
|
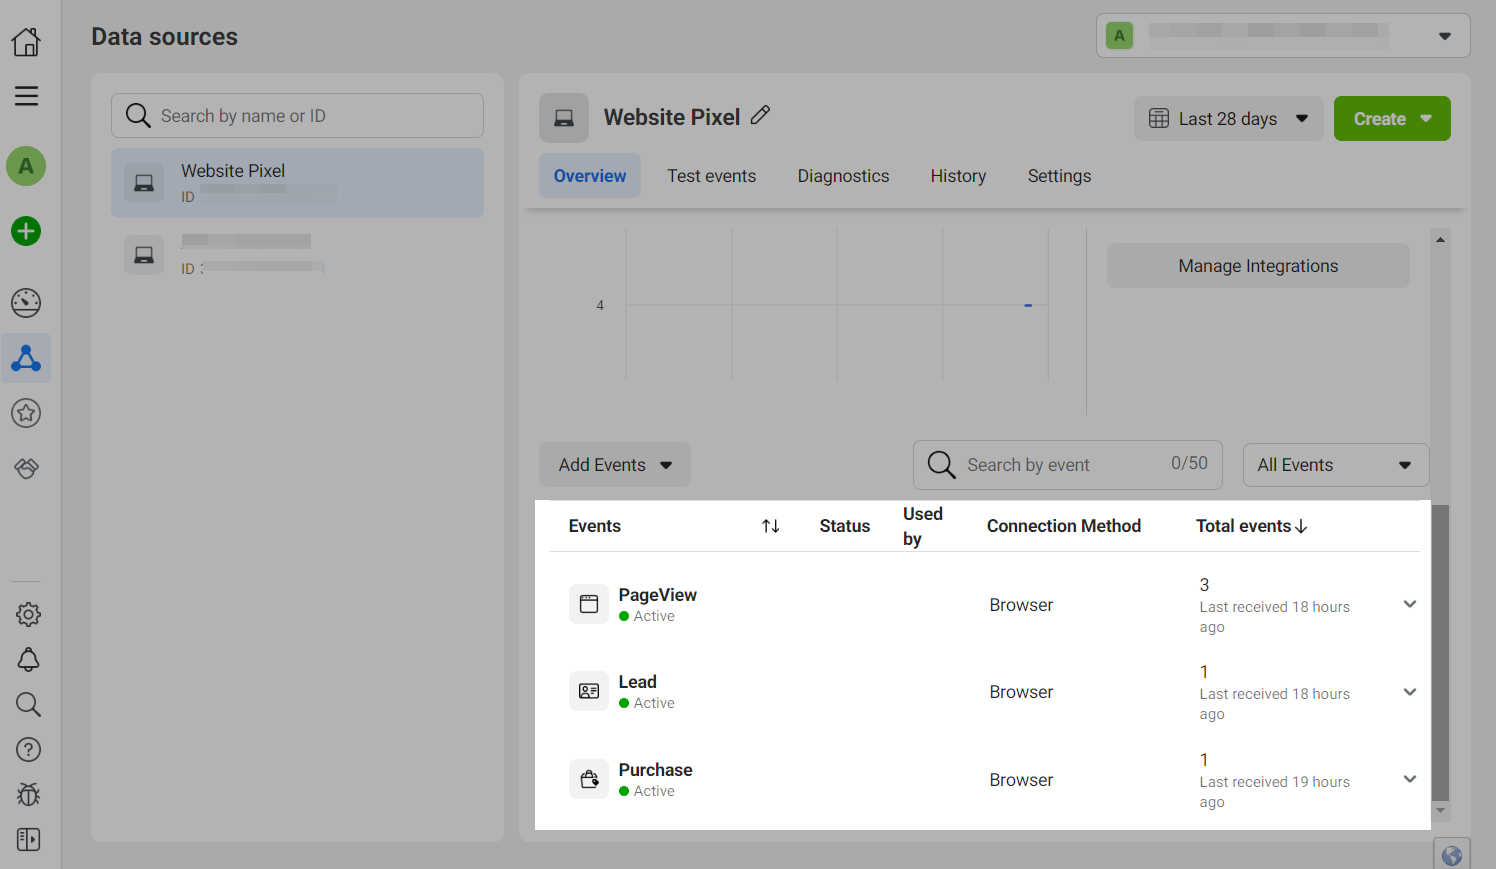
You can also select any standard Meta event.
Read about events in the Meta documentation.
Go to Events Manager in your Facebook Business Account, select the required pixel, and view the list of events.
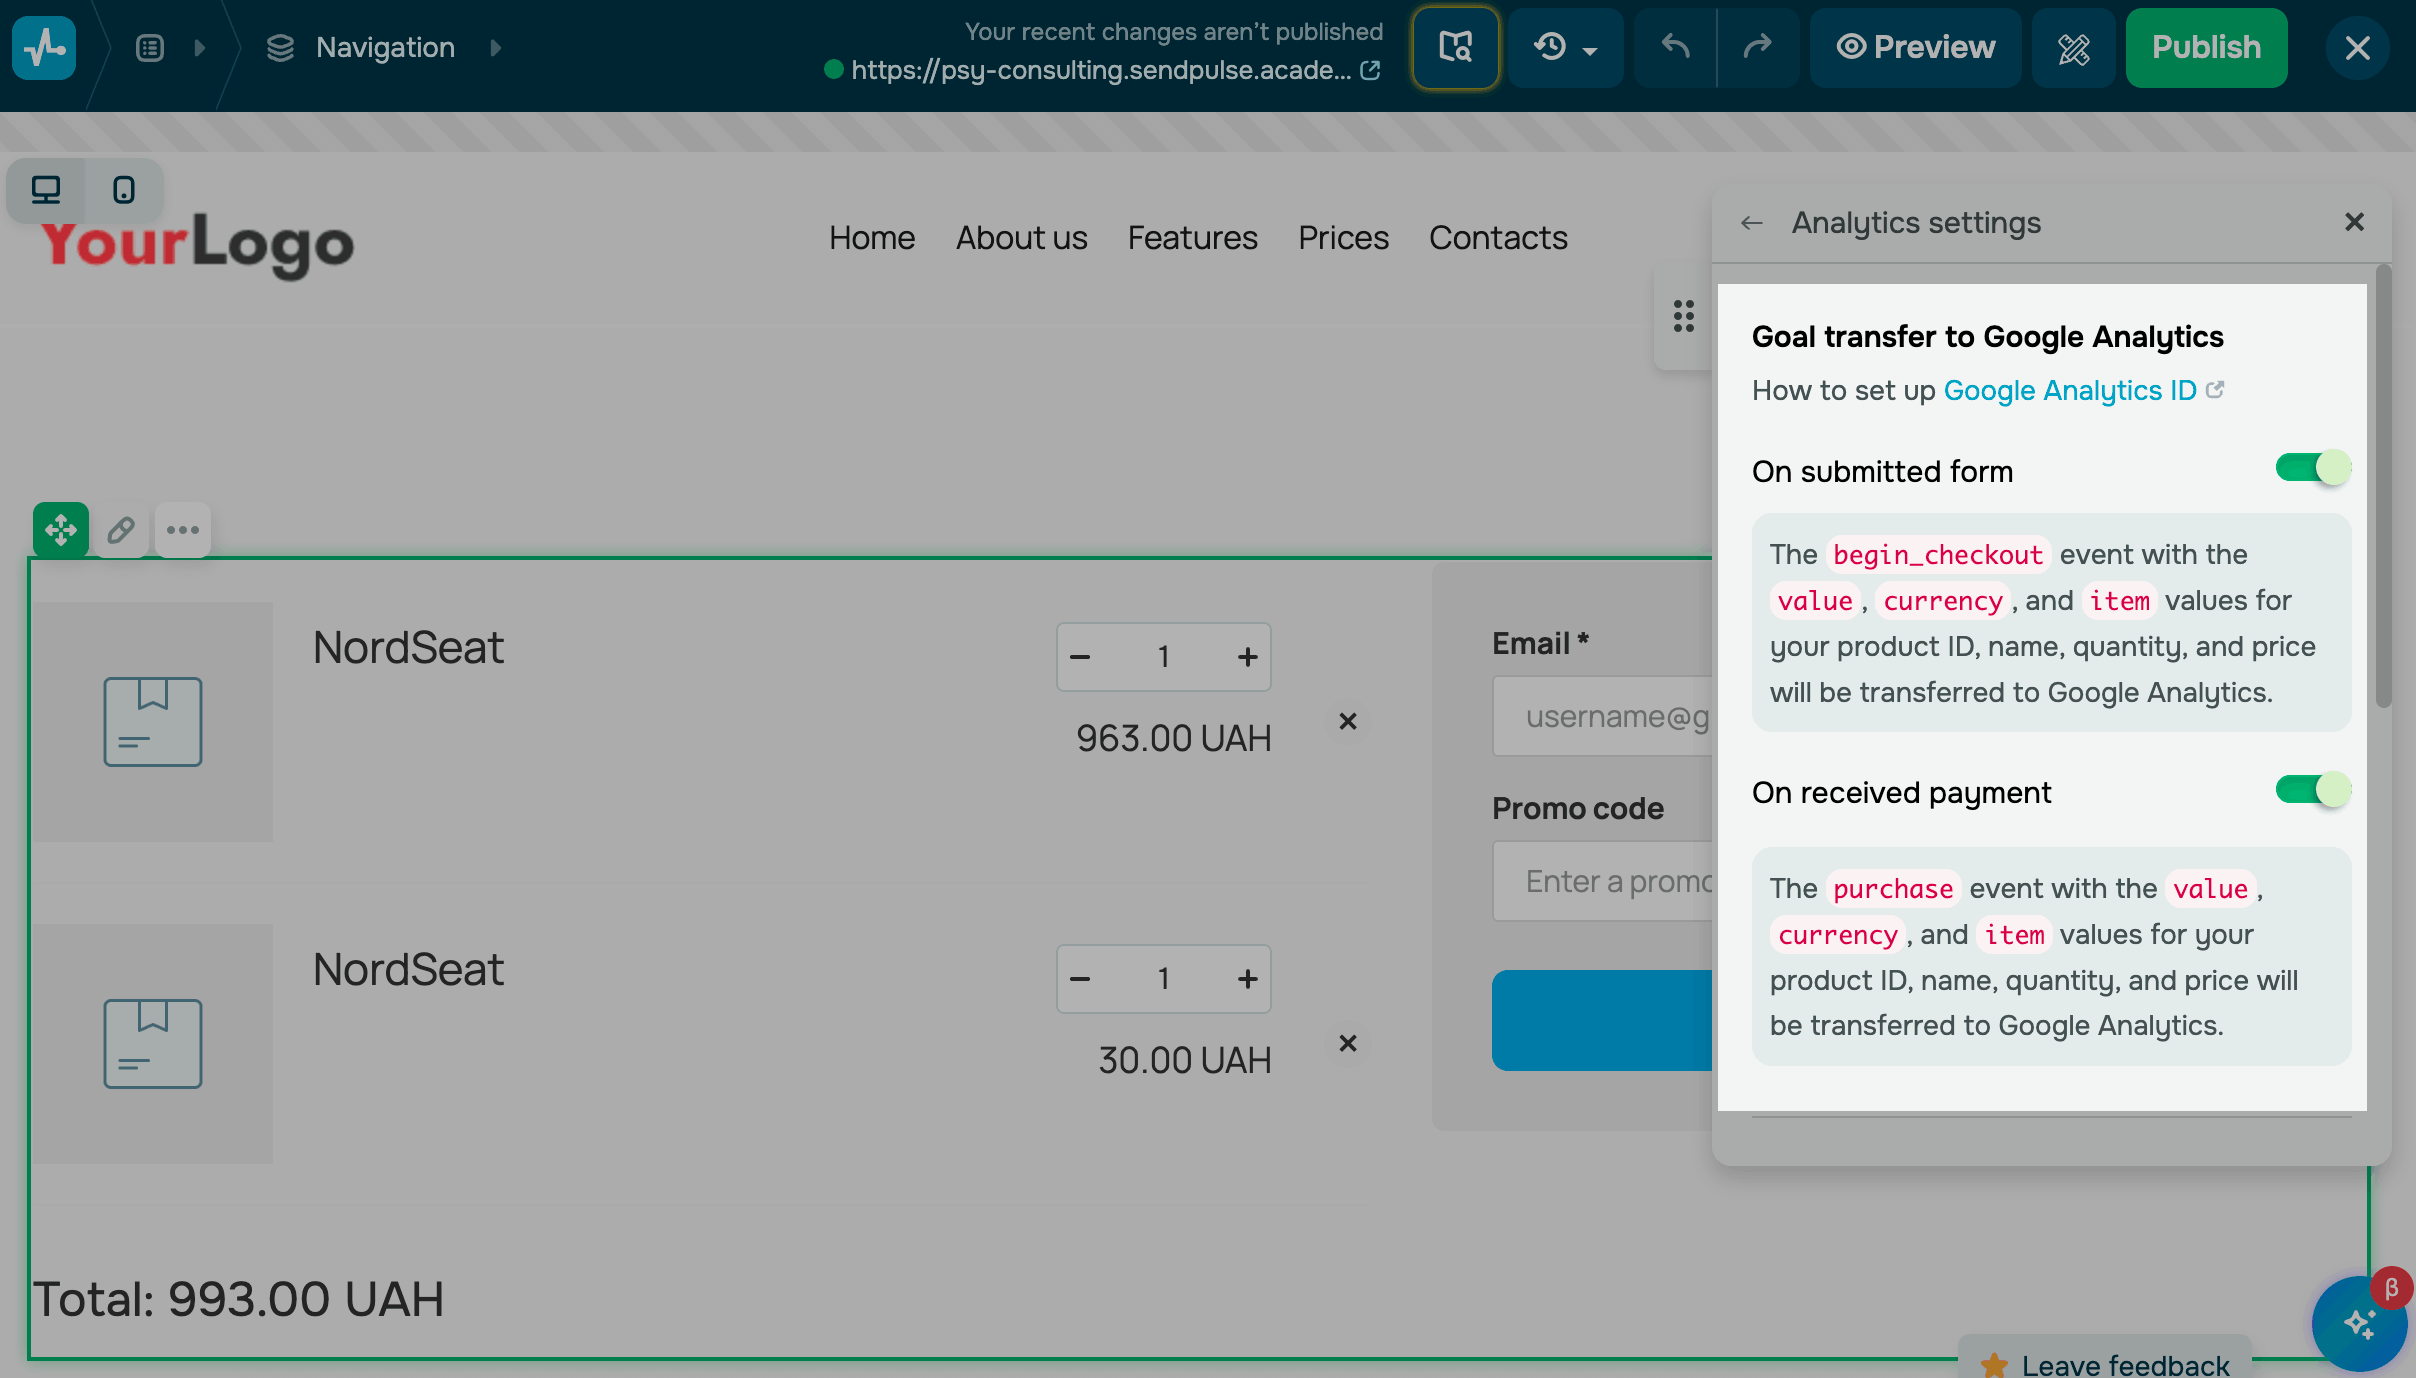
Configure cart data transfer
Go to the website builder, open the cart page, and click the widget.
In the settings, click Analytics settings. In the Goal transfer to Facebook Pixel section, turn on a relevant toggle:
| On submitted form |
This toggle becomes available once you add your ID. Select an event* to send when a customer fills out your cart form. |
| On received payment |
This toggle becomes available once you add your ID and API token. When a customer completes a payment, the selected event* will be sent to your business account. If you select the |
*Read more about each event in Meta’s documentation.
Meta also records the ViewContent event when a customer views a product. When a customer adds a product to their cart, the AddToCart event is sent automatically.
Last Updated: 17.06.2024
or