Add a custom tracking event to a widget
Google Tag Manager (GTM) is a tag management system that allows you to manage and deploy marketing and analytics tags on your website. Tags are snippets of code that are used to track user behavior, collect data, and deliver personalized experiences.
SendPulse-powered websites use static widget IDs, enabling you to bind to them and track custom events. For example, a tag can be triggered when a user clicks the "Sign up" button in an email subscription widget.
Your static ID will be linked to the entire widget, not each specific button. This means that any button click within your widget will count as one event. If this setup doesn’t work for you, consider placing your buttons on different widgets.
In this article, you will learn how to set up custom widget tracking events for your SendPulse-based website using Google Tag Manager.
Set Up Google Tag Manager
Go to Google Tag Manager, and create an account.
Select your target platform from the available options:
| Web | For use on desktop and mobile web pages. |
| iOS | For use in iOS apps. |
| Android | For use in Android apps. |
| AMP | For use in Accelerated Mobile Pages. |
| Server | For server-side instrumentation and measurement. |
Click Create.
Read the Google Tag Manager Terms of Service Agreement and accept them.
Install Google Tag Manager on Your Website
Copy the Installation Code
Upon registering an account, Google Tag Manager will display a pop-up window with the installation code. Copy the code provided:
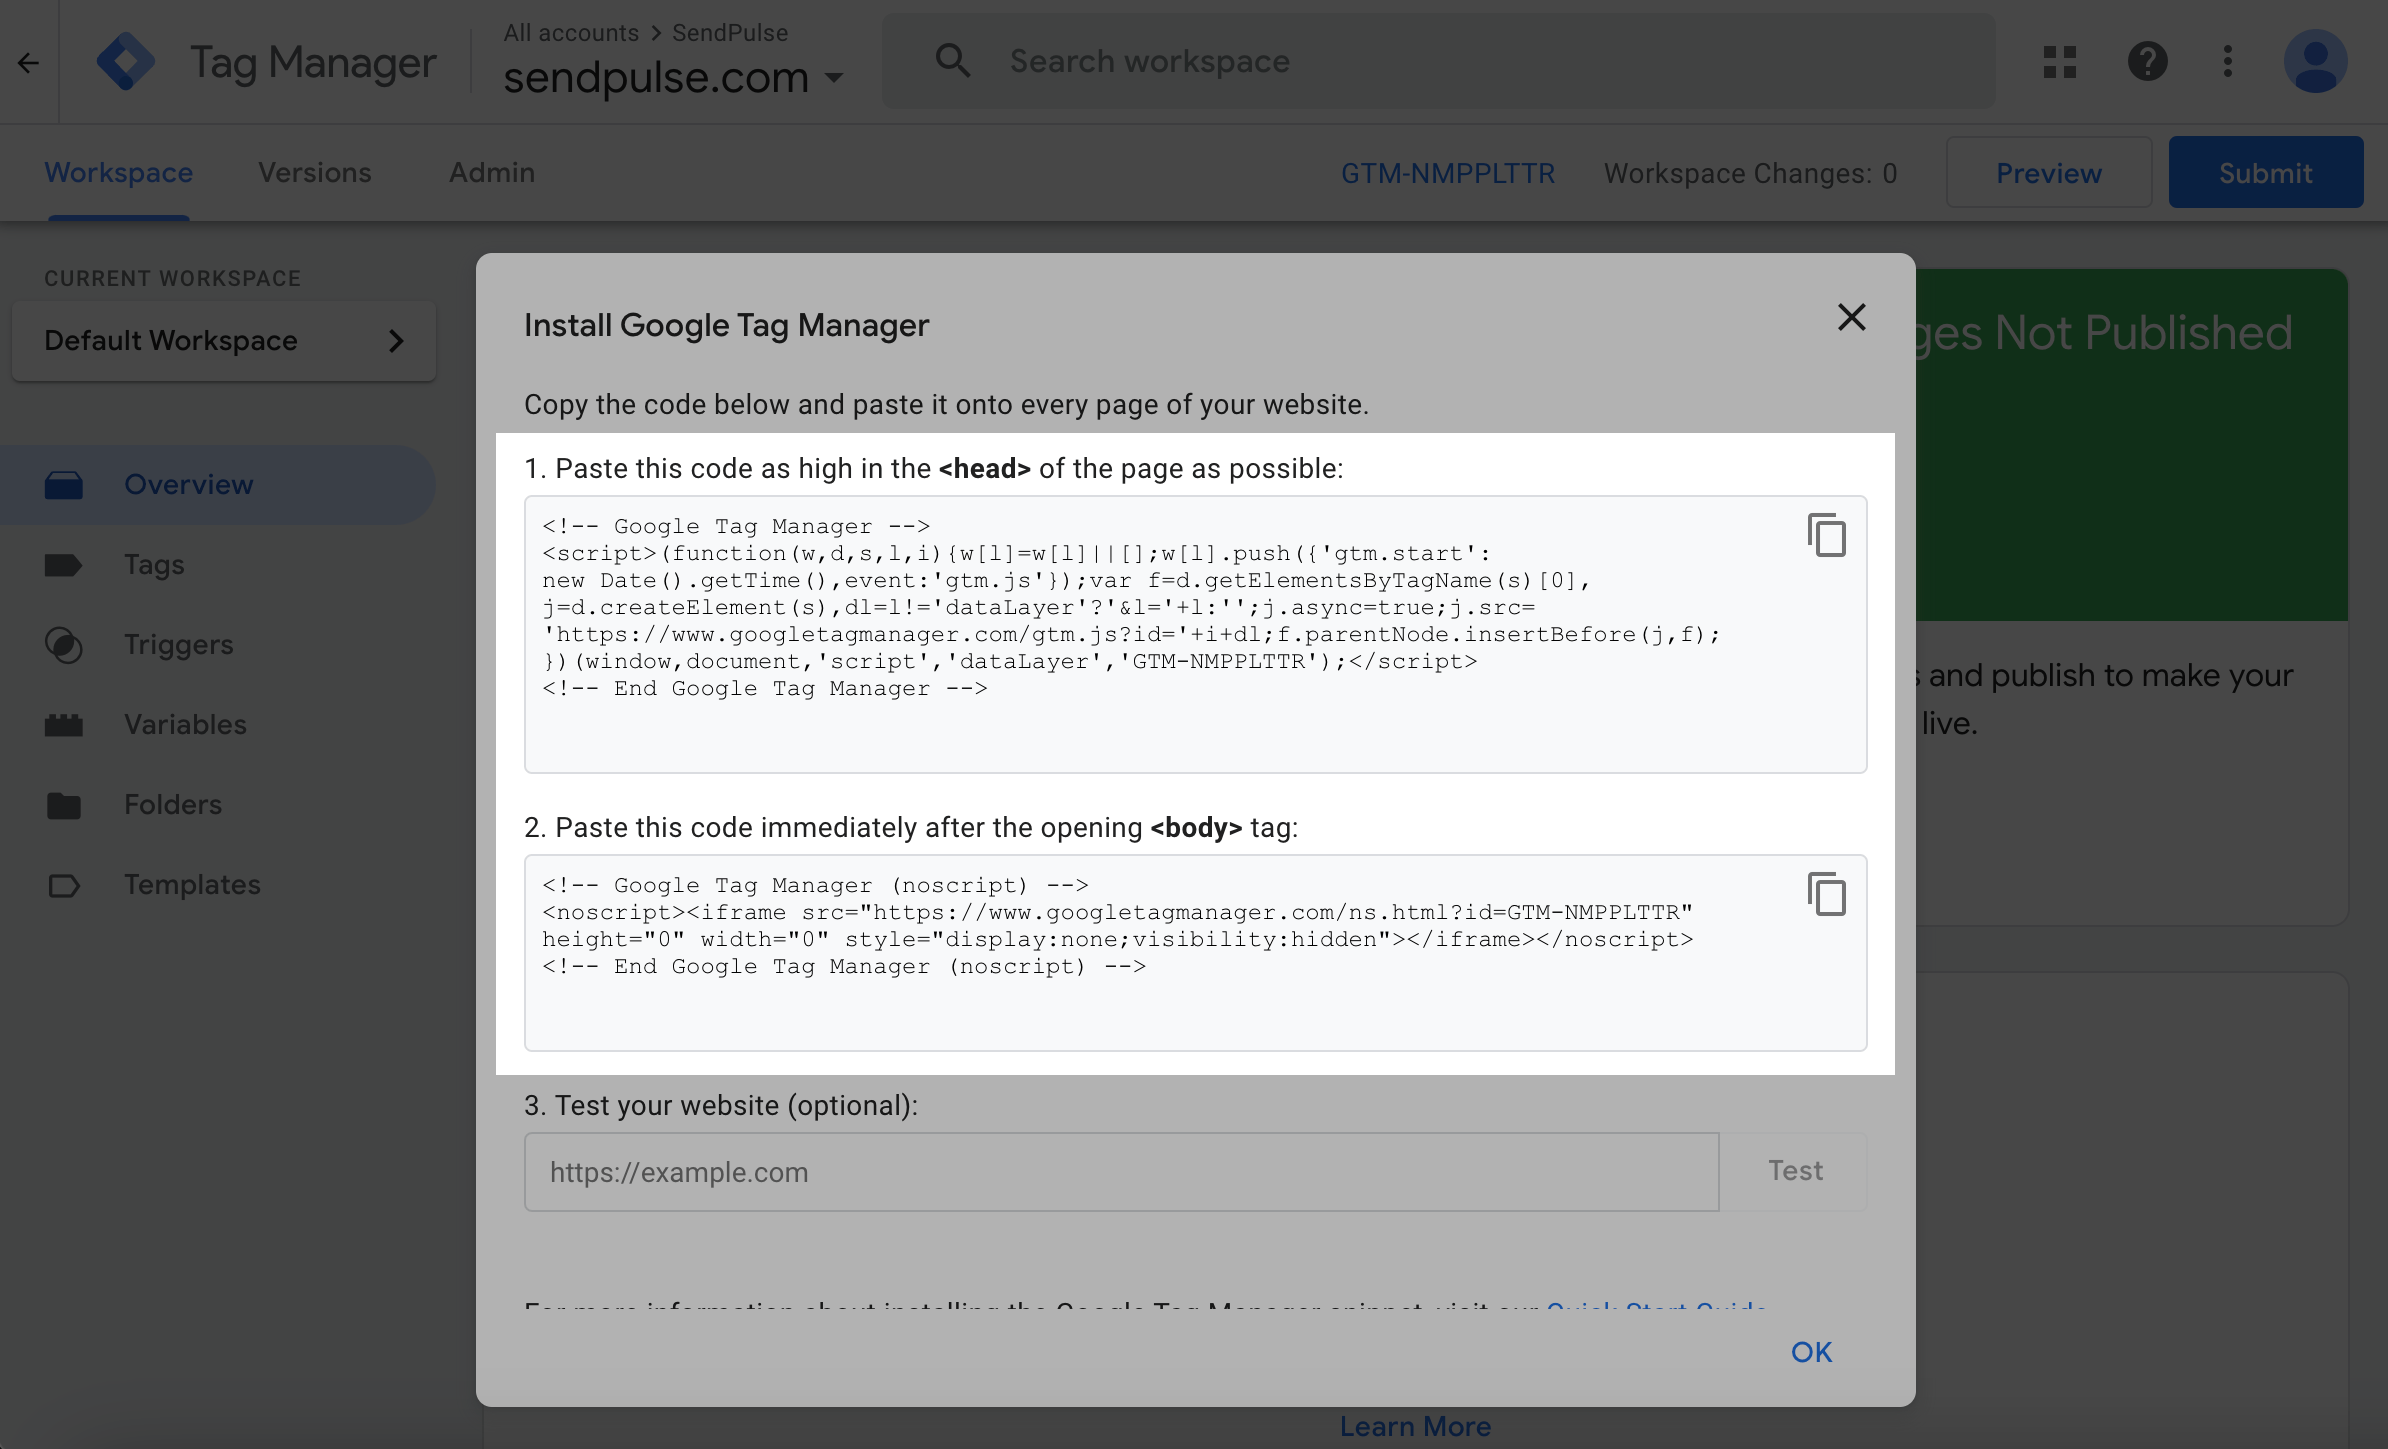
To access the code later, go to Admin > Install Google Tag Manager.
Insert as Custom Code
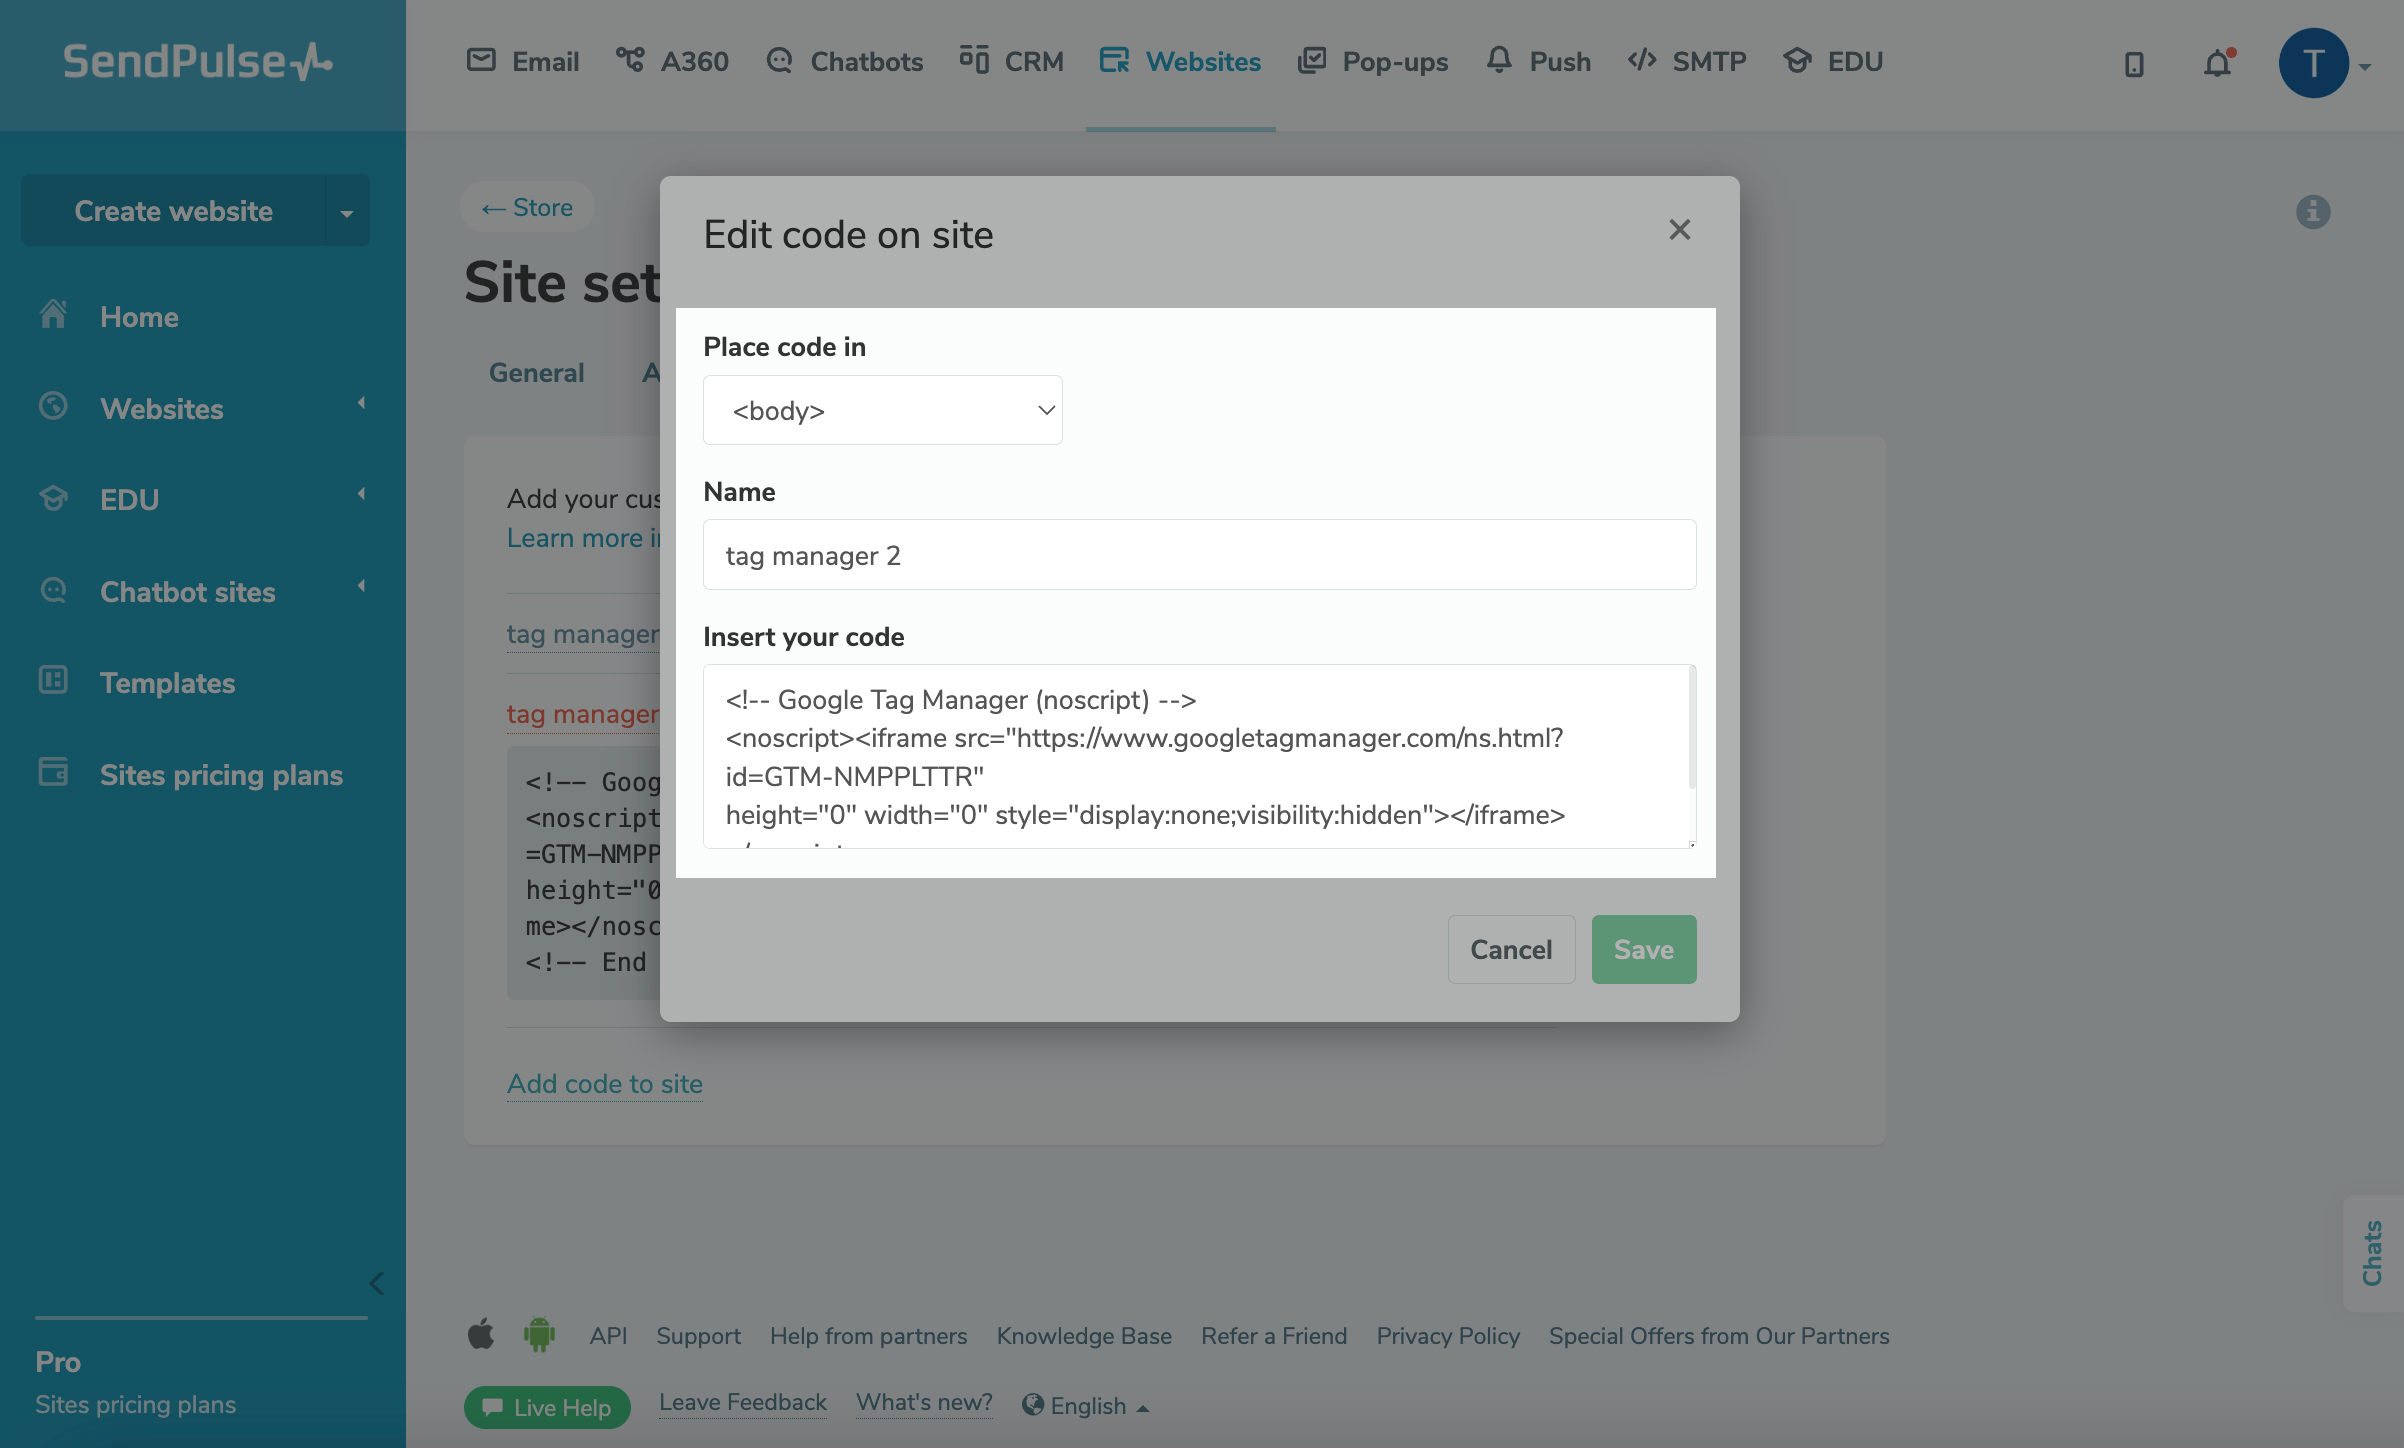
To install Google Tag Manager on your website, you will need to add the provided code to the custom code tab in SendPulse:
Go to the Websites section, select your website, and click Site settings.
In your website settings, go to the Custom code tab, and click Add code to site.
Select the <head> option, and paste the following code:
<!-- Google Tag Manager -->
<script>(function(w,d,s,l,i){w[l]=w[l]||[];w[l].push({'gtm.start':
new Date().getTime(),event:'gtm.js'});var f=d.getElementsByTagName(s)[0],
j=d.createElement(s),dl=l!='dataLayer'?'&l='+l:'';j.async=true;j.src=
'https://www.googletagmanager.com/gtm.js?id='+i+dl;f.parentNode.insertBefore(j,f);
})(window,document,'script','dataLayer','GTM-NMPPLTTR');</script>
<!-- End Google Tag Manager →Click Save.
Repeat the process. Select the <body> option, and paste the following code:
<!-- Google Tag Manager (noscript) -->

<noscript><iframe src="https://www.googletagmanager.com/ns.html?id=GTM-NMPPLTTR"

height="0" width="0" style="display:none;visibility:hidden"></iframe></noscript>

<!-- End Google Tag Manager (noscript) →
Click Save.
Read more: How to Add a Custom Code to a Website.
Copy Button ID
Each widget with a button on your page has a unique identifier (ID) that allows you to anchor it to a specific location on the page or set analytics goals for its clicks.
Your button ID is linked to the entire widget, not each specific button. This means that a widget can have multiple buttons with the same ID.
In the SendPulse website builder, locate your button, and click the pencil icon above it. Go to Button Settings, and copy your ID from the ID field.
Read more: How to Set Up a Button on Your Website: Edit Your Button ID.
Configure a Trigger
In Google Tag Manager, go to the Triggers tab, and click New.

Select Click - All Elements as your trigger type. Configure the trigger to fire on Some Clicks.
Create a new variable named Click ID, and set its type to contains. Paste the button ID you copied from SendPulse into the variable value field.
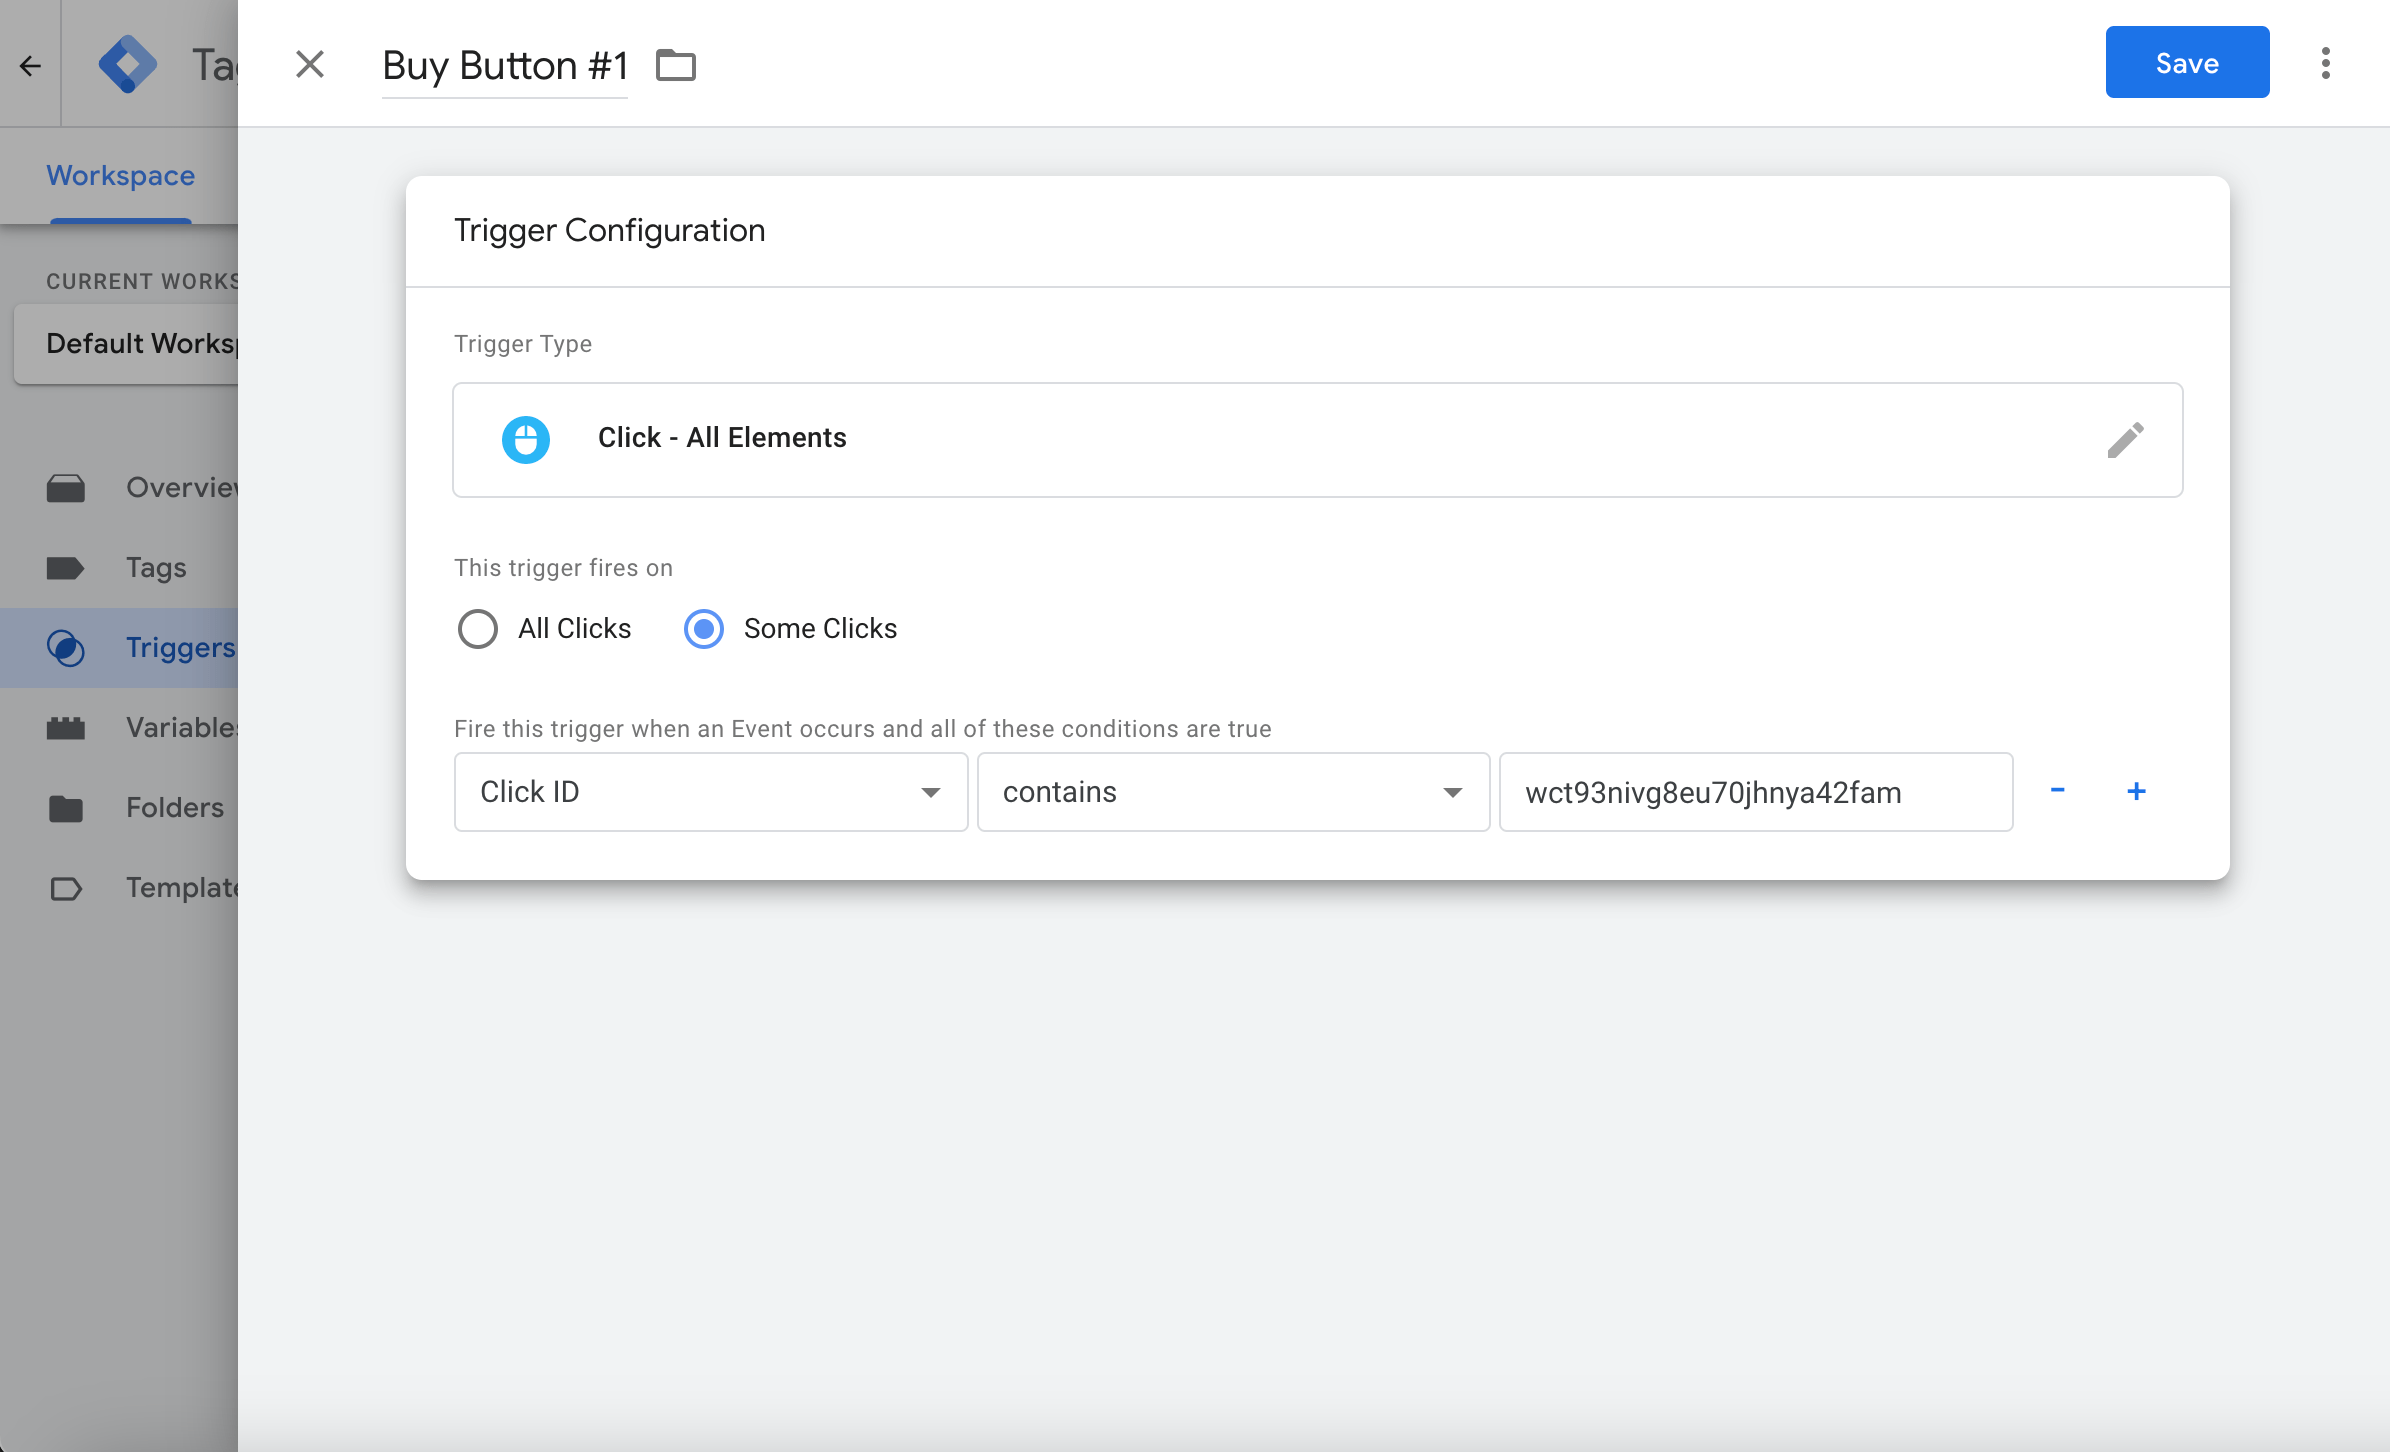
Click Save.
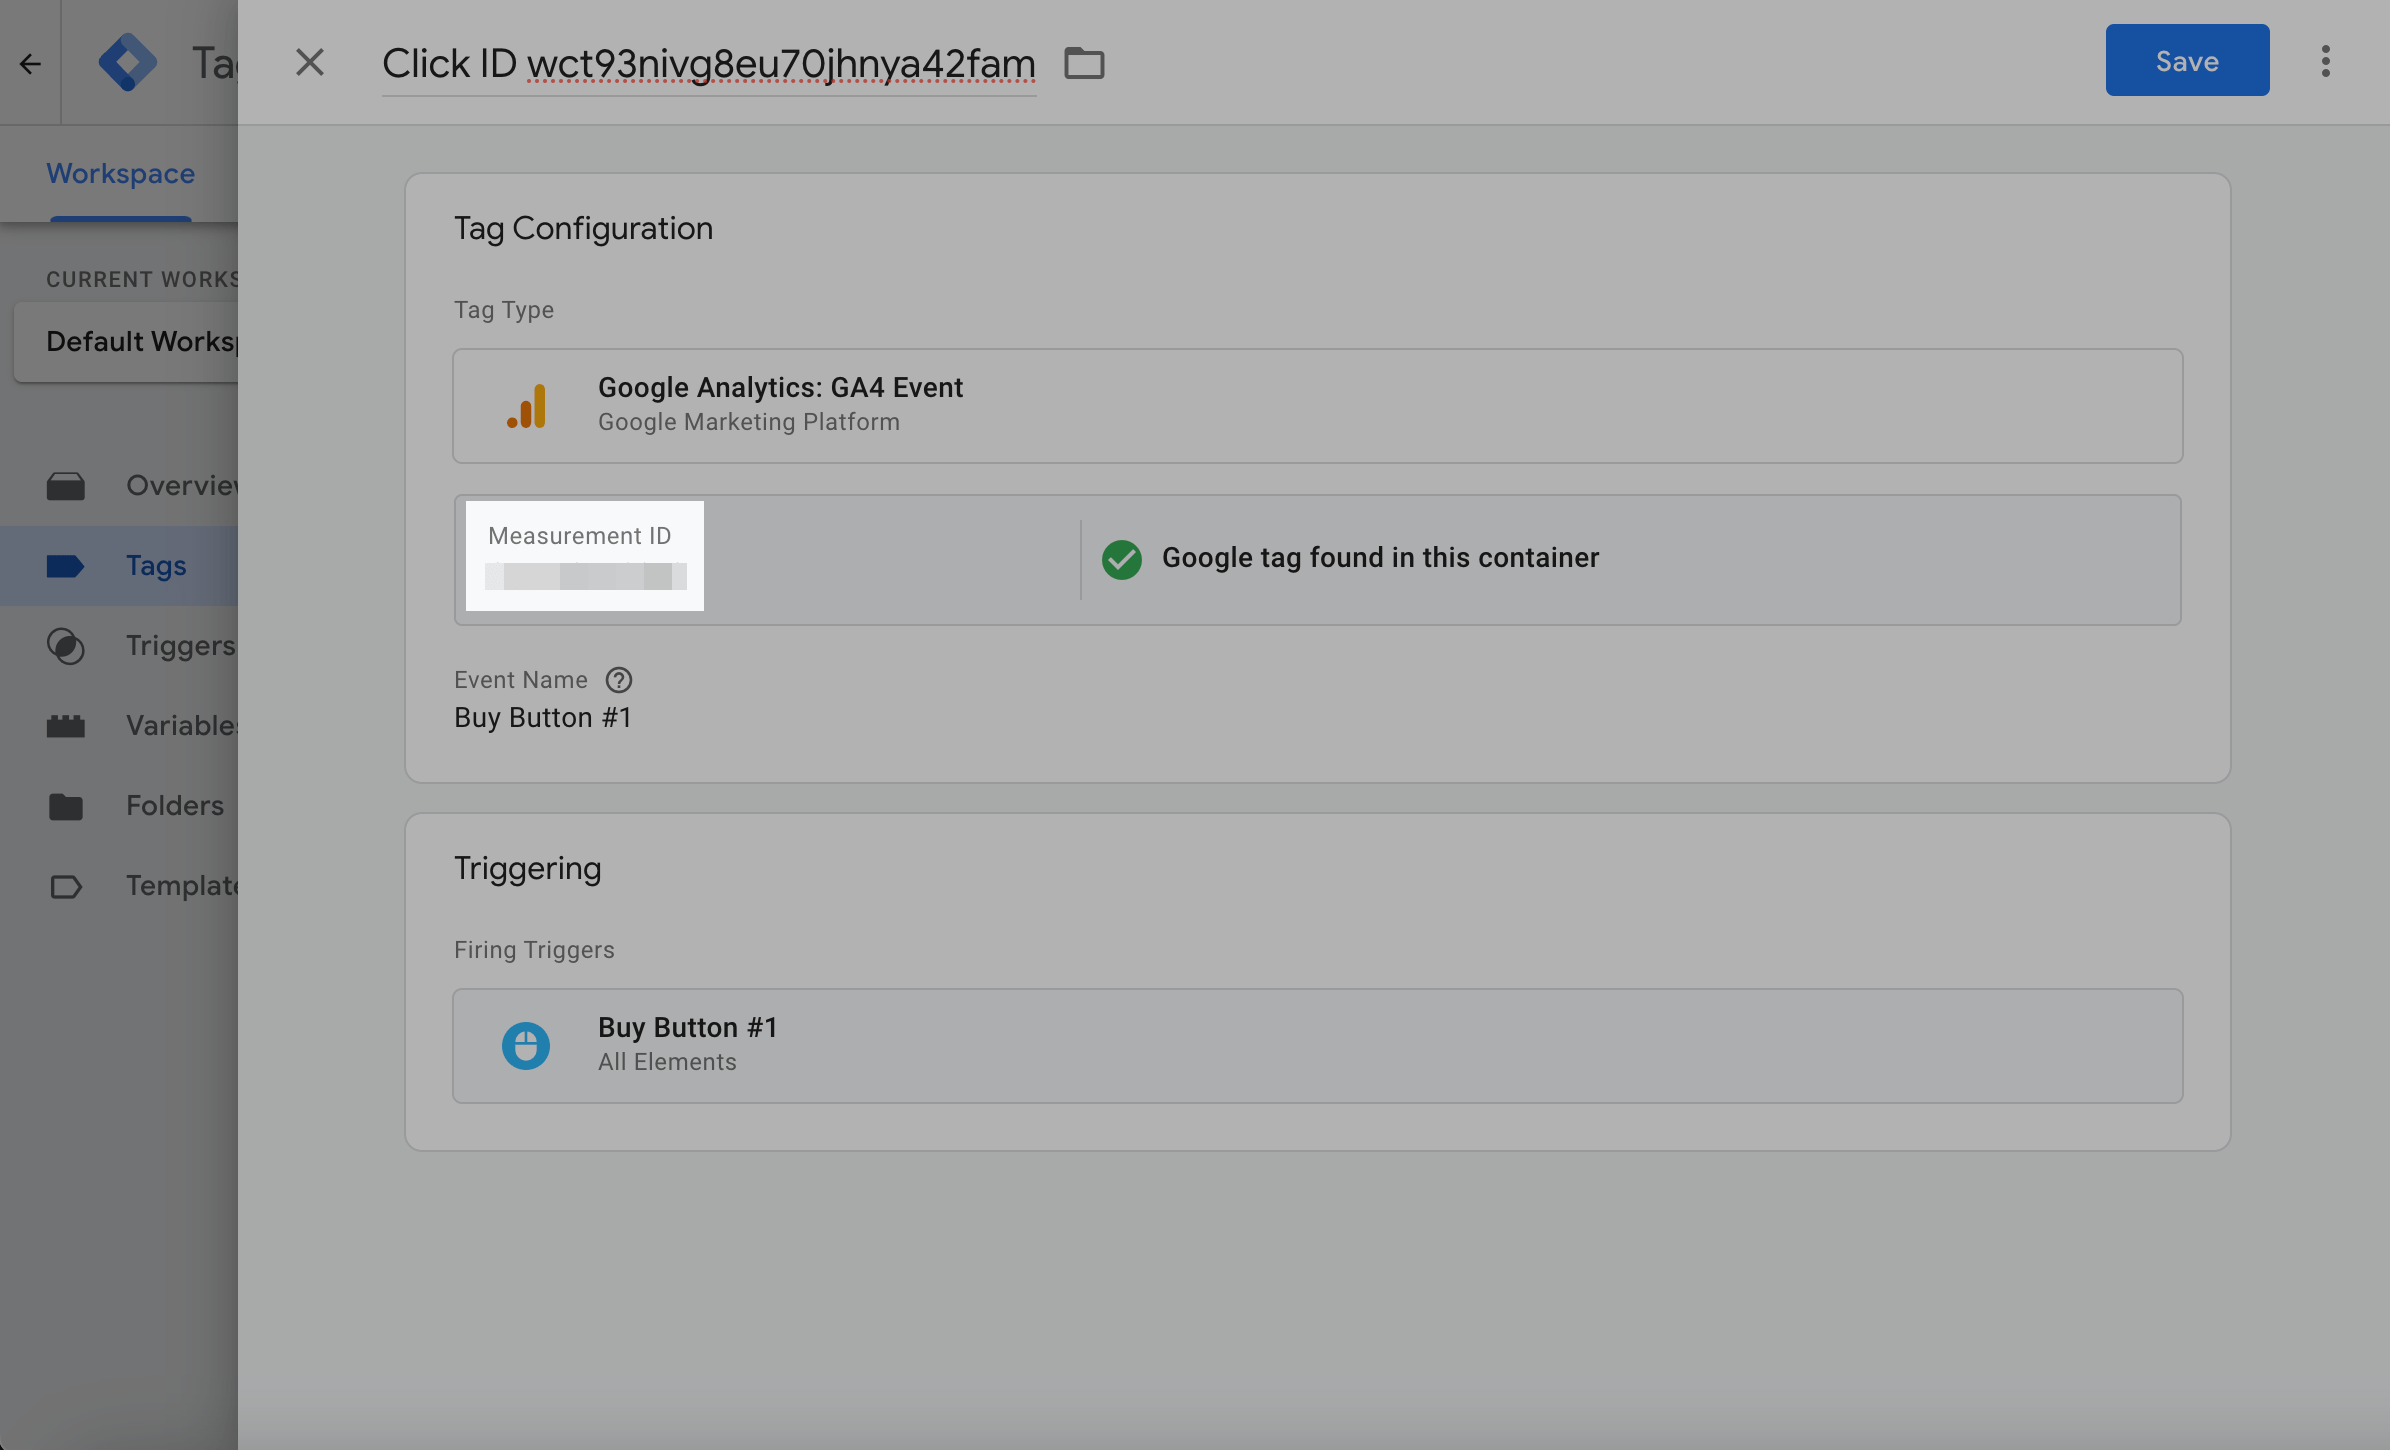
Configure a Tag
To track your trigger firing, configure a tag. In the Tags tab, click New, and select Google Analytics: GA4 Event as your tag type. Paste the Measurement ID, and enter your event name. Choose your trigger, and click Save.
Read more: [GA4] Measurement ID.
View the Result
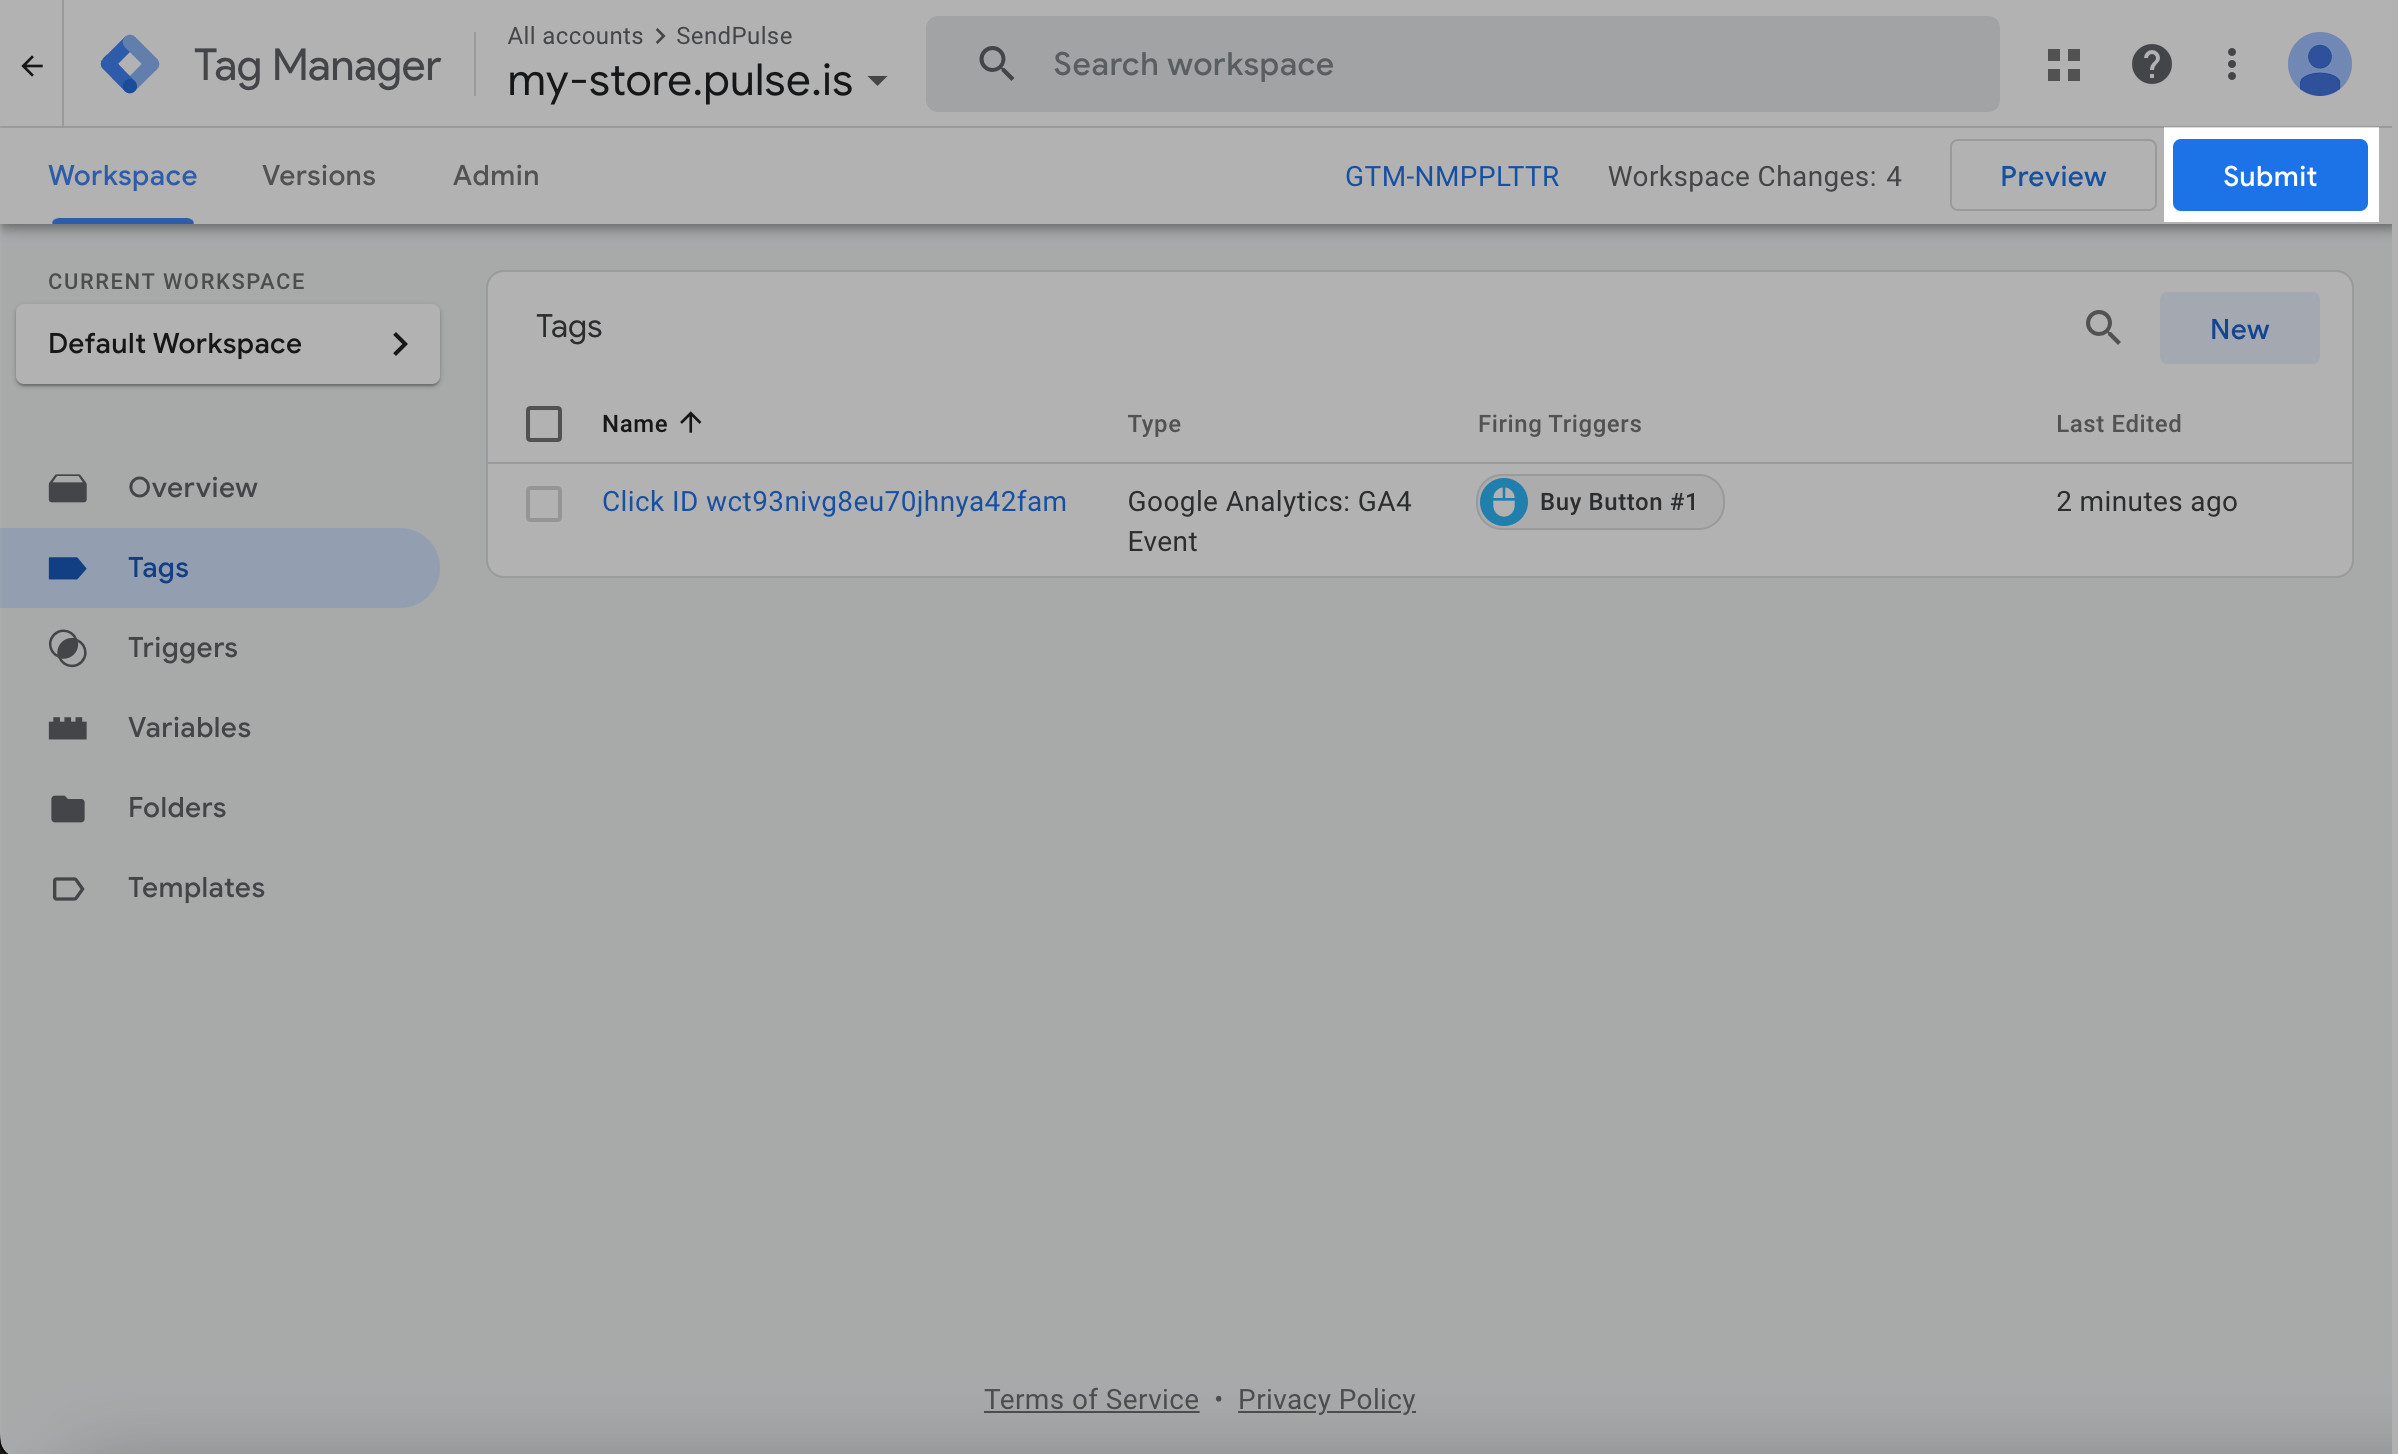
Click Submit to publish changes, name the version, and click Publish.
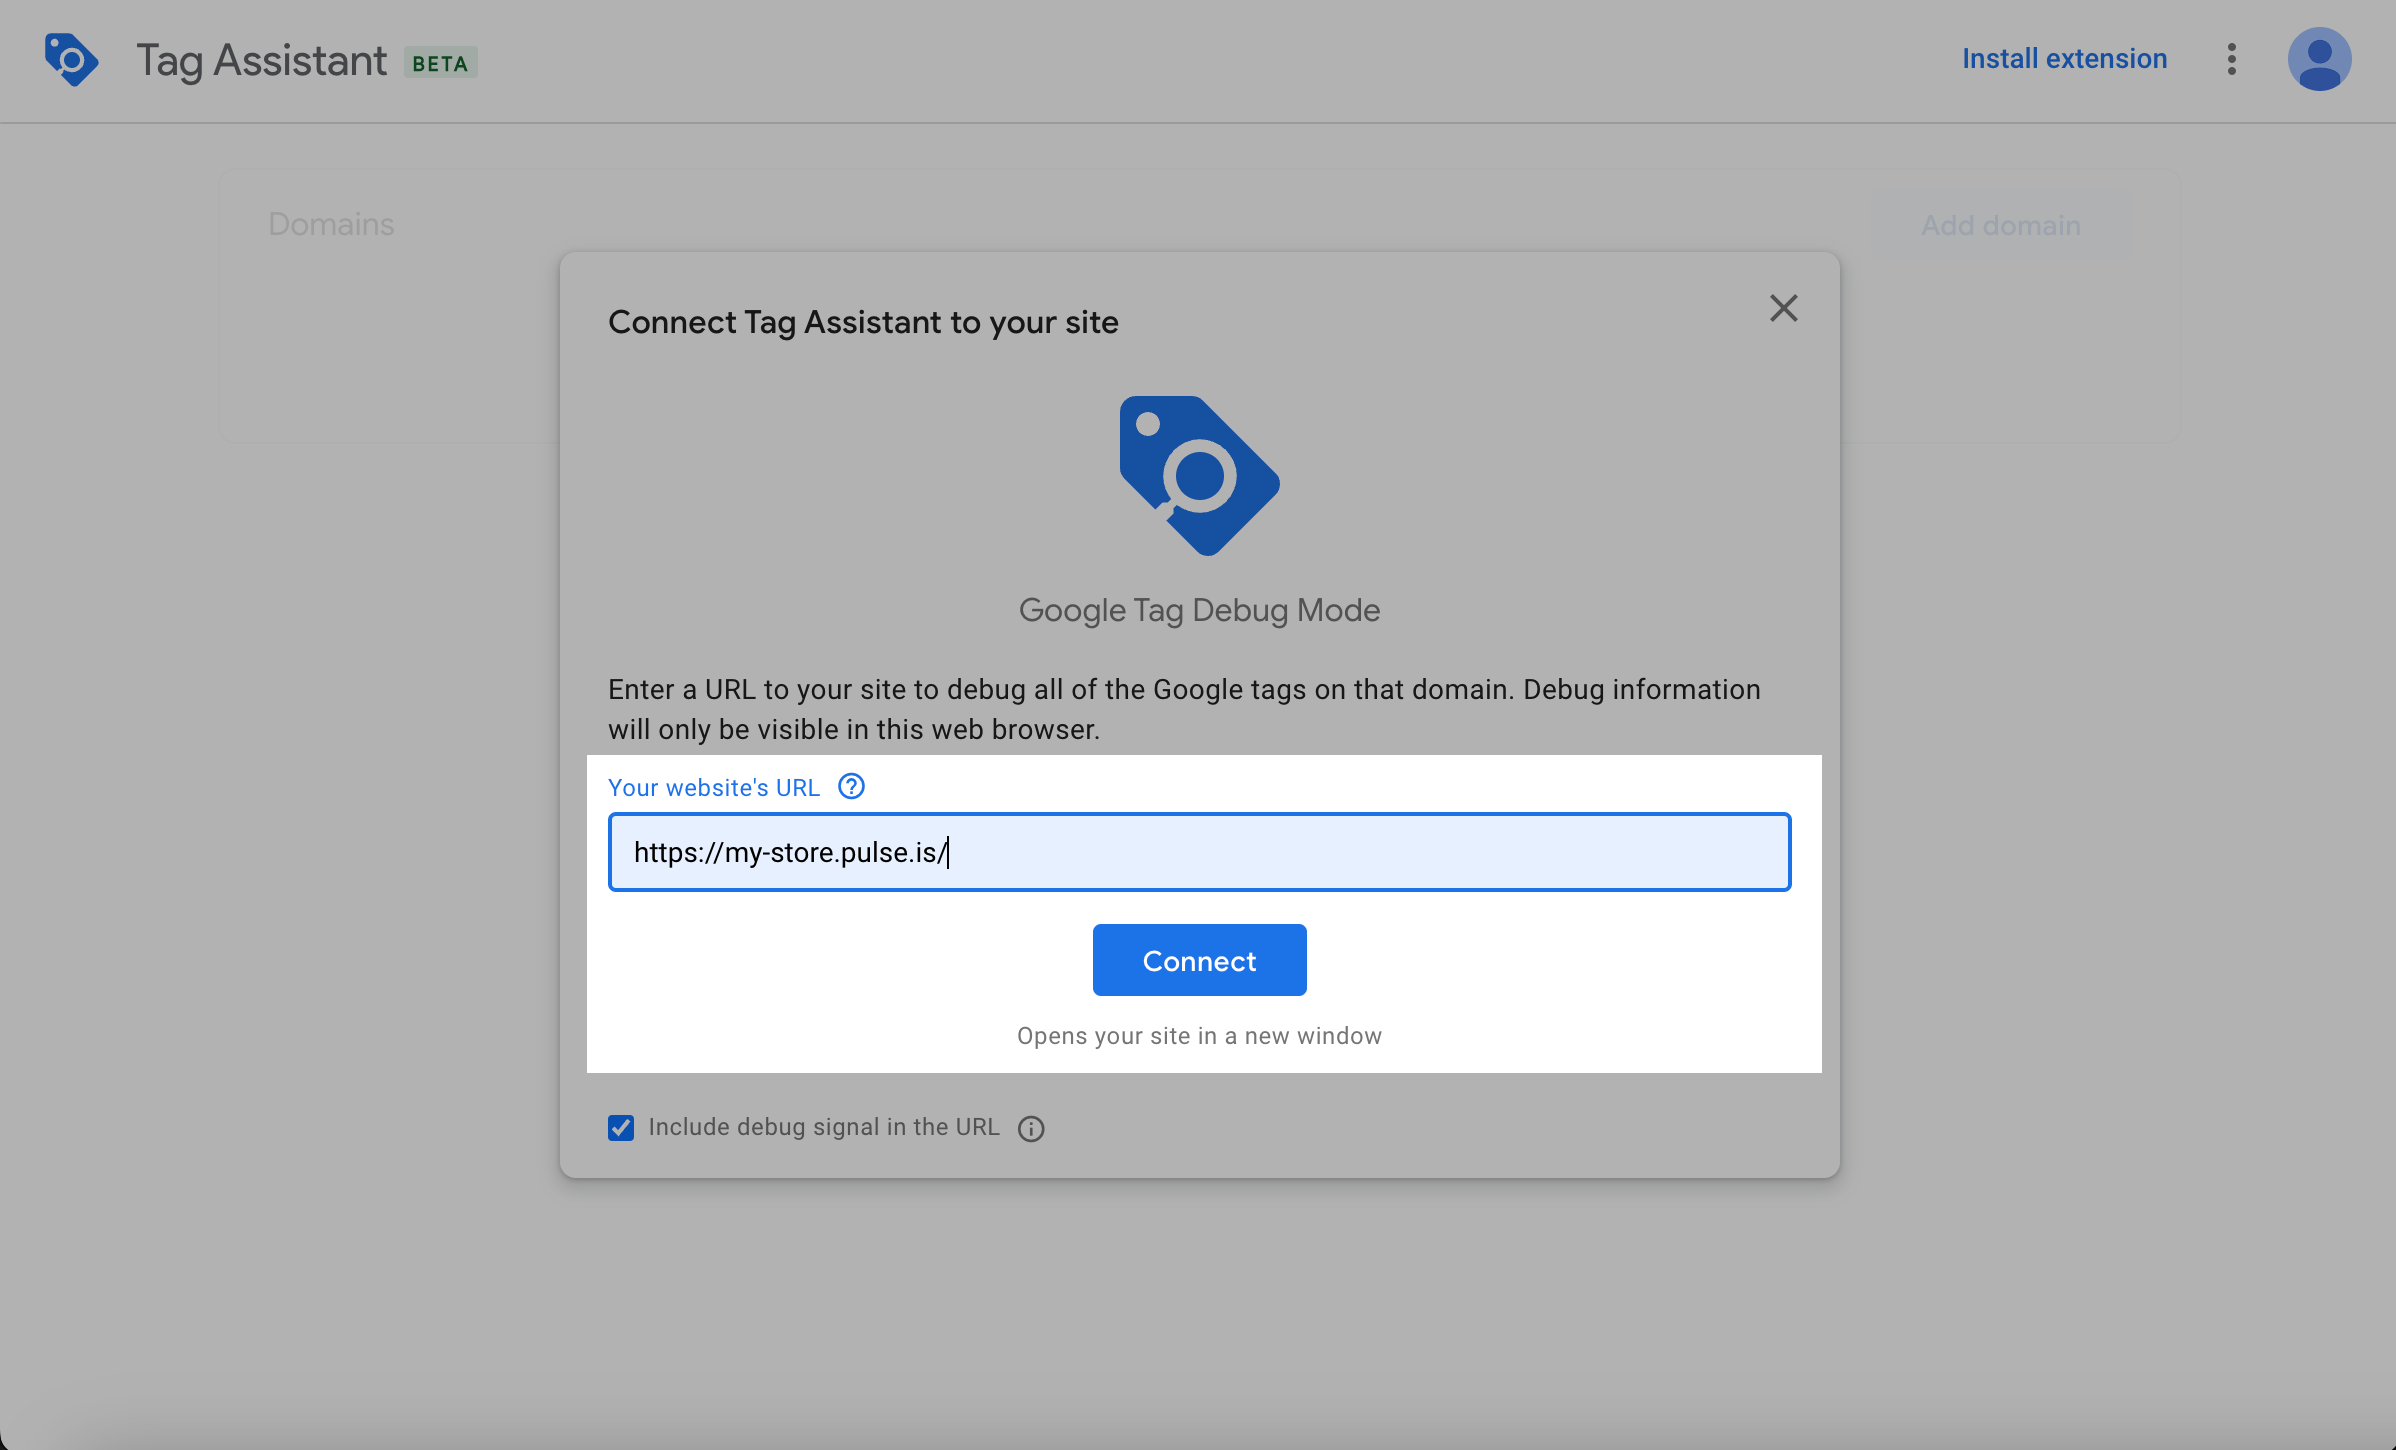
Click Preview, enter your website URL, and click Connect.
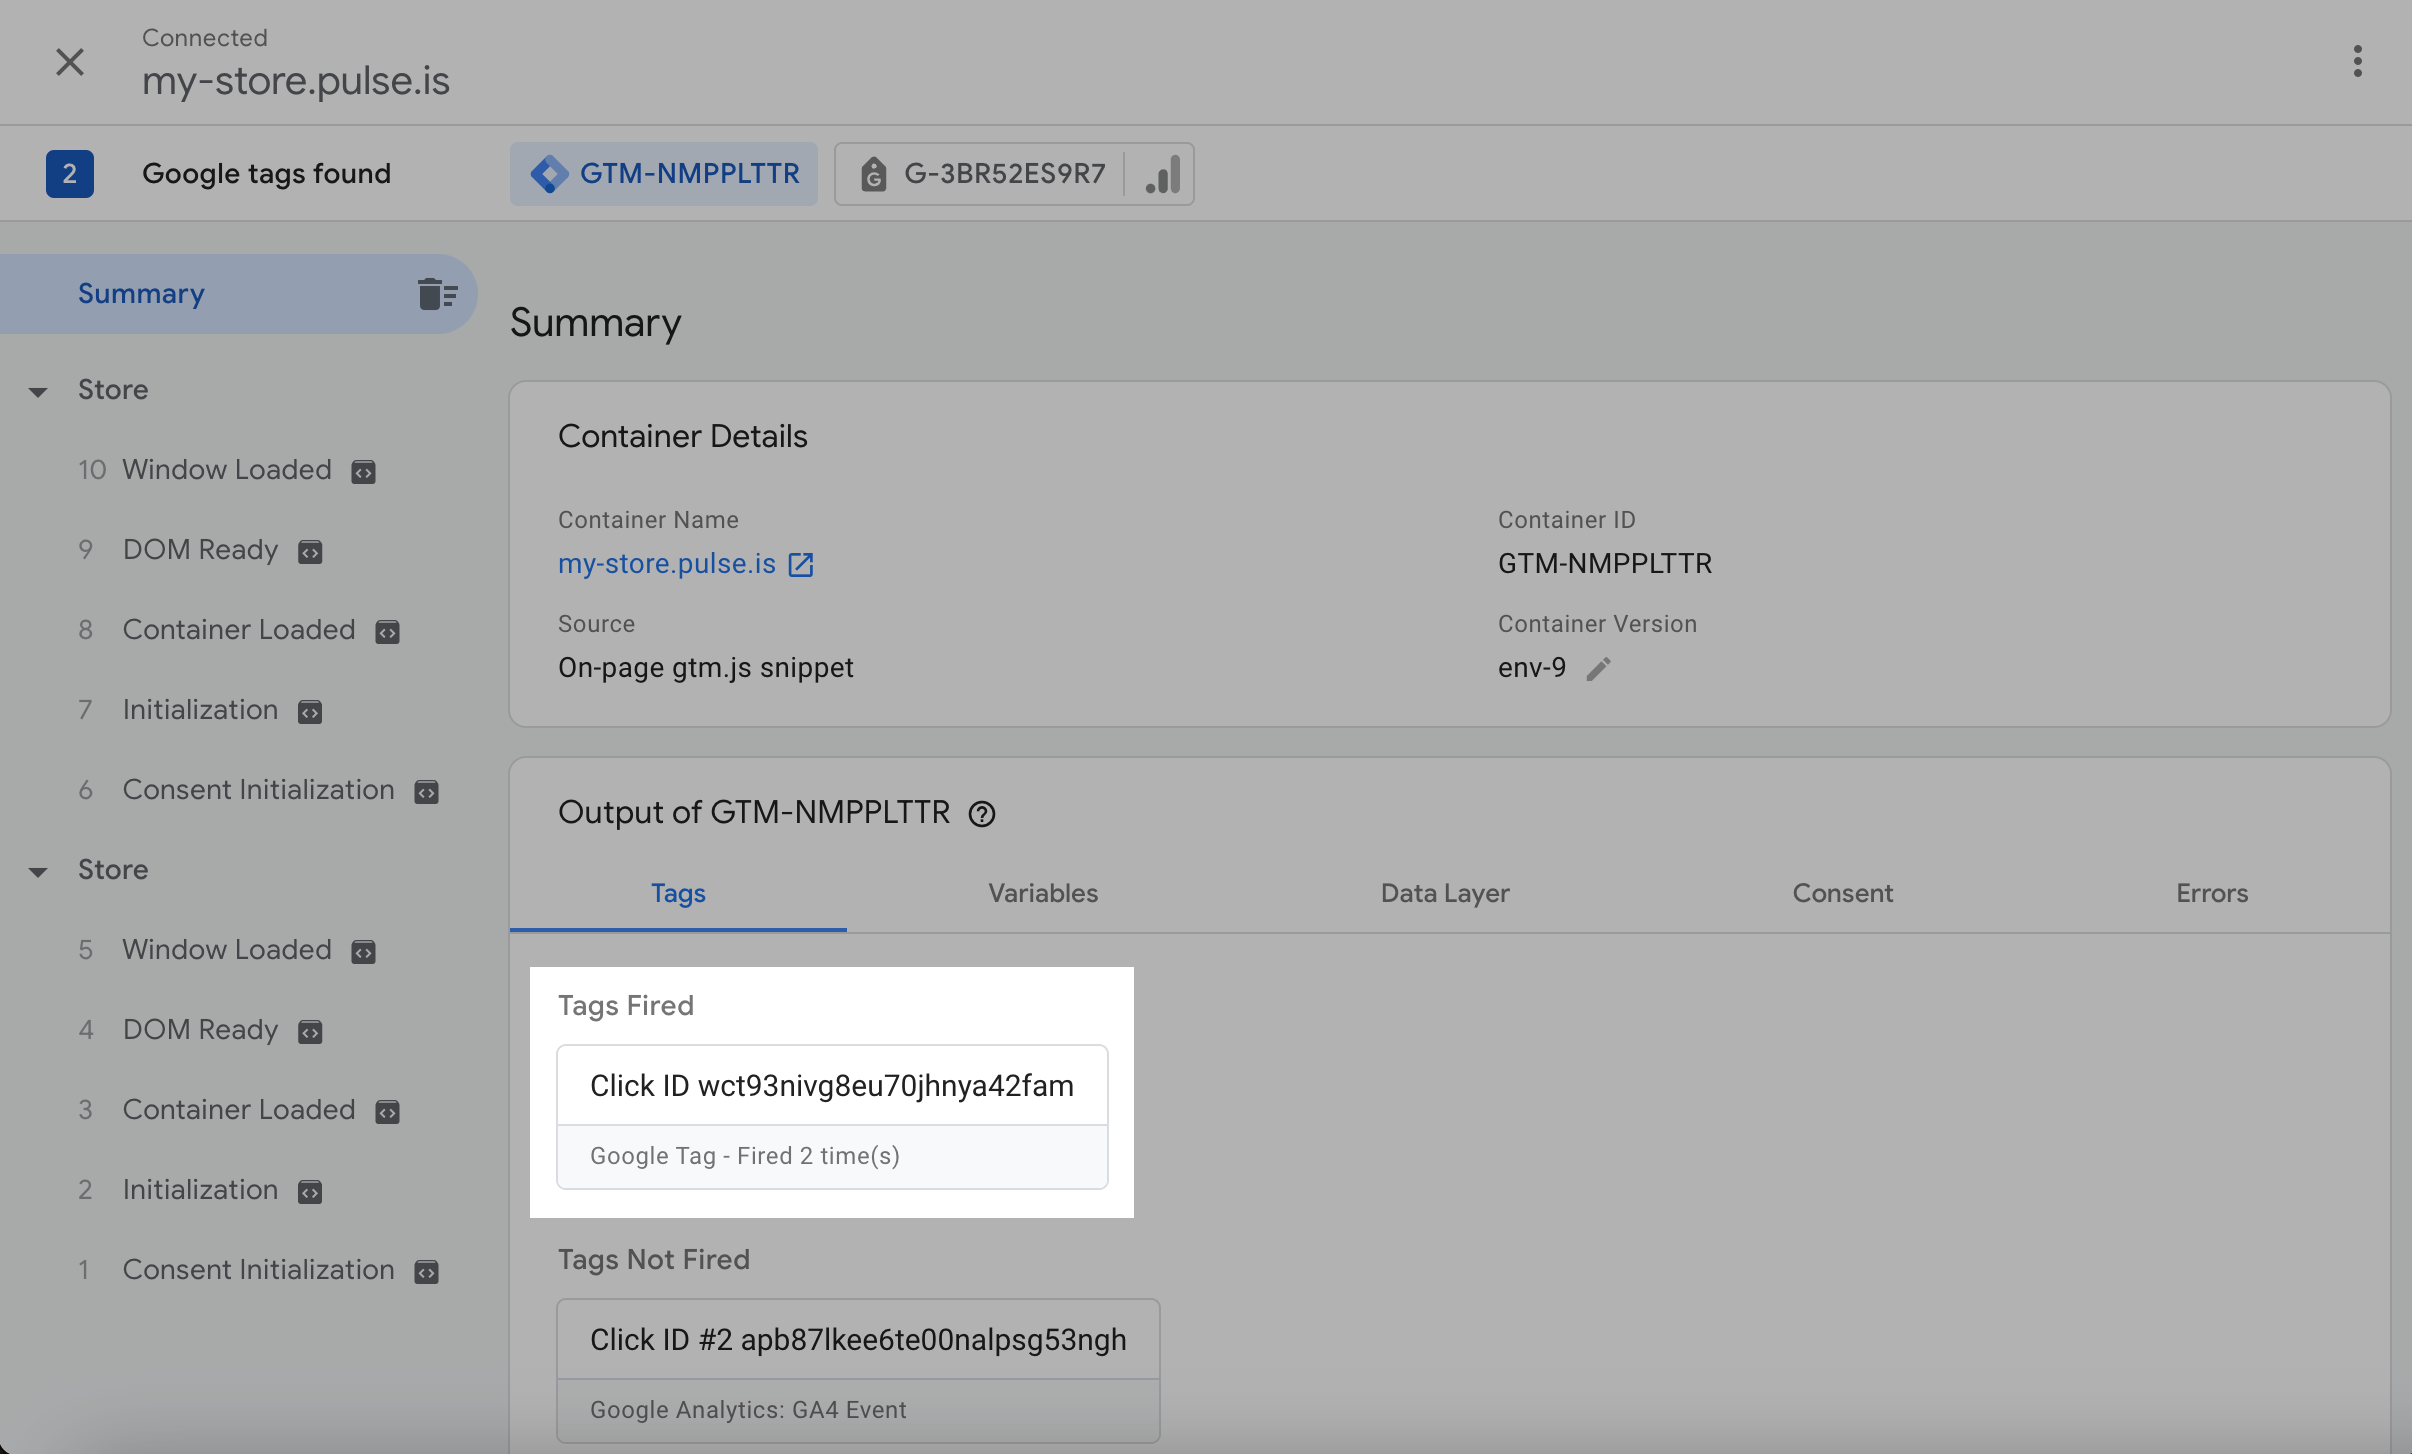
Once the Tag Assistant is connected, check if your tag is listed in the Summary tab under Tags Fired.
Last Updated: 27.12.2023
or