Send an Instagram chatbot campaign
Campaigns on Instagram are a way to promote your brand or company to reach a larger and more targeted audience. In SendPulse, you can send campaigns on Instagram with text, images, cards, and payment buttons — buttons that can redirect recipients to your site or launch an automation flow for bulk notifications to your subscribers or segmented group.
Instagram chatbot subscribers are users who followed a link to your bot and messaged your business page in direct messages.
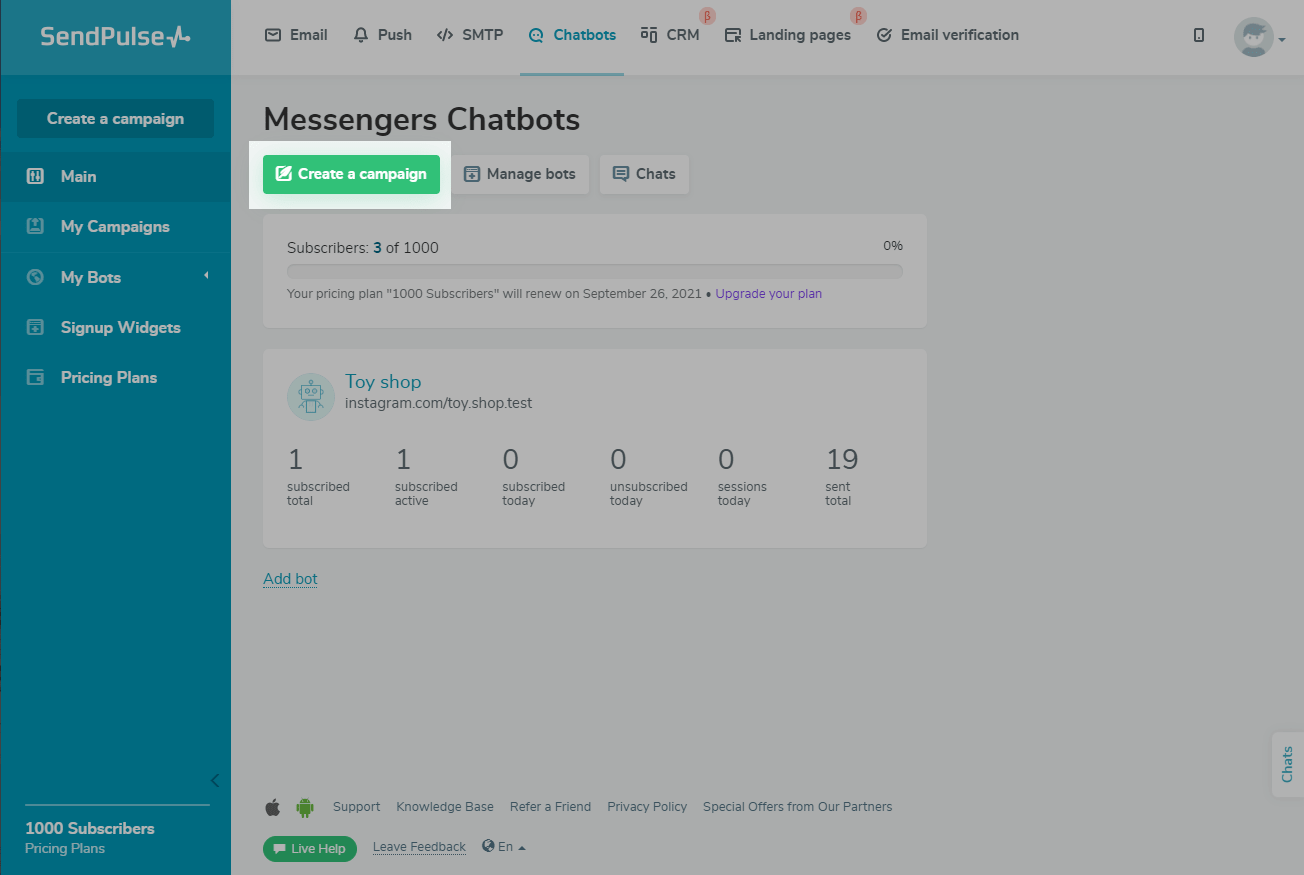
To create a campaign, in the Chatbots section, go to the Main tab, and click the Create a campaign.
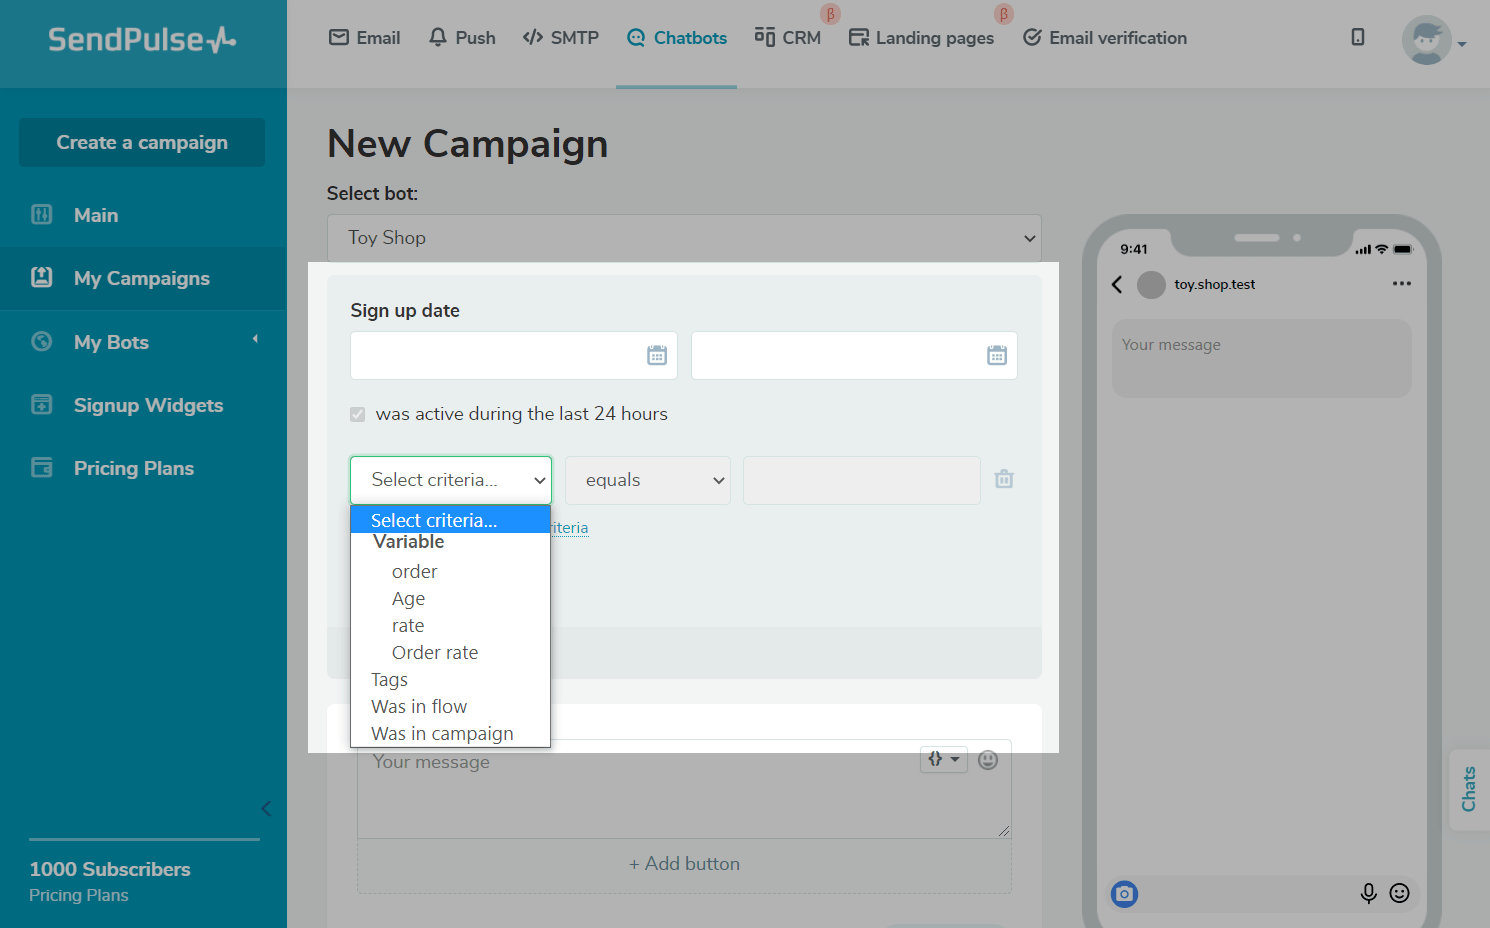
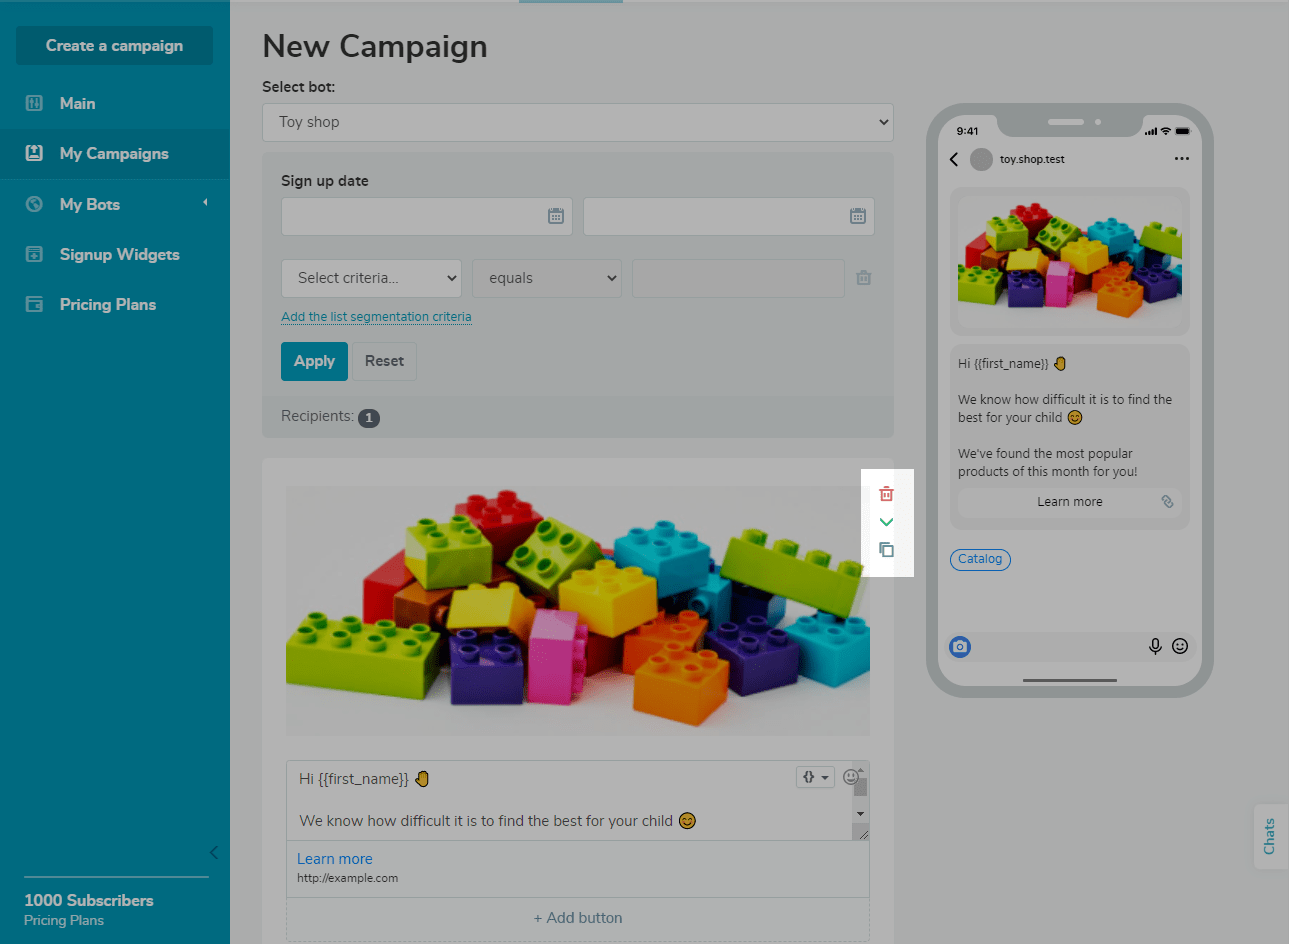
Choose your bot
Choose a previously connected bot from the drop-down list. The campaign will be sent to that chatbot’s audience list.
Please note that the campaign is sent to all subscribers who have interacted with the bot in the last 24 hours.

Segment your audience
If you need to filter your recipients, tick the Segment recipients checkbox. Your campaign will only be sent to recipients who meet your segmentation criteria.
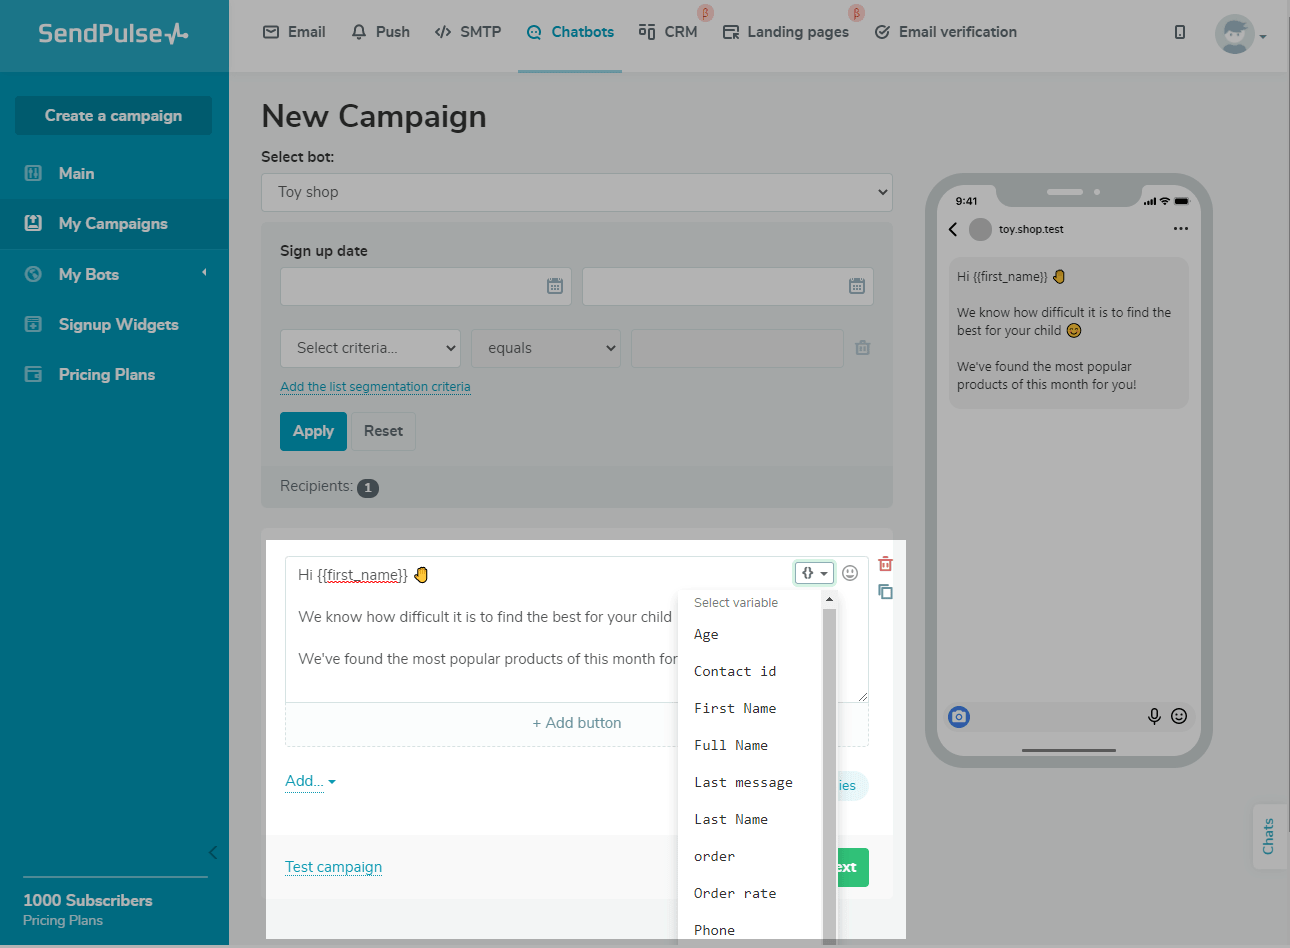
Write message text
Enter your text in the text field. The limit for one text element is 512 characters. If you use buttons in your message, add only up to 80 characters.
You can add variables and emoji here too. To add a variable click on the {} in the right corner of the text field and choose a variable from the drop-down menu. Each user will receive a message that includes the value of the given variable filled in based on their contact info in your audience list. With variables, you can make your messages more appealing by including the recipient’s name and information about their registration or order.
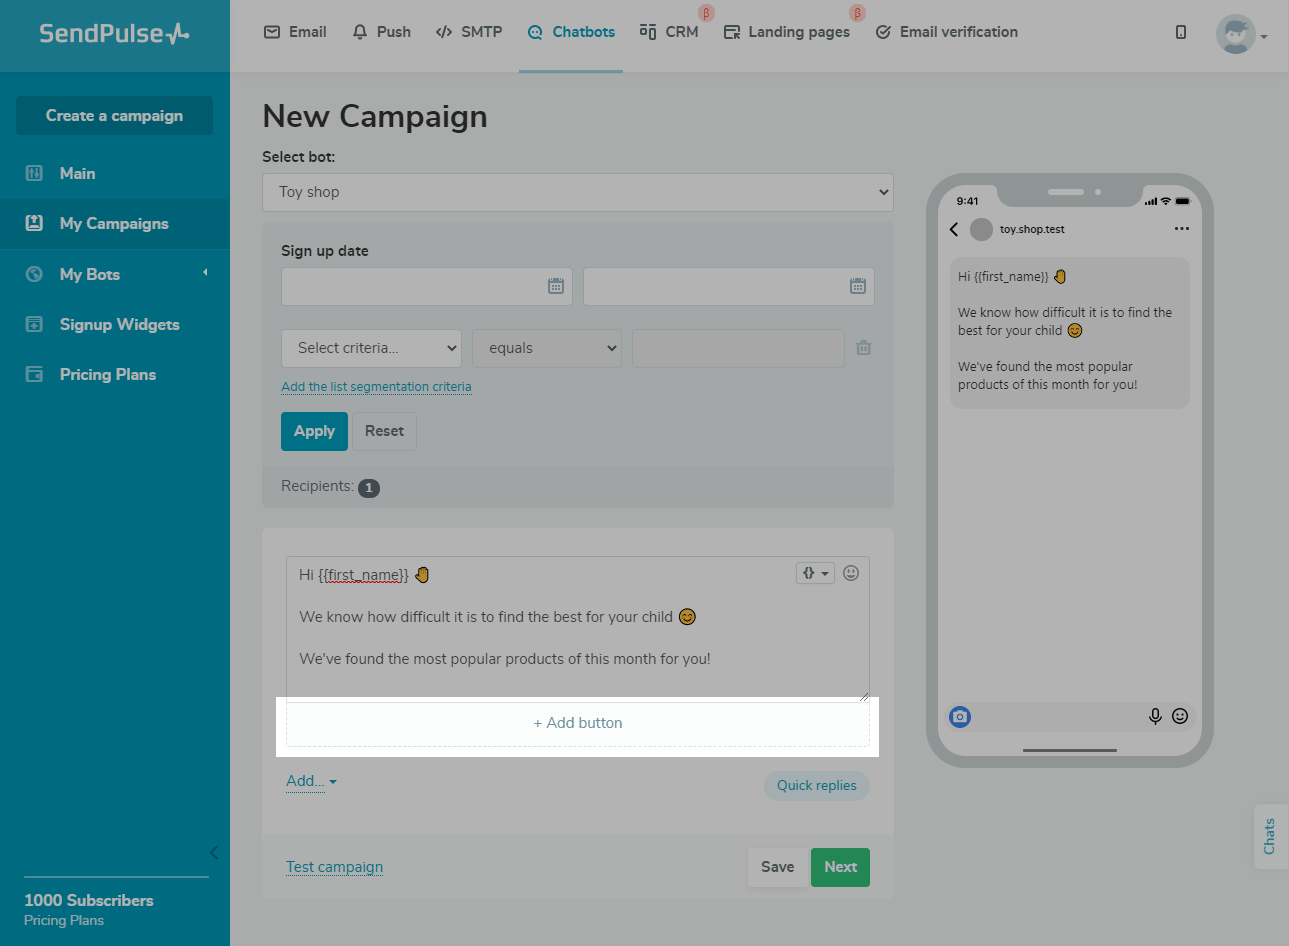
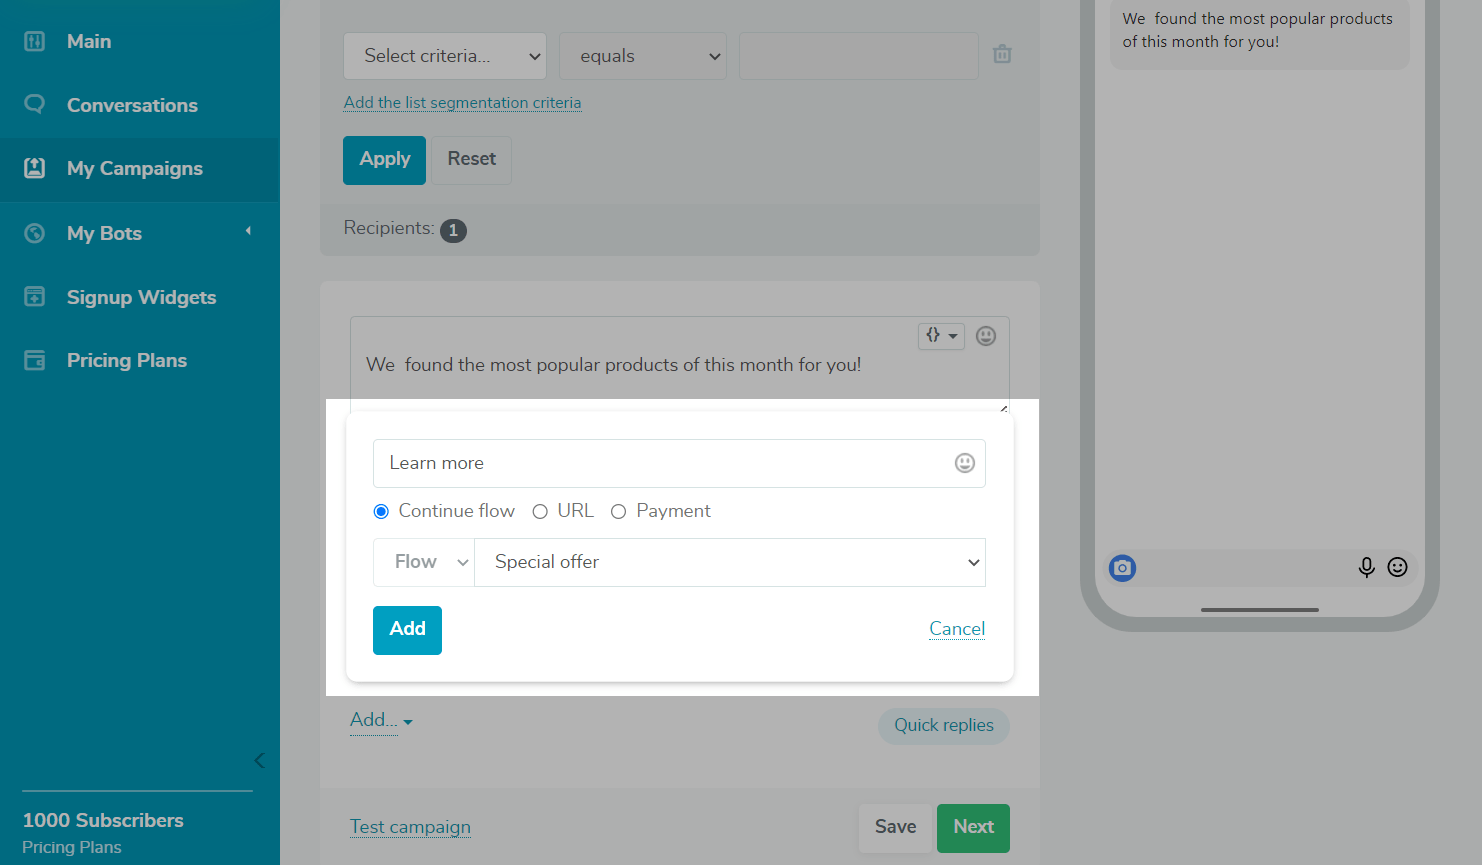
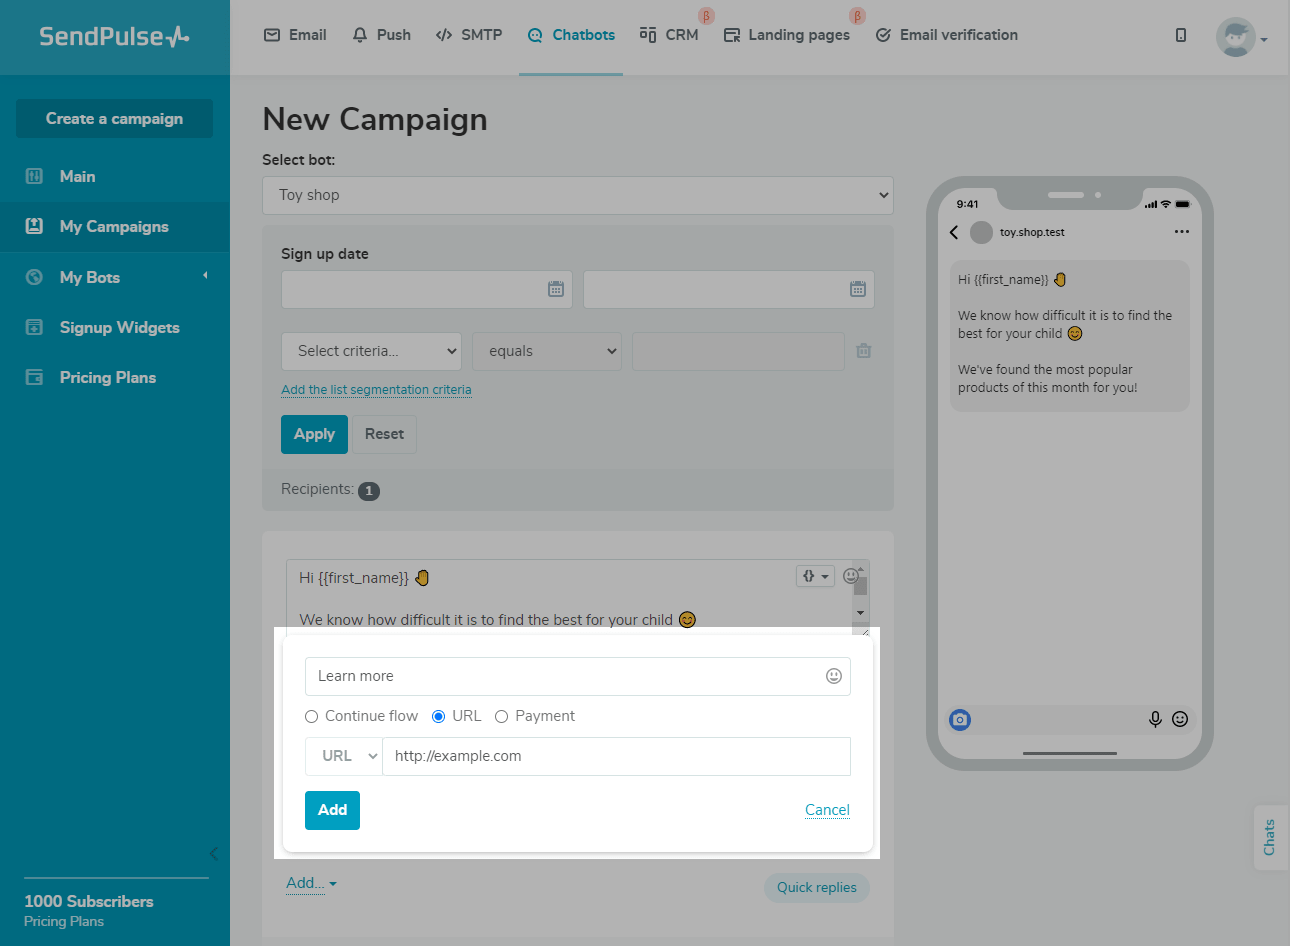
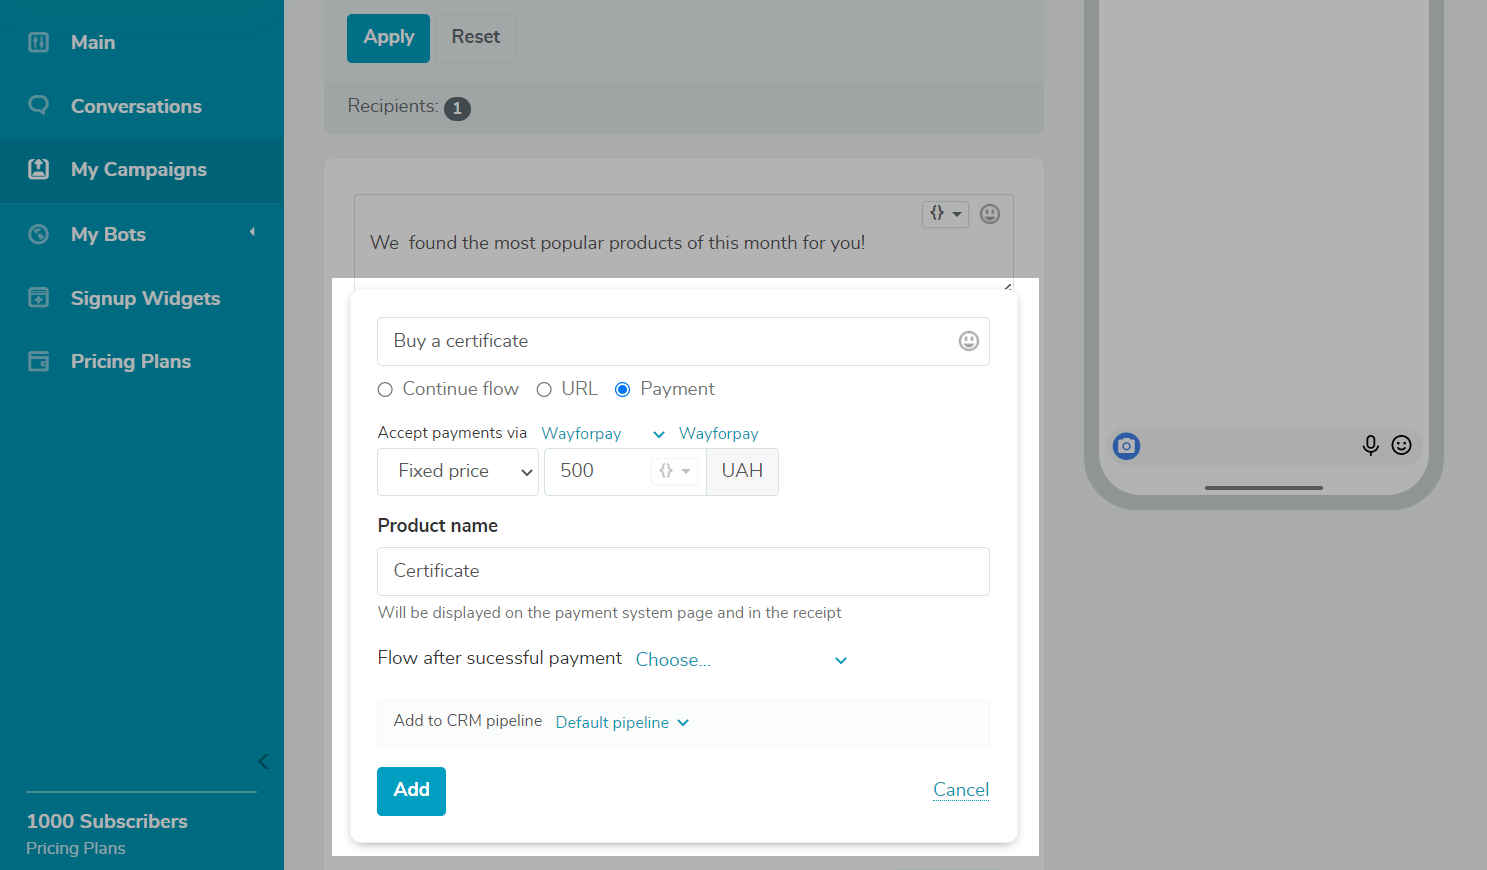
Add a button
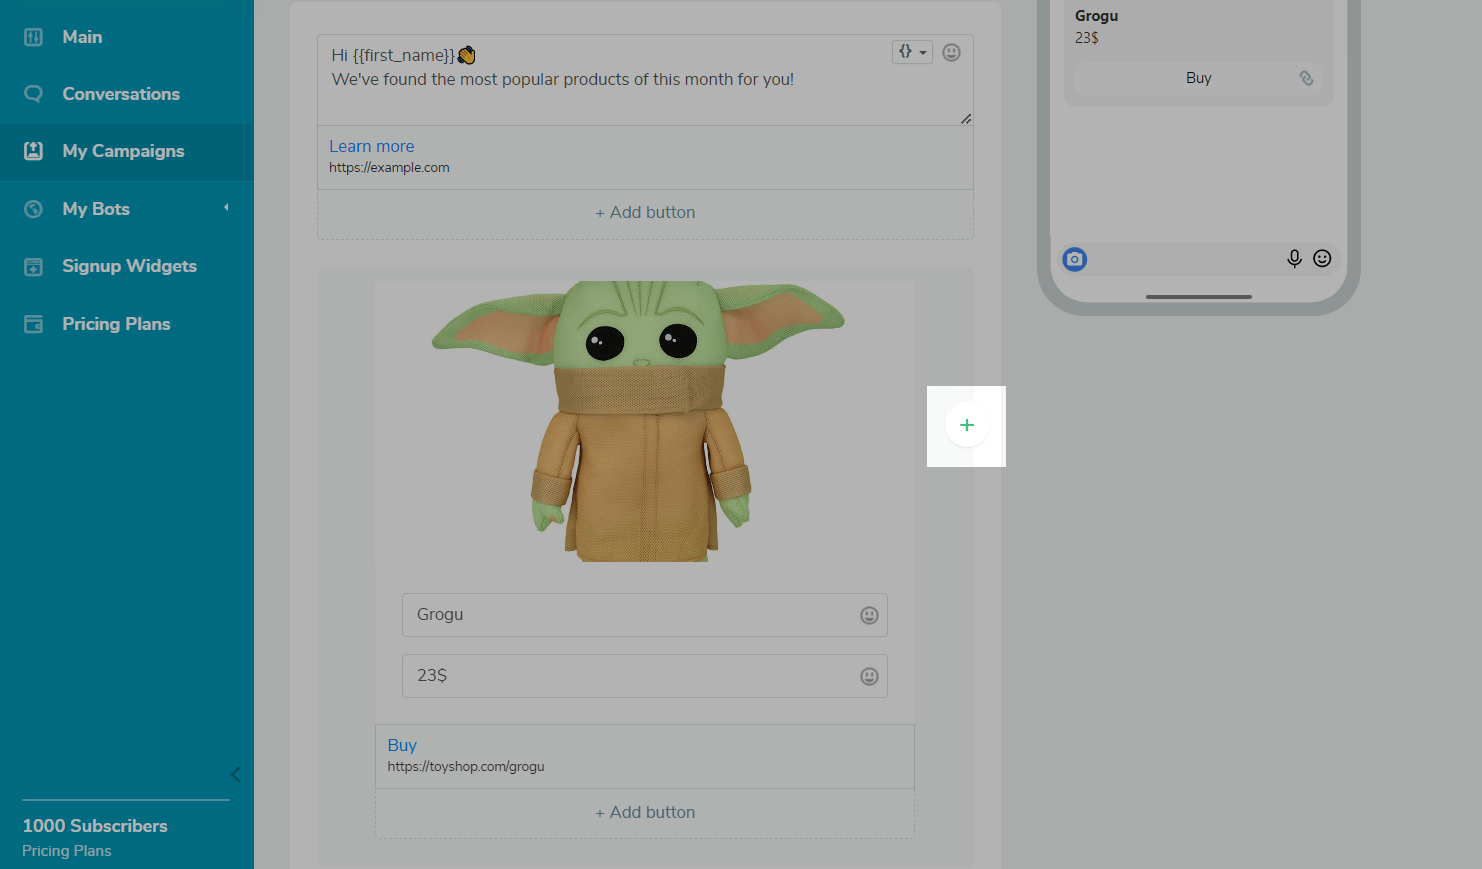
You can add a button with a link to your external resources, link to start a flow, or a link to payment. You can add it under a text element or any other element.
Click +Add button.
Continue the flow
Select the Continue flow button type, write a button text, and flow that will be sent when a user clicks the button.
Link
Select the URL button type and add a link.
Payment
Select Payment and enter the amount and method of payment. For the payment button, you can select the pipeline that the user goes to after initiating a payment.
You can also choose a flow that will be launched to the user after successful payment. So, for example, you can inform the user about a successful payment, advise on further steps, or get feedback.
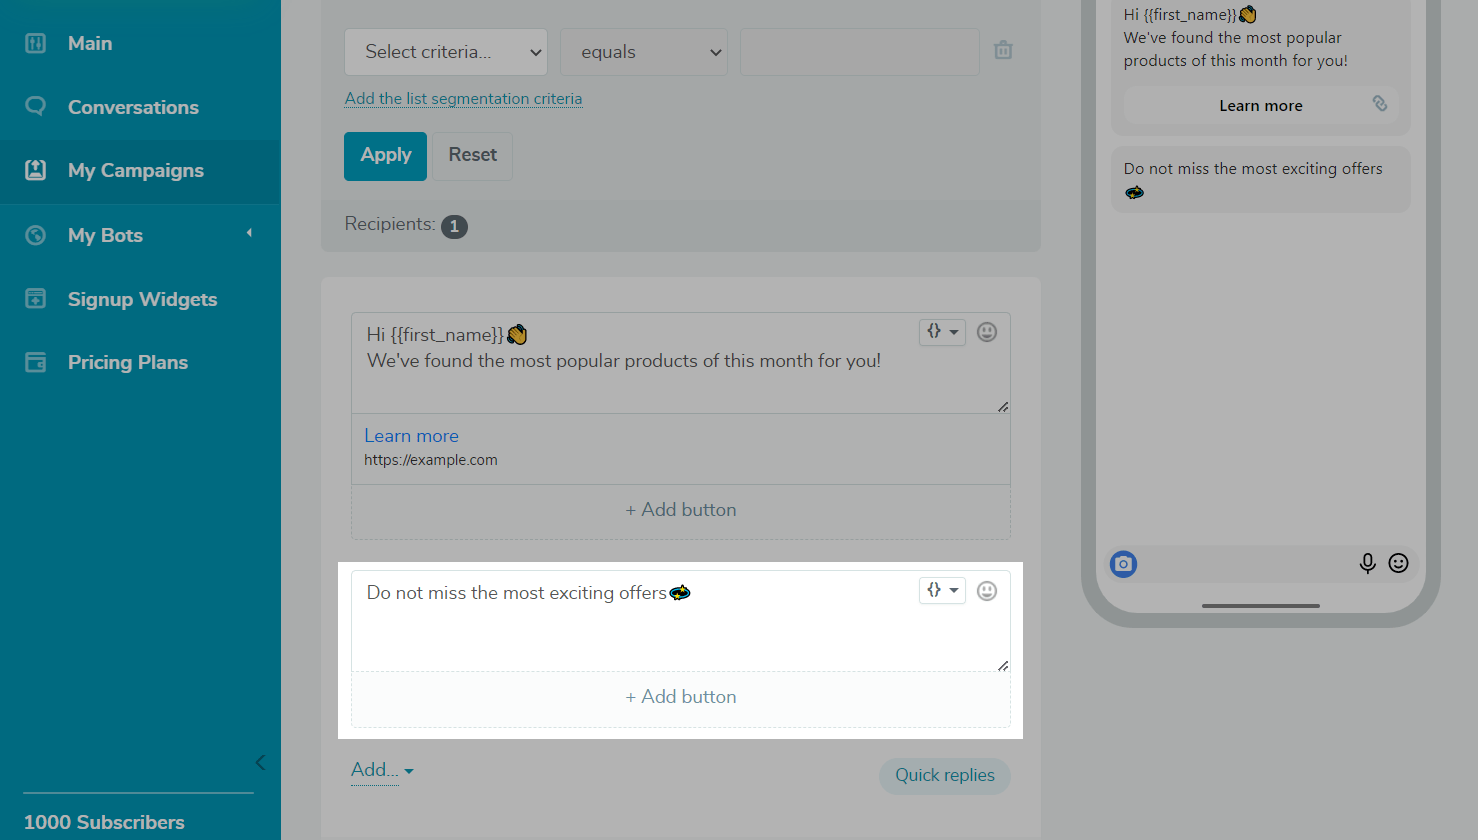
Add elements
You can add an image, card, more text, or button elements.
To do this, click Add.. and choose the element you want.

Text
You can add text that will be separated from the main message.
Image
You can add images in JPG and PNG formats up to 5 MB in size.
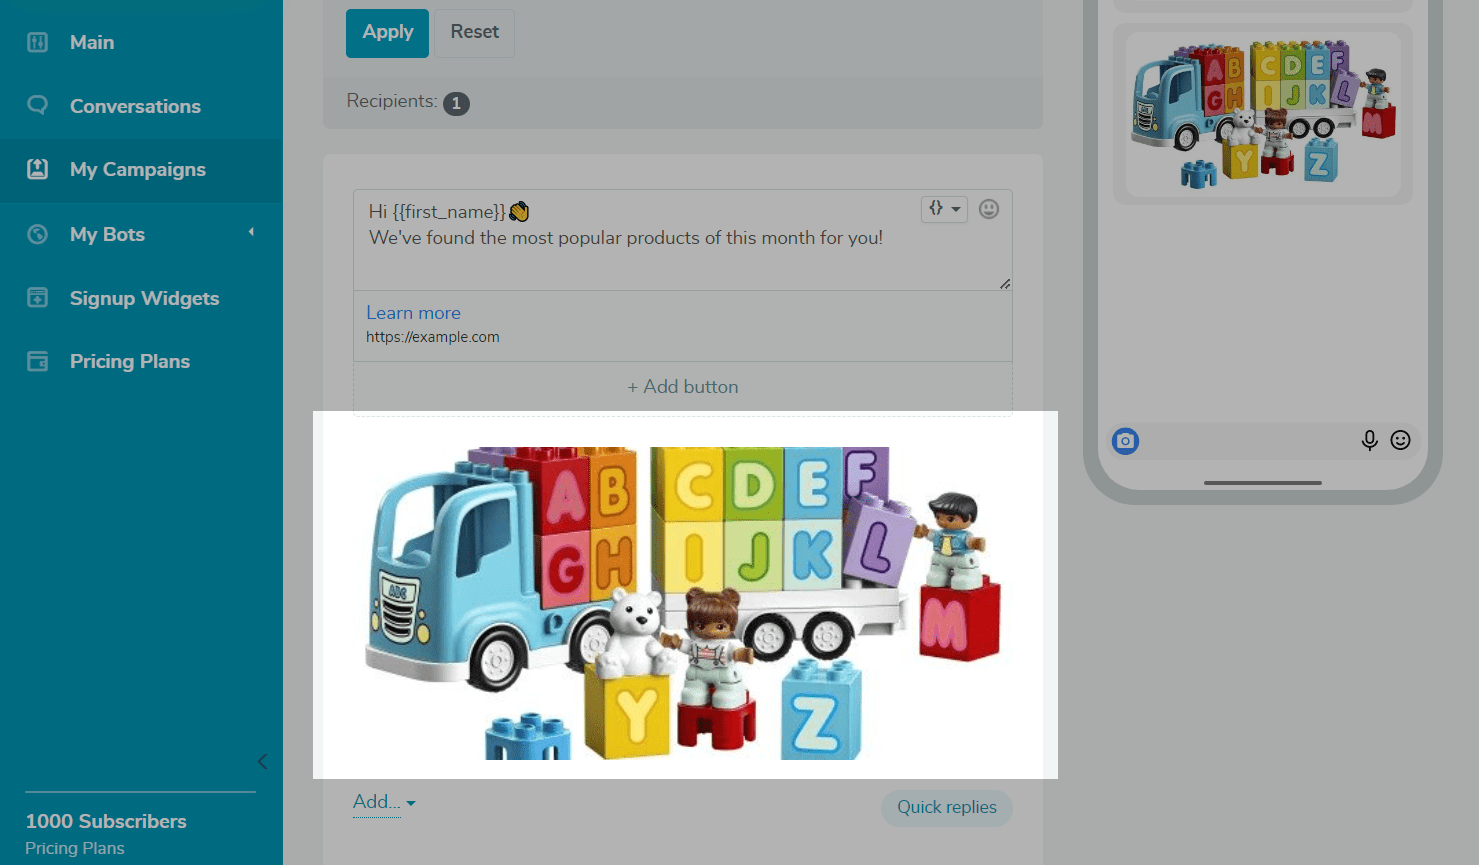
Card
You can add an image to one card, up to 80 characters to your title, up to 80 characters to the description, and 3 buttons with a link to another flow, external resource, or payment form. There can be no more than 10 cards in the carousel. To add a new one, click the plus icon on the right.
Media: Audio and Video
You can also add audio and video messages to your flow scenario. You can upload files up to 20 MB.
File formats supported:
- Audio: AAC, WAV, MP4, M4A;
- Video: MP4, AVI, MOV, WEBM.
Quick Replies
Click the Quick Replies button to add a quick reply. Enter text up to 20 characters and select the chatbot flow, which will start after selecting a button. Click the Add button.
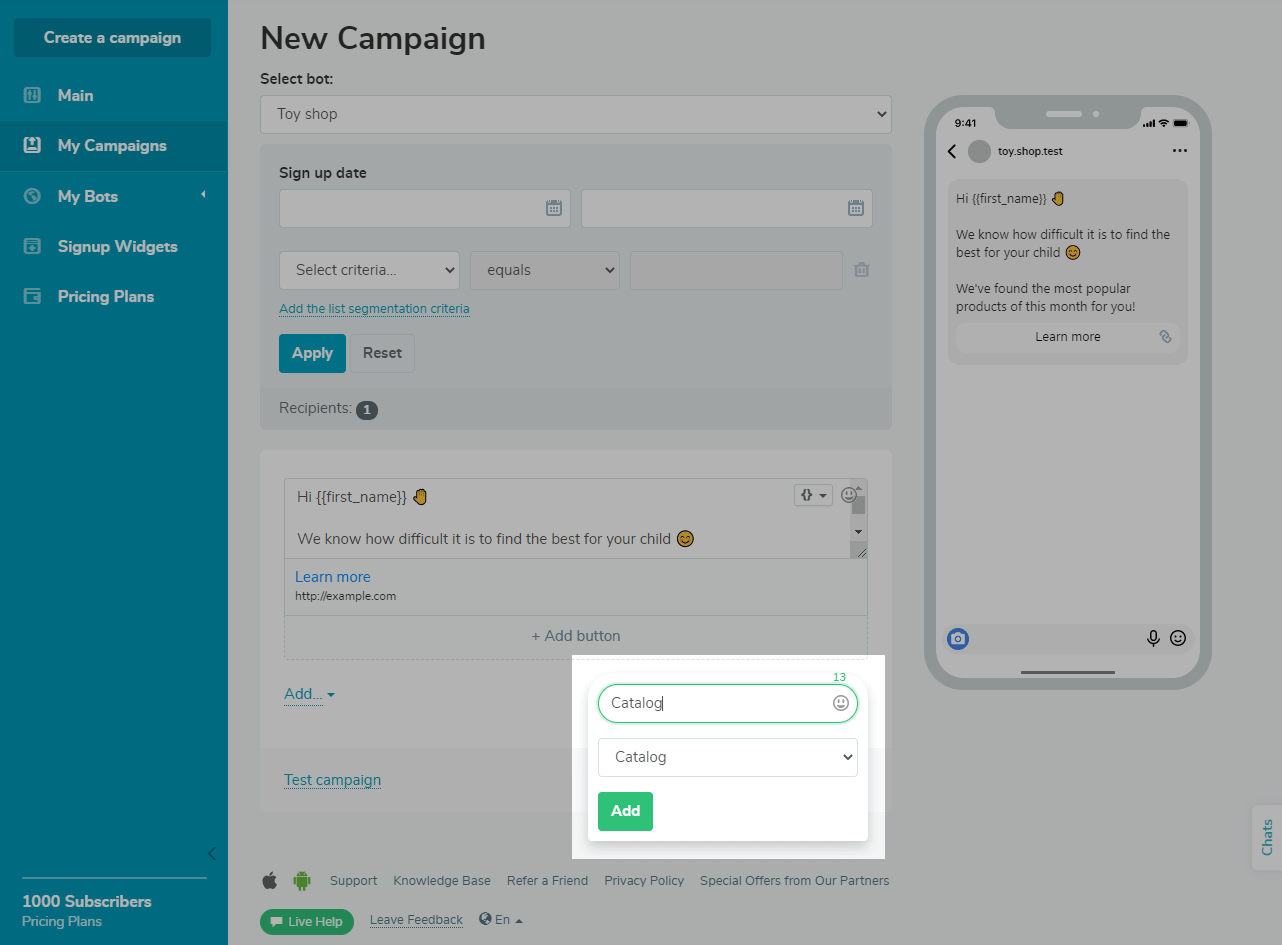
Click on the cross in the quick reply field to delete it.
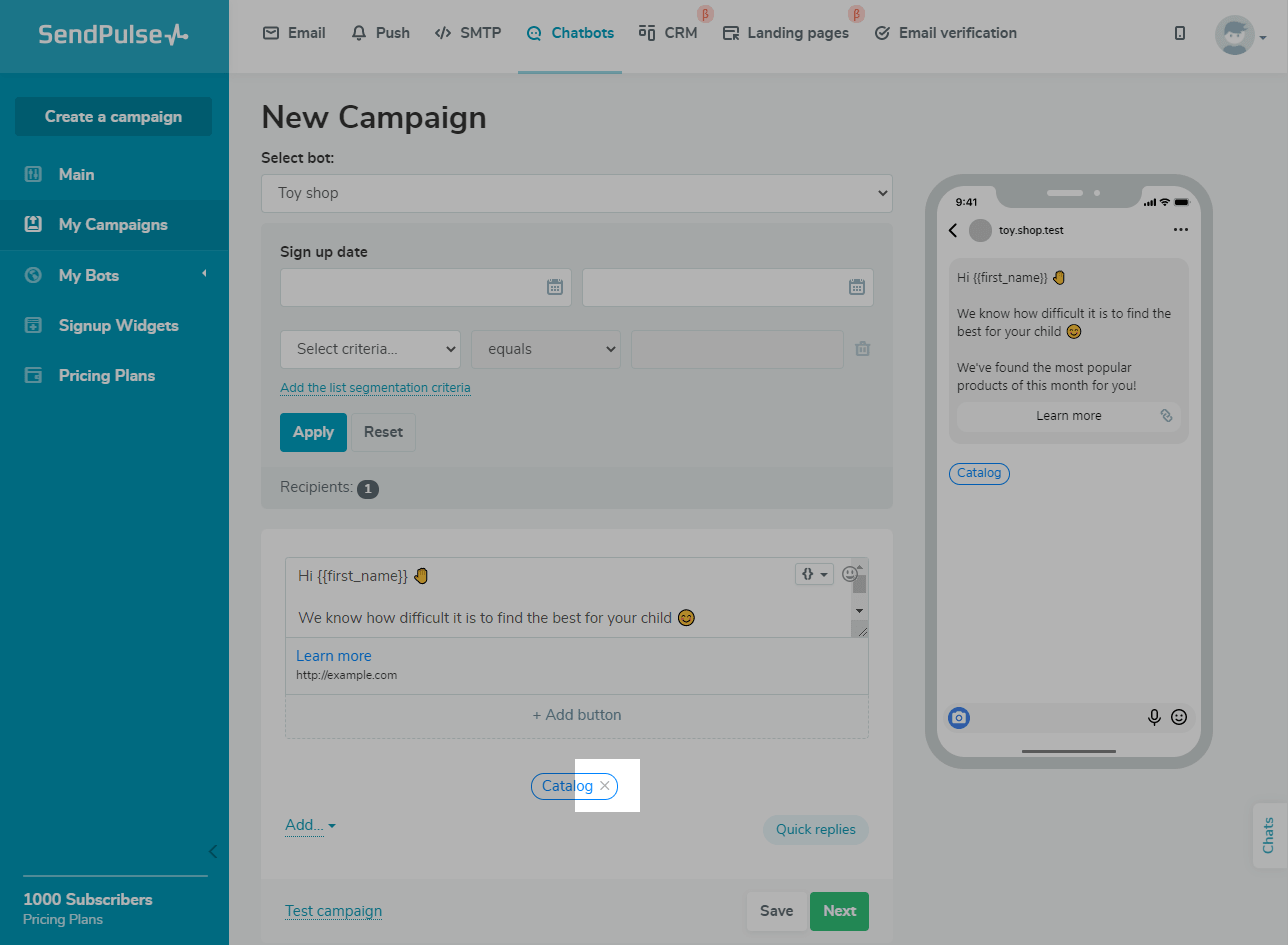
Preview your campaign
You can move elements up and down, delete, and copy them. To do this, hover over the element you want to edit and you will see a button for each function.
When you finish adding all the elements you need, you can do a test sending and see how your messages look on your device.
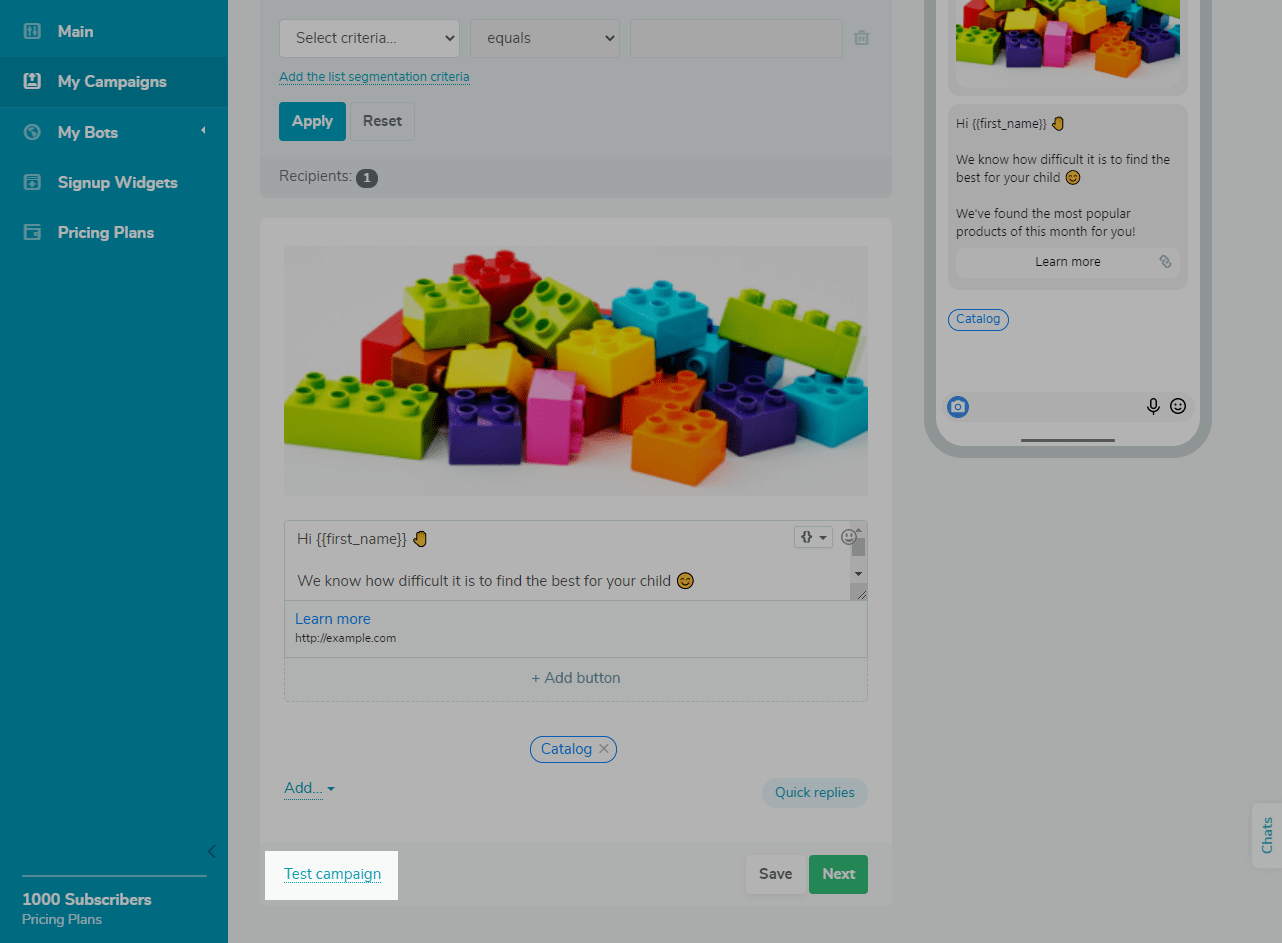
If everything is correct, click the Next button.
Choose a sending time
In the next window, you can choose a name for the campaign — only you will see it in the My campaigns list.
And, you can choose your sending time — Send now or Send later to schedule a date and time to send the campaign if you chose to send it later.
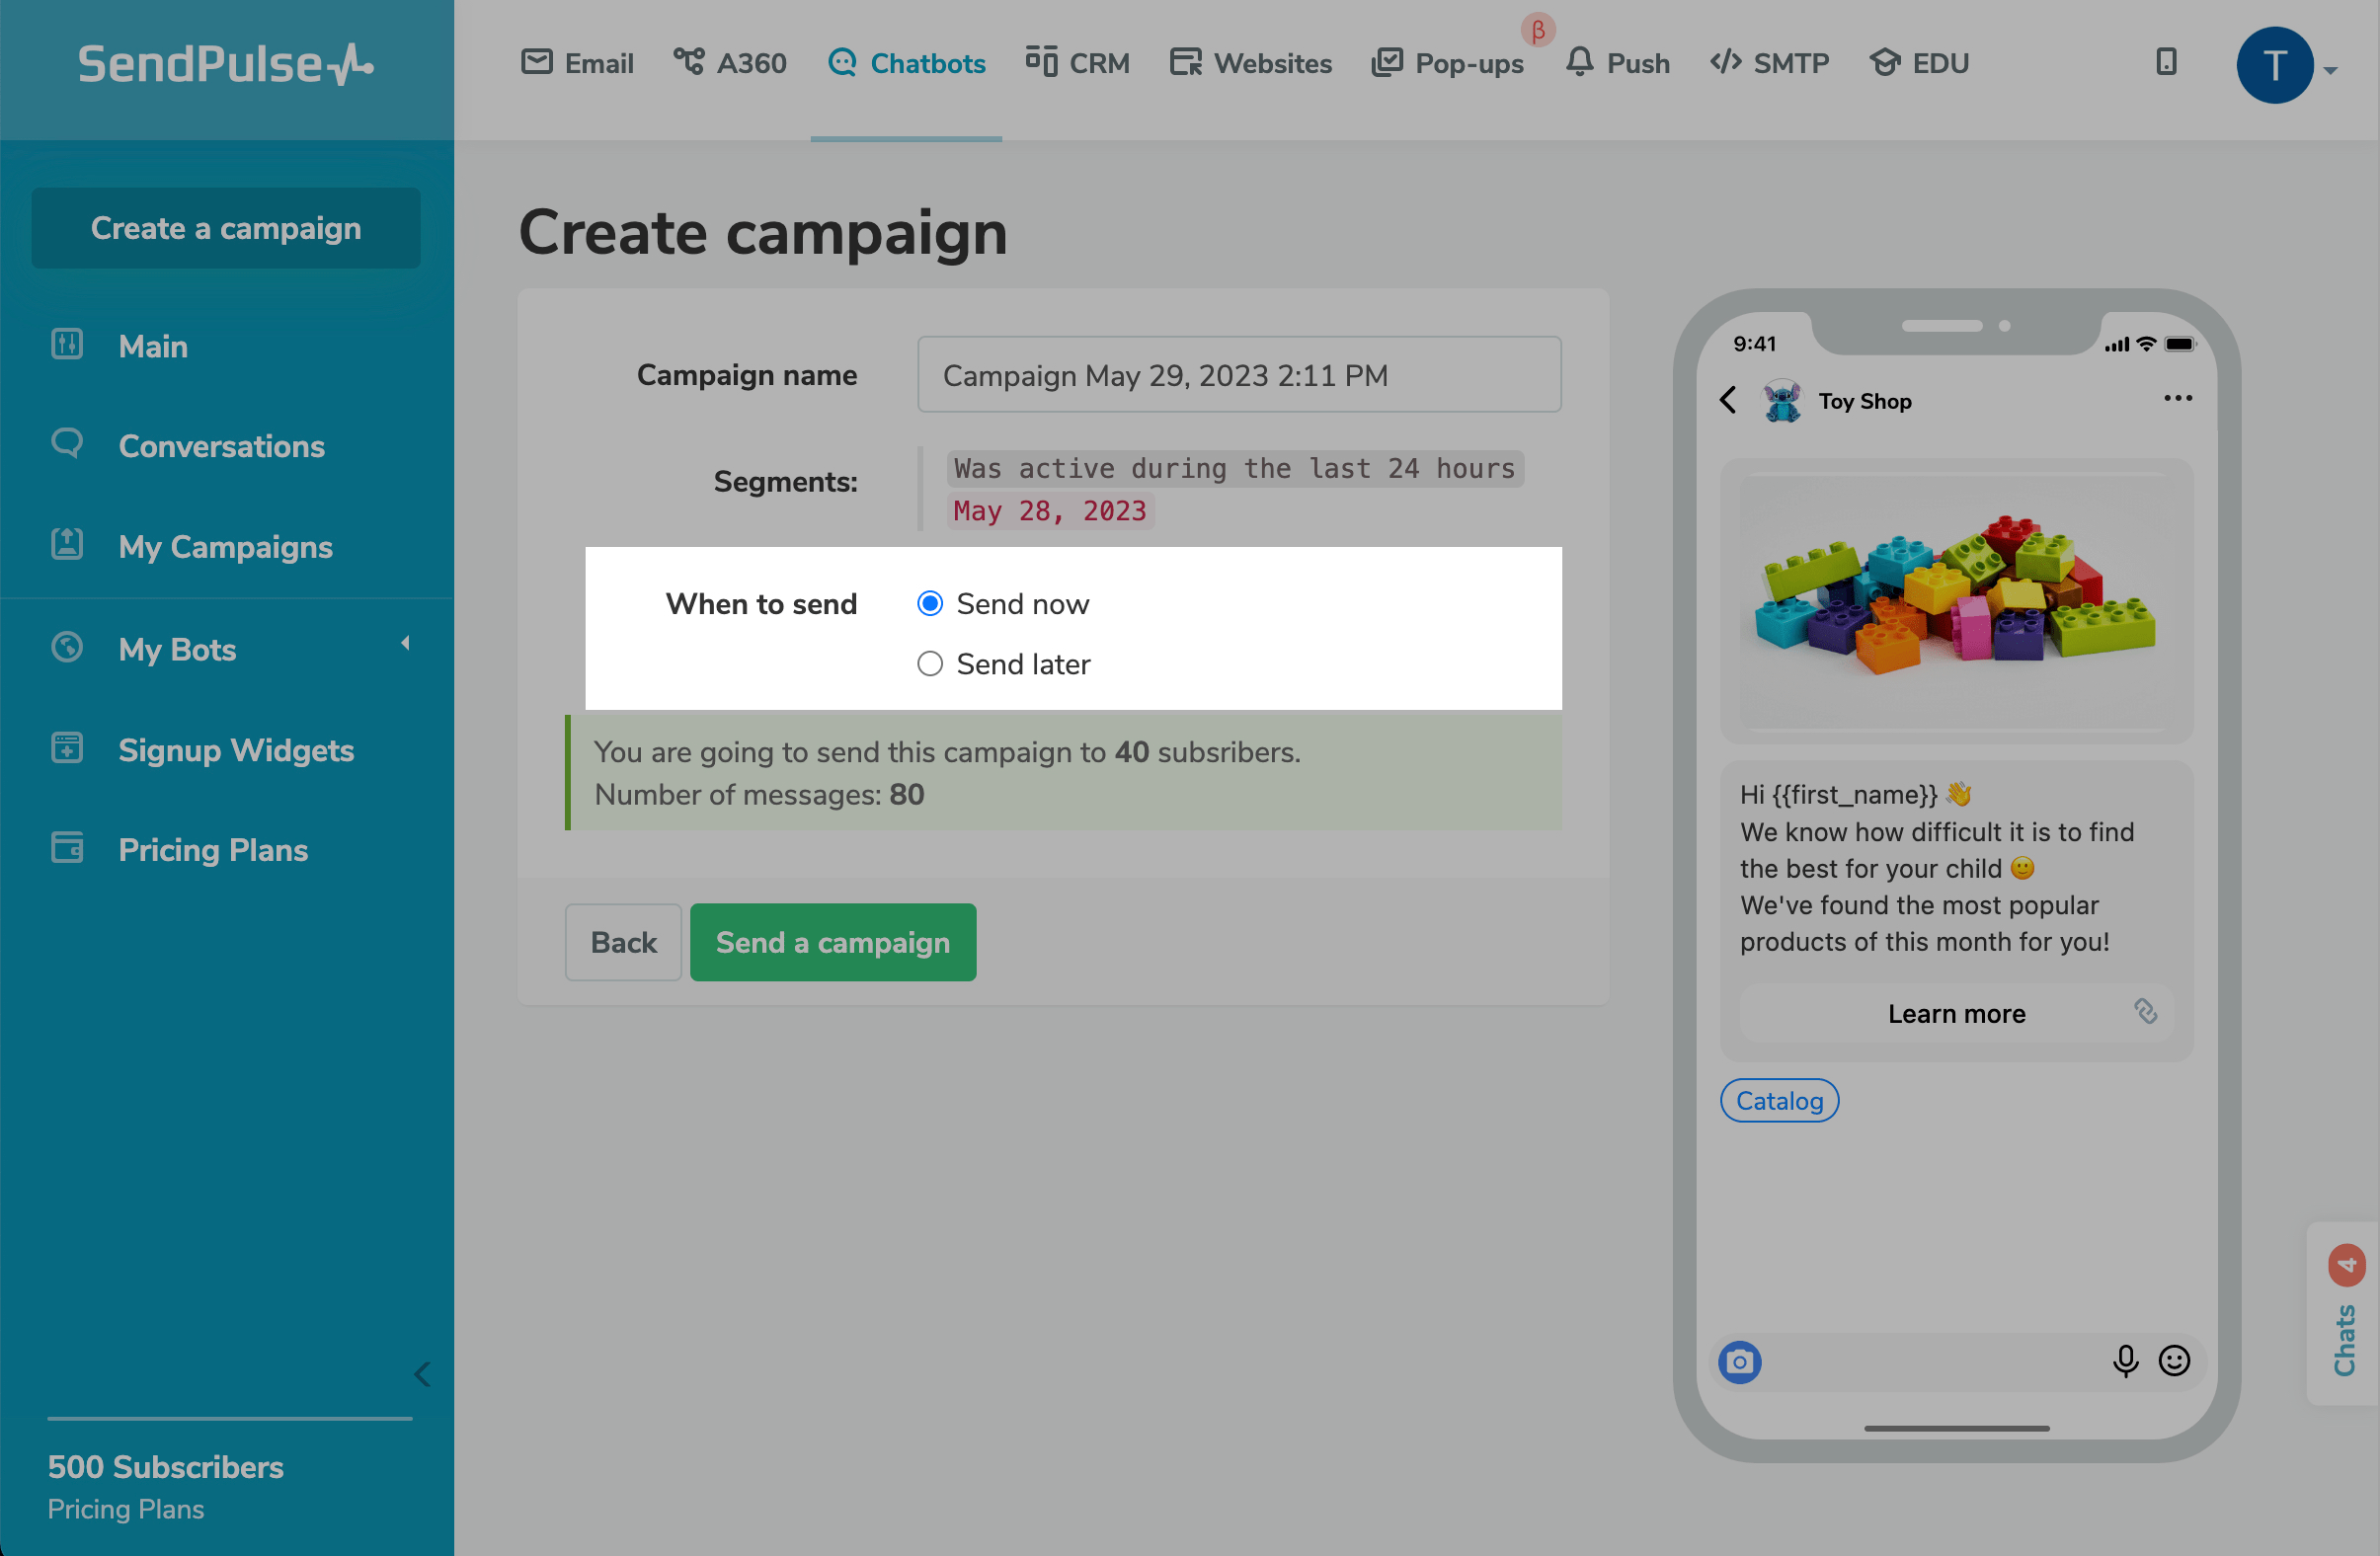
Click Send a campaign — and your campaign will be sent to recipients.
Edit scheduled campaign
If you schedule your campaign to be sent later, you can edit it again before sending it. Go to the list of campaigns, select the campaign, and in the Status field, click Edit. To cancel sending, click Cancel.
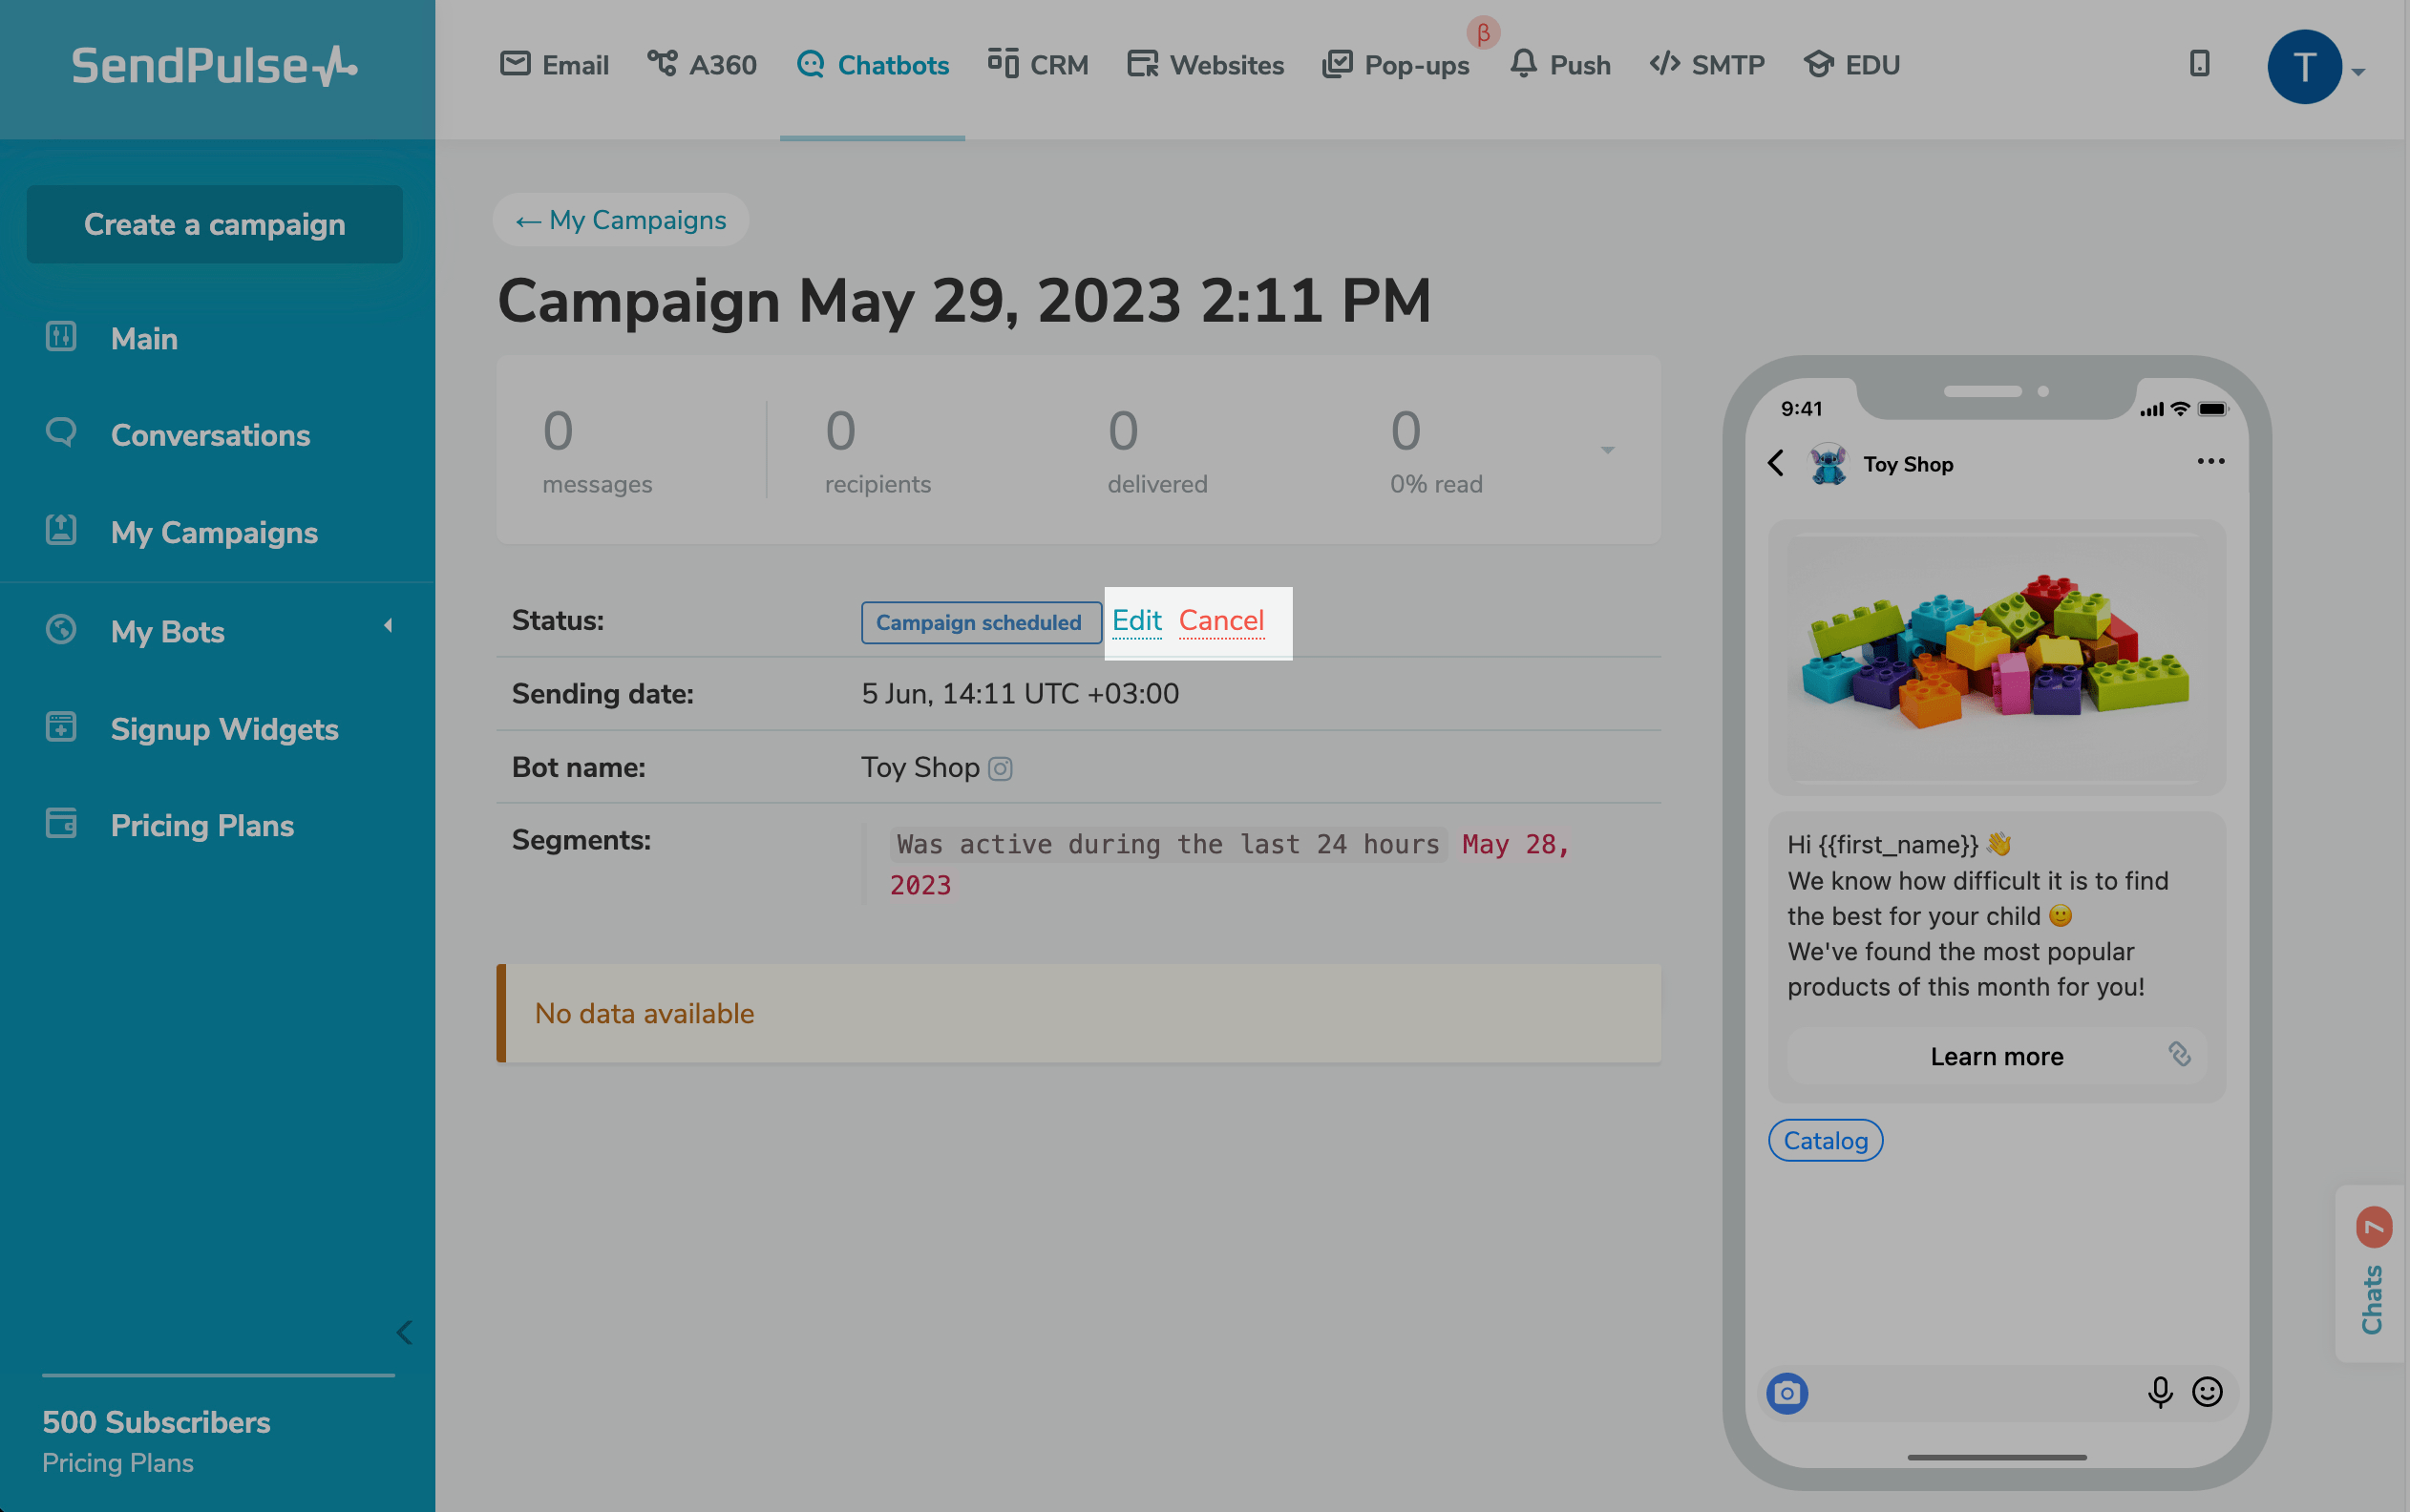
Analyze your results
You can check detailed information about each campaign: how many messages were delivered and how many recipients interacted with your bot
To do that navigate to the My campaigns tab and choose a campaign from the list. You will see the status and statistics of the campaign and its list of recipients.
Read more: Campaign statistics.
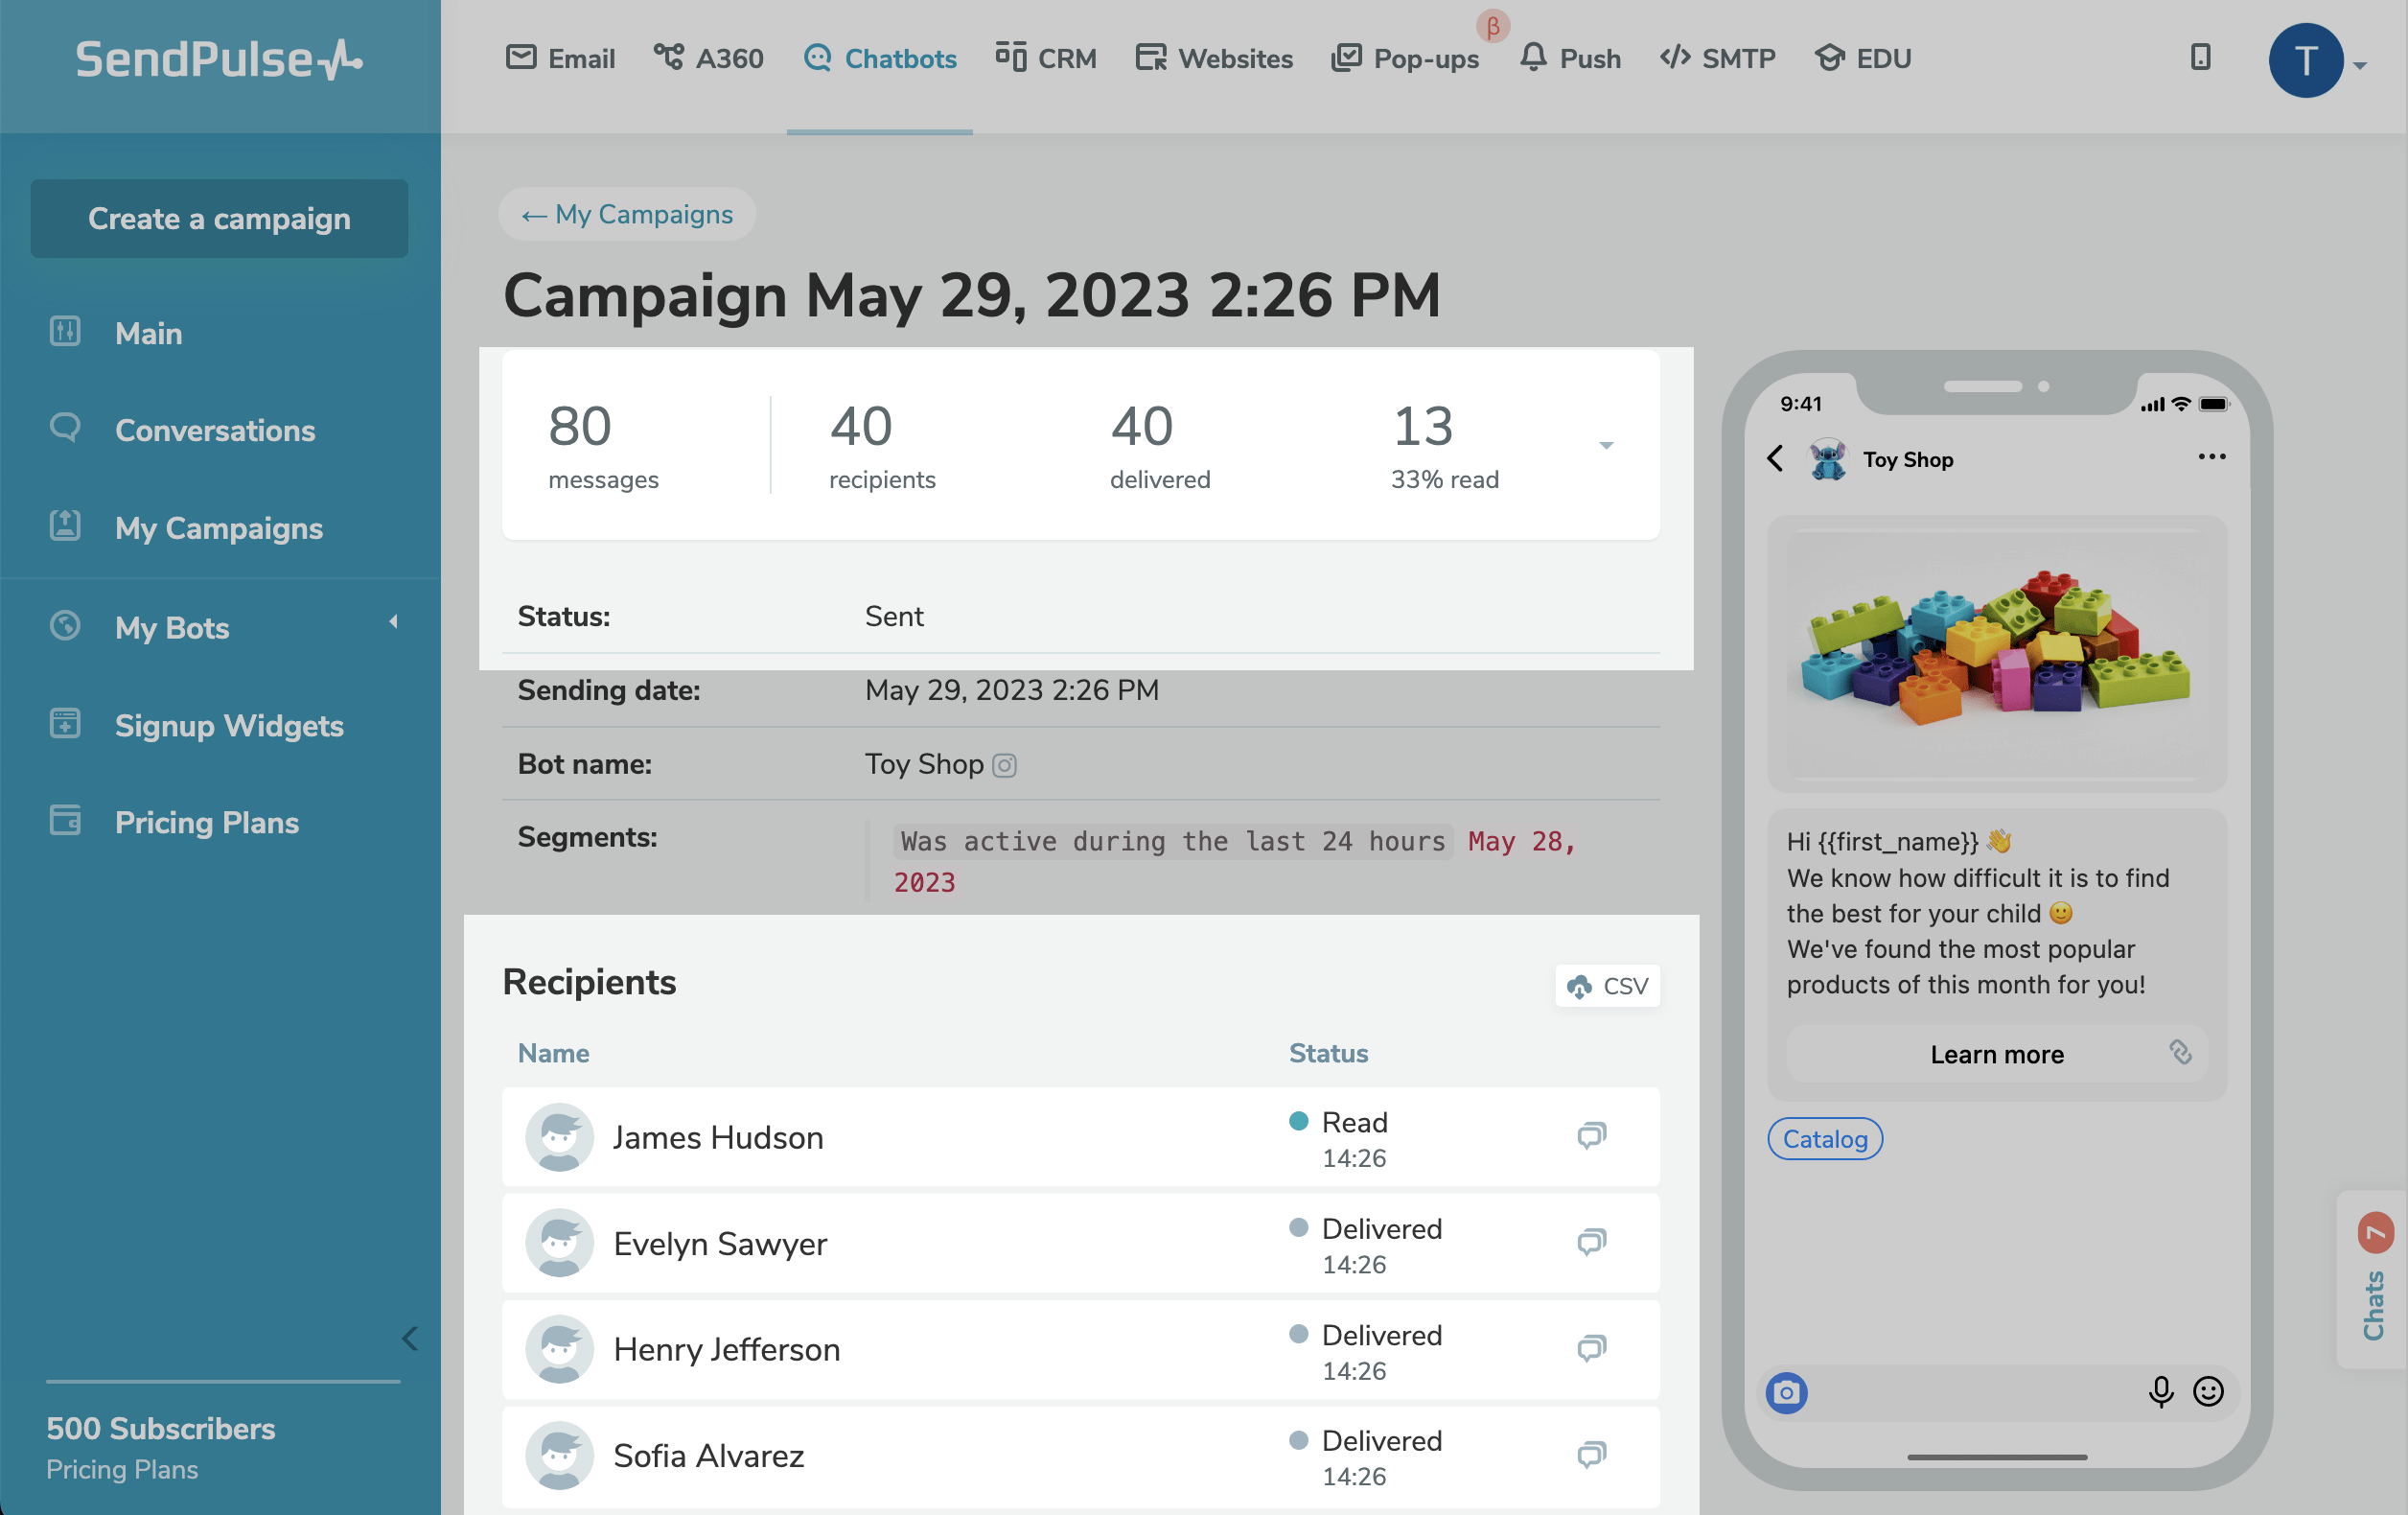
You can also export a CSV file along with your campaign recipient list and delivery status on a paid pricing plan.
Last Updated: 17.07.2024
or