Create an Instagram chatbot
A chatbot is an automated multifunctional assistant that can send and receive triggered messages. With SendPulse, your bot can save information as variables for future usage.
Follow these step-by-step instructions to create your first chatbot for Instagram messenger.
Instagram chatbot features
Automated interactions. Chatbots can reply to messages 24/7 and send campaigns, event announcements, or updates. Create dedicated chatbot flows with your preferred commands to help resolve specific subscriber issues.
Personalization. Use the Filter element to branch your chatbot flow based on variables, number of subscribers, sources, and subscriptions. You can also add personal data to messages and reply based on a subscriber’s previous actions.
Flow triggers. Set a specific trigger to launch your flow, for example, when users send specific keywords, mention you in a Story, or comment on your post or live stream.
AI-powered features. Integrate ChatGPT or other AI models so that your chatbot can answer free-form questions, not just scripted ones. The AI Agent element in your flow can guide the conversation along various branches depending on the context.
External queries and integrations. Your chatbot can make API calls to your system, retrieve data points, and generate replies based on them.
Getting started
You can connect a chatbot using your Instagram account directly or via Facebook Business. To connect a chatbot directly via Instagram you only need an Instagram business account.
To connect a chatbot to your Instagram profile via Facebook Business, you must have:
- The Instagram business account for which you are connecting the bot. There are also no restrictions on subscribers to connect the bot.
- Your brand’s Facebook page linked to the Instagram account with access to messages enabled.
- Personal Facebook profile with administrator rights to your brand's Facebook page. You connect this profile when creating a bot and linking applications.
- An additional (second) personal Instagram account. You need to add this account as a subscriber using the owner’s account for testing.
This is a detailed checklist of everything you need to connect a chatbot. You will also find a brief description of the steps on the bot connection page.
Learn more: Checklist for solving possible problems when connecting an Instagram chatbot.
Connect your chatbot directly via Instagram
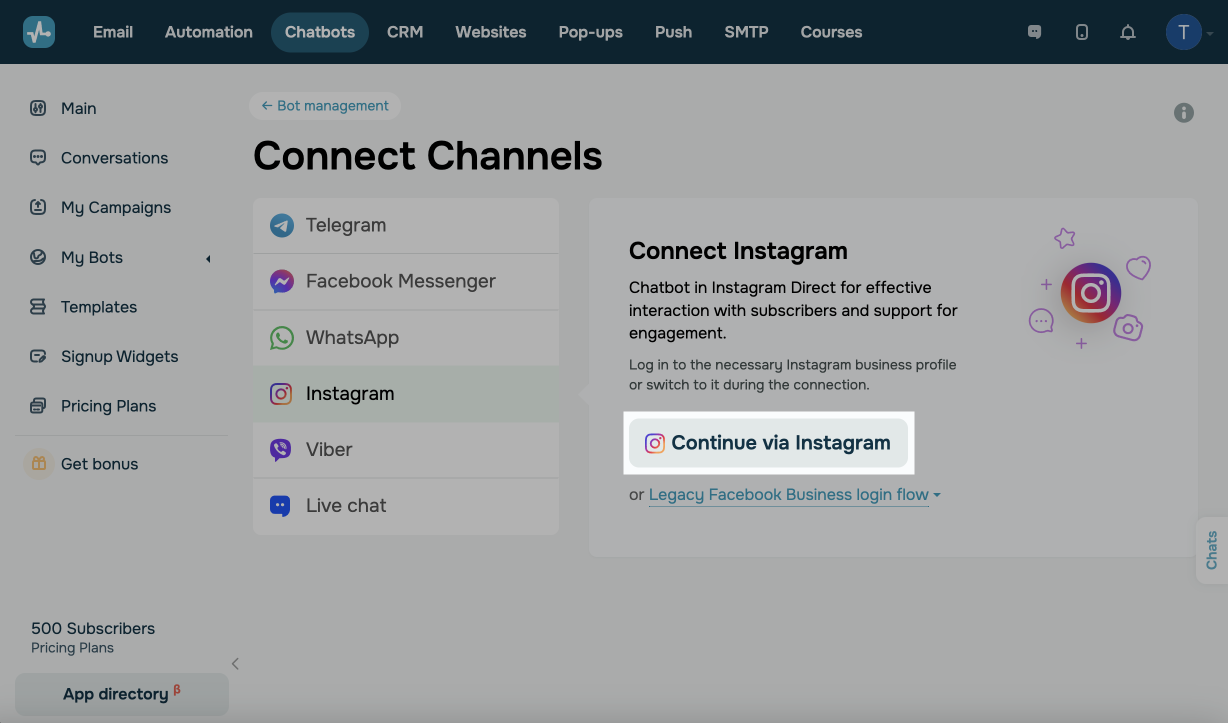
You can connect a chatbot directly using your Instagram account. To do this, go to Bot management > Add bot, select Instagram, and click Continue via Instagram.
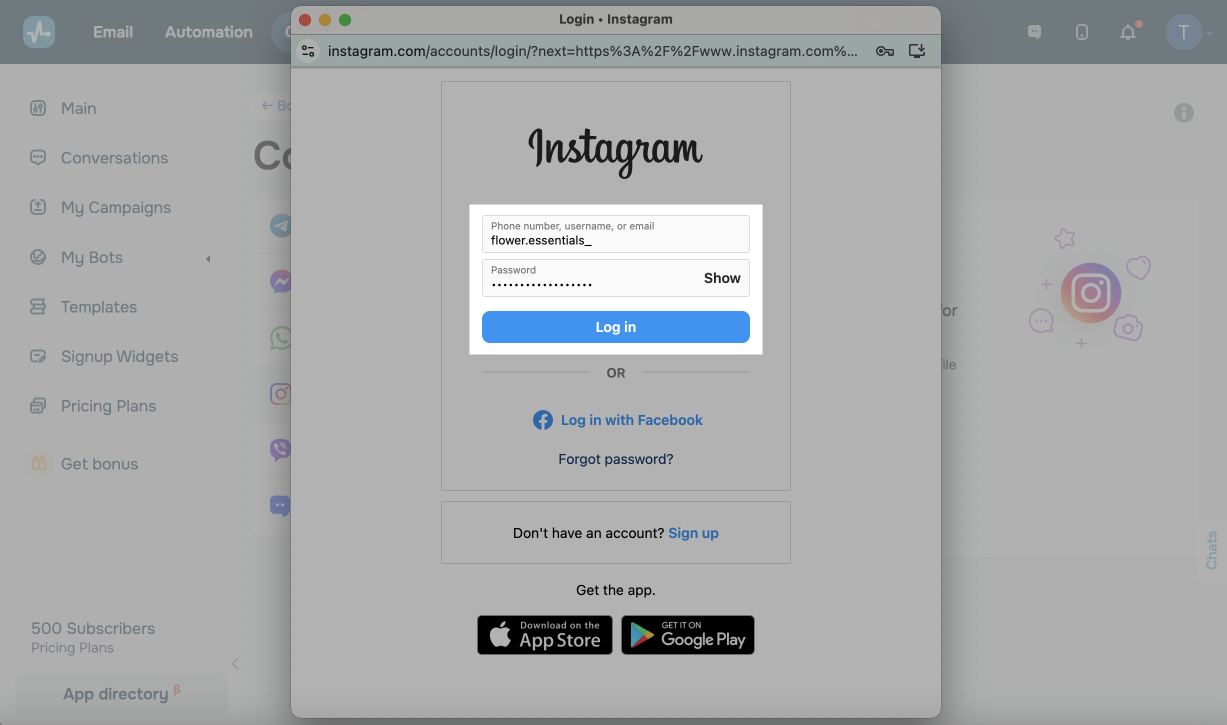
In the login window, type in your Instagram login credentials and grant permissions to manage your account.
If you haven’t switched your account type to Creator or Business, update it and click Continue.
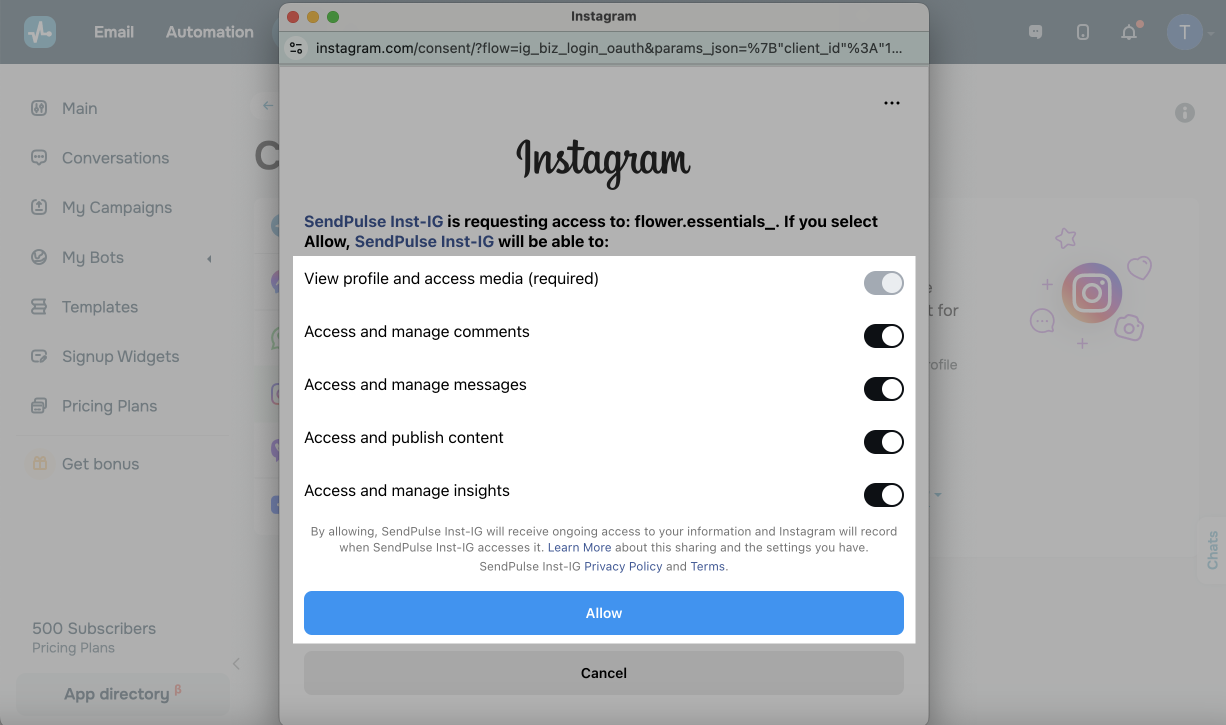
Next, authorize Instagram to access and manage messages.
Once your Instagram chatbot is created, you can move on to its initial setup.
Connect via Facebook Business
You can also connect your chatbot using you Facebook Business account. You must first complete the setup following one of the two methods below.
Link your Facebook page to your instagram Business account
You can link social networks and grant the necessary permissions for Facebook in your Facebook page settings or in your Instagram business account settings.
Choose a method.
If you already have social networks linked, skip the first step and go to the second step. Just make sure the permissions are granted and that you have the correct Instagram account type.
Method 1: Connect Instagram via Facebook (New Page Experience)
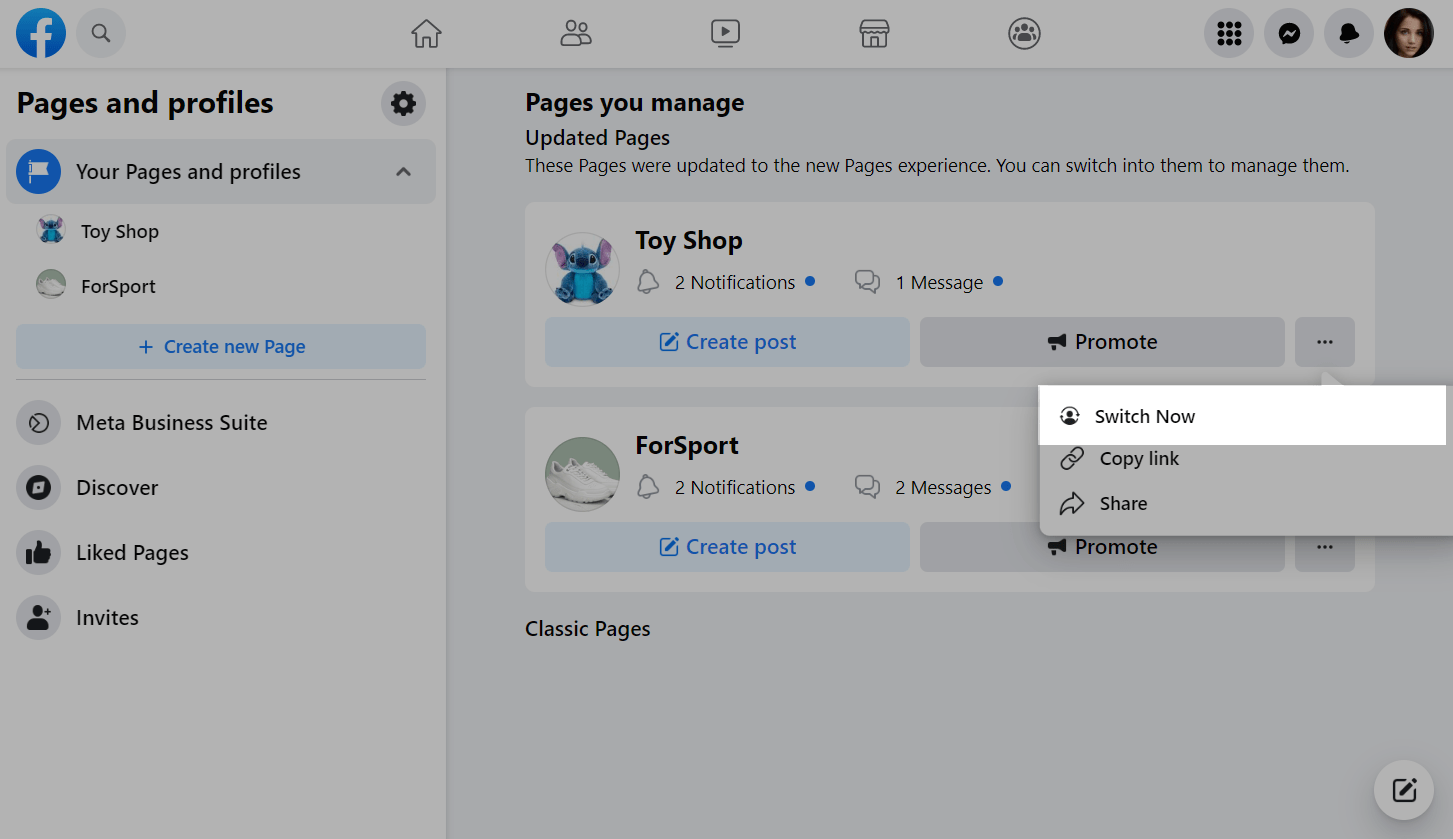
If you have not switched to the new page experience but want to try, go to your Pages and profiles, click the three dots icon next to your page, and select Switch now.
Once you switch, you will see your page’s updated style and be suggested to take a tour.
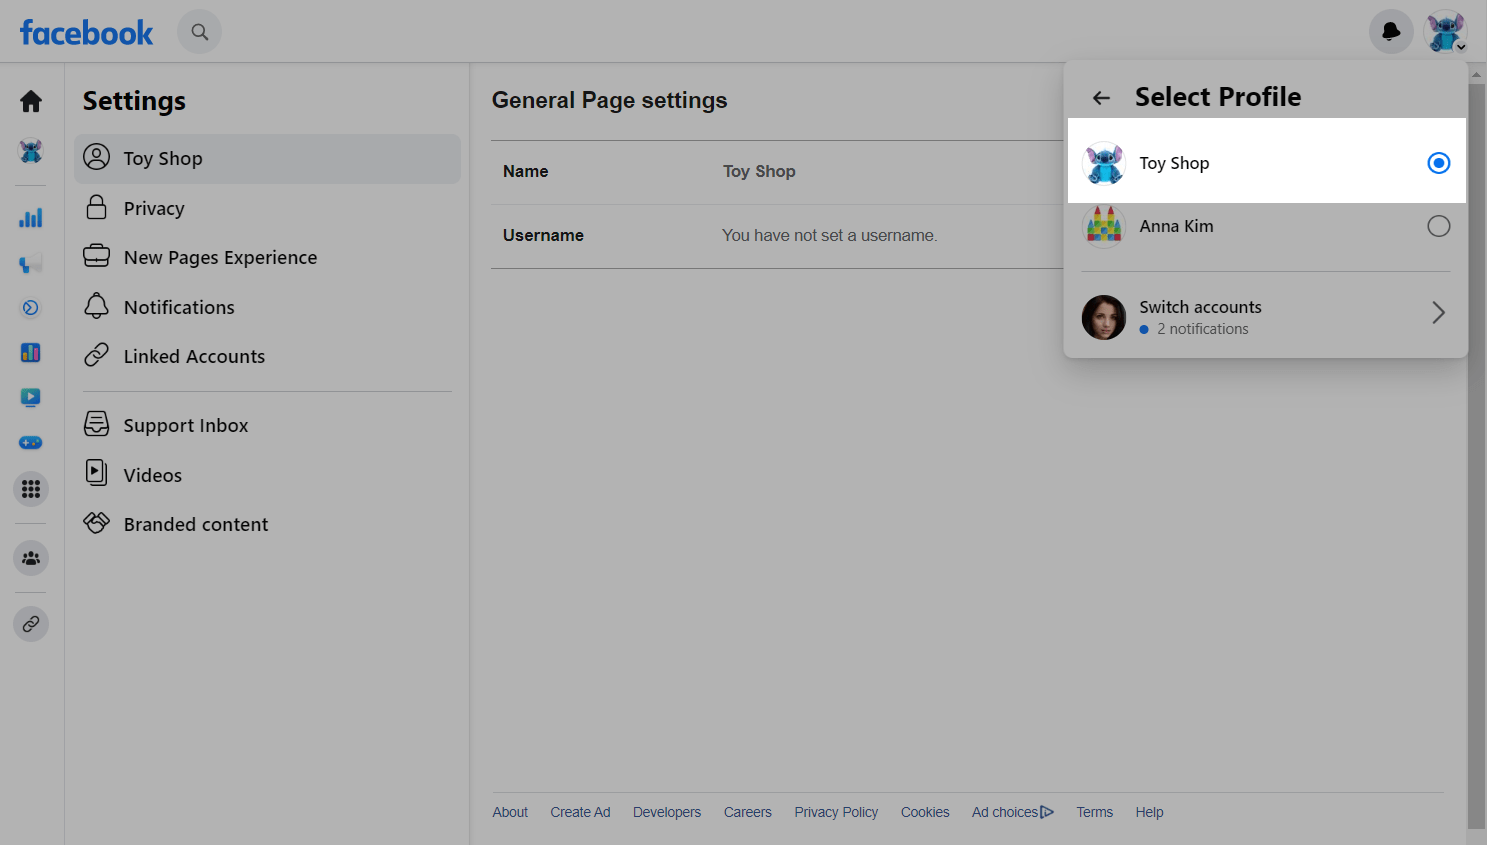
In the new version, you need to switch to the account you want to link to Instagram. To do this, click the avatar in the top right corner and select See all profiles. Select the one you want from the list.
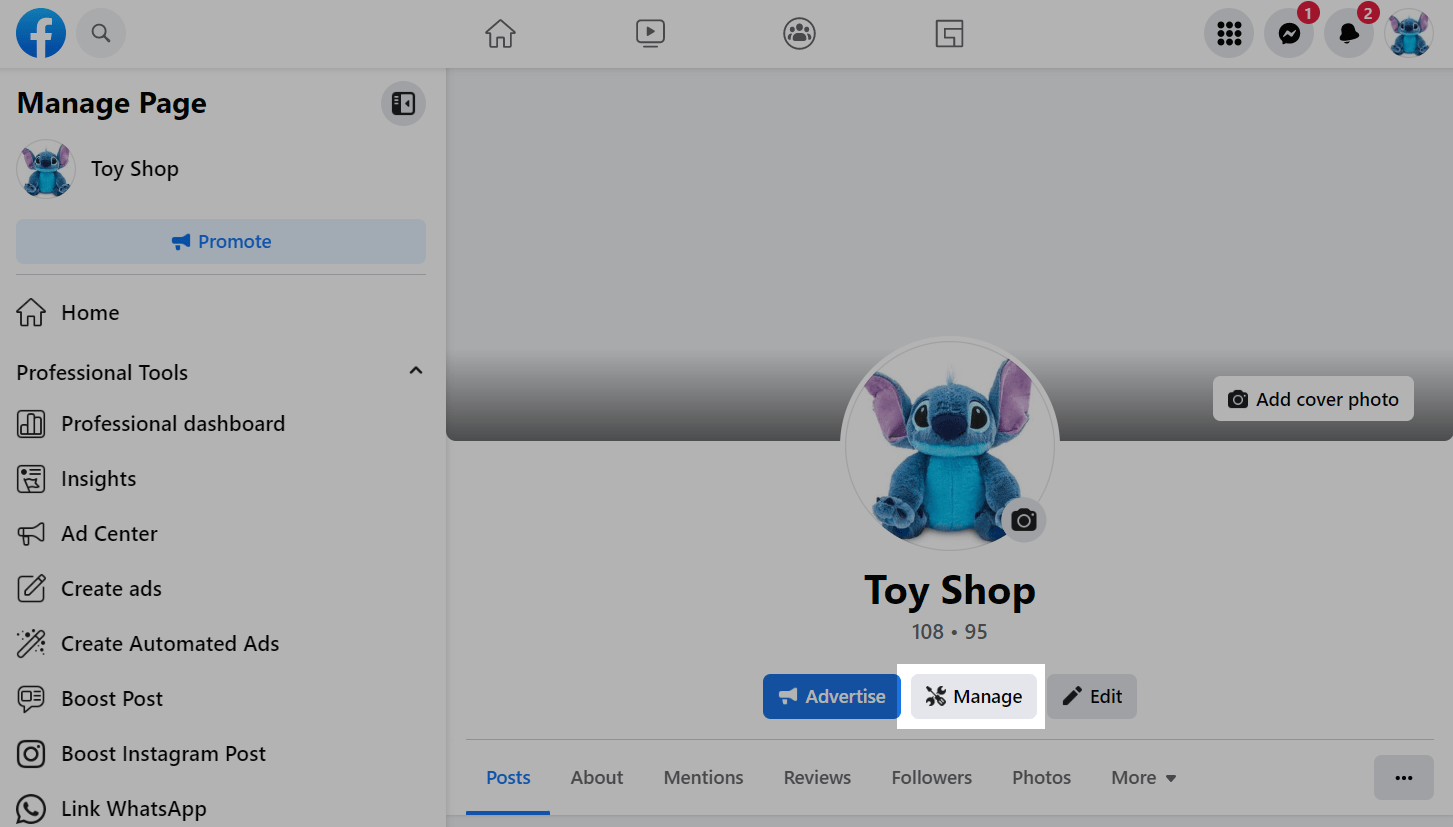
Click Manage to go to your page settings.
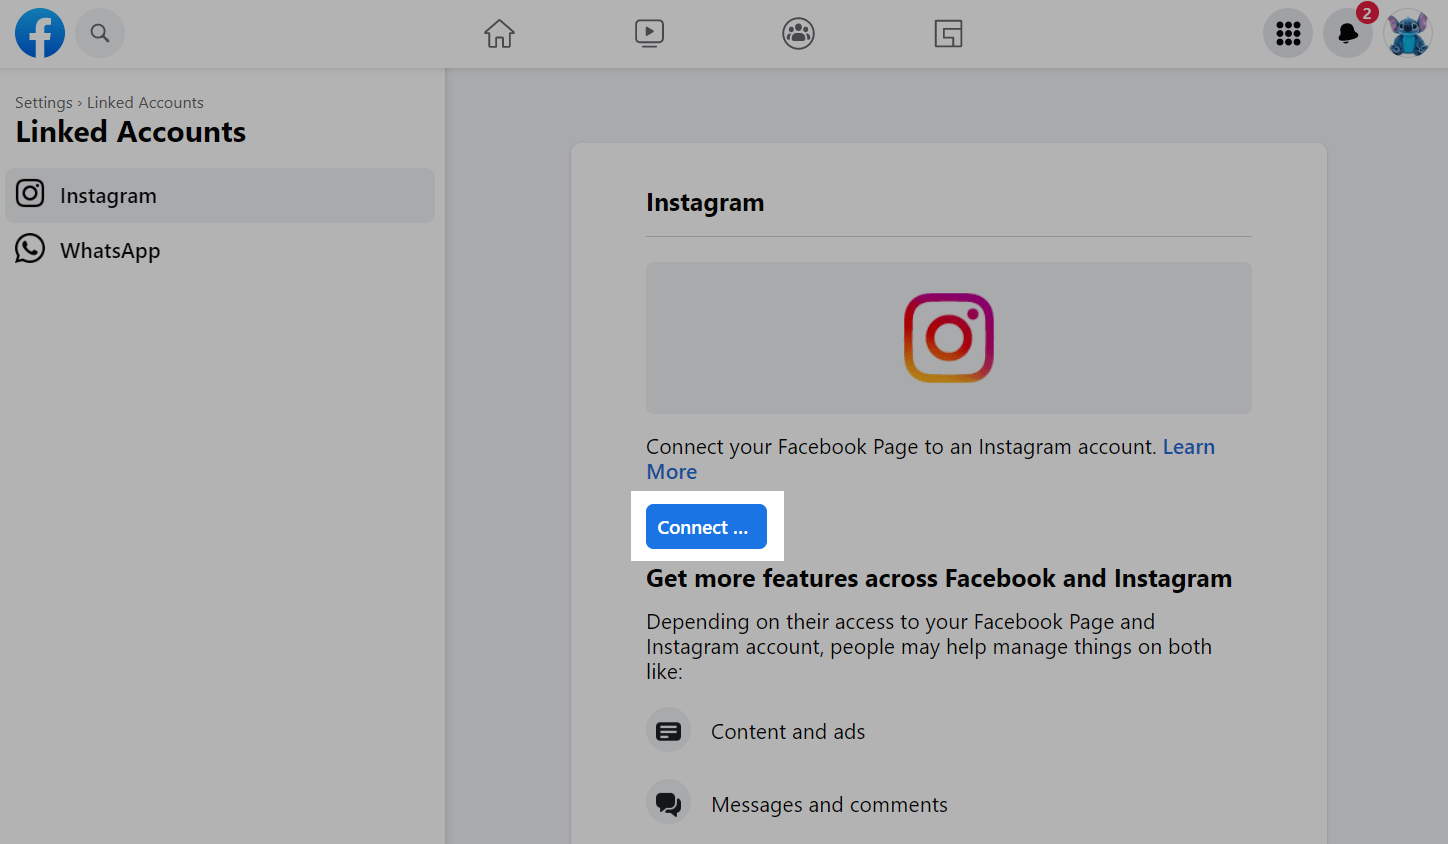
Select the Linked accounts tab on the left.

In the Instagram tab, click Connect ….
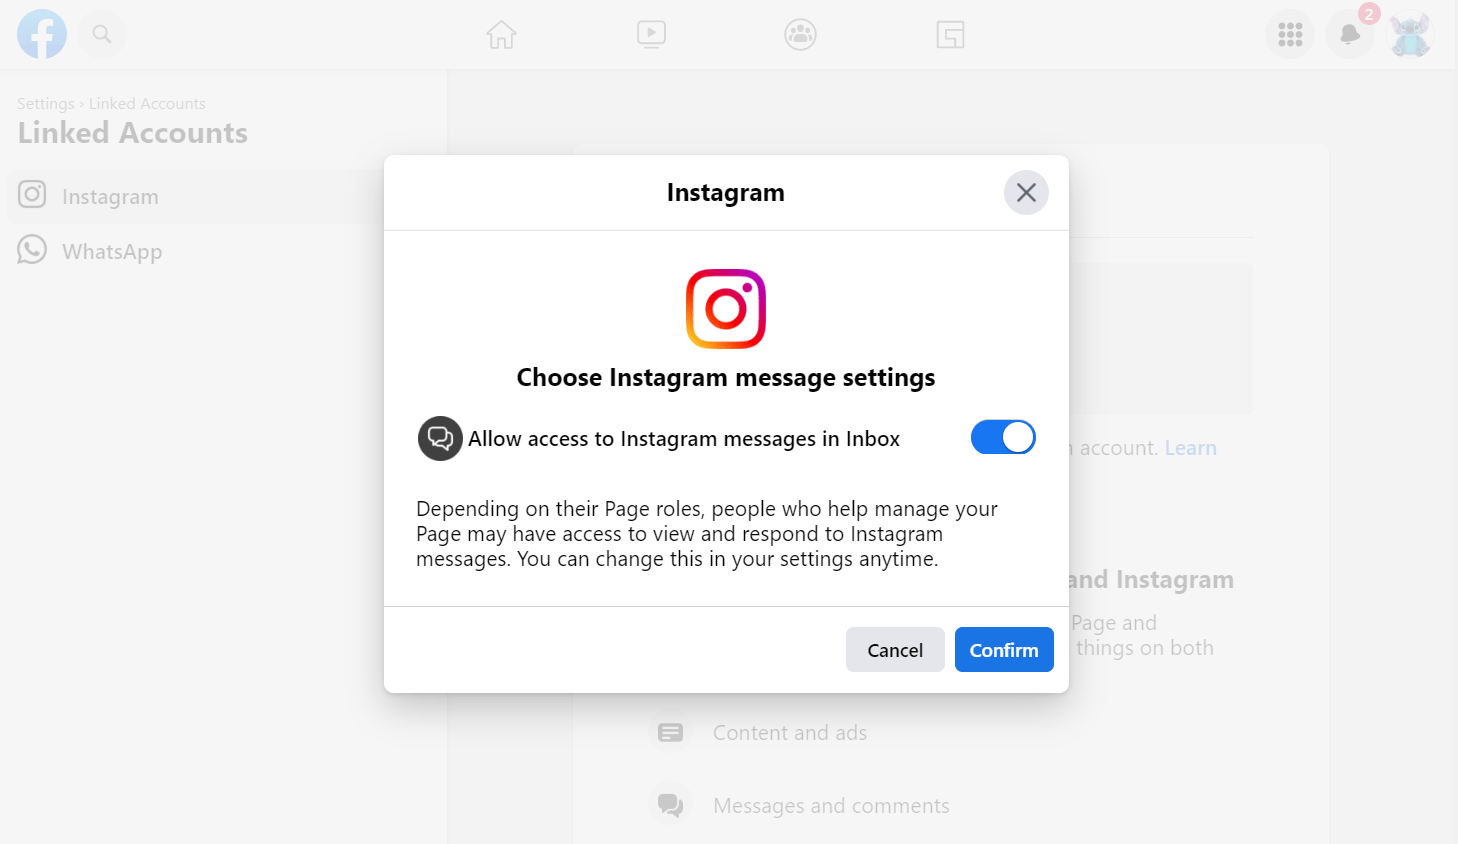
Log in to your Instagram business account, and grant the permission to send messages in a new modal window.
Once you successfully confirm the connection, you will be notified that your accounts are connected.
Method 2: Connect Facebook via Instagram
You can connect Facebook to your Instagram page when you switch your Instagram type to a business account or separately in the settings.
If your account type is Personal, open the menu ☰ in the upper left corner, go to Settings > Account, click Switch to Business. Instagram, in the process of setting up an account, may prompt you to immediately connect your brand's page to Facebook.
Learn more: How to create an Instagram business account and how account types differ.
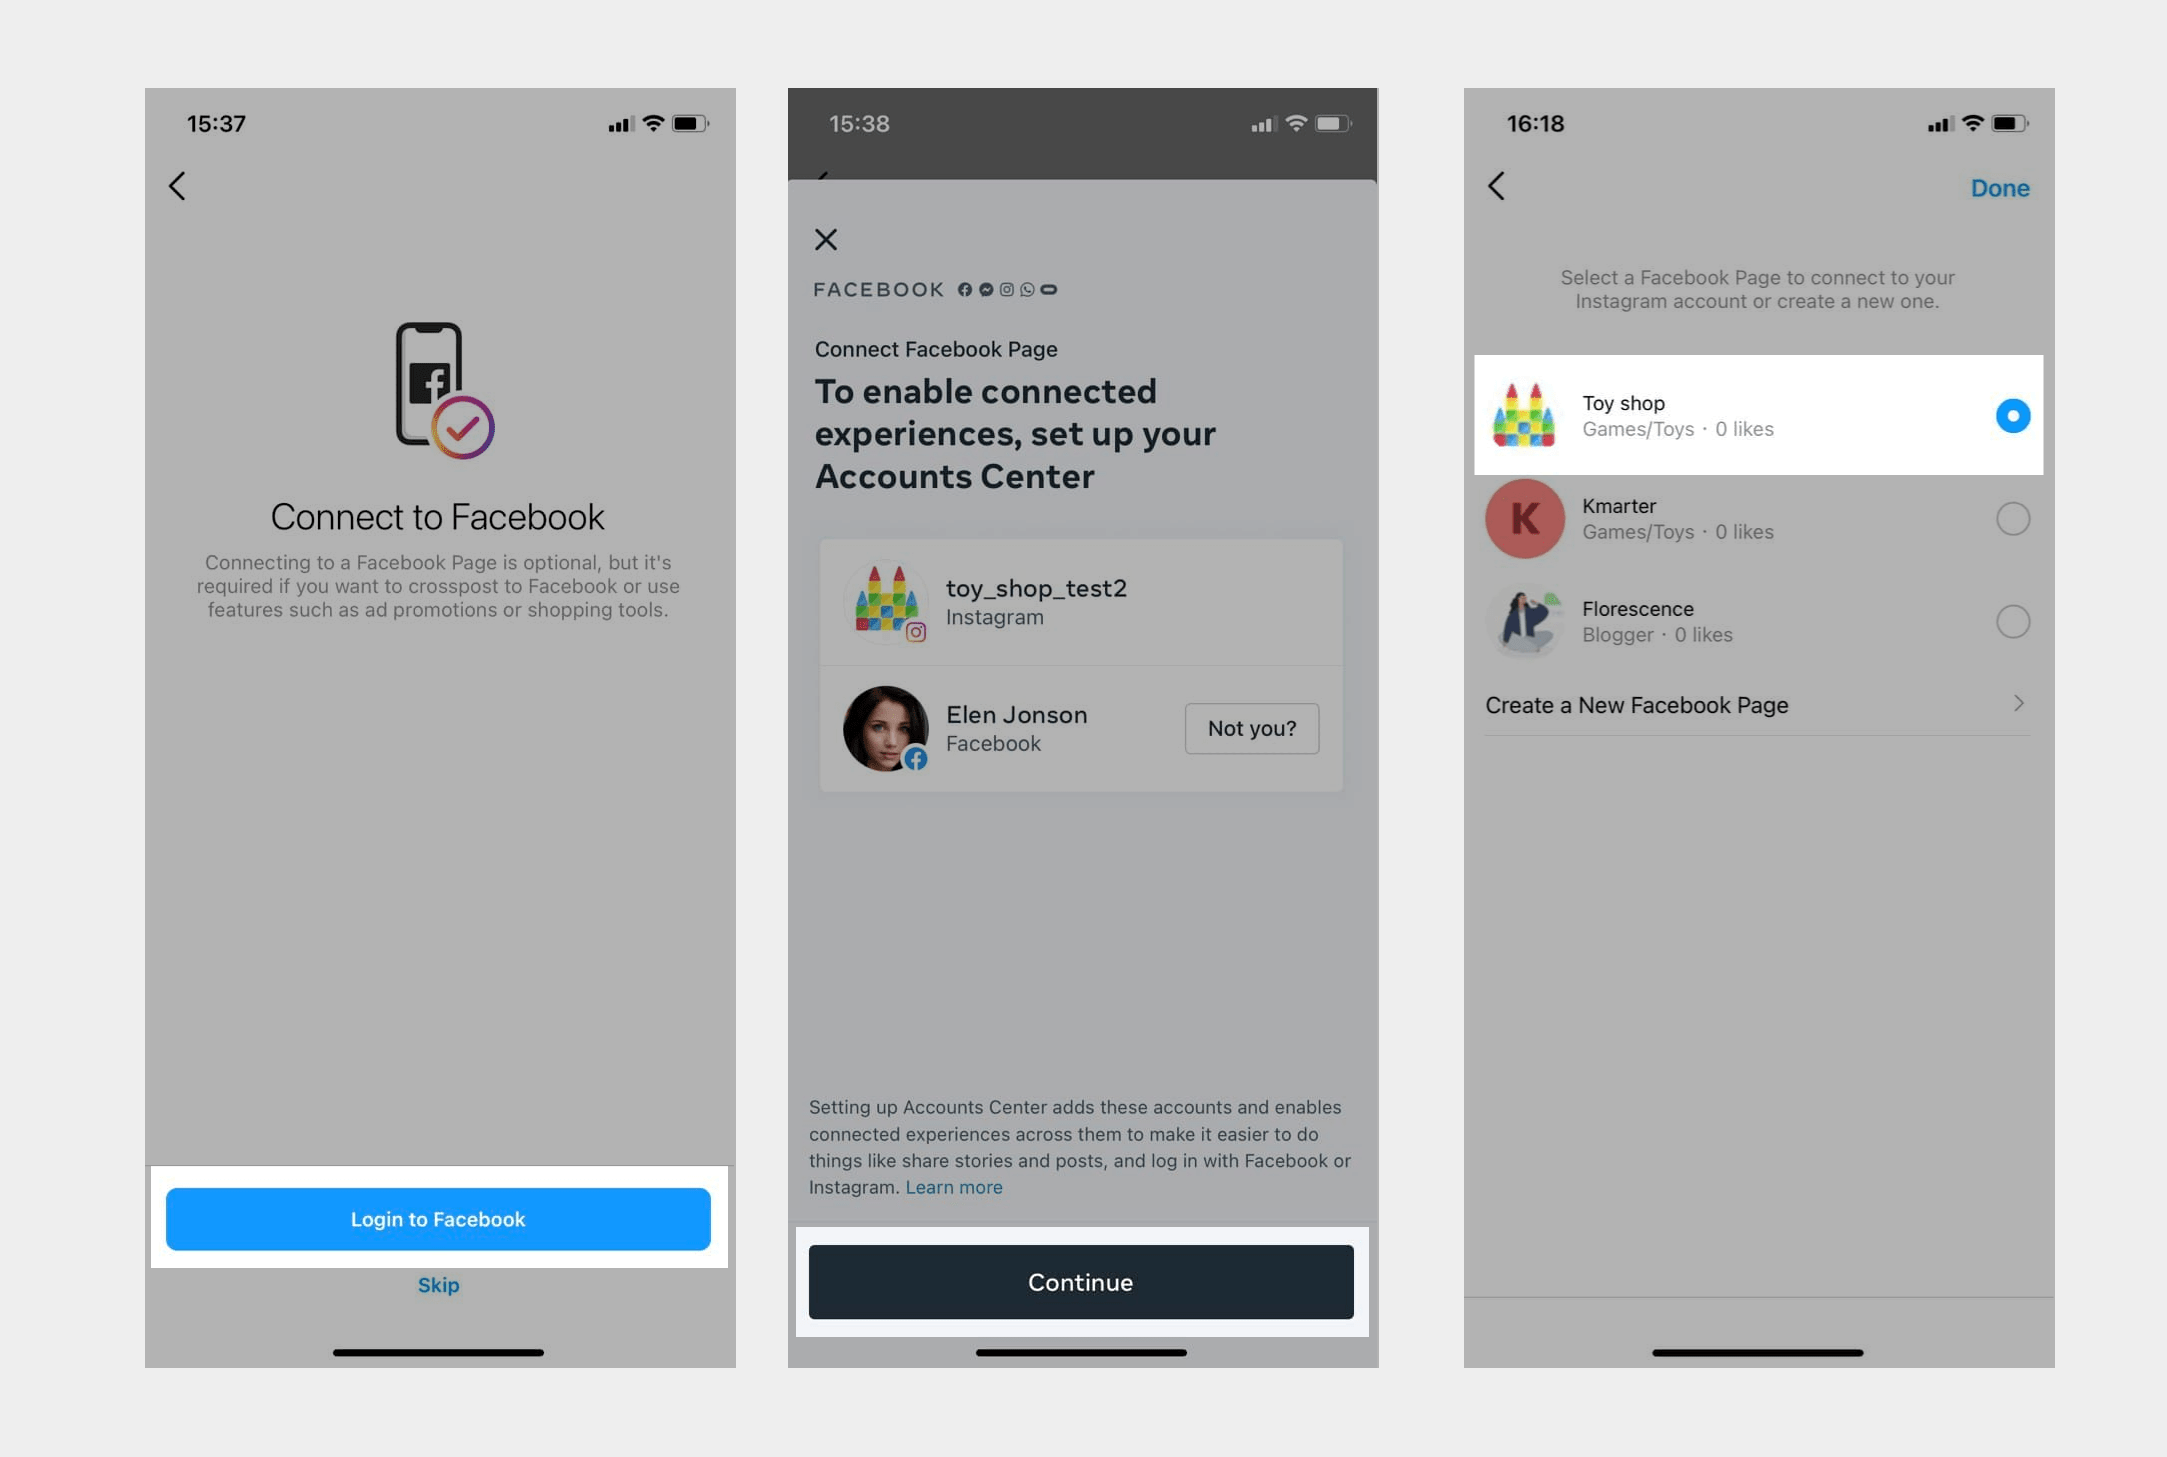
Next, select Login to Facebook. Log into your personal Facebook page, read the permissions you grant, and select your brand's Facebook page.
If you have the Facebook app installed on your phone, or you have already connected to Facebook through the Account Center, Instagram will automatically pull up the information and prompt you to select pages from the profile you are logged into.
You can also connect your Facebook account separately through the settings. Open the menu ☰ in the upper left corner and go to Settings and privacy > Business tools and controls > Connect a Facebook Page.

Select the Continue option. Log into your Facebook account if you are not logged in yet, select one of the pages that have loaded or create a new one, and click Done.
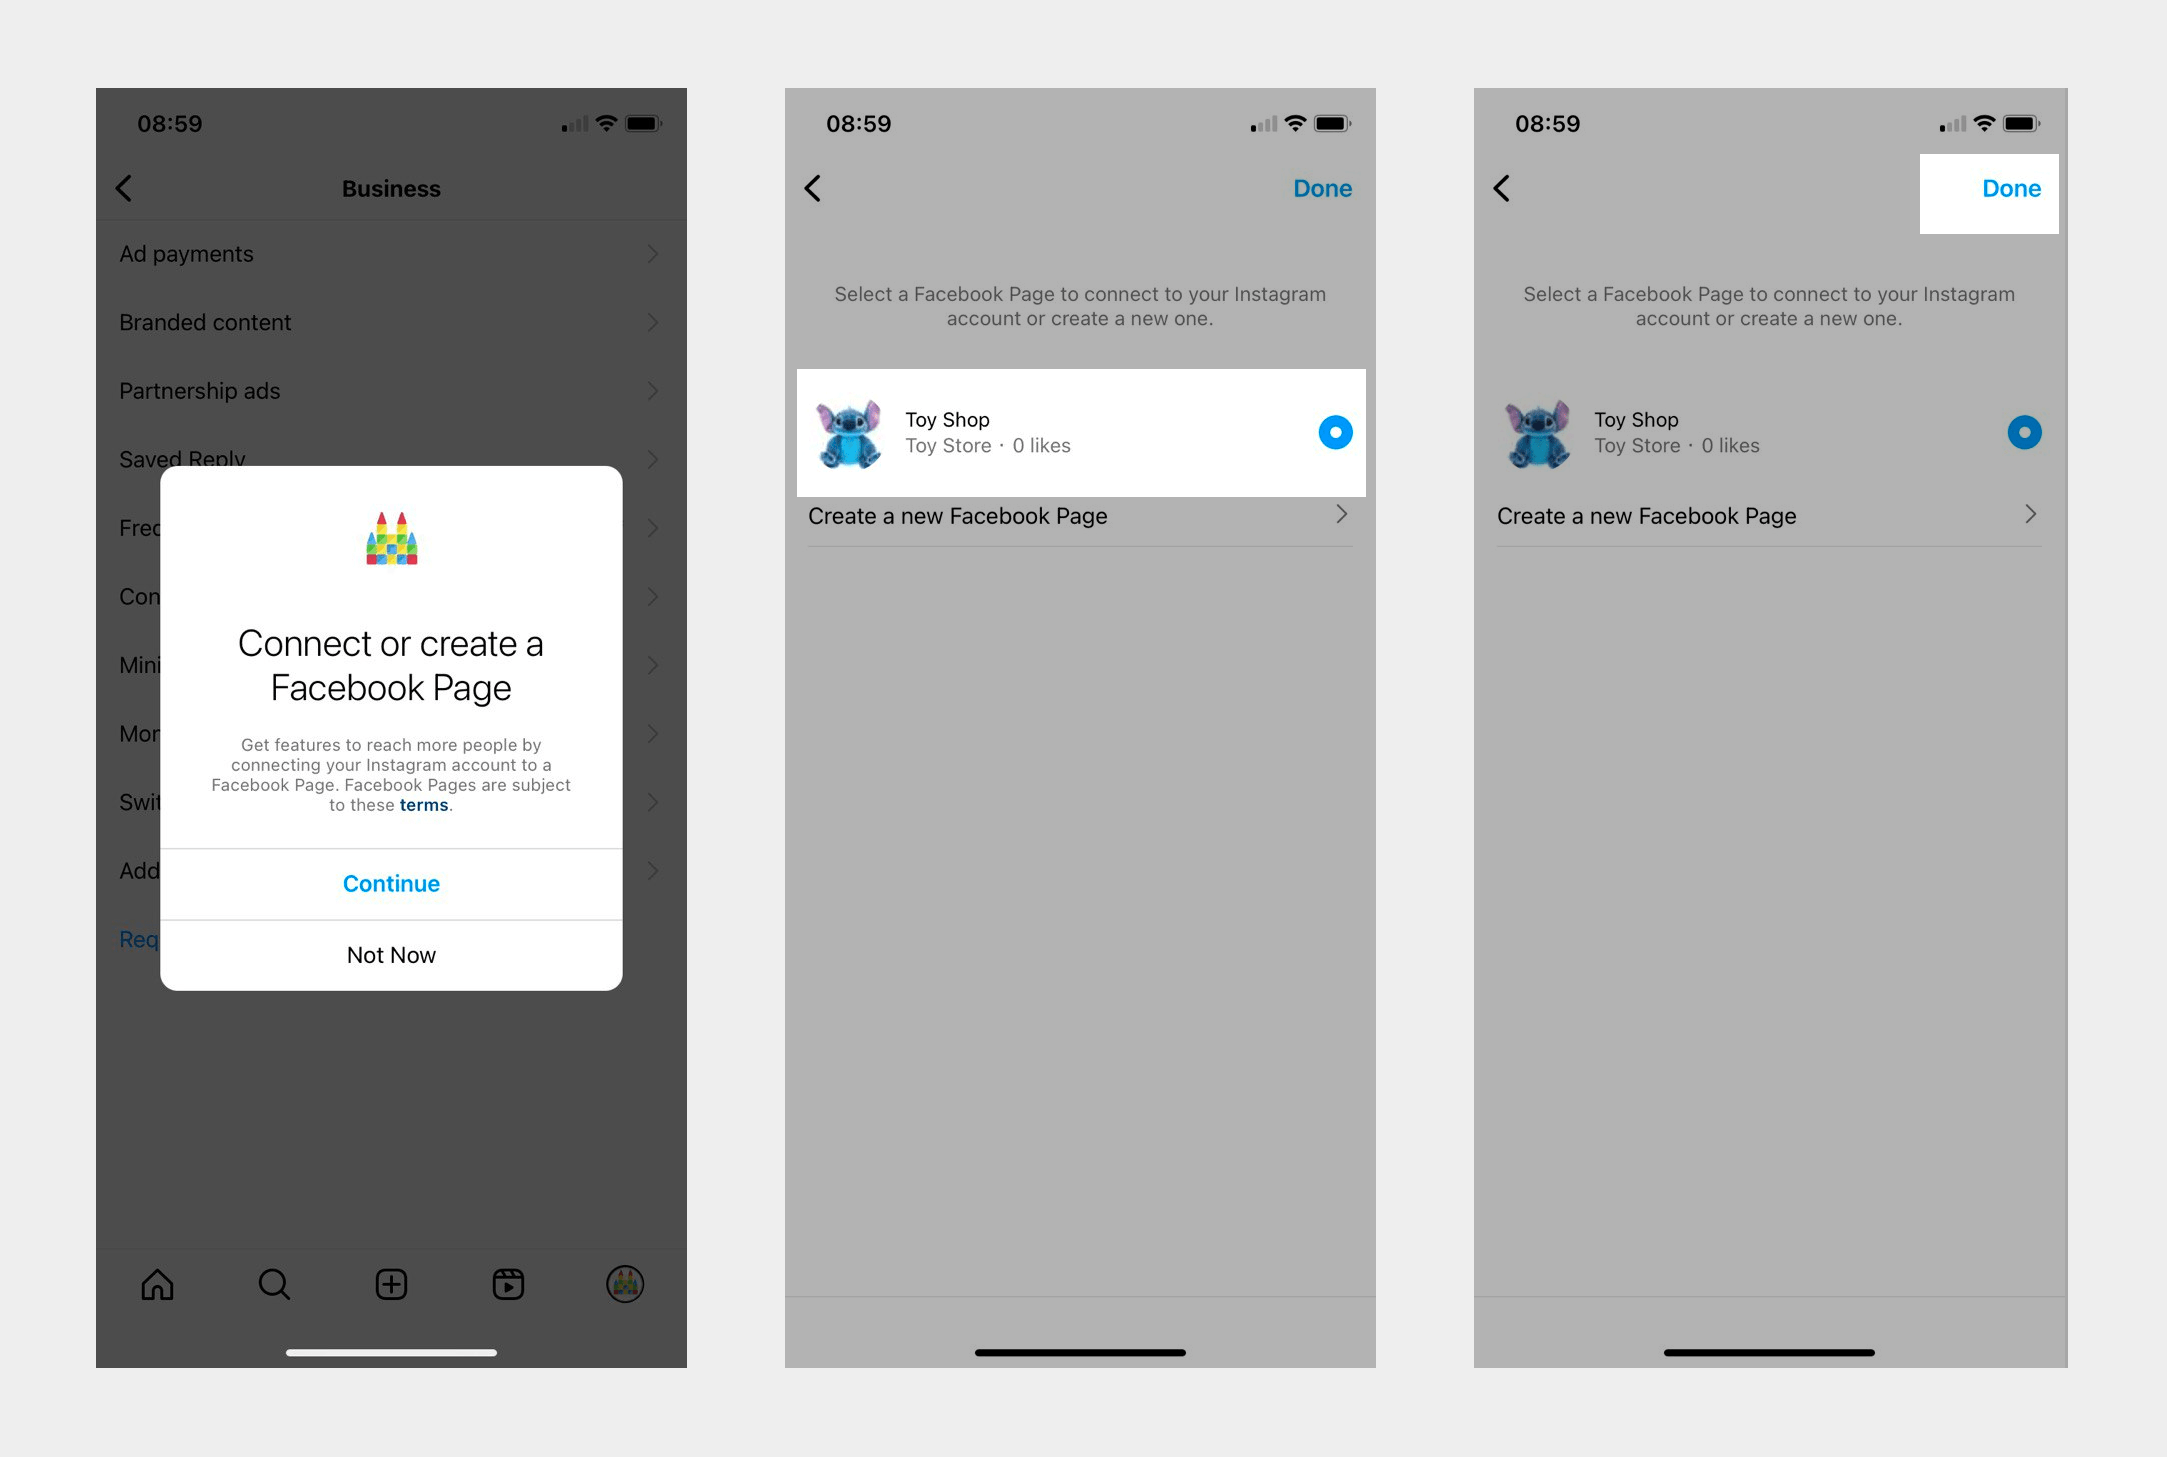
When you connect your Facebook page, you automatically give permission to send Facebook messages from your Instagram page. When you re-enter this setting, you will be able to check the connected Facebook pages.
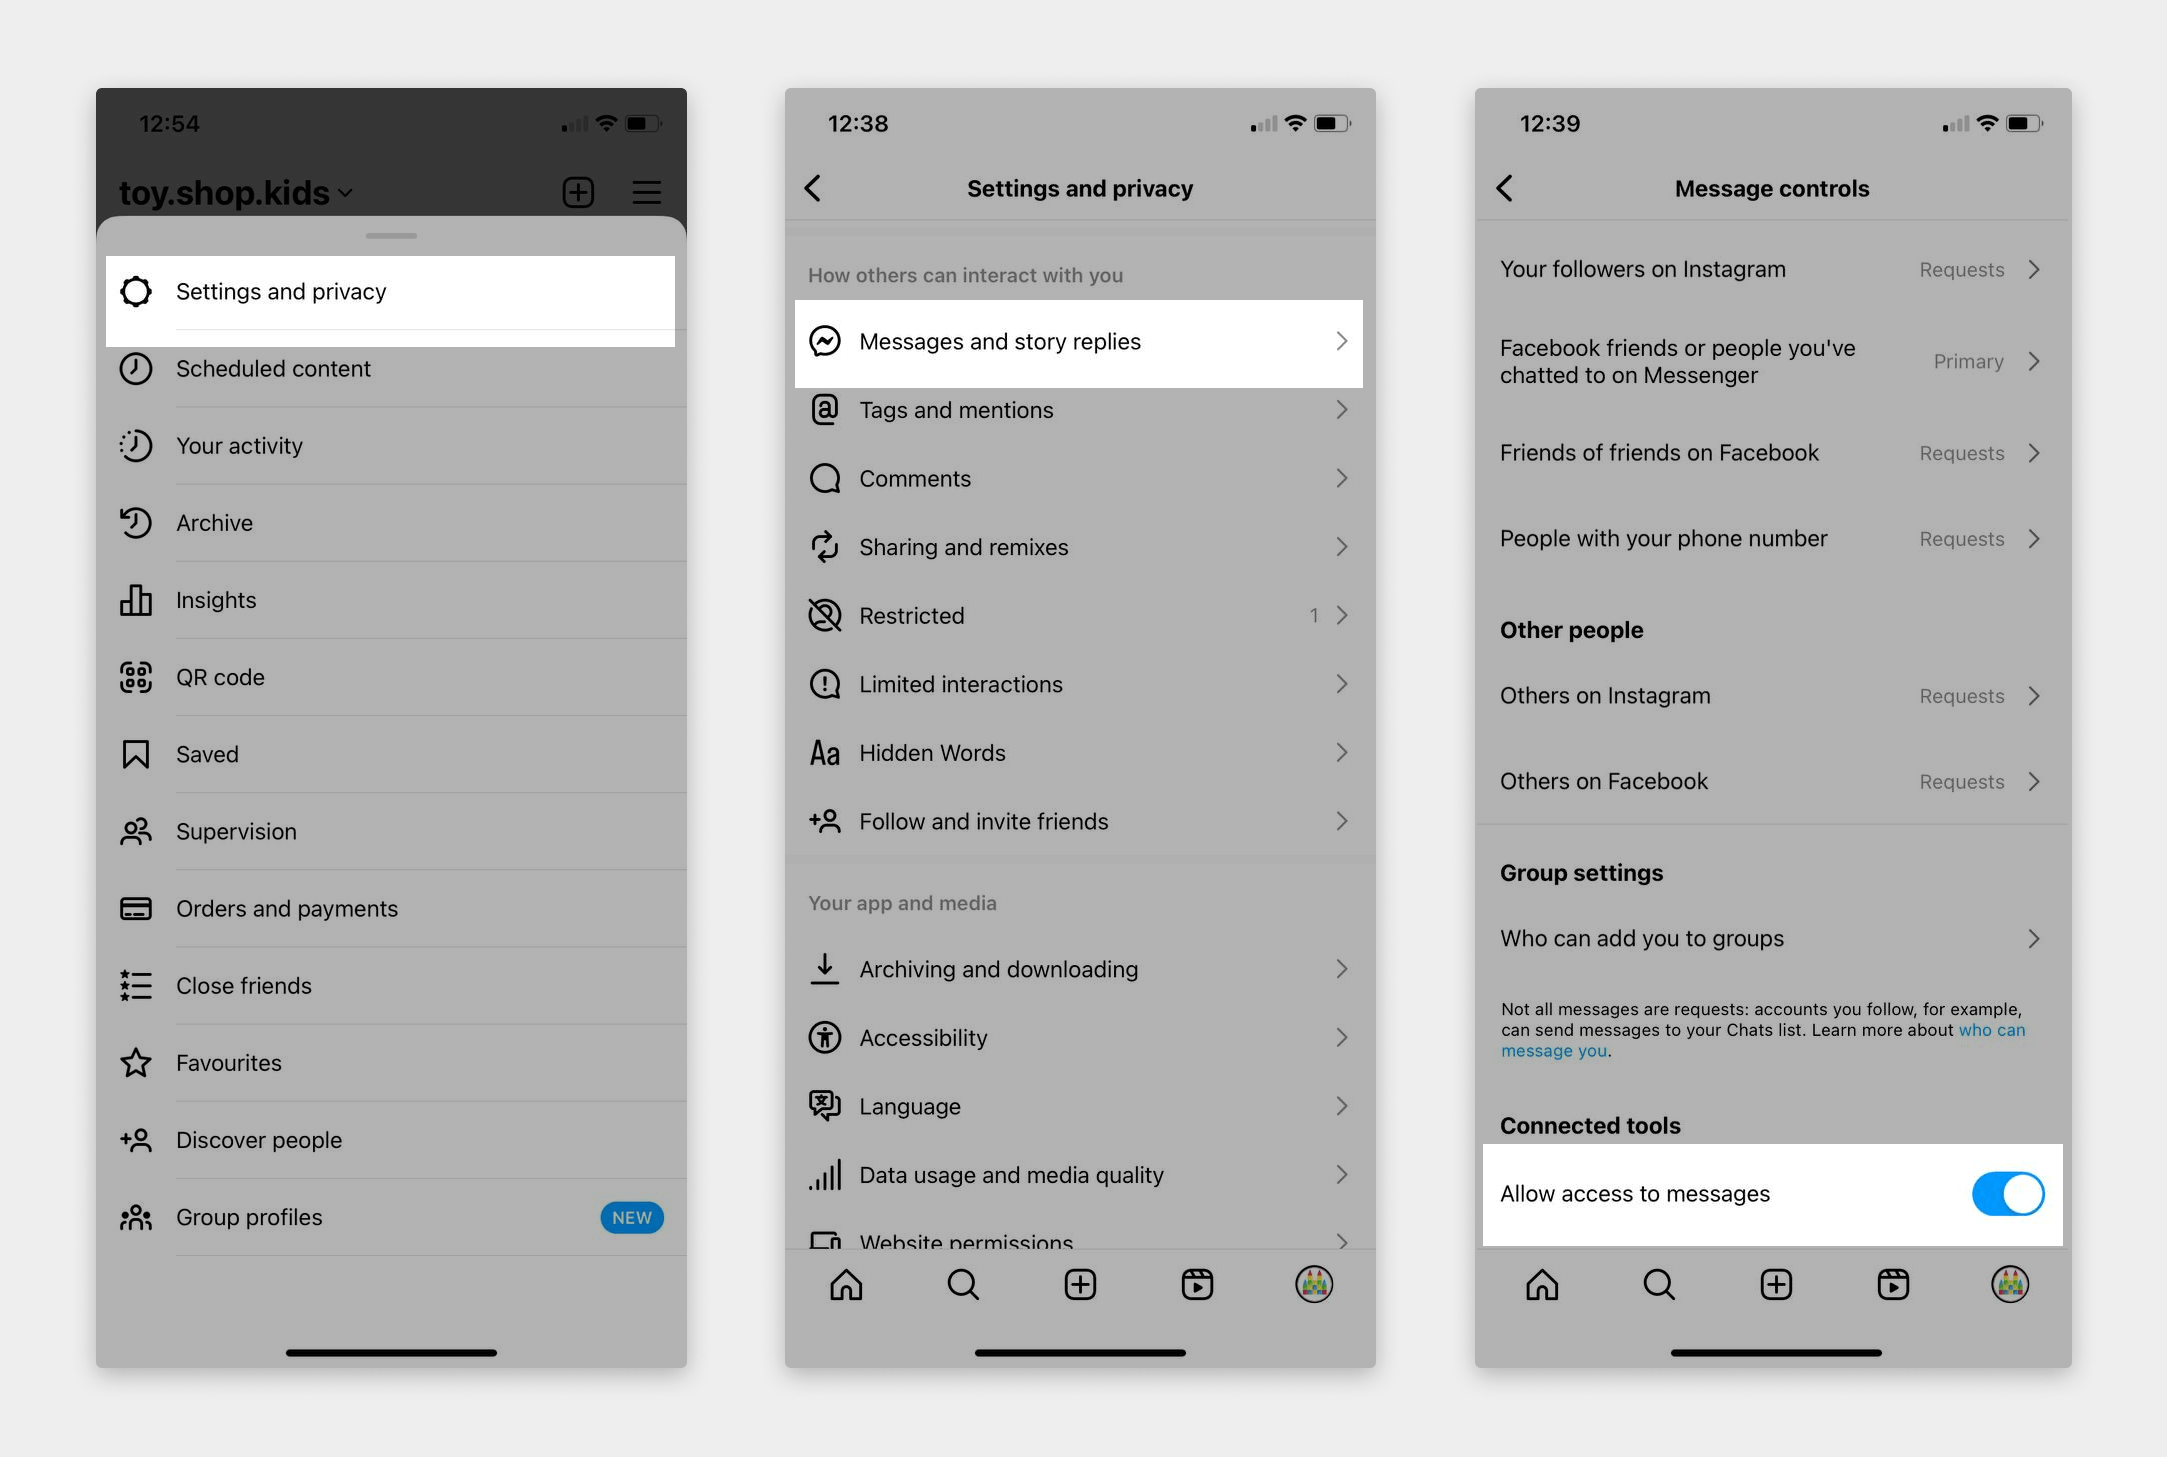
You can also check the permissions in the settings. Open the menu ☰ in the upper left corner and go to Settings and privacy > Messages and story replies > Message controls. Allow access to messages must be active for your bot to function.
Connect the bot to SendPulse
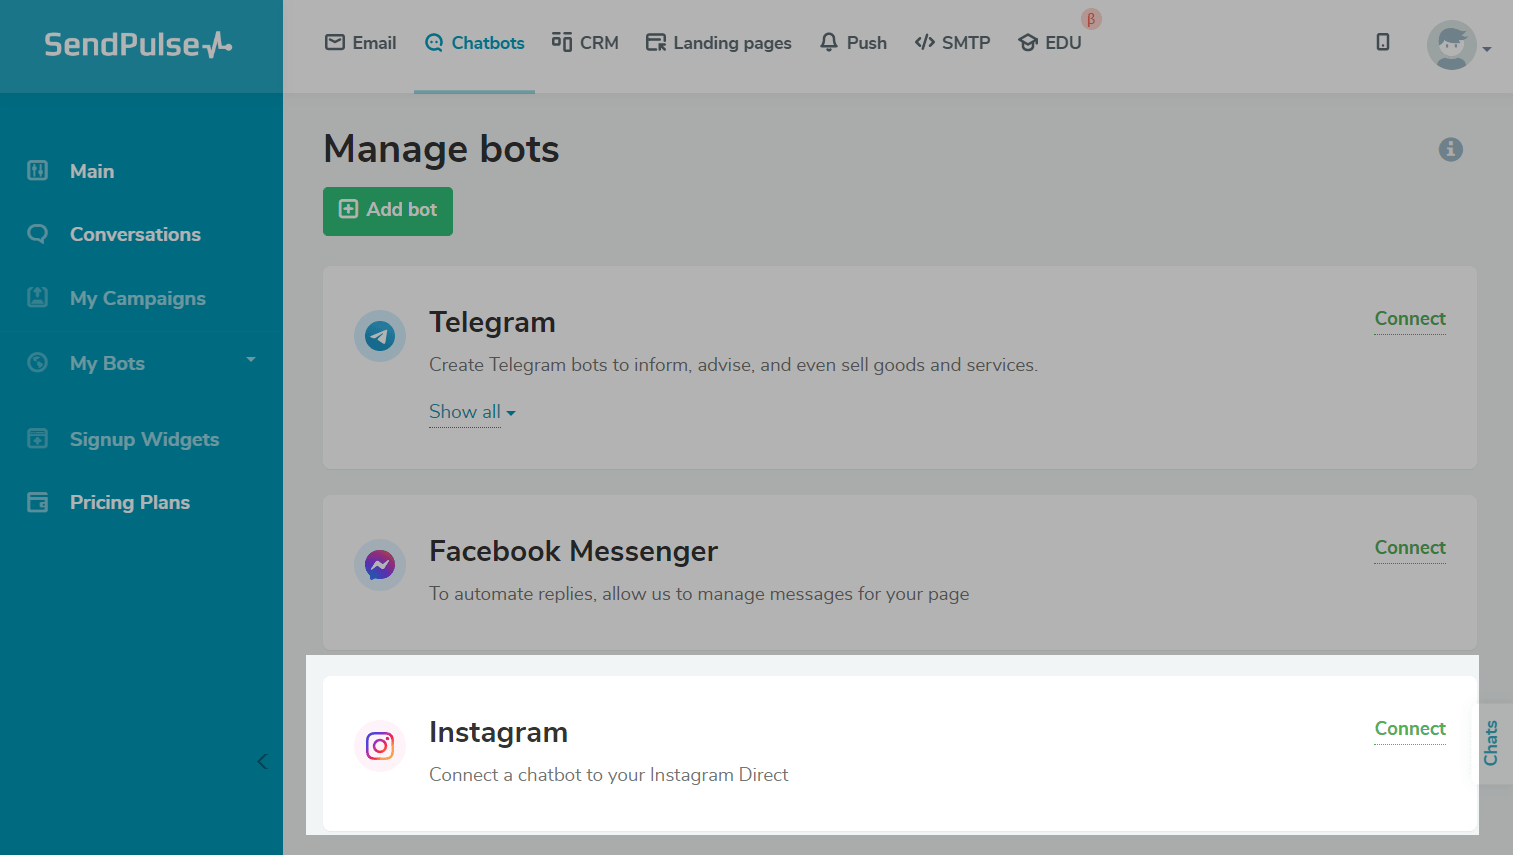
Go to the Chatbots section in your SendPulse account. If you have not previously had any channels connected, click Connect.
If you have already connected bots, go to the Manage bots section, and click Add bot. You can also click Connect next to the channel.
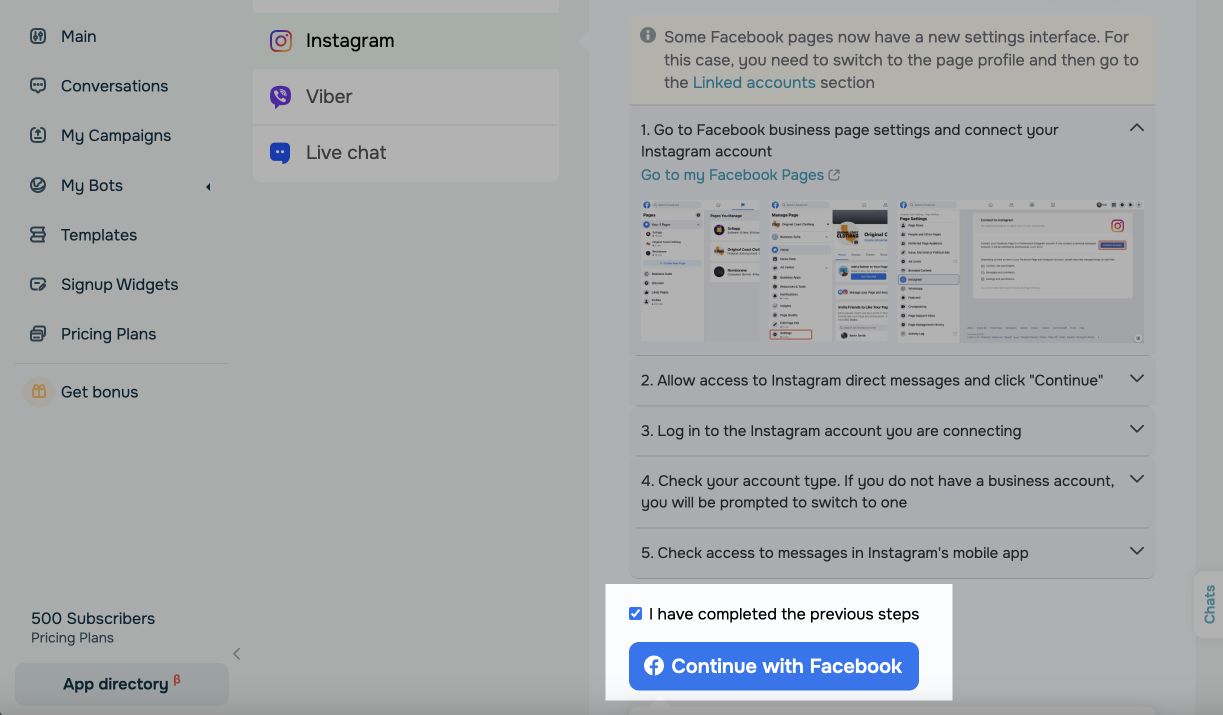
To connect a chatbot using your Facebook account, click Legacy Facebook Business, go over all checklist items, select the I completed the previous steps checkbox, and click Continue with Facebook.
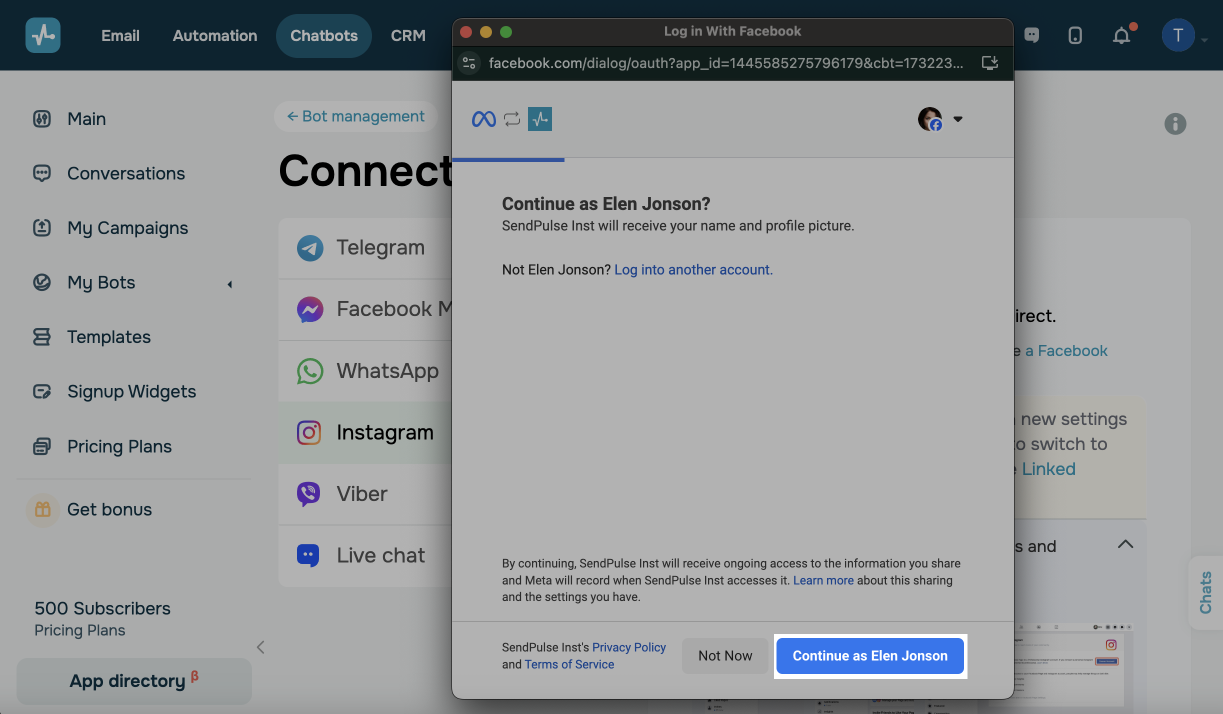
Log into the Facebook account that is linked to your Instagram business account.
Please note that the user you are connecting to must have administrative rights to the brand’s connected Facebook pages for the bot to work correctly.
If you want to reconnect the bot, in the setup wizard, click Edit settings to select the brand's Facebook page to connect.
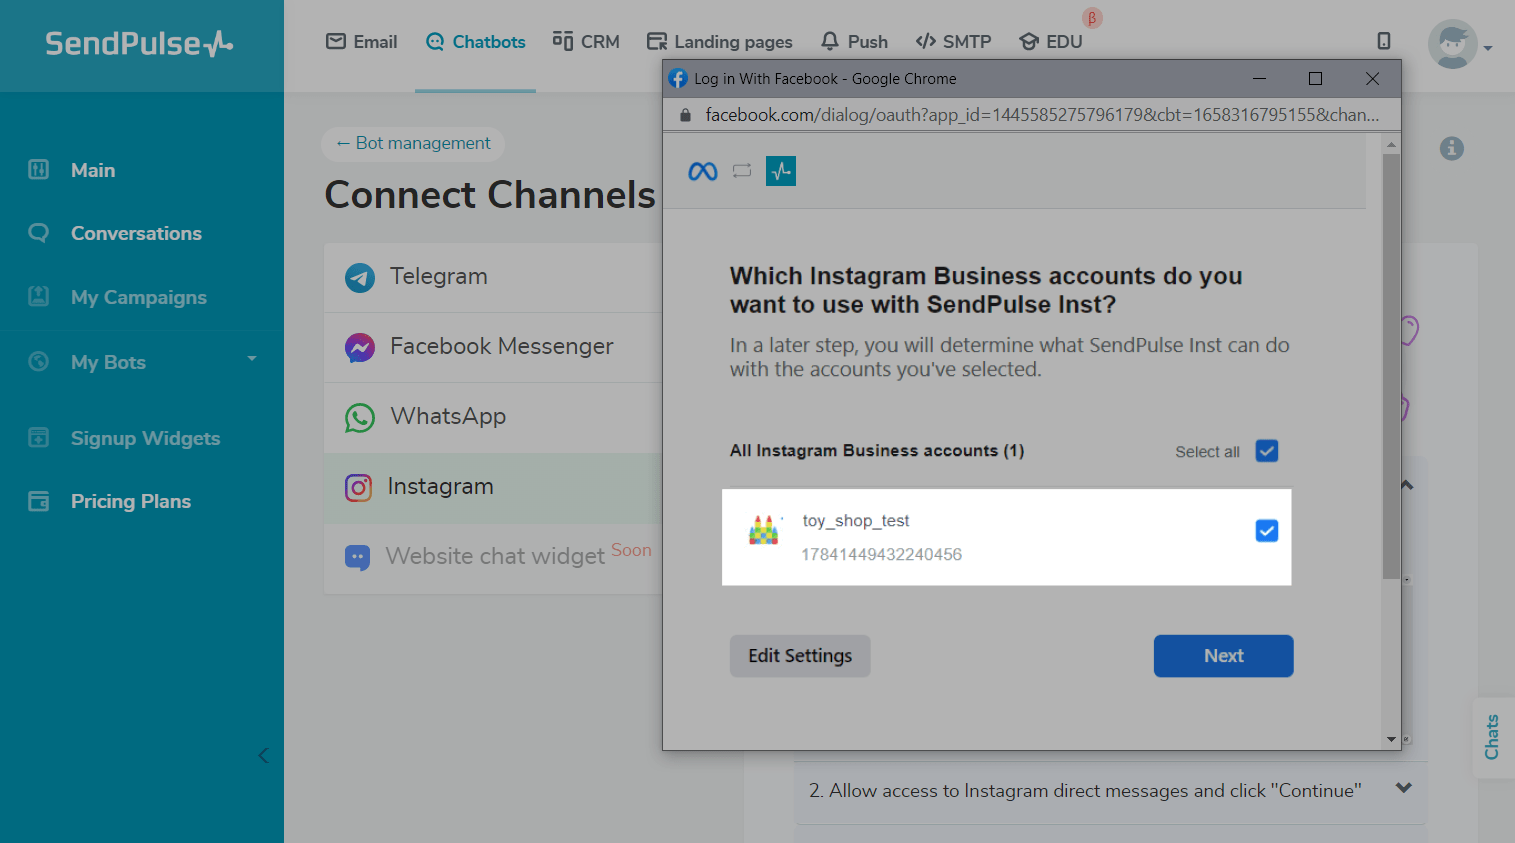
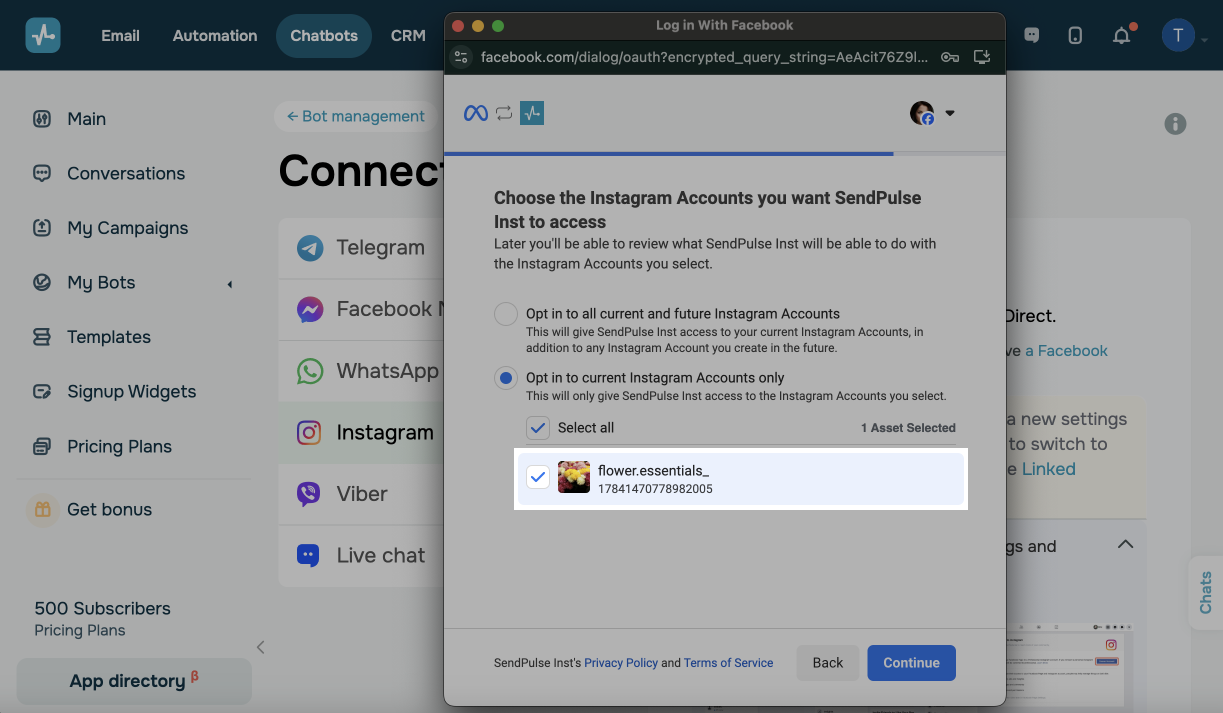
Select the Instagram business account for which you want to create a bot. You can mark several accounts at once if you need to create different bots.
Select the linked company Facebook page.
If you have more than one company Facebook page, make sure to select the Facebook page that is associated with the Instagram account you want to connect the bot to.
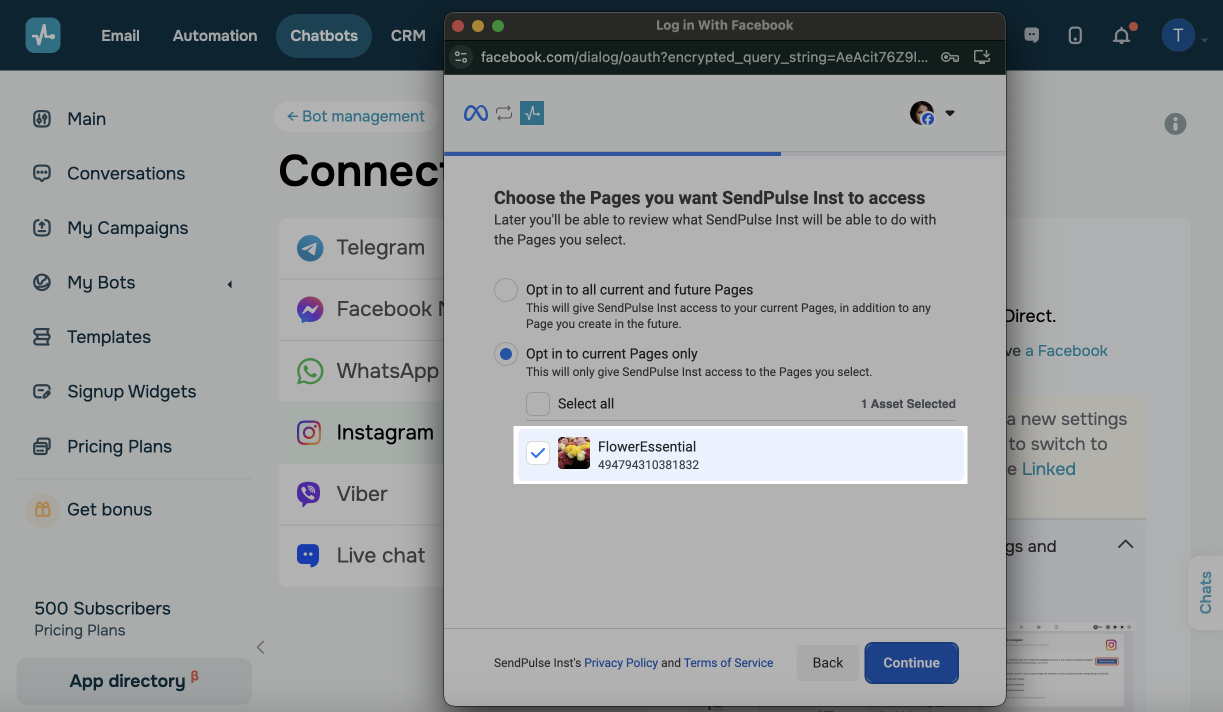
Next, select an Instagram business page to grant SendPulse Inst access to it.
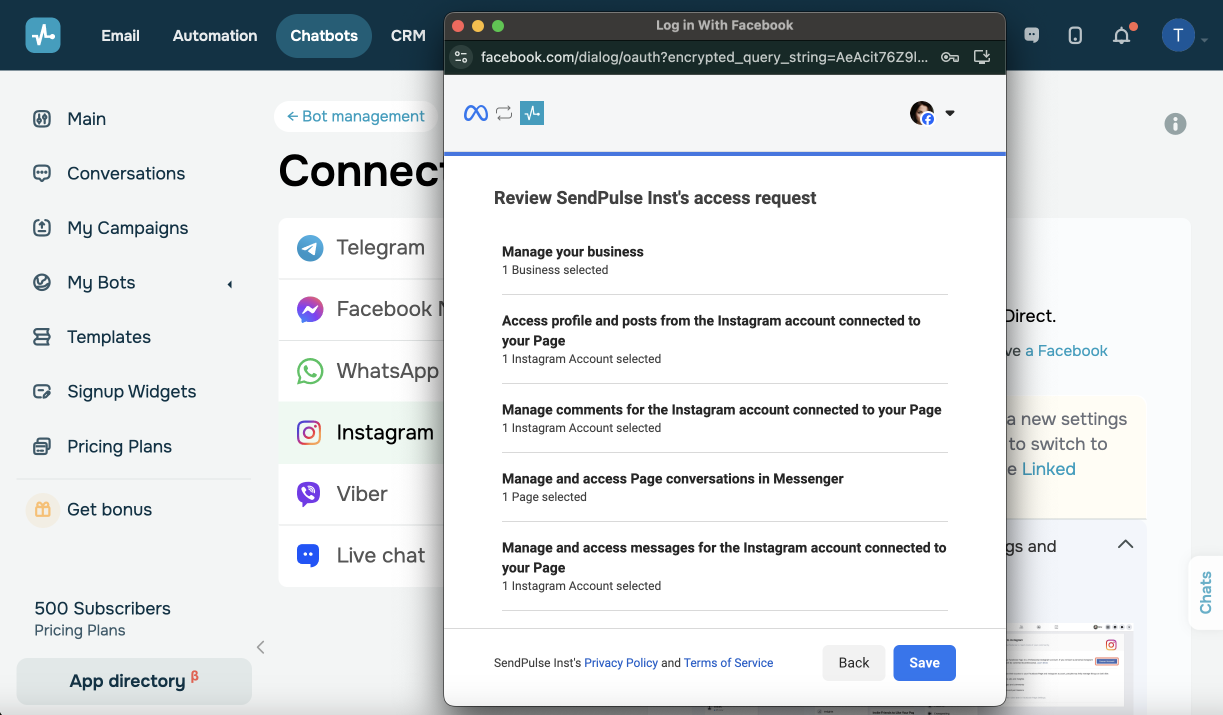
Grant the SendPulse app permissions and click Done. For the correct connection and operation of the bot, select all the items.
Almost everything is ready. After successfully completing the previous steps, a bot for Instagram will be created. Now you just need to do the initial configuration.
Add the owner to the created bot
To test your Instagram chatbot, you need to add your second Instagram account as an owner.
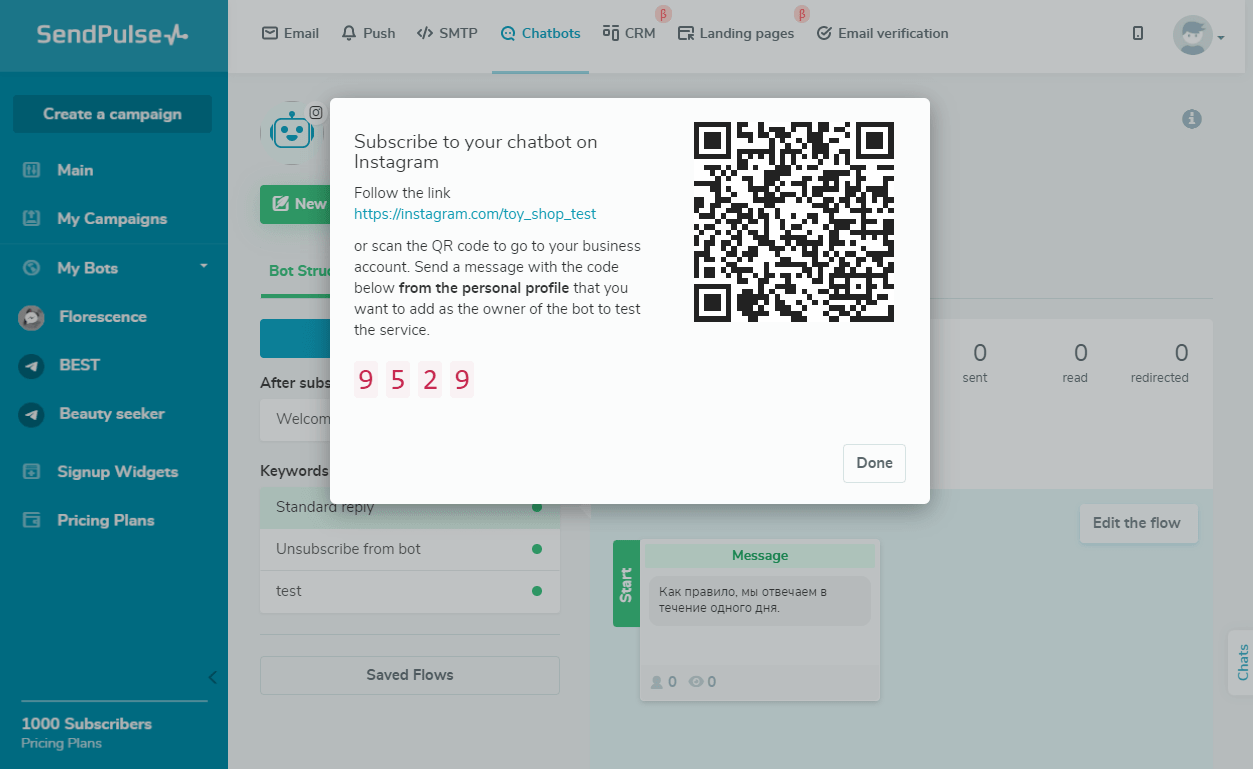
Log in to the personal Instagram account that you want to make the owner of the bot and scan the QR code or follow the link to your Instagram business account.
Please note that the code will change when you reload the page. You need to send the current code to identify the user as the owner of the bot.
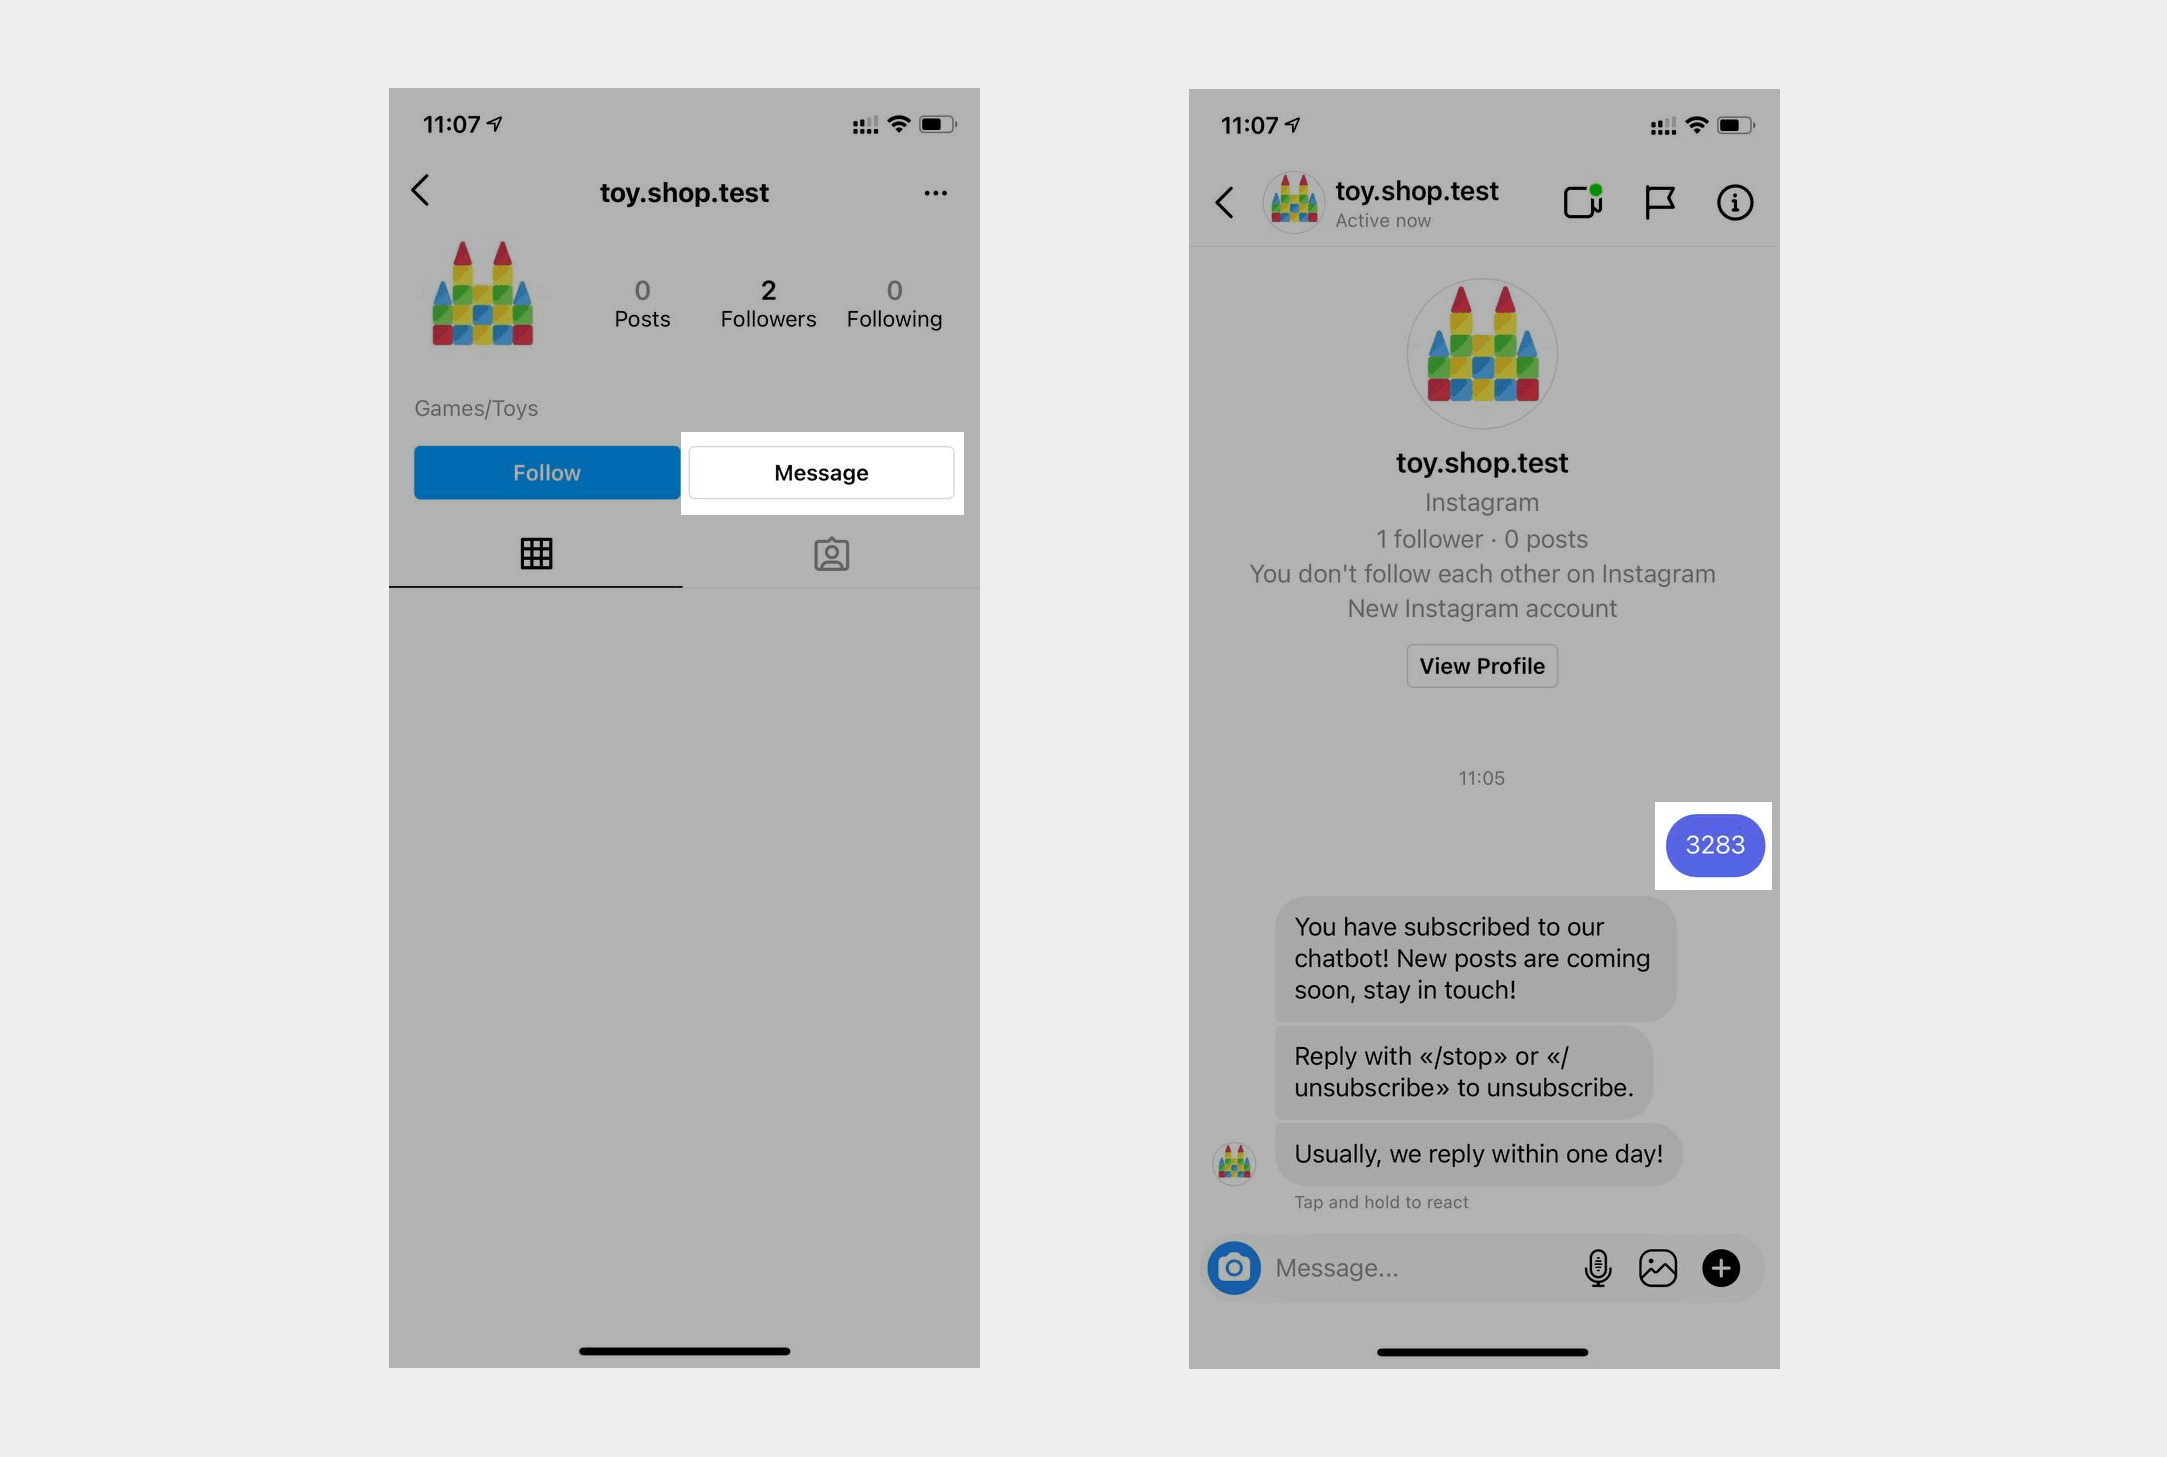
Click Message on the profile, enter the code and send a message.
If you set it up correctly, you will receive a welcome flow, and in the bot audience panel in SendPulse, the inscription Owner will be added to your contact in your chatbot Audience.
Continue building your chatbot
The Welcome message, Standard reply, and Unsubscribe from flows are available by default. You can also create your own triggers and flows.
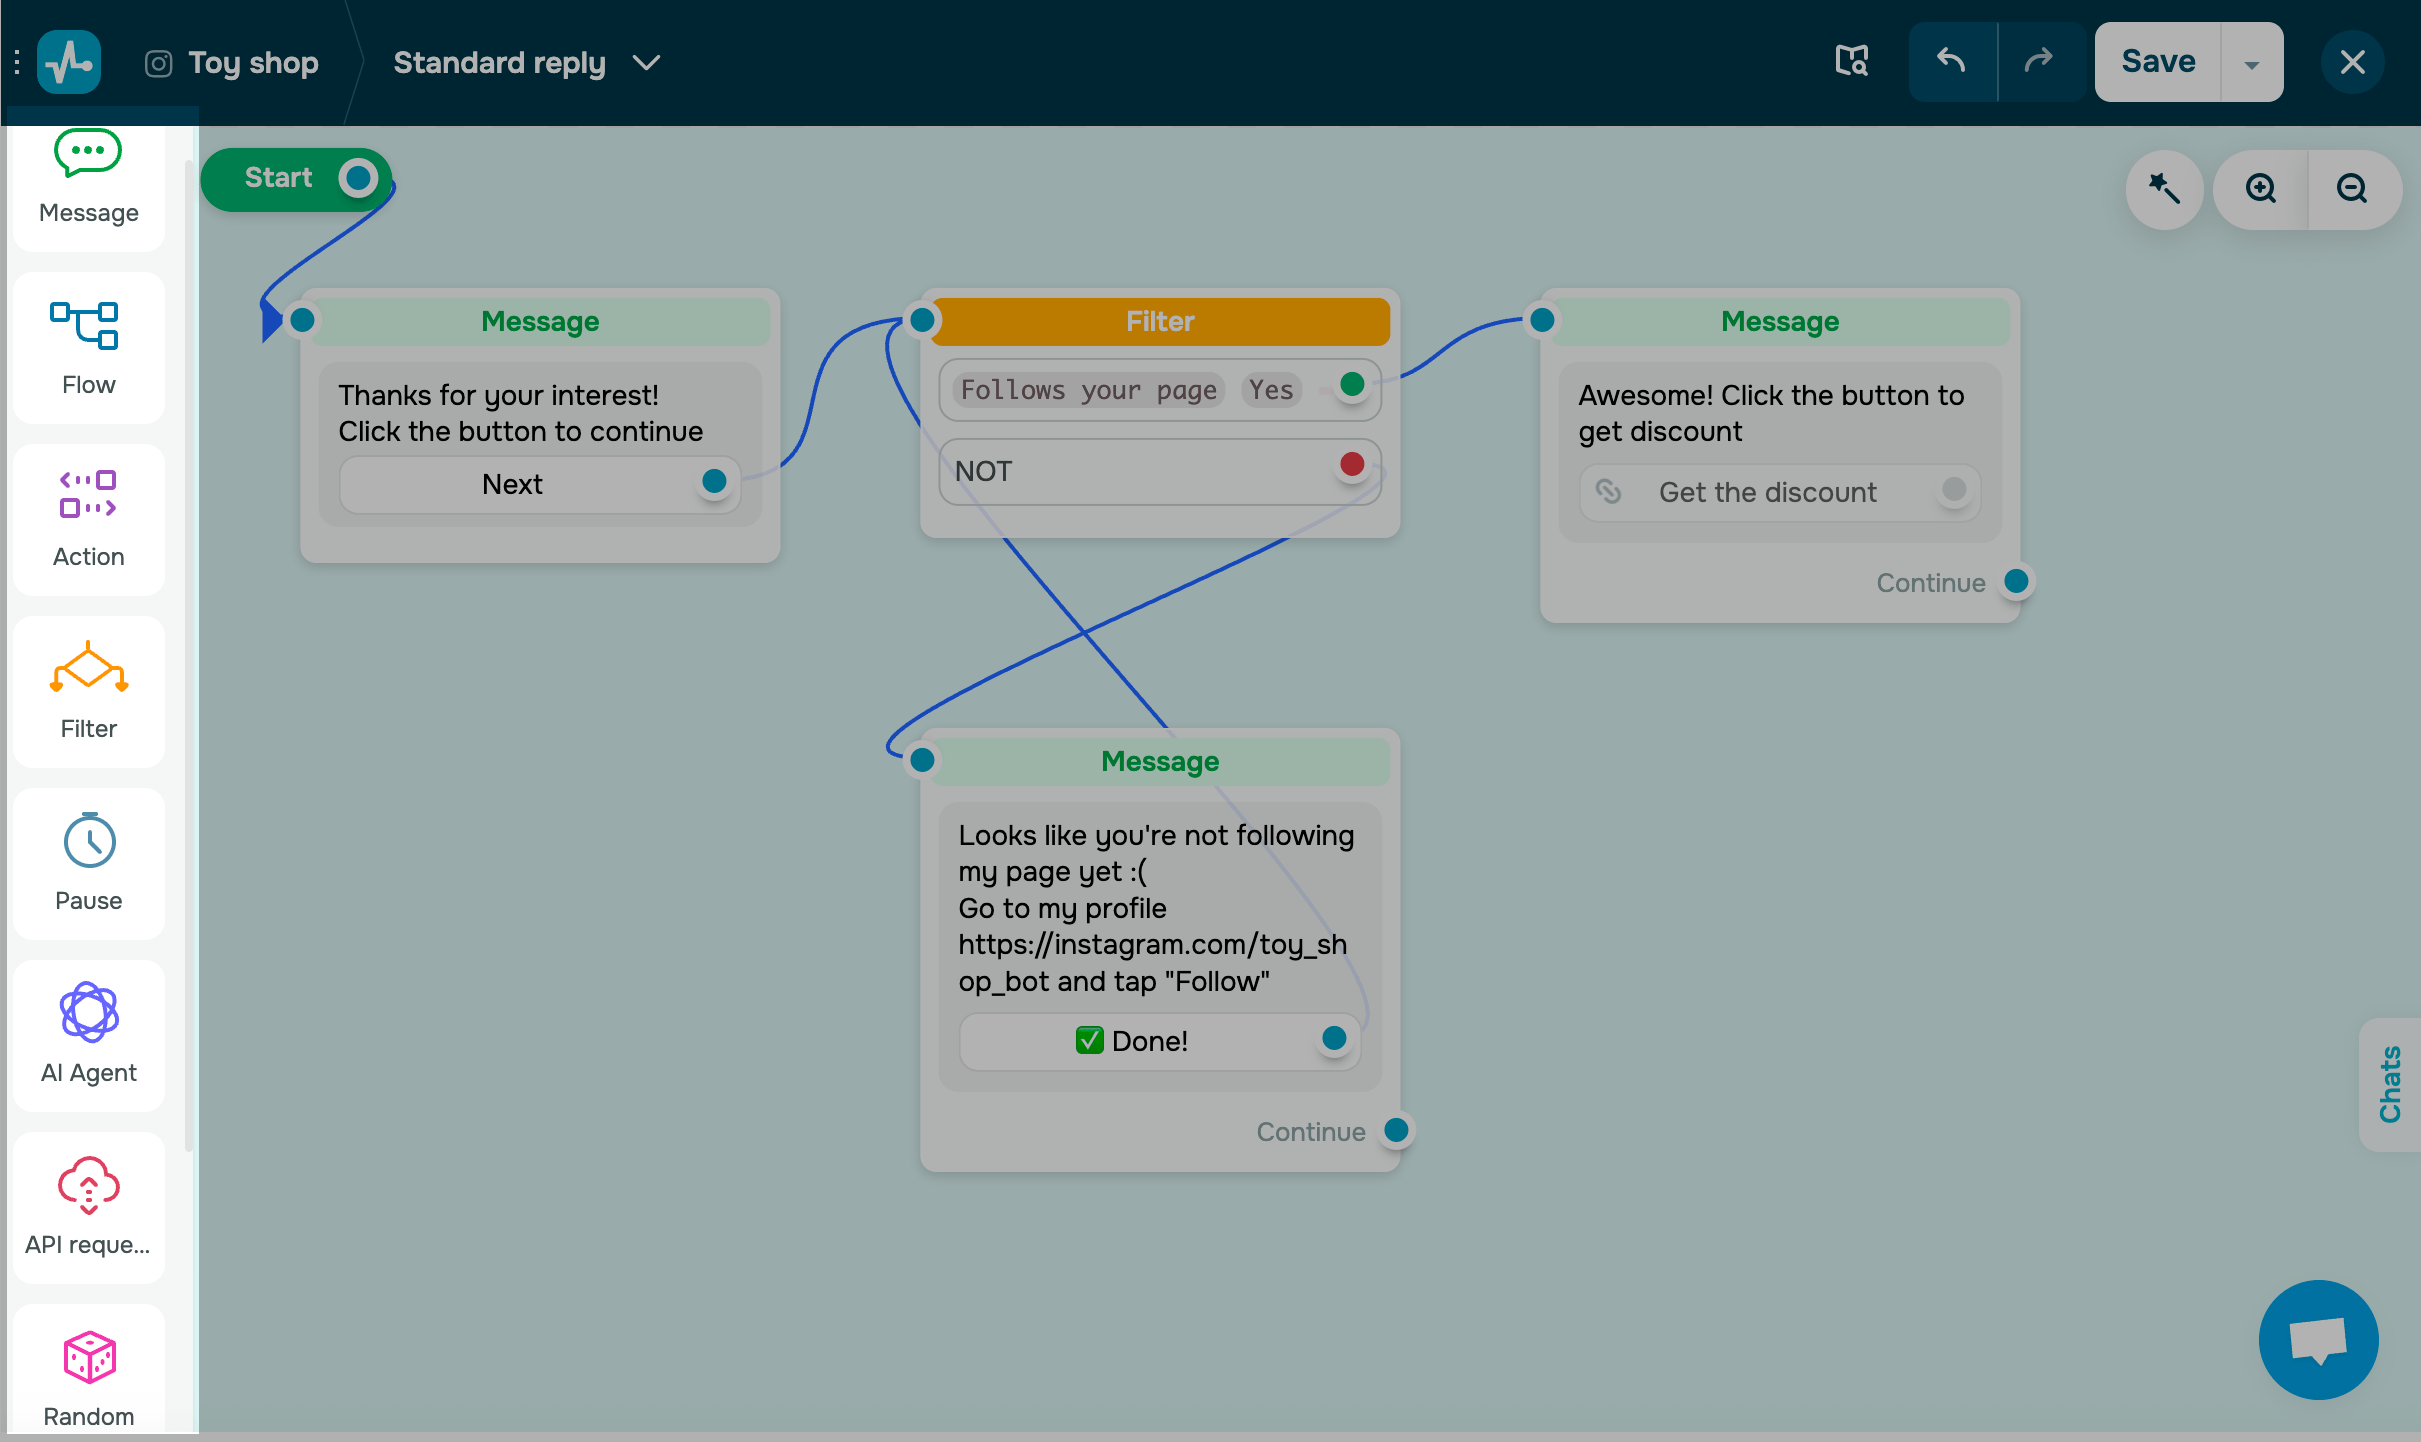
Plan out key conversations your chatbot should support, then build dedicated flows using chatbot builder elements. You can also manage flow branches based on user behavior using the Button, Filter, and AI Agent elements.
Read more: Create a chatbot structure and Tips on chatbot flow design.
You can also use AI to generate flows or apply ready-made templates that match your goals. This can significantly reduce the time spent on brainstorming and flow planning.
Once you’ve set up your chatbot and flows, you can add chatbot links to your website or pop-ups. If you have a list of subscriber IDs (8–10 digits each), you can import it.
You can also track your chatbot's behavior in your account statistics and chats with subscribers to analyze the user journey and improve user experience.
Last Updated: 10.10.2025
or