Send message cards in chatbots
You can use data that your API service to send data as an array in the JSON format in the “API request” element and create a message card with a brief description and preview image. For example, you can show your most popular items or services, a list of available product categories, or a preview of your latest blog posts in a chat with a subscriber.
The feature is supported in Telegram, Instagram, and Facebook messaging platforms. And for chatbots on WhatsApp, you can send product cards using Facebook Commerce Manager and SendPulse.
Let’s talk about the parameters you can pass and how to configure the “API request” element in a chatbot flow.
Set a URL to Send the Request
Find a flow where you want to add cards, or create a new one. In the flow builder, add the "API request" element, select the GET request method, and insert the link to your API in the "Retrieve data from an external URL" field.
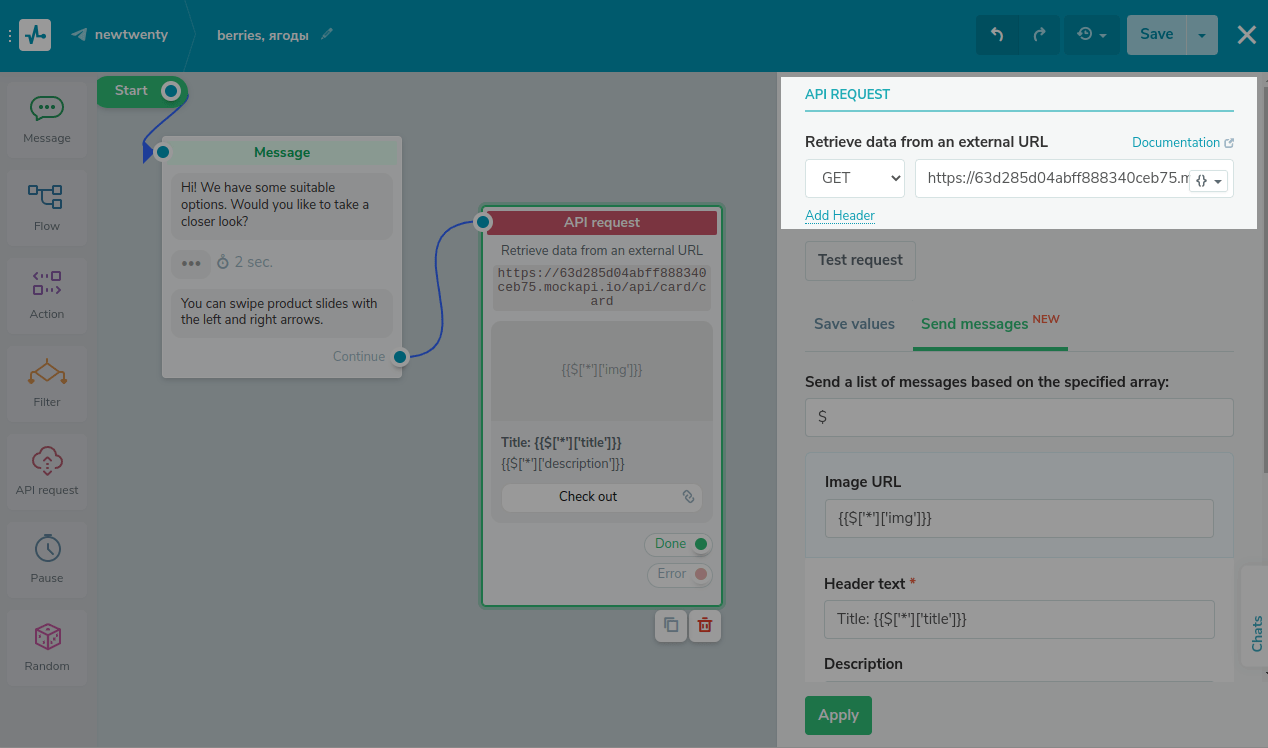
Be sure to run a test request by clicking Test request and get the array structure.
Go to the "Send messages" tab. In the "Send a list of messages based on the specified array" field, specify the path to the array — its address will be output in the JSONPath format ({{$['somekey']['nestedkey']}}). If the array is the JSON root element, the $ symbol will be specified as its path.

Customize the Display of Received Data
You can show up to ten cards in one message that your client can scroll through, compare, and click a link to buy an item. This way, your chatbot will display only the first ten elements with the data from the obtained array.
Select values from the array. Each card field can have the following elements:
- relative addresses of matching array elements. Ordinal numbers in address elements will be replaced by
[*], for example,{{$['data'][*]['title']}}; - a static text value (string), for example, a link
https://shop-example.comor button name; - a combination of a relative address and static text value, for example,
Title: {{$[*]['title']}}; - relative addresses of matching elements outside the array;
- variables stored in your bot's audience.
The available parameters are described in the table below.
| Image URL optional |
A link to a product card image. |
| Header text required |
A product card header consisting of several array elements added one after another. The maximum header length is 80 characters — any extra text will be cropped. |
| Description required for Facebook Messenger |
A product description that can consist of several array elements added one after another. The maximum description length is 80 characters — any extra text will be cropped. |
| Button optional |
Each button consists of a name and an external link. You can add two buttons maximum. |
Fill in the fields with the selected values.

Click Apply to save the settings.
Test the Result
Save the flow, run the trigger, and test how the cards are displayed in your chatbot.
On Instagram and Facebook Messenger, users can swipe cards left and right with the cursor.
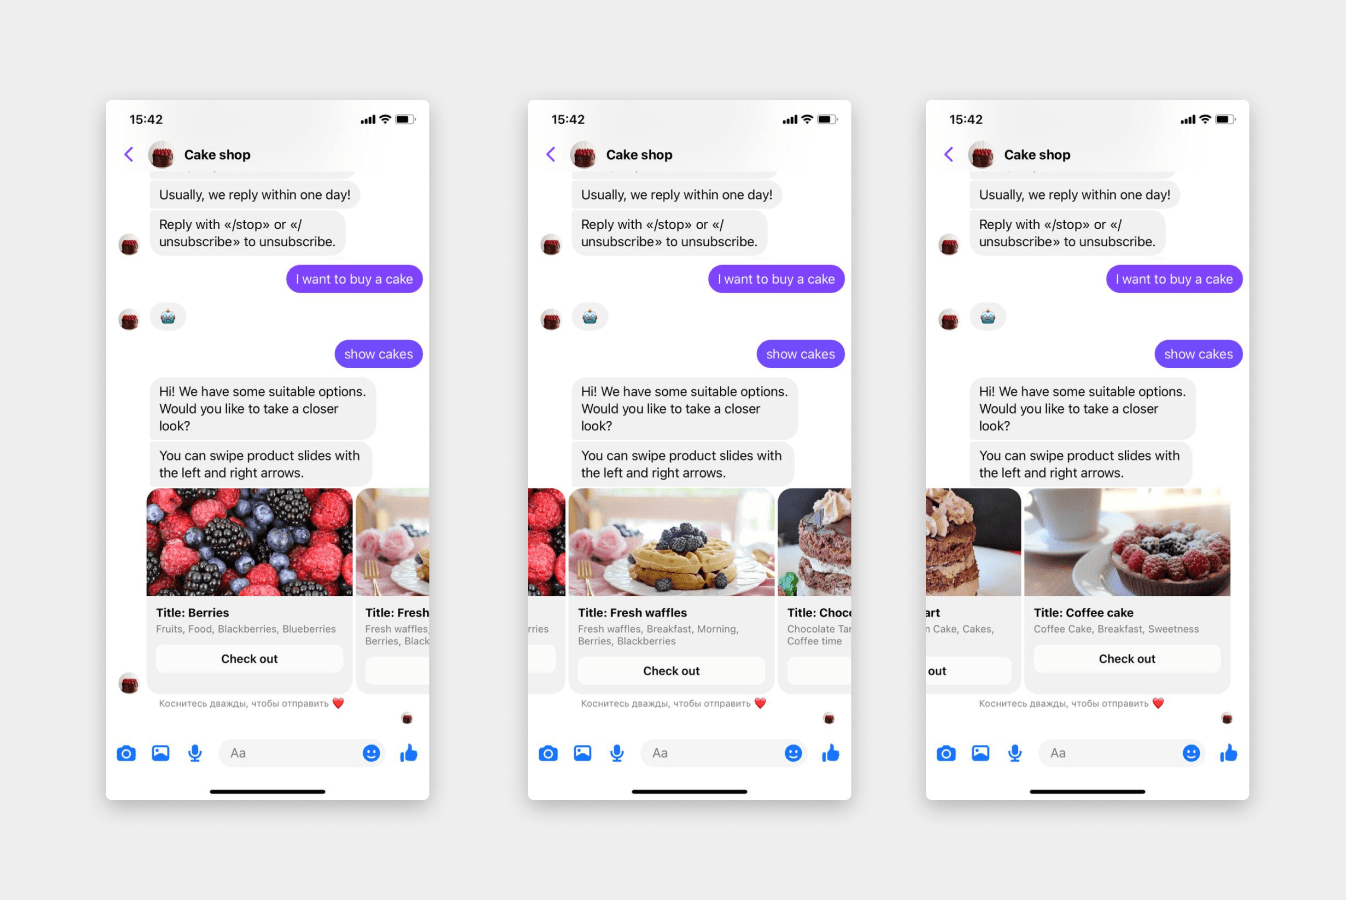
There is no ready-made “Carousel” structure in Telegram. Your chatbot will send product cards one at a time, allowing users to switch between slides using the right and left buttons.

In the message card, you can only add a link with a link to an external resource. To continue the flow, connect the next message via connectors (red in case of error, green in case of successful request).
You can't branch the flow depending on the button pressed, so, to help select the item, you can add sequential numbers from 1 to 10 to the buttons in the next message or ask the customer to specify numbers or the name of the product they like.
Last Updated: 27.12.2024
or