Send push notifications in Automations
You can add an additional channel of communication with your clients and send messages that appear on their browsers. To do this, you need to add the push notification code to the site, configure the transfer of additional variables from the site to the SendPulse service, and integrate push notifications with the SendPulse email service. Let's take a look at each configuration step.
Pass additional variables
You can pass additional variables to segment and personalize your push notifications using two methods. Let's break down each of them.
Method 1. Via script
After adding the web push notification code, add the following code to the site as another script:
<script type="text/javascript">
window.addEventListener('load', function() {
   oSpP.push("Name","Name_of_website_user");
   oSpP.push("Email","Email_of_website_user");
});
</script>
Where:
Name and Email are variable names.
Name_of_website_user and Email_of_website_user are the values of these variables.
If a variable is added after a user subscribes to web push notifications, the information will be transmitted to the server, and the subscription record will be updated when the user revisits the site.
Method 2. Via input fields
Add additional input fields to the site using the sp_push_custom_data class:
<input class="sp_push_custom_data" type="hidden" name="Variable 1" value="Data1">
<input class="sp_push_custom_data" type="hidden" name="Variable 2" value="Data2">
Where:
Variable 1 and Variable 2 are the appropriate variables for entering personal customer data. For example: Name, Last name, or Email.
You can add as many lines with variables as you want. The data from them will be added to subscribers’ records in the web push service. This data will be used for message personalization and segmentation.
Both methods described above are applicable for all sites on any CMS.
Integrate push notifications with the Email service
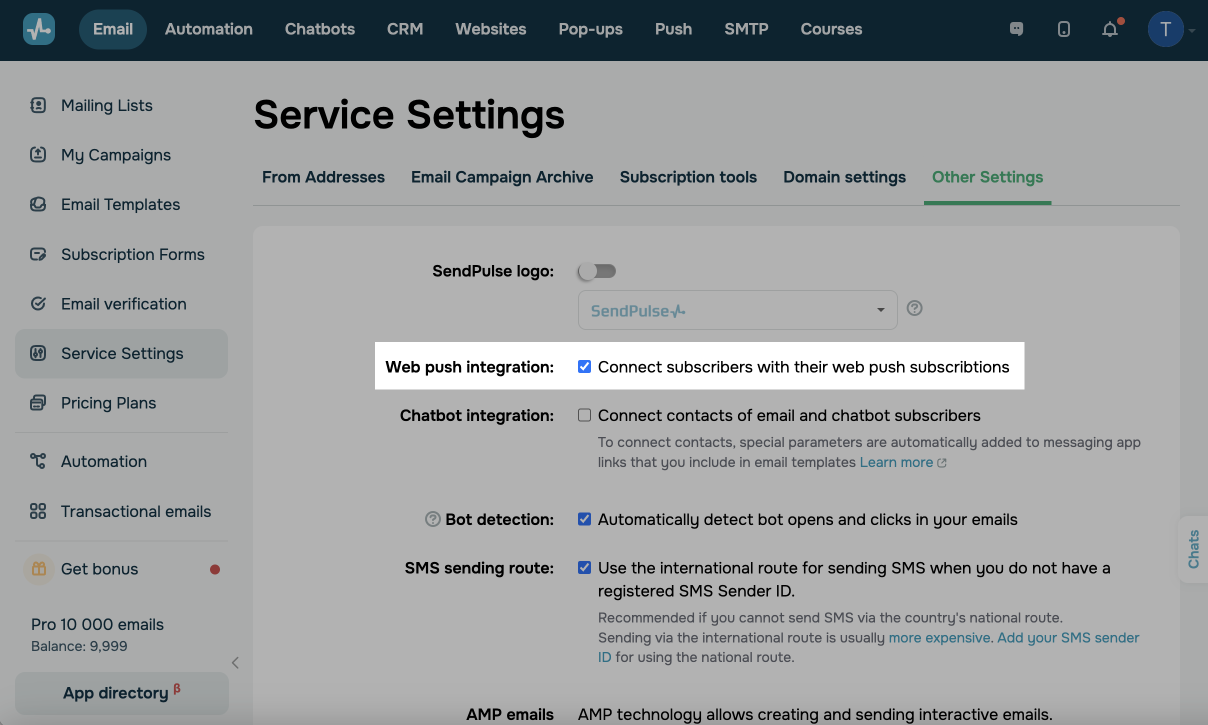
Go to Email > Service Settings > Other settings tab, and select the Web push integration checkbox.
Push notifications usage in Automation 360
Automation can be triggered by adding a contact to a mailing list, creating and changing the deal stage in CRM, a special date, contact webhook, variable value change, or event.
Push notifications are only sent to contacts that subscribed to push campaigns and their push subscriptions are associated with their email addresses.
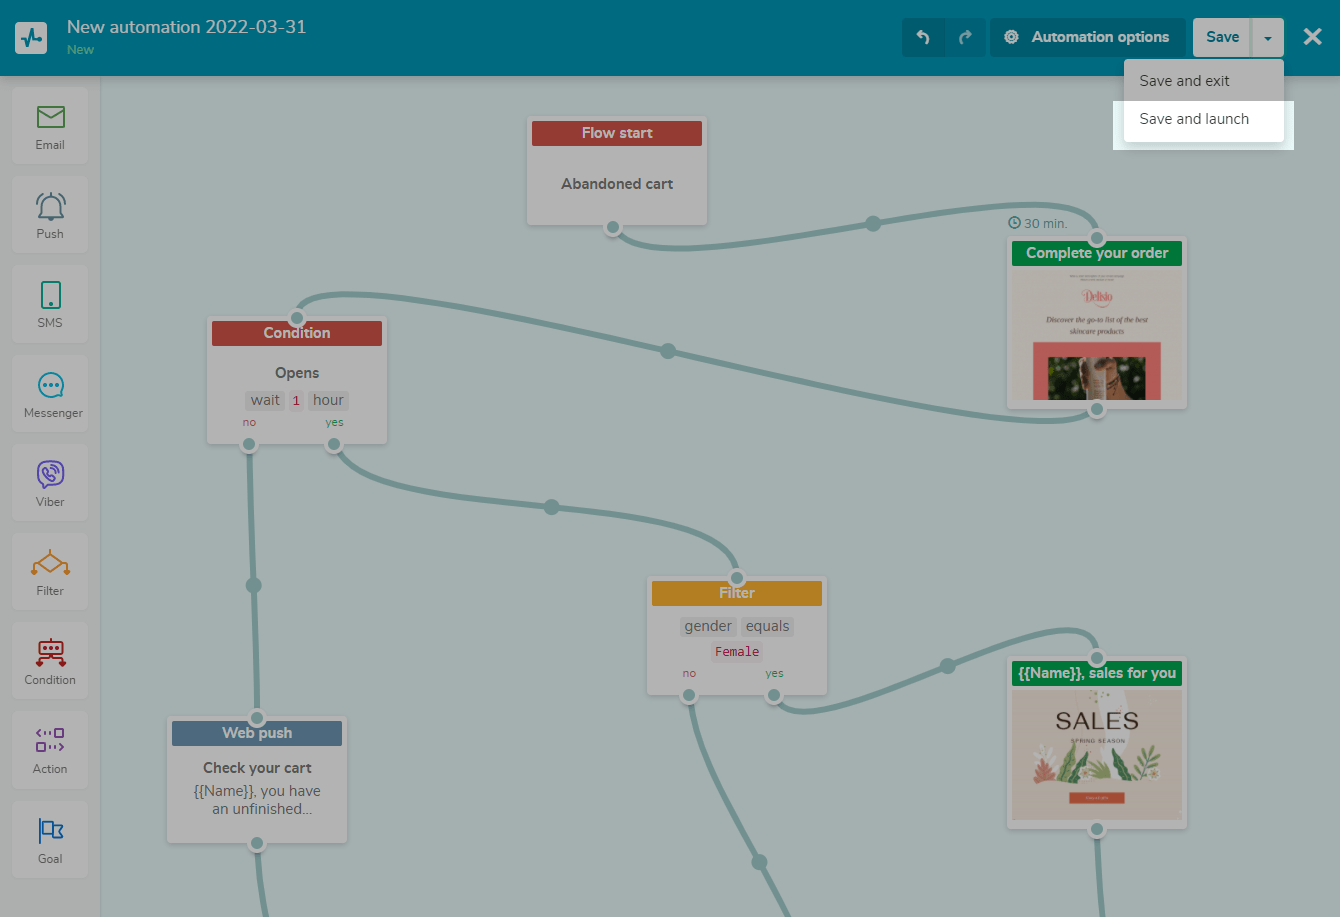
An example of an automated web push notification
Let's see an example of creating an automation triggered by an abandoned cart event. As soon as the abandoned cart event occurs in your system, the user will receive an email. If the user does not open the email within an hour, they will receive a push notification.
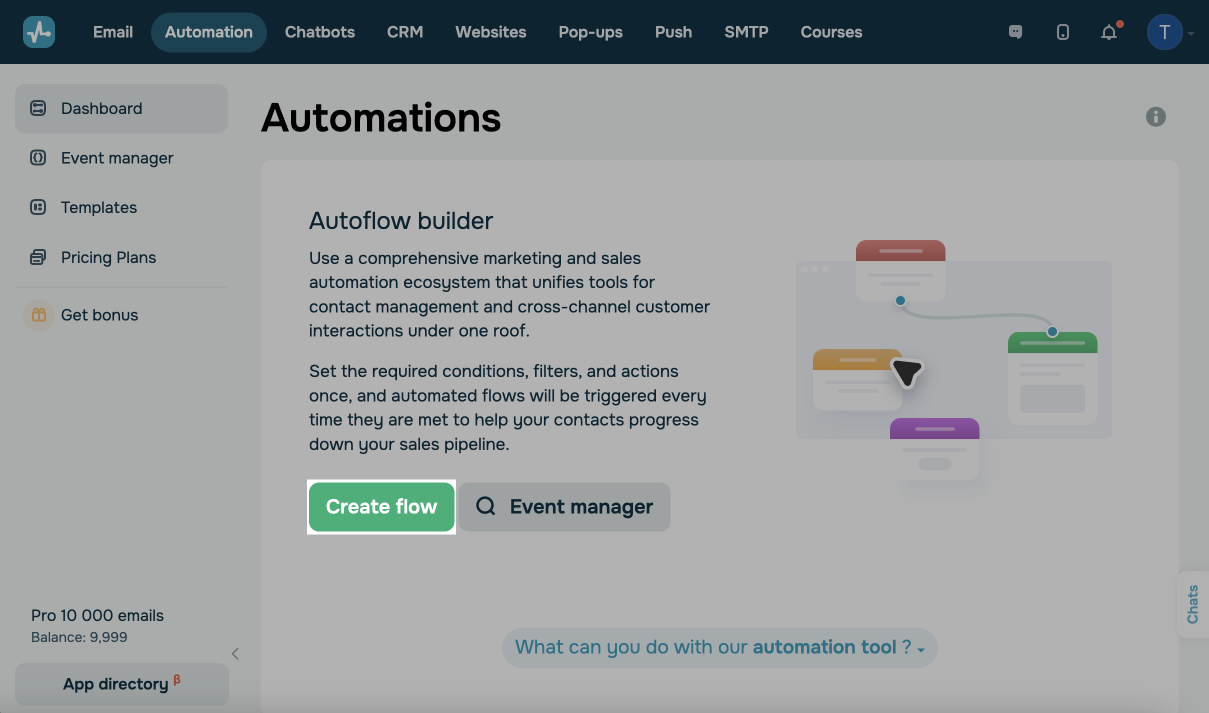
Go to Automations360 section and click Create automation.
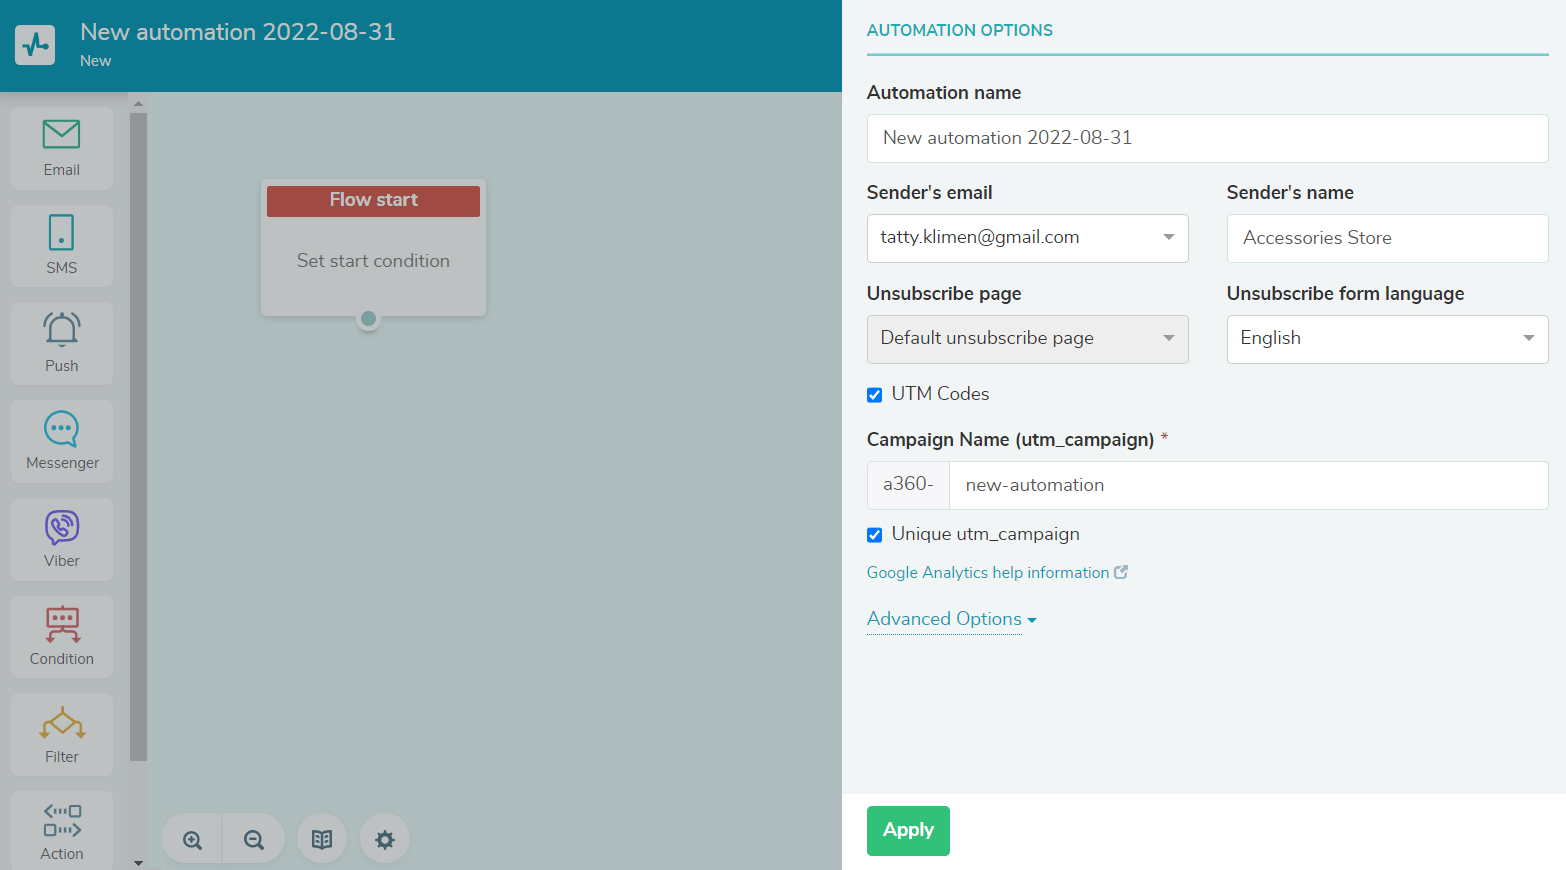
Enter your automation name, specify the sender, connect Google analytics, and select the unsubscribe page and unsubscribe form's language.
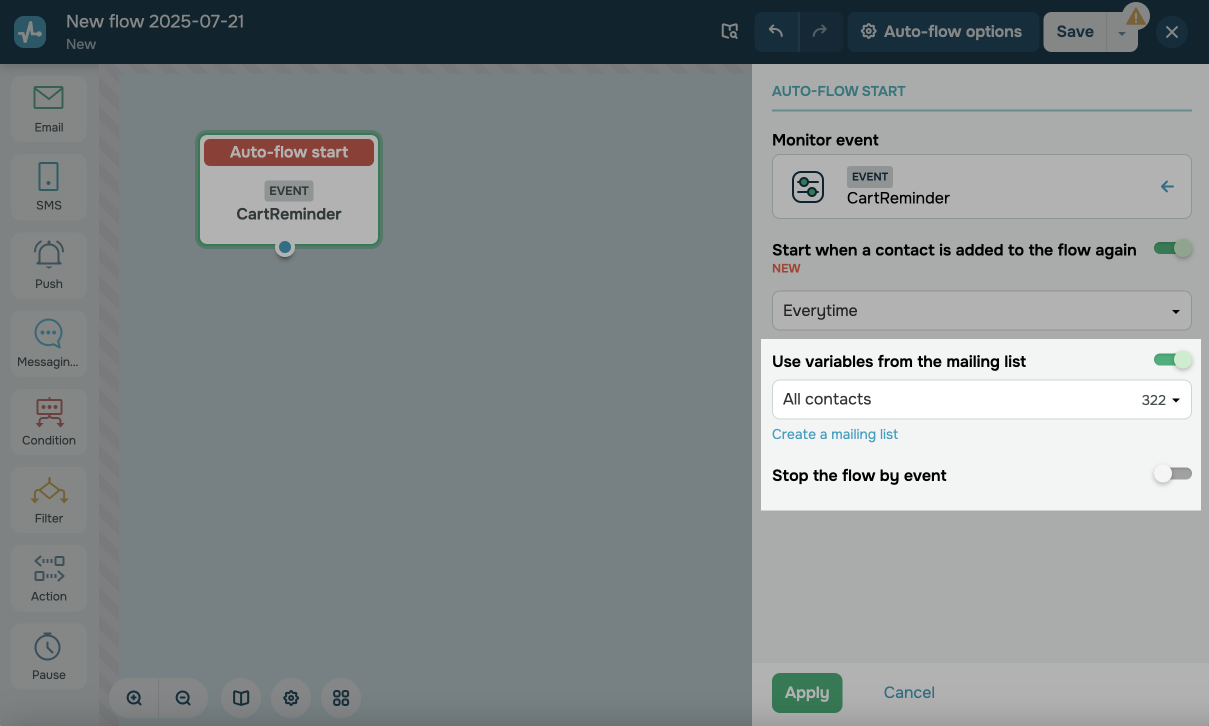
Specify the Abandoned cart event as the series start. Select the mailing list to which the automation will be sent.
Check whether you want the series stop to be triggered by an event, and select this event. You can also count the series stop as a conversion.
Drag the Email element into the editor field, and specify the start message’s sending time. Enter your email subject and preheader, and add your variables from the mailing list. Select a template. Additionally, you can attach files to your email.
Read more about block execution conditions in the article: Element execution time.
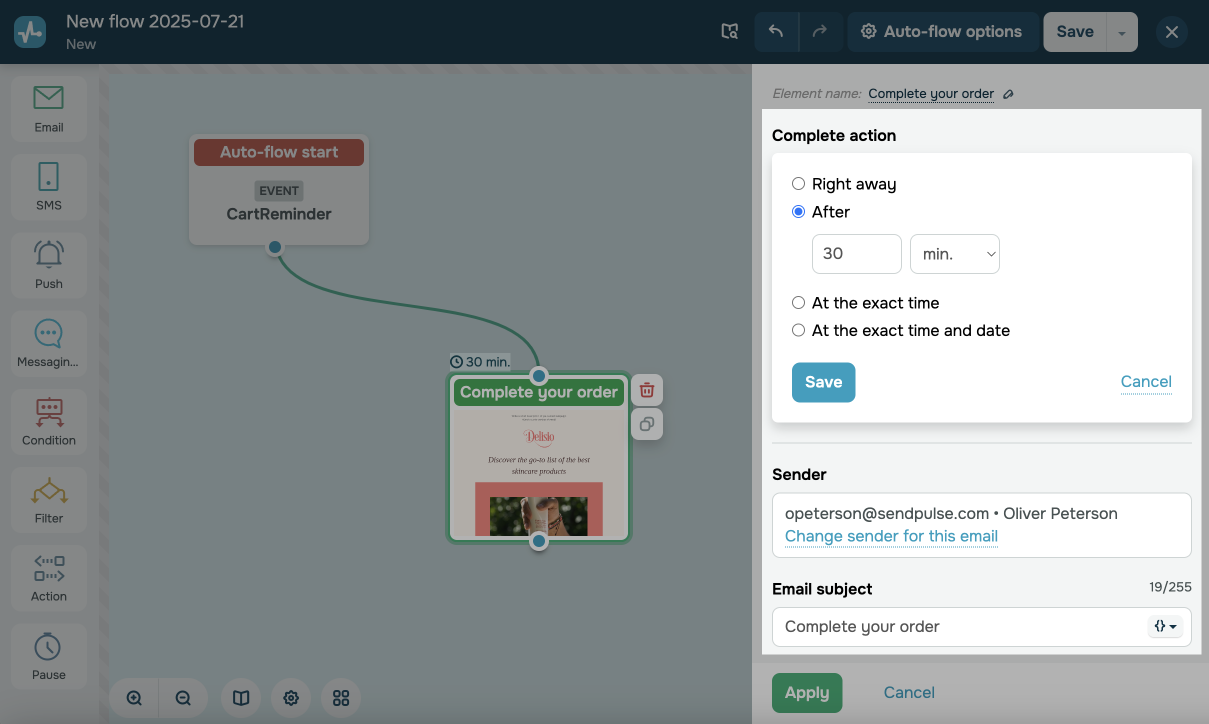
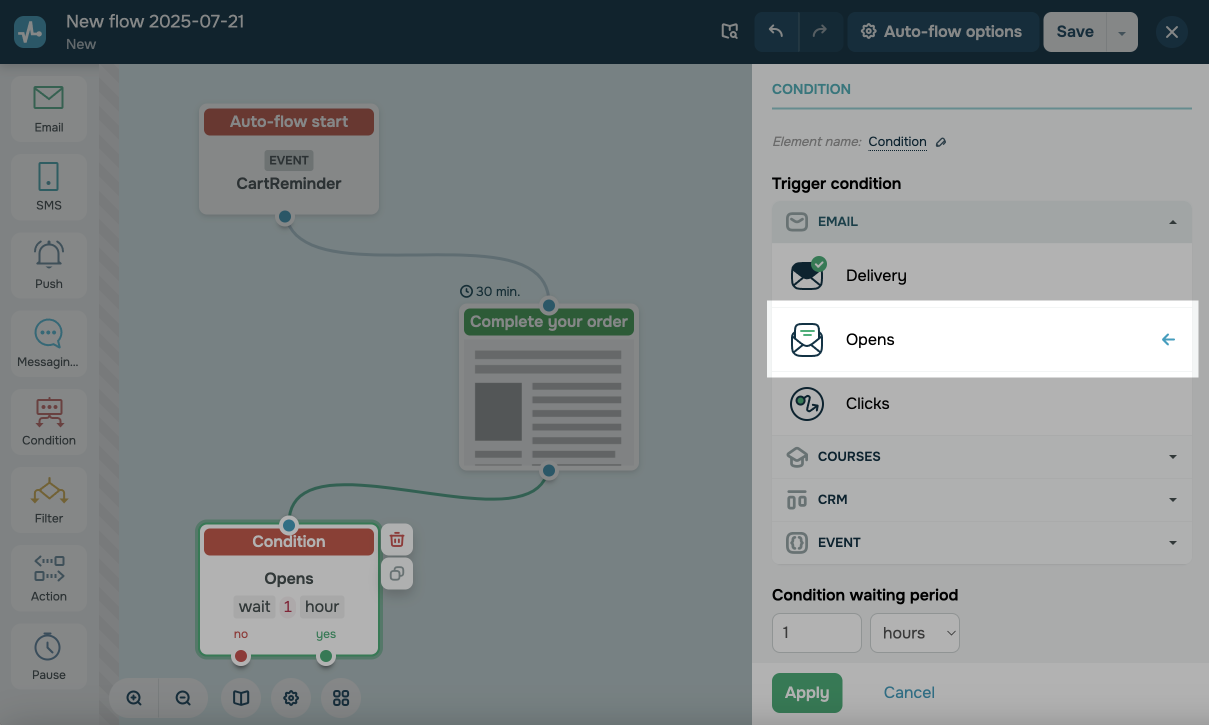
Drag the Condition element, and connect it to the Email element. Select the Open condition. Specify the waiting interval.
Drag the Push element into the editor field, and select the recipients of your push message. Connect the element with the No condition. Specify the start notification’s sending time.
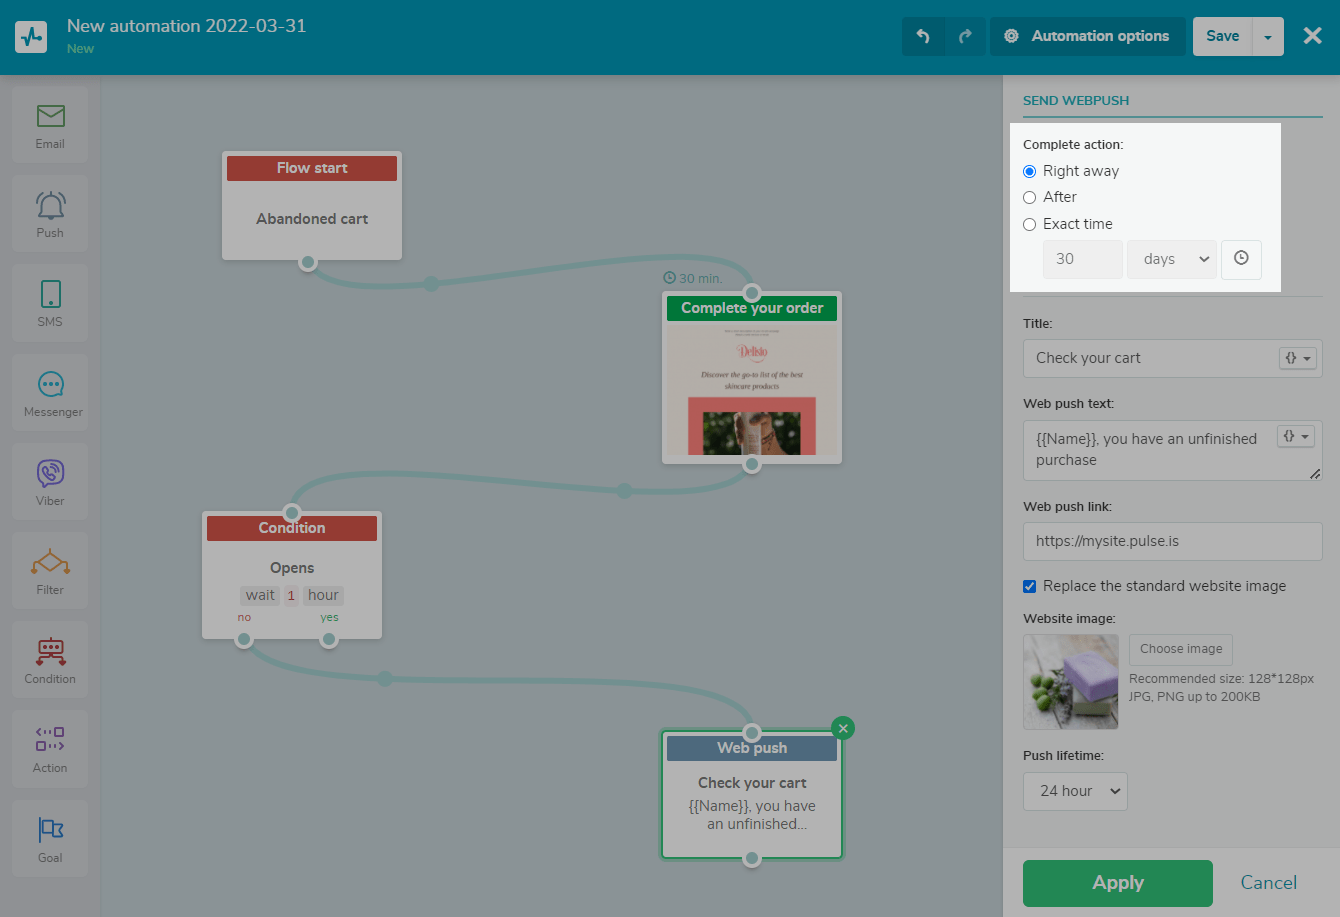
Enter the notification’s title and text. Additionally, you can add variables here as well.
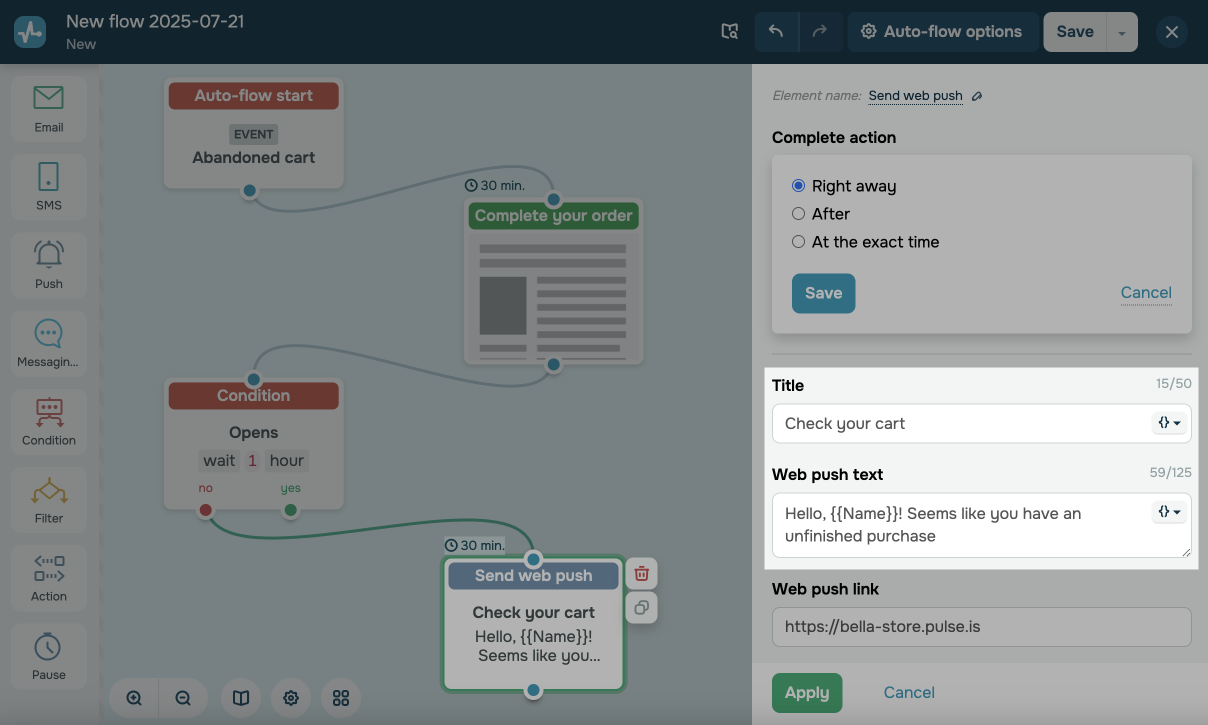
Add the link the recipient will follow after clicking on the notification.
Optionally, you can replace the default image.
The recommended image size is 128*128px, up to 200 KB. The preferable image formats are JPG and PNG.

Set the push lifetime — the period when the message can be delivered to the subscriber. By default, it is 24 hours.
Drag the "Email" element into the editor field, and connect the element with the Yes condition.
Additionally, you can add other elements to diversify the functionality of the flow. For example, you can add the Filter element to branch the flow based on the variable value or Messenger, SMS, or Viber to send messages via other channels.
Once you've finished setting up your flow, save and launch it.
Last Updated: 28.09.2024
or