Enroll students in a course
To start learning, students must first enroll in your course. You can add them manually, enable automated enrollment, or let them sign up on their own.
In this article, we will talk about how to enroll students in your course.
Course enrollment flow
Students access your course using their email addresses. They can share it during enrollment or have an instructor add it. Then, they will receive an email with login credentials to their student account and be able to take your course.
Those who are already enrolled won’t receive a second email, even if you re-enter their email address. If they’ve enrolled in other courses before, they’ll receive an email with a link to their student account, where the new course will show up.
Email notifications are sent from the standard sender email address (courses@sendpulse.online). You can change it in Settings > Sender’s email address.
Make sure to confirm your email address in the SMTP section so that it appears in the Courses section.
To access your course content, students need to choose and pay for a pricing plan, then wait for the course start date you set in their plan settings.
If your student doesn’t get a confirmation email, they should check their spam folder or ask you to resend it. You can also generate a login link or send an email with their login credentials.
Manual student invitation
You will be able to send invitations once you publish your academy website and launch your course.
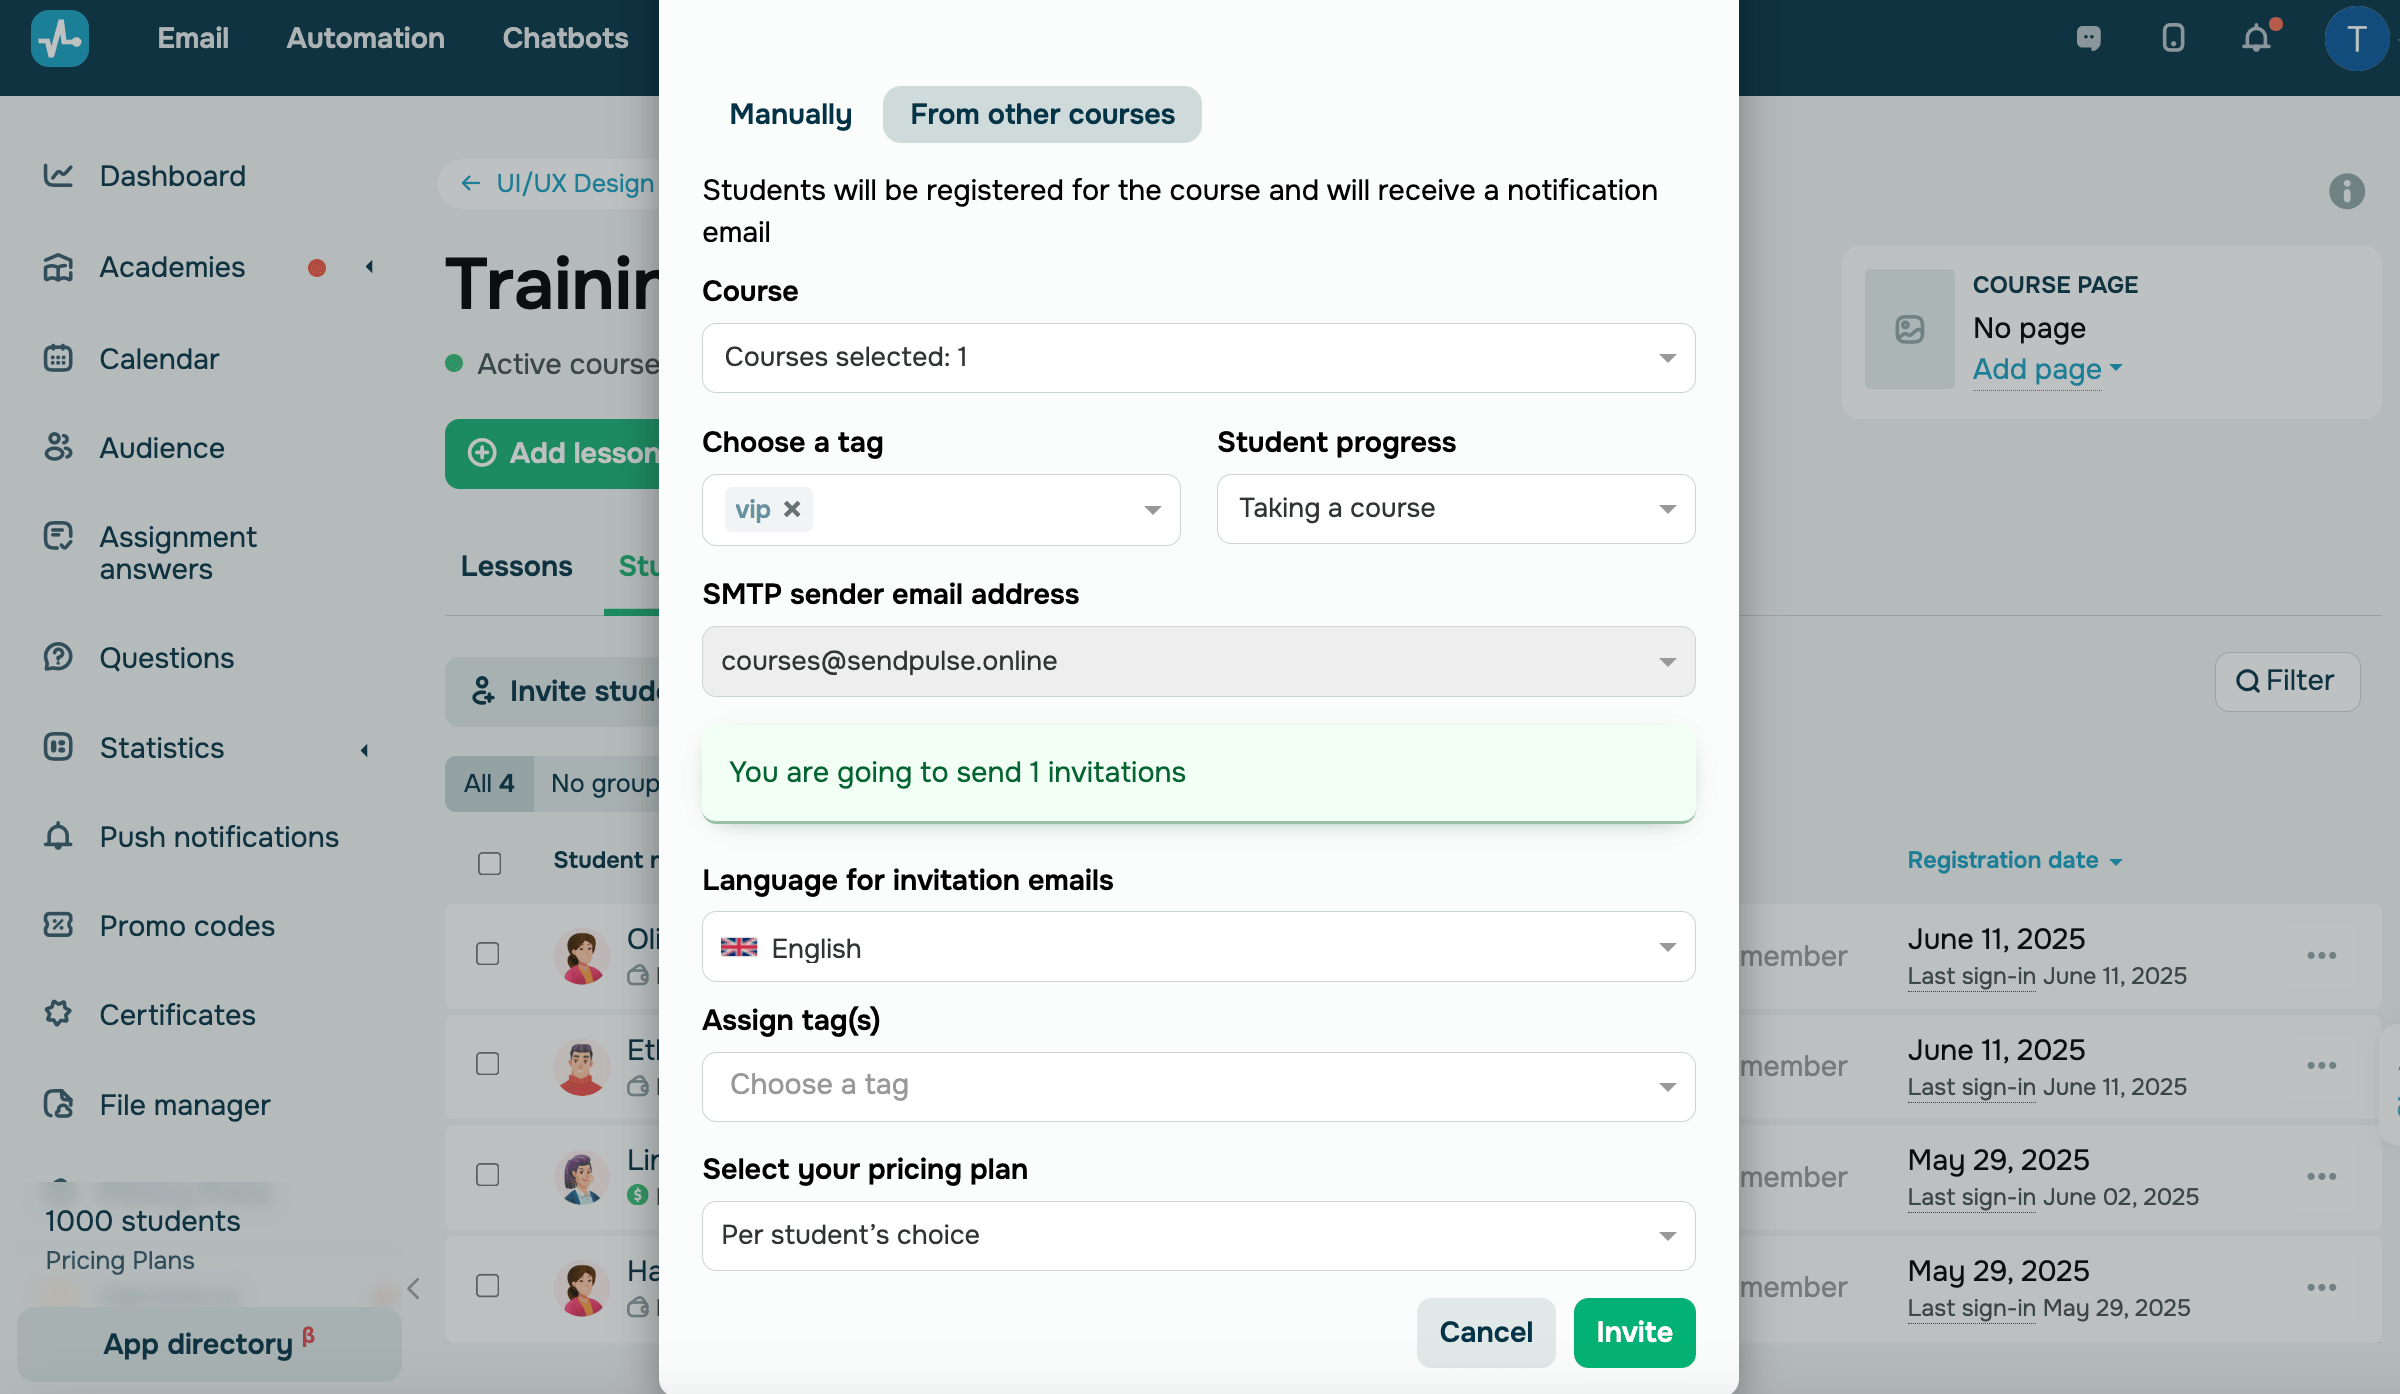
You can add students manually using their email addresses or enroll them from other courses using extra invitation conditions.
Go to the Students tab and click Add a student.
| Manually |
Type in students’ email addresses, each on a new line. You can manually upload up to 1,000 email addresses. |
| From other courses | Available with a paid pricing plan and above Select one or more courses from the list and click Select. You can also select a tag you used to segment the course. In the Student progress field, you can filter students by their course progress. |
In the Language for invitation emails field, select the language of your email. If a student already has an account, your email will be sent in the language set in their account settings.
In the Assign tag(s) field, you can apply tags to all students you add. For example, you can use tags to track the sources your students come from.
In the Select your pricing plan field, choose an available pricing plan for this course. The default option is Per student's choice, which allows users to choose a plan when they enroll.
Click Invite.
You can also invite students in the Audience tab.
Automated student invitation
On top of that, you can automatically enroll students in your course using various SendPulse tools:
| Websites |
Every academy comes with a generated website. You can also create dedicated course pages. Visitors can find your website through search engines or direct links. To enroll, students need to click Sign up and fill in their details. A confirmation email will be sent to the email address they’ve shared. Read also: How to enroll in a course. |
| Chatbots |
Use chatbot flows to answer student questions, send course invitations, and enable pricing plan payments. Read more: How to enroll students automatically after a chatbot payment. |
| Automation |
Build automated flows to enroll students, track their payment status, and send personalized messages based on their actions. Read more: How to manage student data or send a message triggered by a course event. |
| Pop-ups |
Use pop-ups on your website to invite visitors to join your courses. Read more: How to enroll students in a course via a pop-up. |
You can accept course payments once students sign up and choose a pricing plan. Read more: How to receive course payments.
Last Updated: 24.06.2025
or