Send AMP emails
You can use the AMP technology to create interactive emails with real-time content changes right in the email without having to visit the website.
To use the AMP technology in emails, you need to send a request to Gmail to validate the address from which you will send the email and create an email template code according to the official documentation specifications.
Confirm sender addresses in gmail
Go to Service settings > Other settings tab.
In the Email AMP section, click Create Request.
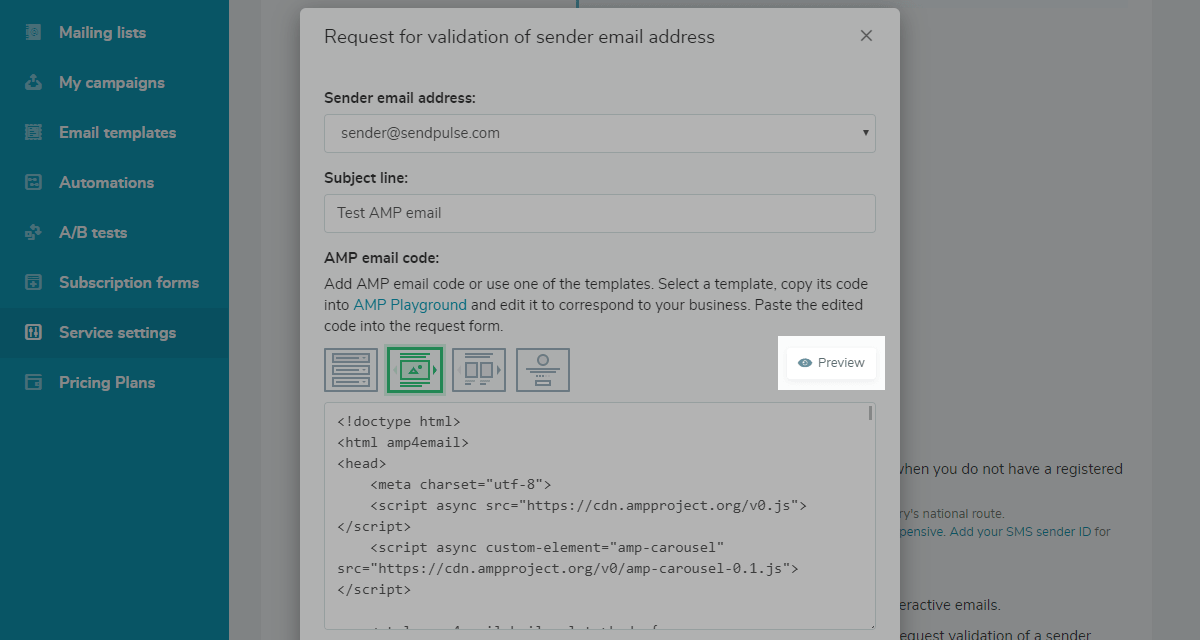
In the Request to validate sender address form, select the email address from which you want to send the campaign.
To have your address validated by email services, choose an email address from which you usually send at least 5,000 emails per month.
The email address must have a domain for which SPF, DKIM, and DMARC records are configured. The DMARC policy must be set to quarantine or reject.
Read also: How to add a new email sender address, How to set up SPF and DKIM for email authentication, How to set Up DMARC policy record.
The request is sent with an AMP email sample. Specify the subject, and add the AMP email code in the request form. You can add your own ready-made code or use one of the templates.
If you are using a template, edit its code to customize the template.
Click Preview to see what the finished email looks like.
To request the validation of your email address by Gmail, fill out the registration form.
Click Submit Request.
Expect the confirmation email to the email address specified as the sender's address within a few days.
To learn more about registering with different email services, read Gmail’s documentation for developers.
Create an AMP email template code
As soon as your sender address is validated, you can start creating AMP emails.
Read the AMP specification for emails to get a better understanding of how this technology works and how to apply it to emails.
Create the HTML code for the AMP version of the email.
Test your AMP email before sending it to subscribers. Use the Gmail sandbox for practice. It provides a set of ready-made components that you can use to write your own code. Here you can also see how the email will look, test some elements, such as scroll arrows, accordion drop-down lists, and the like.
You can also get pre-made components from the AMP components catalog.
AMP for Email requires HTTPS in links. Use standard service variables, such as {{unsubscribe_link}}, to add links to AMP emails.
If you add links to the email using custom variables, the links might not be validated. In this case, the recipients will see the HTML version of your email instead of the AMP version.
See some examples of emails with different AMP elements.
Create a campaign with the AMP email version
In the My campaigns tab, click Create campaign.
Specify the campaign information, and click Next.
Select or add your own email template, and click Next.
Under the template in the Email Content section, select the Add AMP version of the email checkbox.
Add the AMP code of the email in the input box.
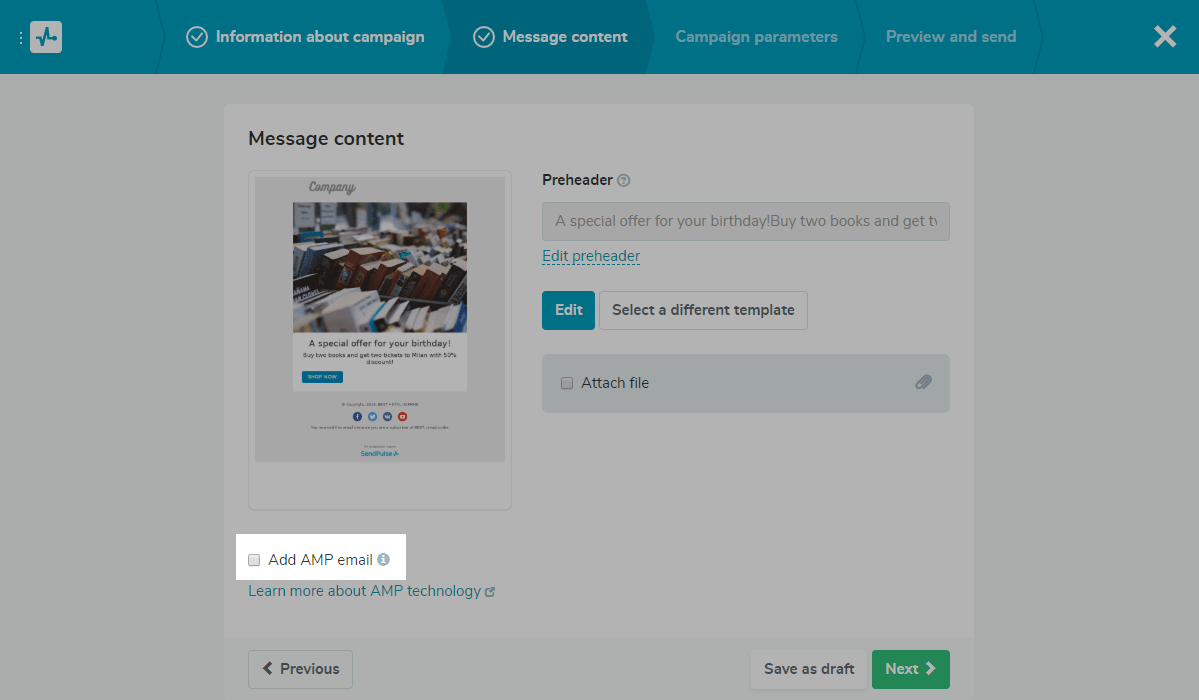
If the AMP code is added correctly, the Next button will become active, and you will be able to continue creating the campaign.
An email with AMP support must contain plaintext, AMP, and HTML versions. If such an email comes to a mail service that does not support the AMP technology, the user will see its HTML version.
When sending an email via API, use the body_amp parameter in the request to pass the AMP email version code.
Last Updated: 22.03.2024
or