Condition element in Automation
Using the Condition element, you can build an automation flow based on the subscriber's actions.
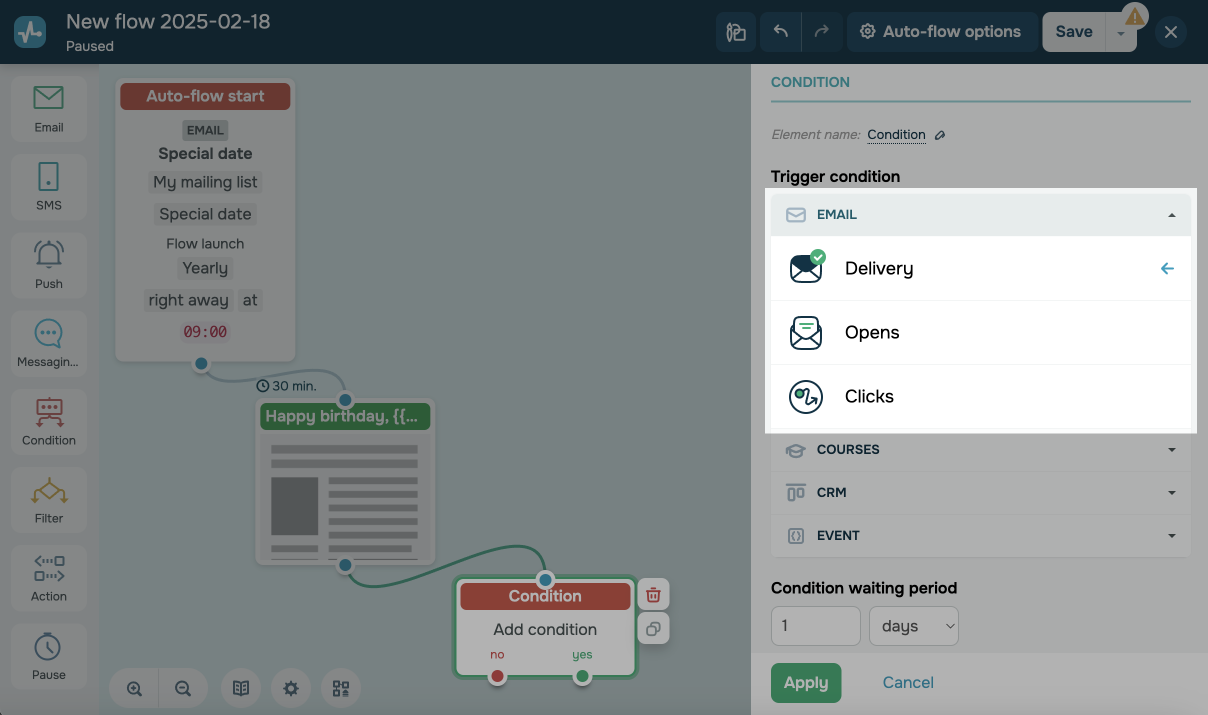
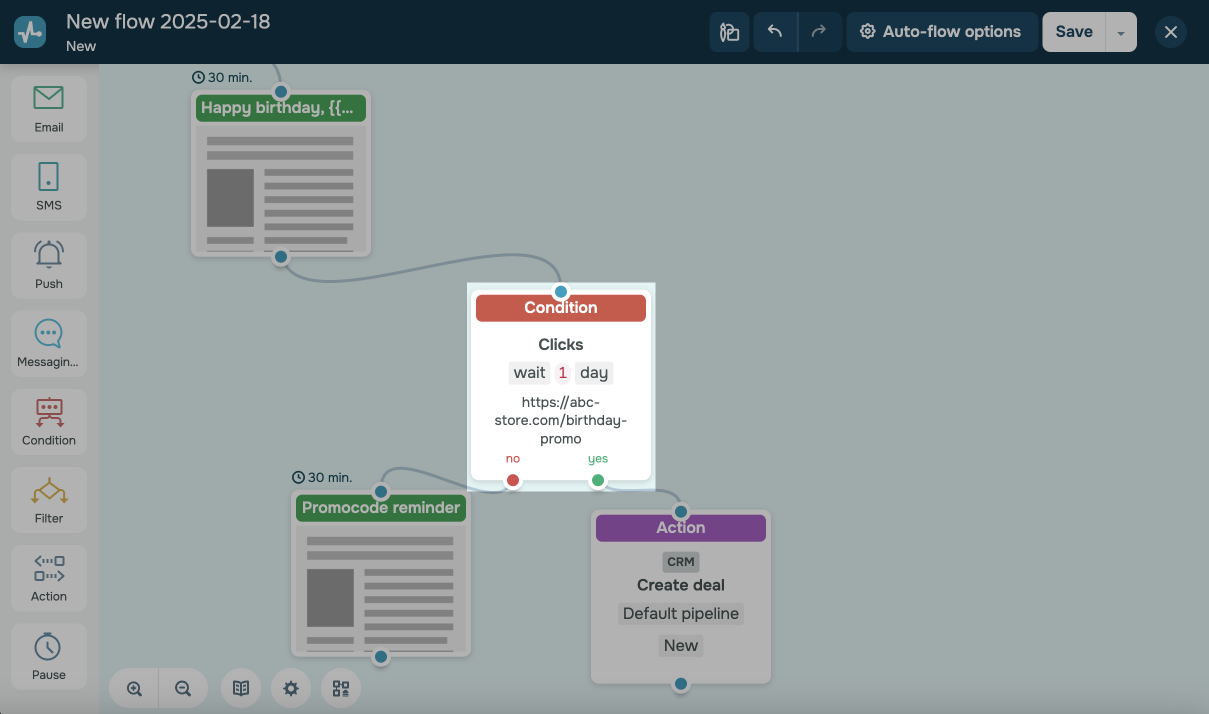
You can track the following events: Delivery, Opens, Clicks in an email or message, and custom events.
To identify a contact in the service, you need the email or phone variable.
Unsubscribed contacts can go through all flow elements except the Email element. When the system verifies email addresses, it processes the following types of unsubscriptions: Unsubscribe from the entire service, Unsubscribe from a category, and Unsubscribe from a specific flow.
If you use the Launch for mailing list option, contacts who unsubscribed from all campaigns will not be added to your flow start, and contacts who unsubscribed from this category or this flow will go further down your flow, skipping the Email elements.
Add an element
Drag the Condition element right after the tracked element.
You can also rename your element to distinguish it from others, or add a comment for your team. Click Element name and enter up to 253 characters in the field. Once you save the settings, the new name will appear in a pop-up window when hovering over the element in the builder.
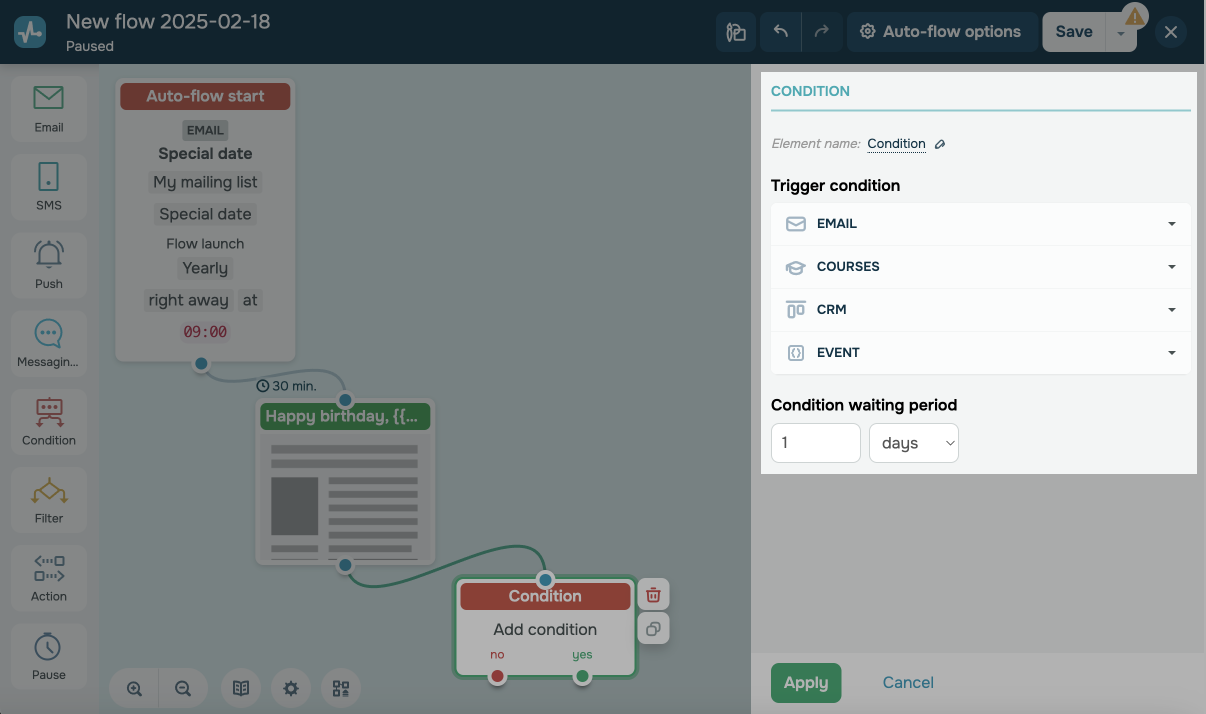
Select the condition
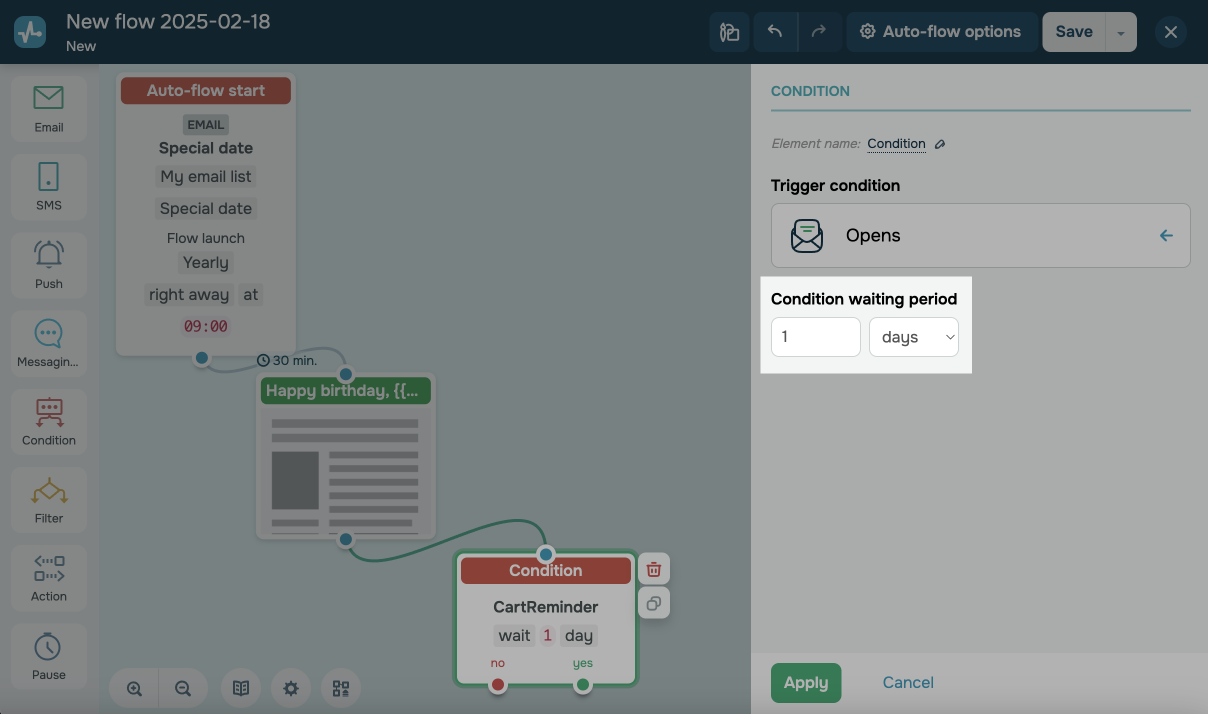
Use this option to track campaign status updates in the bulk email, SMS, Viber, and web push notification services. For example, if your flow starts with an abandoned cart trigger, you can check if a client opened your email and branch your flow scenario accordingly.
You can select and track the following events:
| Delivery | Tracks whether an email, message, or notification was delivered to the user. |
| Opens | Tracks whether the user opened an email. |
| Clicks | Tracks whether the event selected in an element occurred. |
The Opens and Clicks conditions are applicable only to the Email and Push elements. The Delivered condition is applicable to the Email, SMS, Viber, and Push elements.
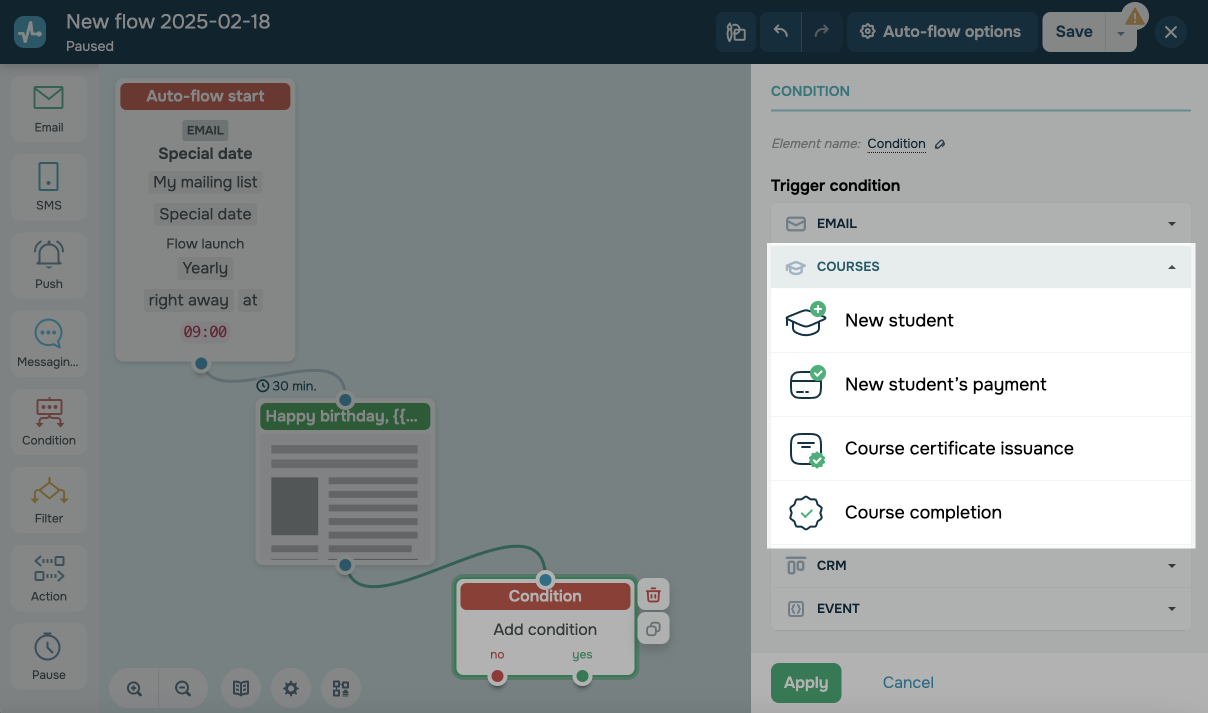
Courses
Use this option to track student progress status updates in the online course builder. For example, if you have a flow for added course students, you can send them a payment reminder and then, after you receive their payment, launch another flow to share access to other chats.
You can select and track the following events*:
| Add student | Tracks whether a student was added to the selected course. |
| Receive student's payment | Tracks whether a student paid for the course. |
| Grand course certificate | Tracks whether a student received a certificate after successfully completing the course. |
| Complete course | Tracks whether a student completed the course. |
*The Condition element checks if the trigger event has been executed from the moment your contact reaches the element and during the selected timeout. You can also check your student's progress status in the Overview section.
If you selected a Course event as a flow start, then you need to select a course in your start element.
CRM: Deal stage update
Use this option to track deal stage changes. For example, if a deal moves to the Done status, you can send a chatbot flow to get feedback.
Depending on your element setup, the system will wait for a deal stage change in the CRM system.
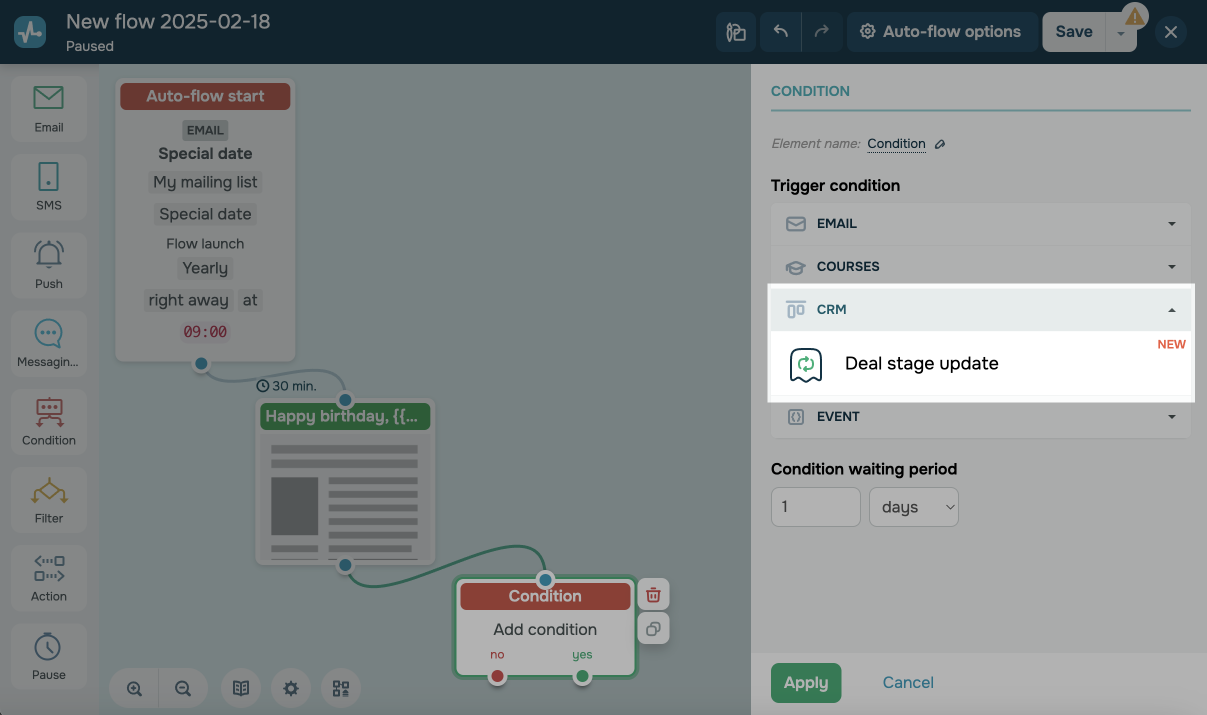
If you select the CRM: Change deal stage trigger and add the Condition: Change deal stage element right after it, both elements will track the same deal stage change in the CRM system.
If you set the CRM: Change deal stage trigger and add Condition: Change deal stage after other elements, your contacts will move to the Condition element and wait for the stage to change again.
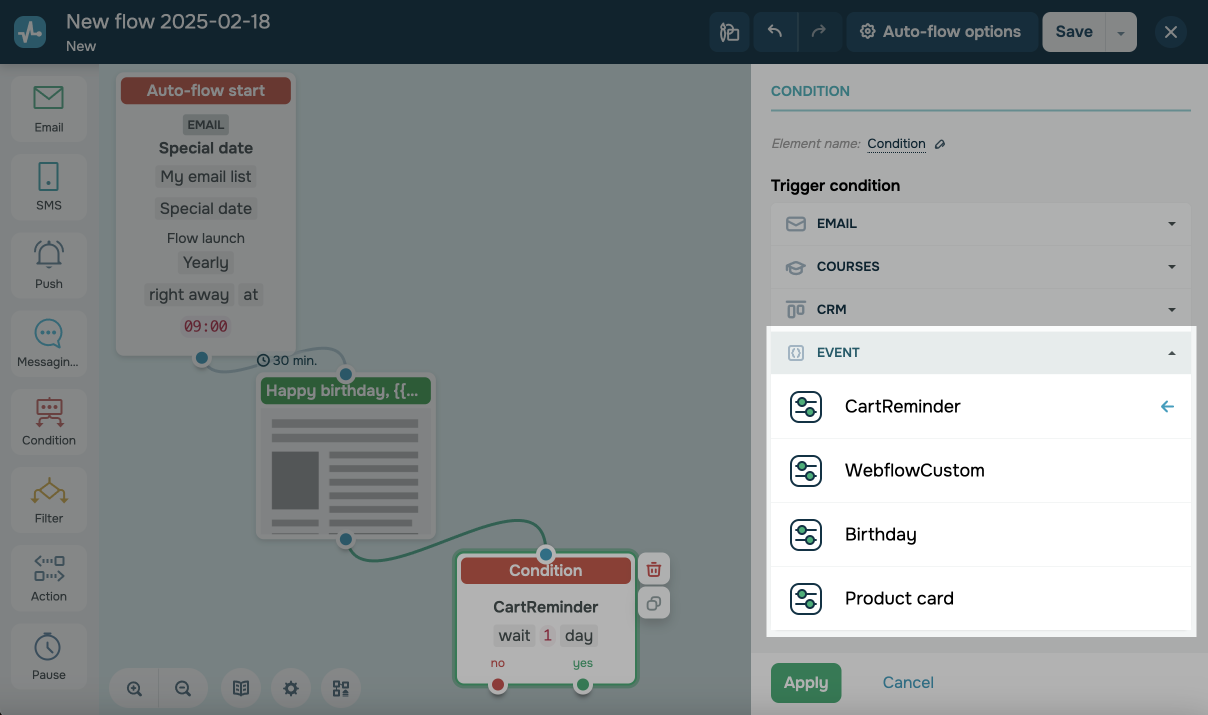
Event
Use this option to track if an event from your system has been received. For example, if your flow starts with an abandoned cart trigger, you can track whether your client purchased a product and branch your scenario based on that event outcome.
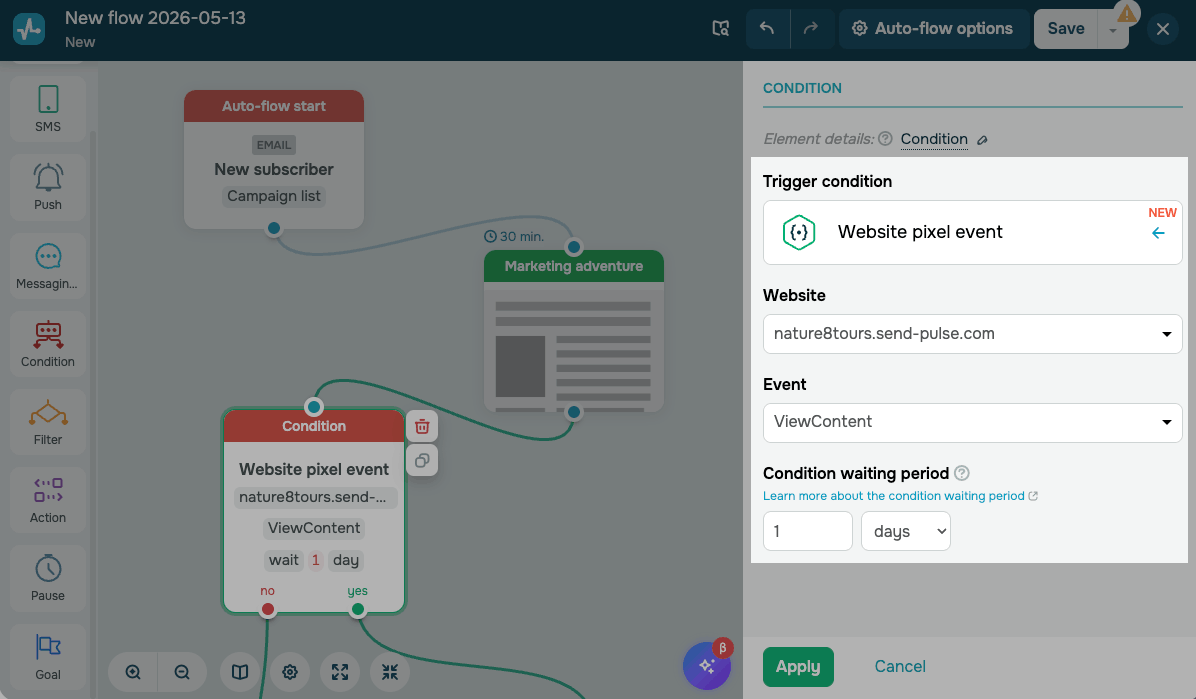
Website pixel event
Use this option to track a pixel event that triggers on your website while your flow is running. Track visitor behavior directly in your flow and branch it depending on whether the target activity happened within the set timeframe.
To give you an idea, after a reminder email, you can check if the recipient triggered the purchase_complete event within 24 hours. Then, branch your flow into different follow-ups based on the outcome.
You can configure the following options:
| Website | Select a pixel connected to your account. |
| Event | Select an event associated with the selected pixel. |
| Condition waiting period |
Set how long the element waits for the event in minutes, hours, or days. The countdown starts when a contact reaches the element. |
Specify the event waiting interval
Select the waiting interval — the period during which the system will wait for the condition to be met.
The countdown occurs when the contact reaches the Condition element. The condition will be checked exactly in 1 minute, 1 hour or 24 hours (1 day), and so on.
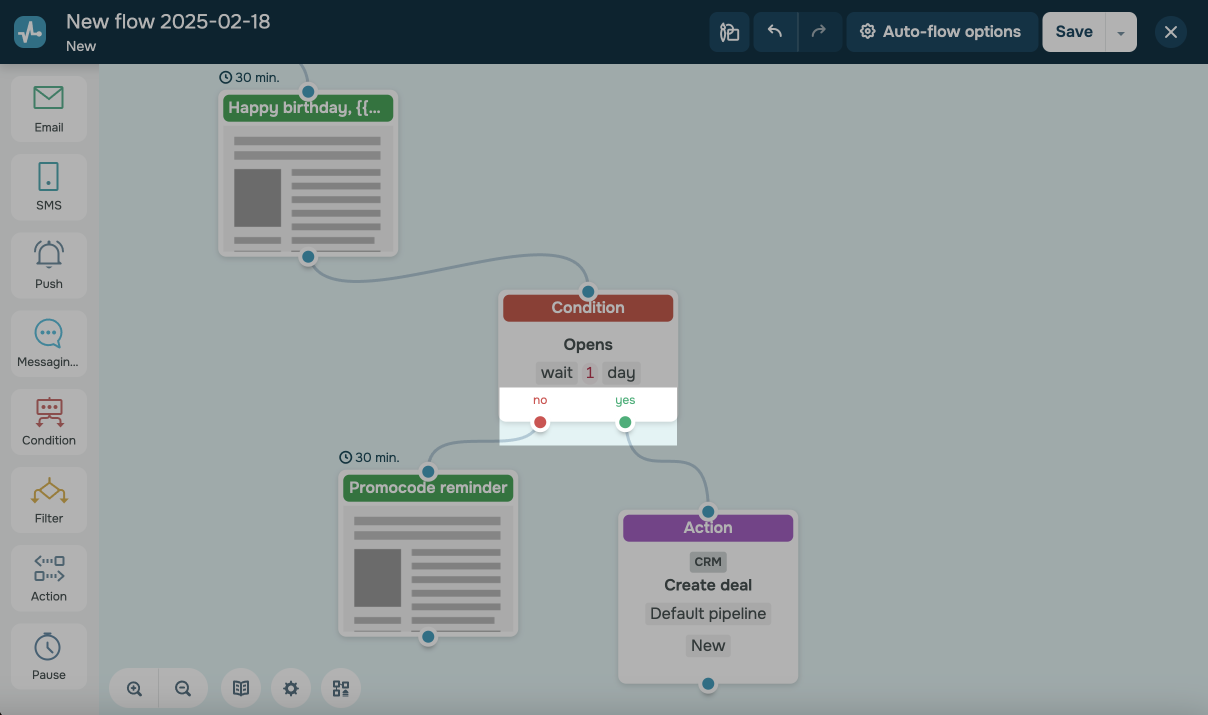
Branch scenario
Below the Condition element, you can branch the flow and add elements to the branches, depending on whether the condition was fulfilled:
| The Yes branch | The condition was fulfilled within the set timeout interval |
| The No branch | The condition was not fulfilled within the set timeout interval |
Examples
For example, you want to track the delivery of an email to a user within 24 hours and send them the next email or receive a failed delivery notification.
Below the Email element, specify a one-day wait for the Delivered condition. Bind the next email in the flow to the Yes option, and the No option — to the Send email to your address action.
If the first email is not delivered to the recipient's email address within one day, you will receive an email notifying you about it.
If an email is delivered to the recipient's email address within one day, the next email in the flow will be sent to the user immediately after the first one is delivered or according to the time interval specified in the Email element.
Another example: You need to track whether users bought an item after you send them an abandoned cart email. Create a flow using the Abandoned Cart event, add the Email element to motivate them to complete the purchase, and then add the Condition element with the Purchase event.
You can add the Email element to the Yes branch to thank your customer in an email or ask them to leave a review when the Purchase event occurs.
If the event did not occur, you can send another email.
View element statistics
To view information about an element, exit the editor, and hover over the required element in the Flow tab.
Last Updated: 13.08.2024
or