Work with the chatbot flow builder
With SendPulse, you can create automated chatbot flows that will be triggered by a user action or keyword and answer customers’ questions or collect user information according to a predefined scenario.
In this article, we'll look at how to create a triggered flow, as well as save, manage, revert to a previous version, and test it.
How to create a flow
Chatbot flows are launched after receiving a trigger action or keyword from the user. By default, the Welcome message, Standard reply, and Unsubscribe from bot flows are available. You can also create your own custom flow.
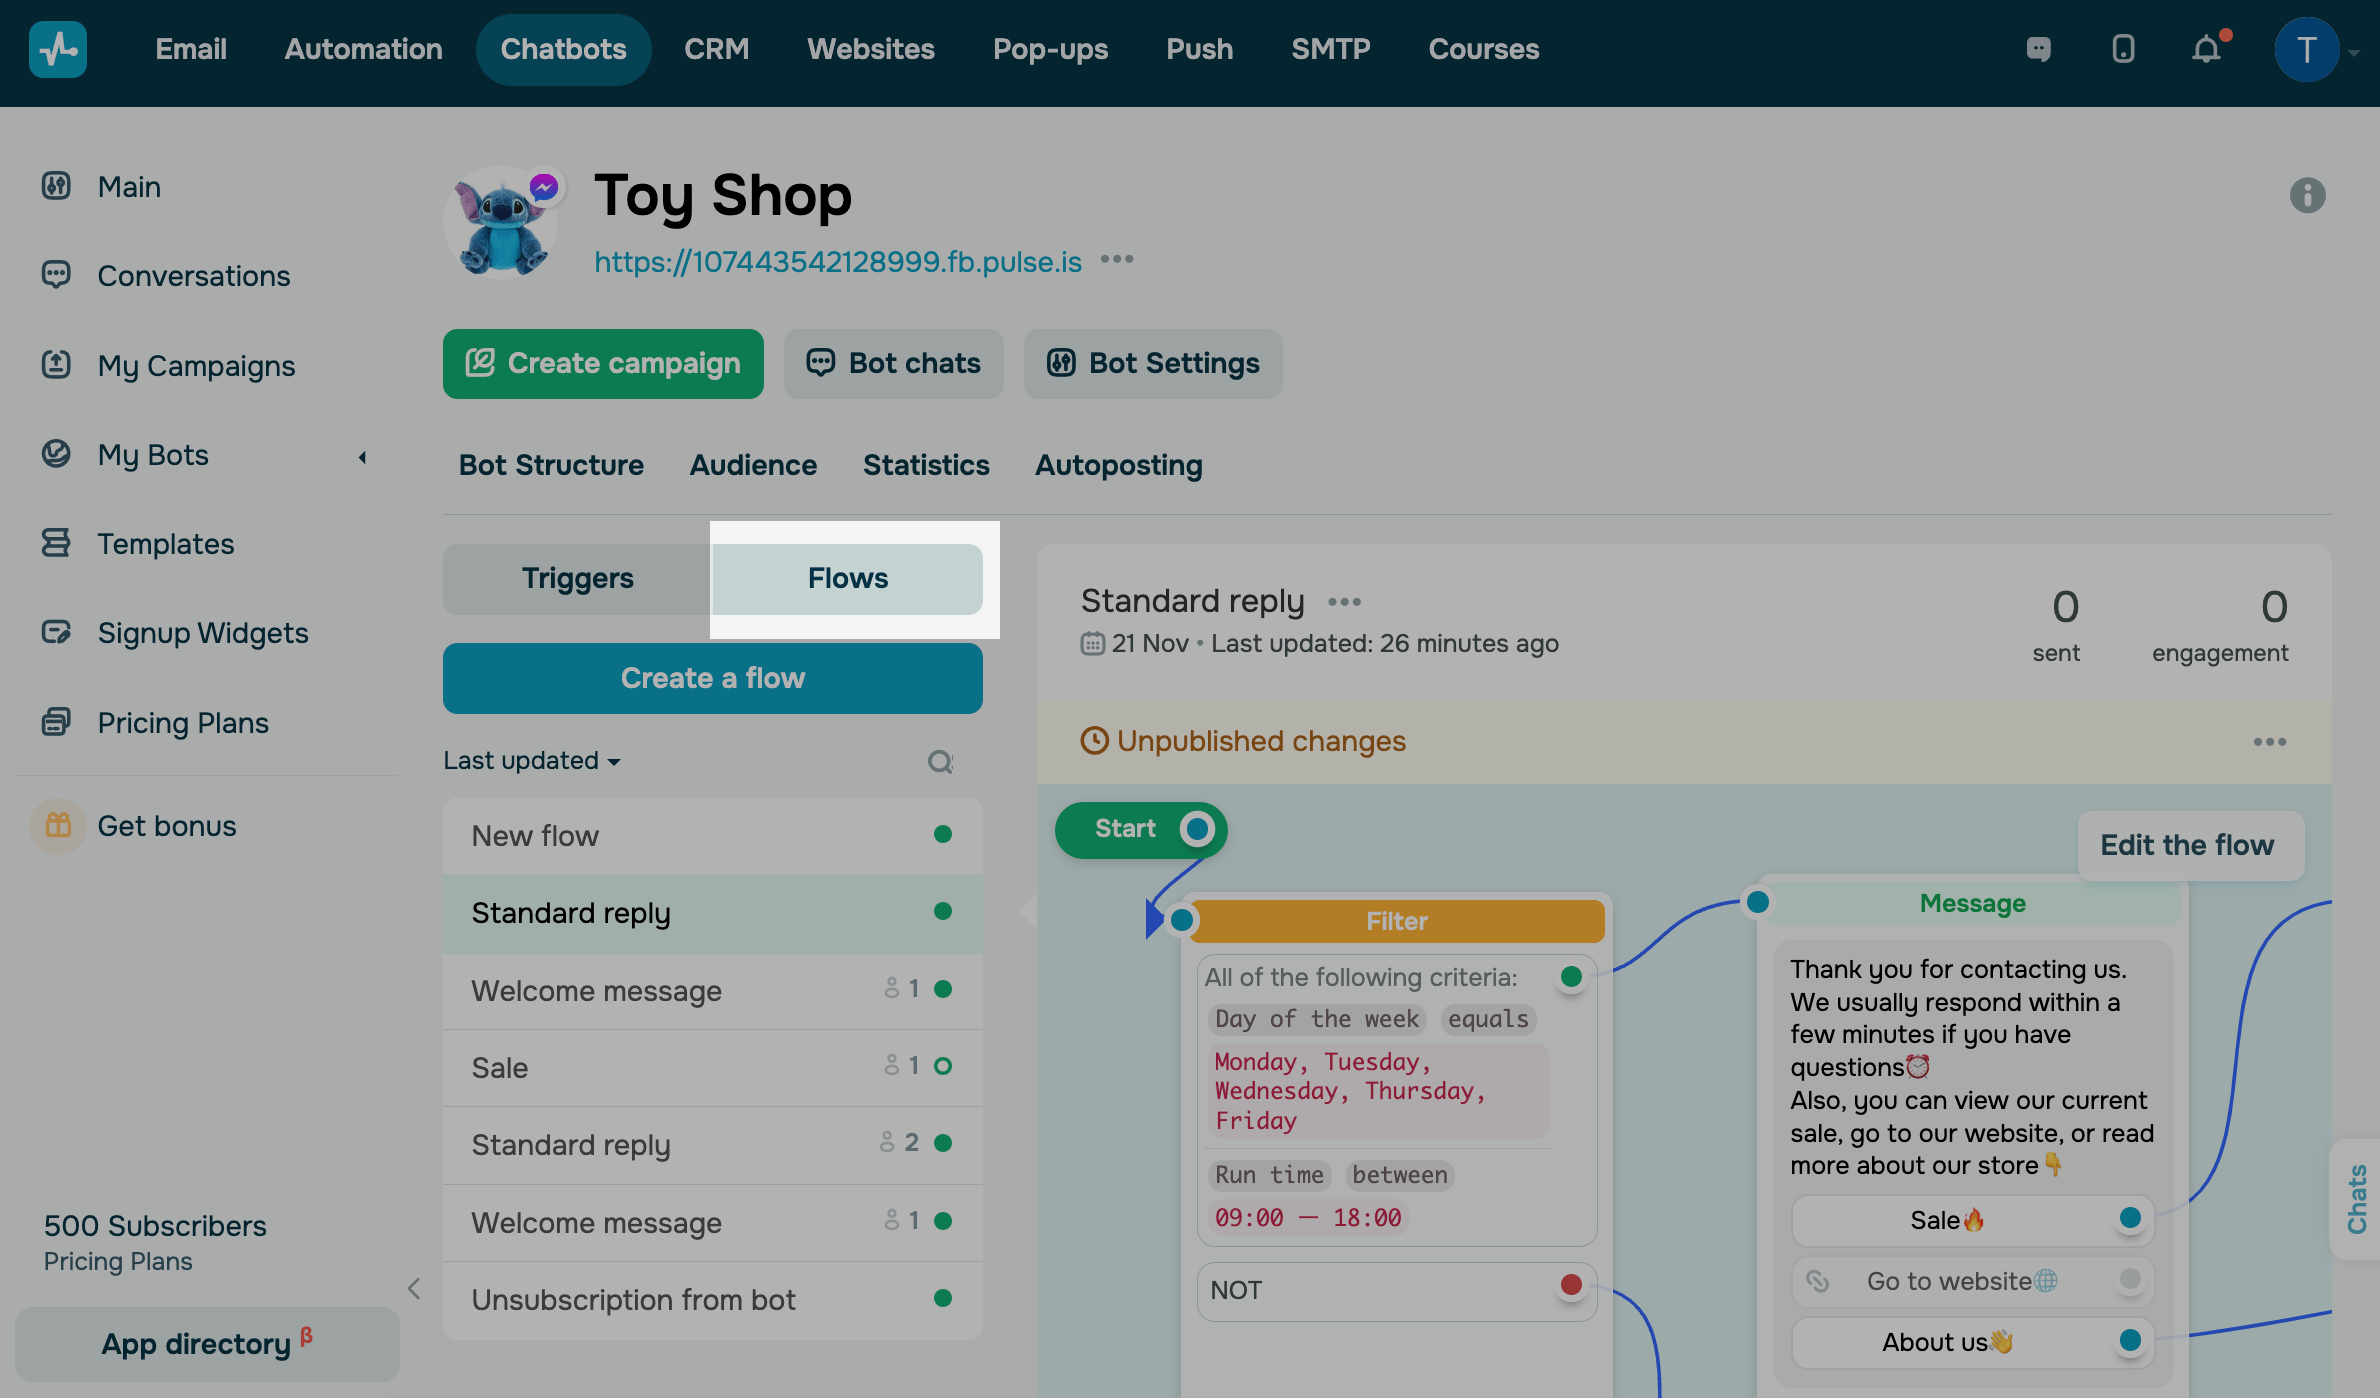
To create a new flow, go to Bot structure > Flows, and click Create a flow. To edit an existing flow, select it in the list and click Edit the flow.
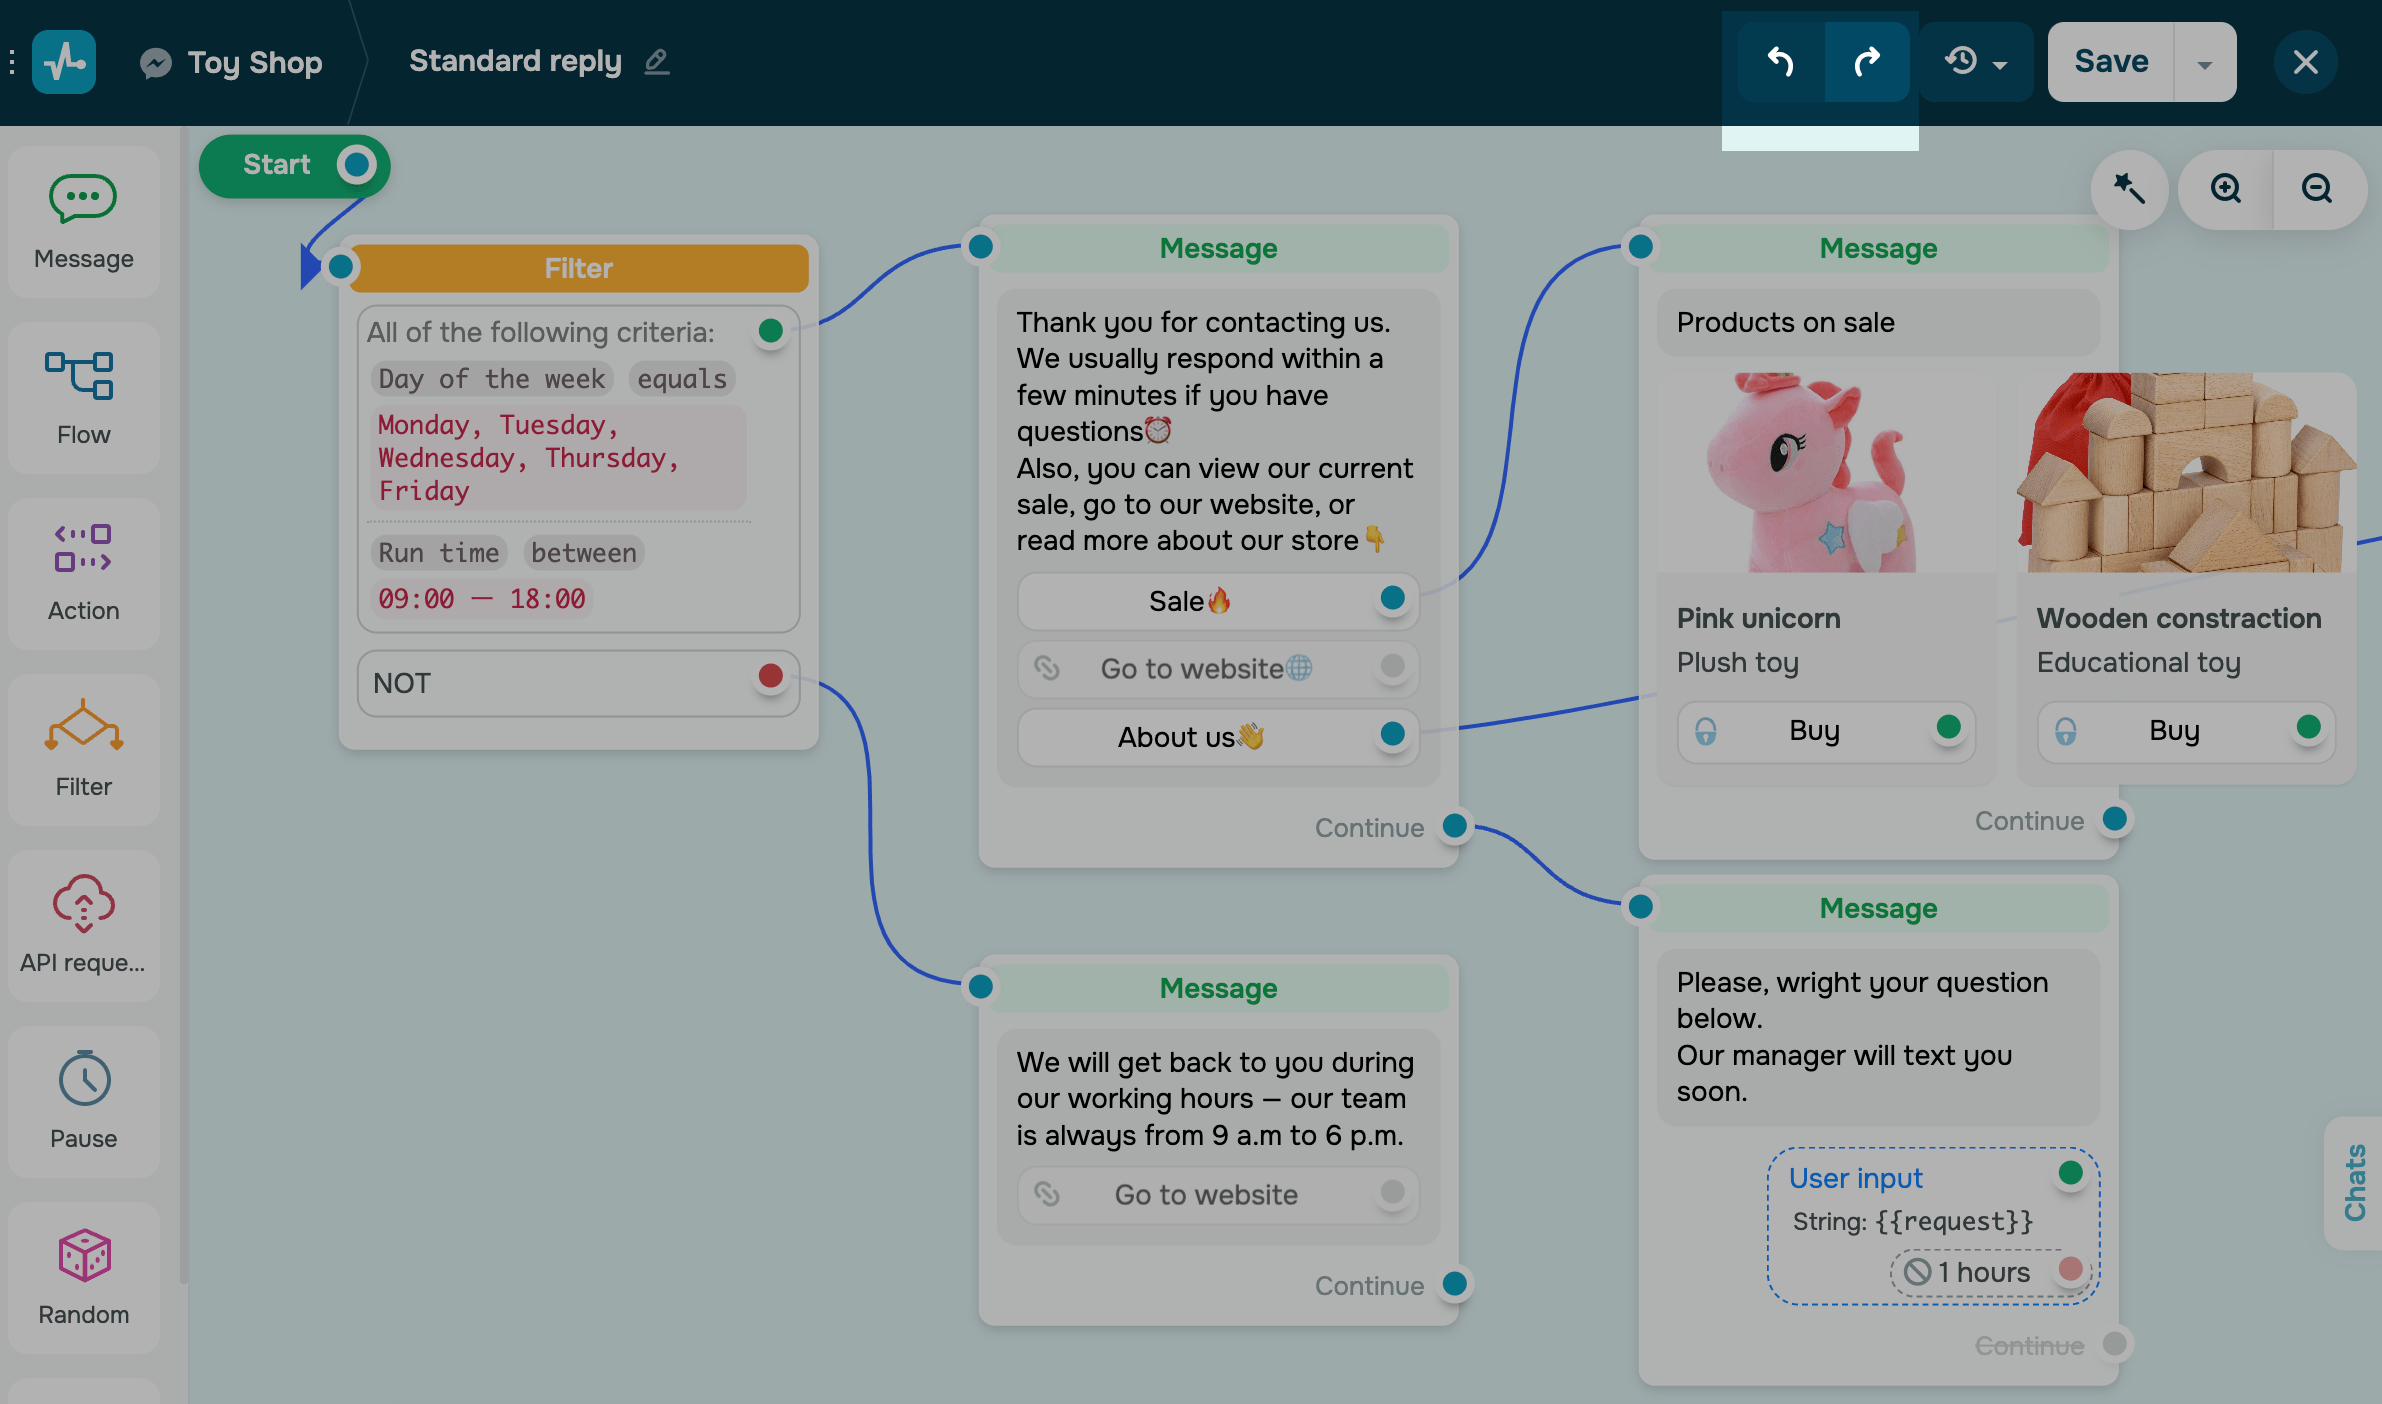
Add elements from the left sidebar. You can also use the quick add menu by dragging a connector from an element to an empty area of the builder and selecting the element it will be linked to.
The quick add menu also appears if you right-click anywhere in the workspace.
Learn more about chatbot builder elements: How to use chatbot builder elements.
You can arrange flow elements automatically. Click Order in the upper-right corner, and the builder will align elements according to your scenario (in the same order that your bot executes elements or sends messages).
You can link an unlimited number of elements to elements that wait for user response and link up to 100 elements to the Continue button.
Flows where you have deleted a trigger are stored in the Flows tab.
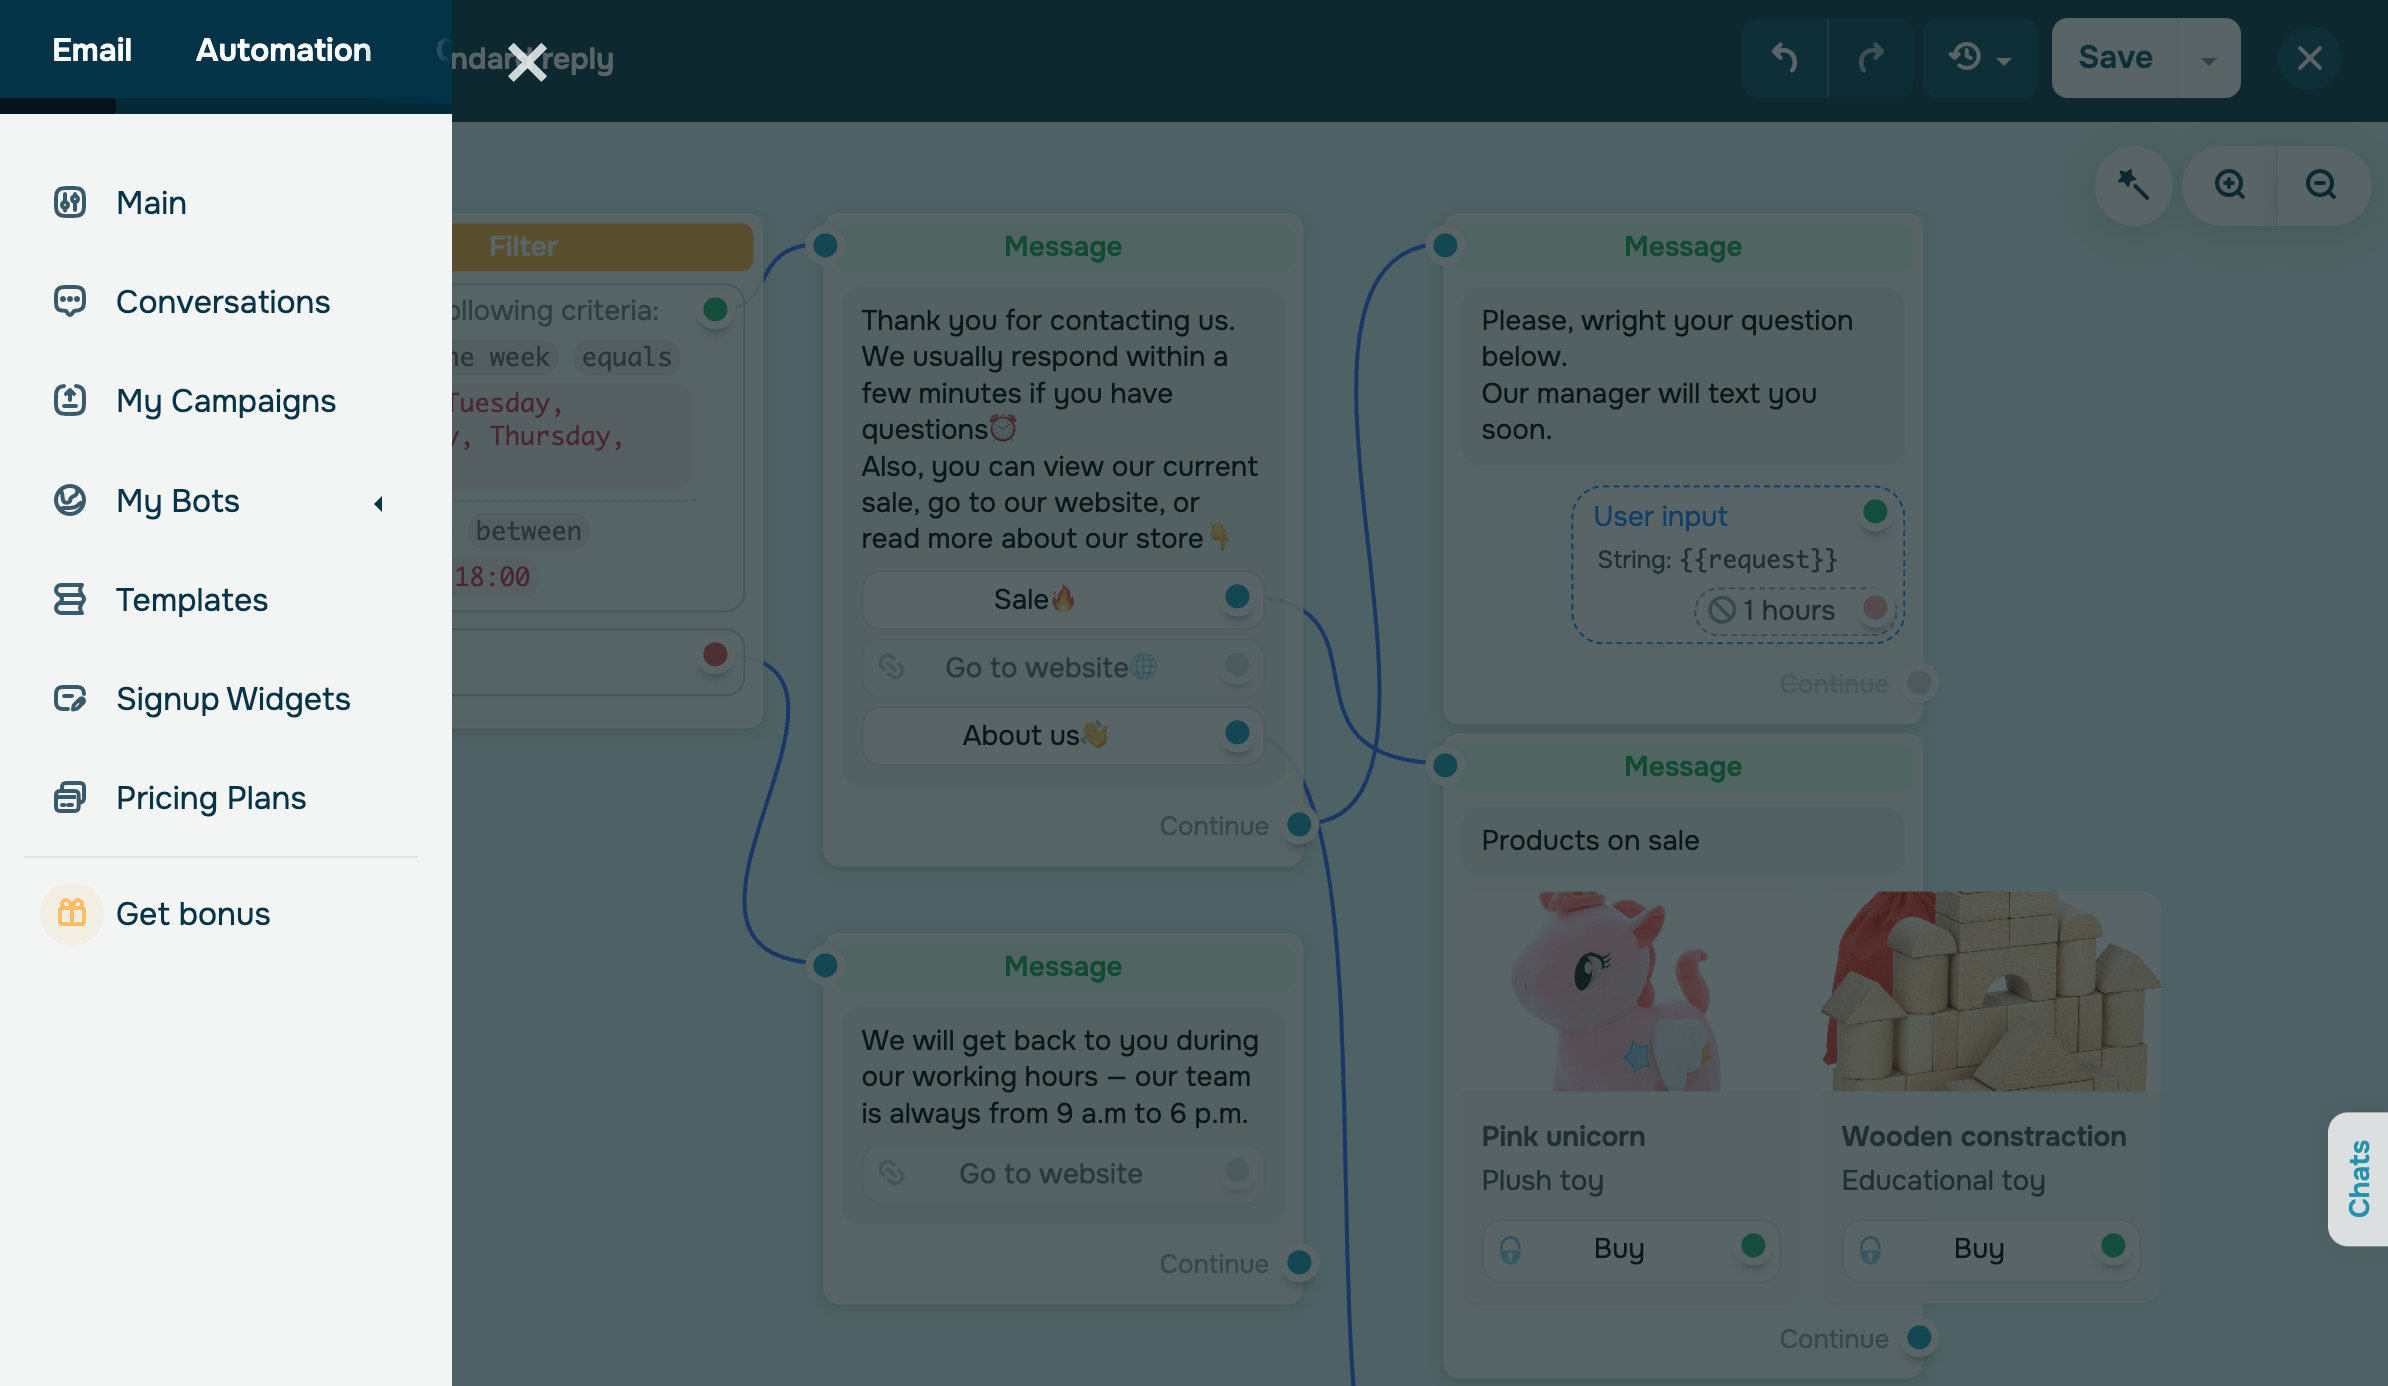
How to go to the chatbots menu
To go to the chatbots menu from the flow builder, click on the logo in the upper left corner, and select the desired menu item.
How to save your flow
When you're done editing the flow, click Save, or select Save and exit from the dropdown menu. The current version of the flow will be saved in your flow history.
You can also save an updated version of the flow while leaving the current version unchanged. To do this, click Save as a new flow. The new flow will be saved in the Flows section.
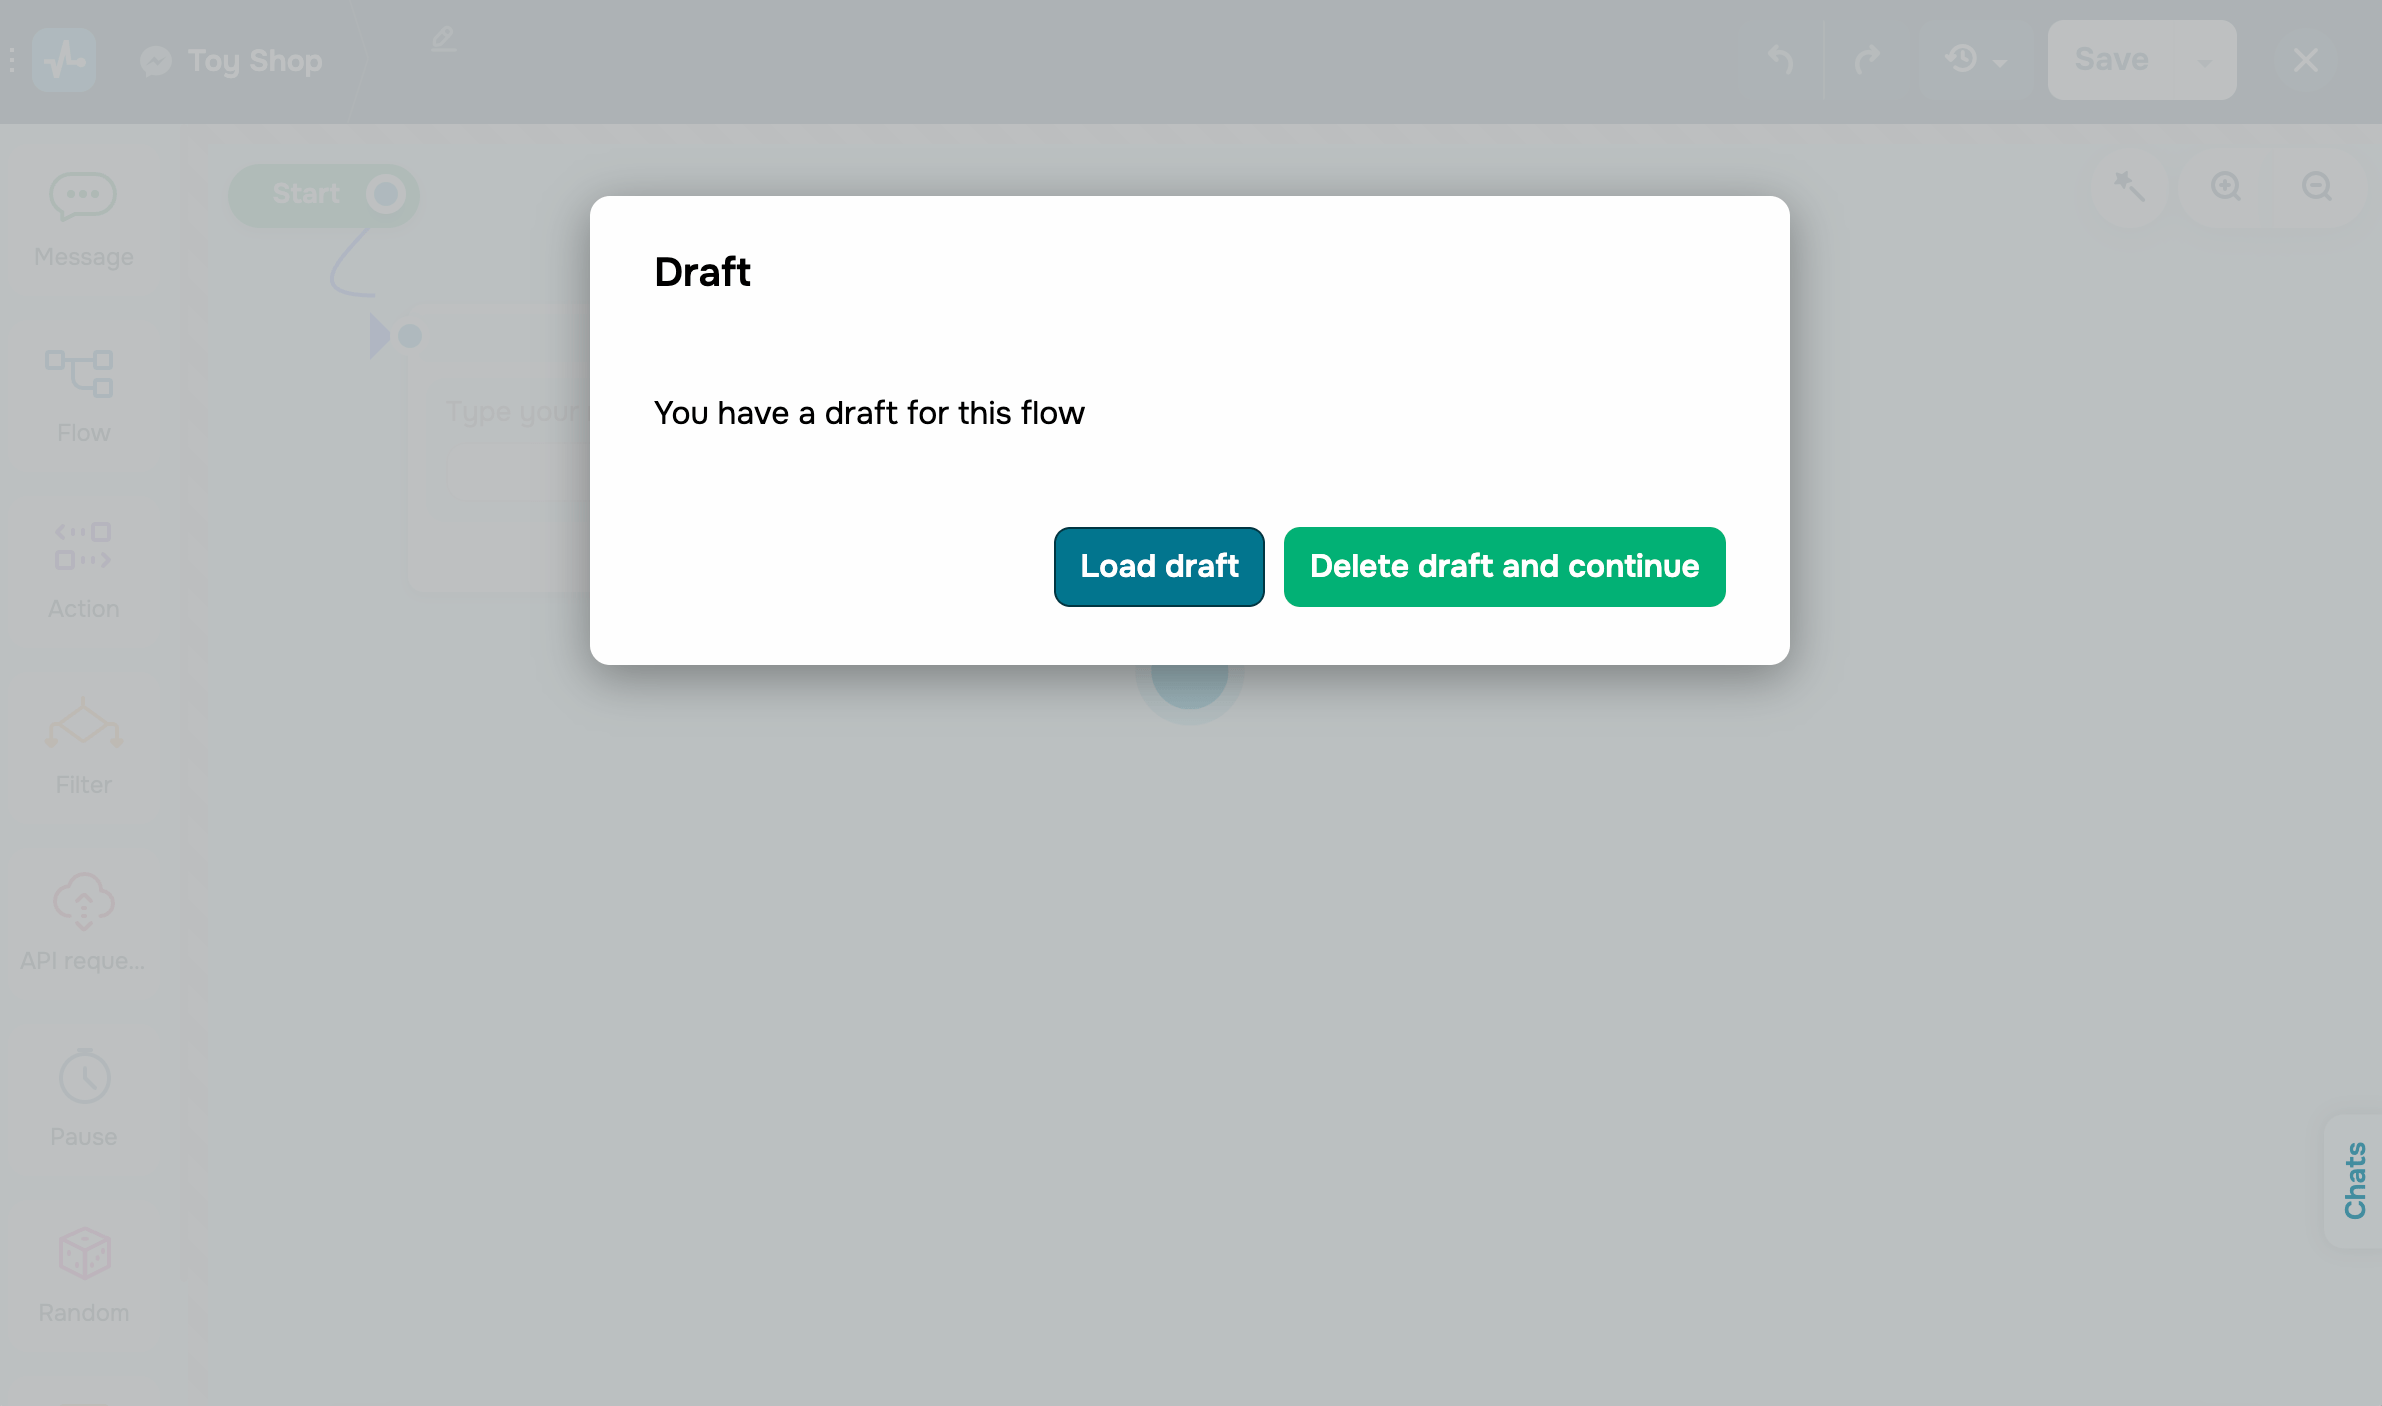
If you left the builder without saving the flow, the current version will be saved in the draft. The next time you enter the builder, you will be able to select your draft or the last saved version of the flow.
On the flow editing page, you can see which changes were or were not saved.
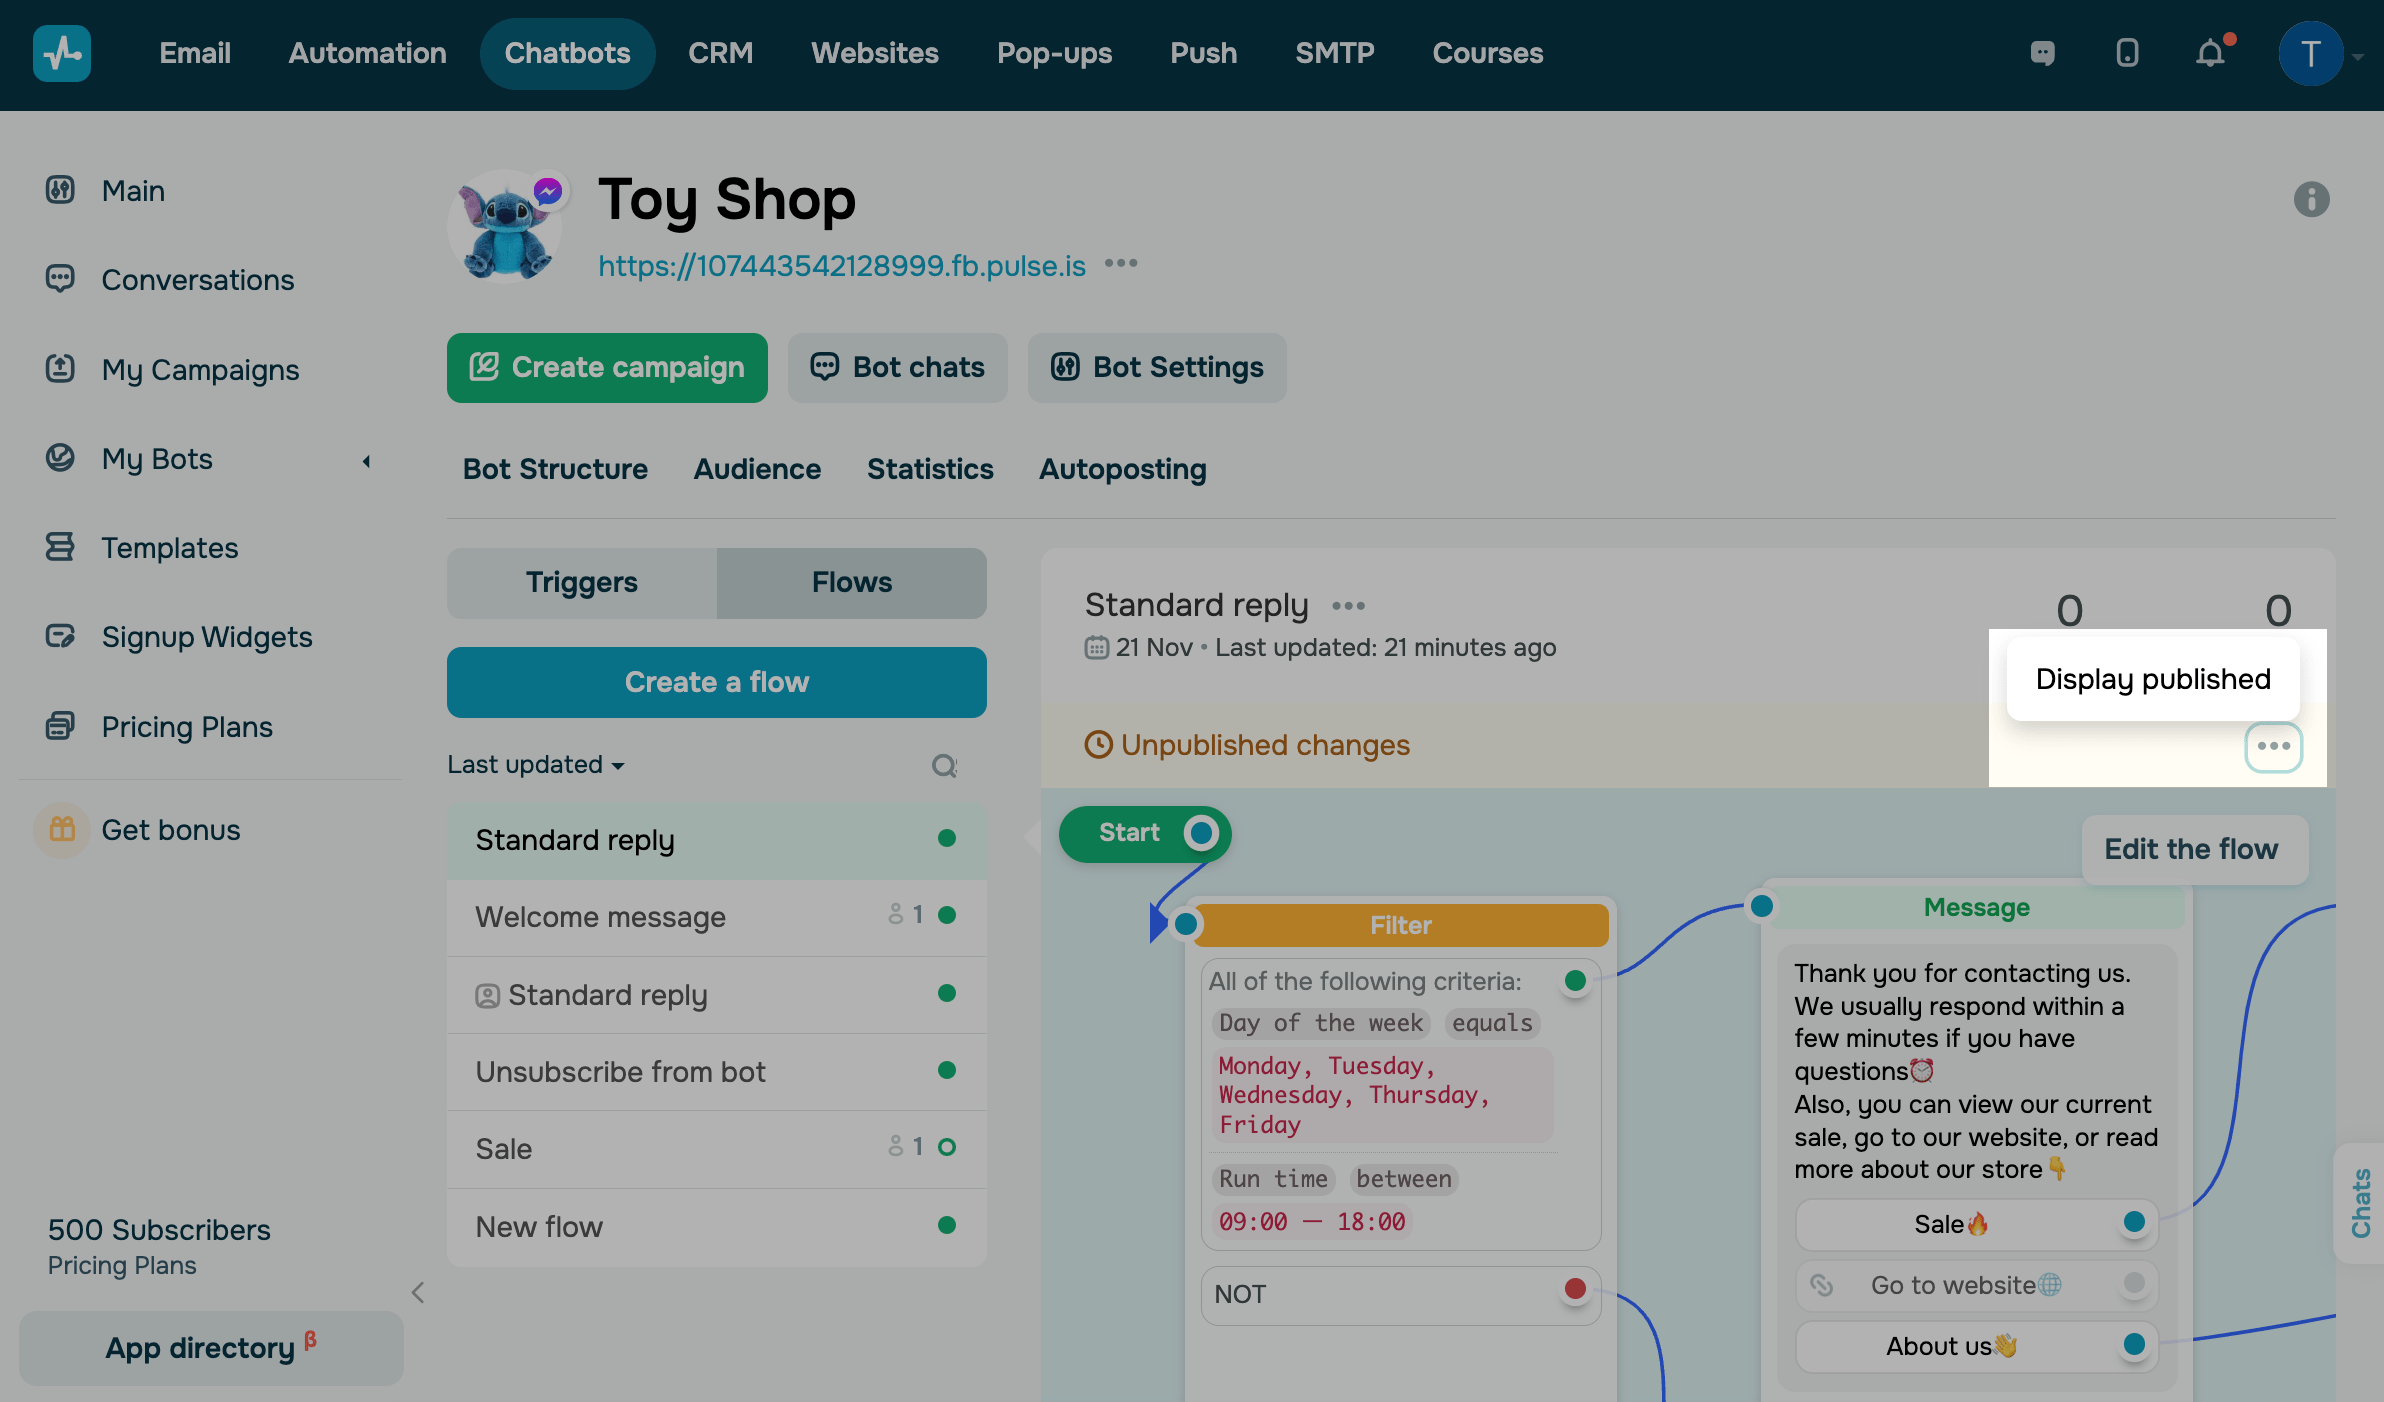
How to view your saved flows
You can also view the list of flows for which there is no trigger. To do this, go to the Flows tab.
To find a specific flow, click on the search icon, and enter the flow name.
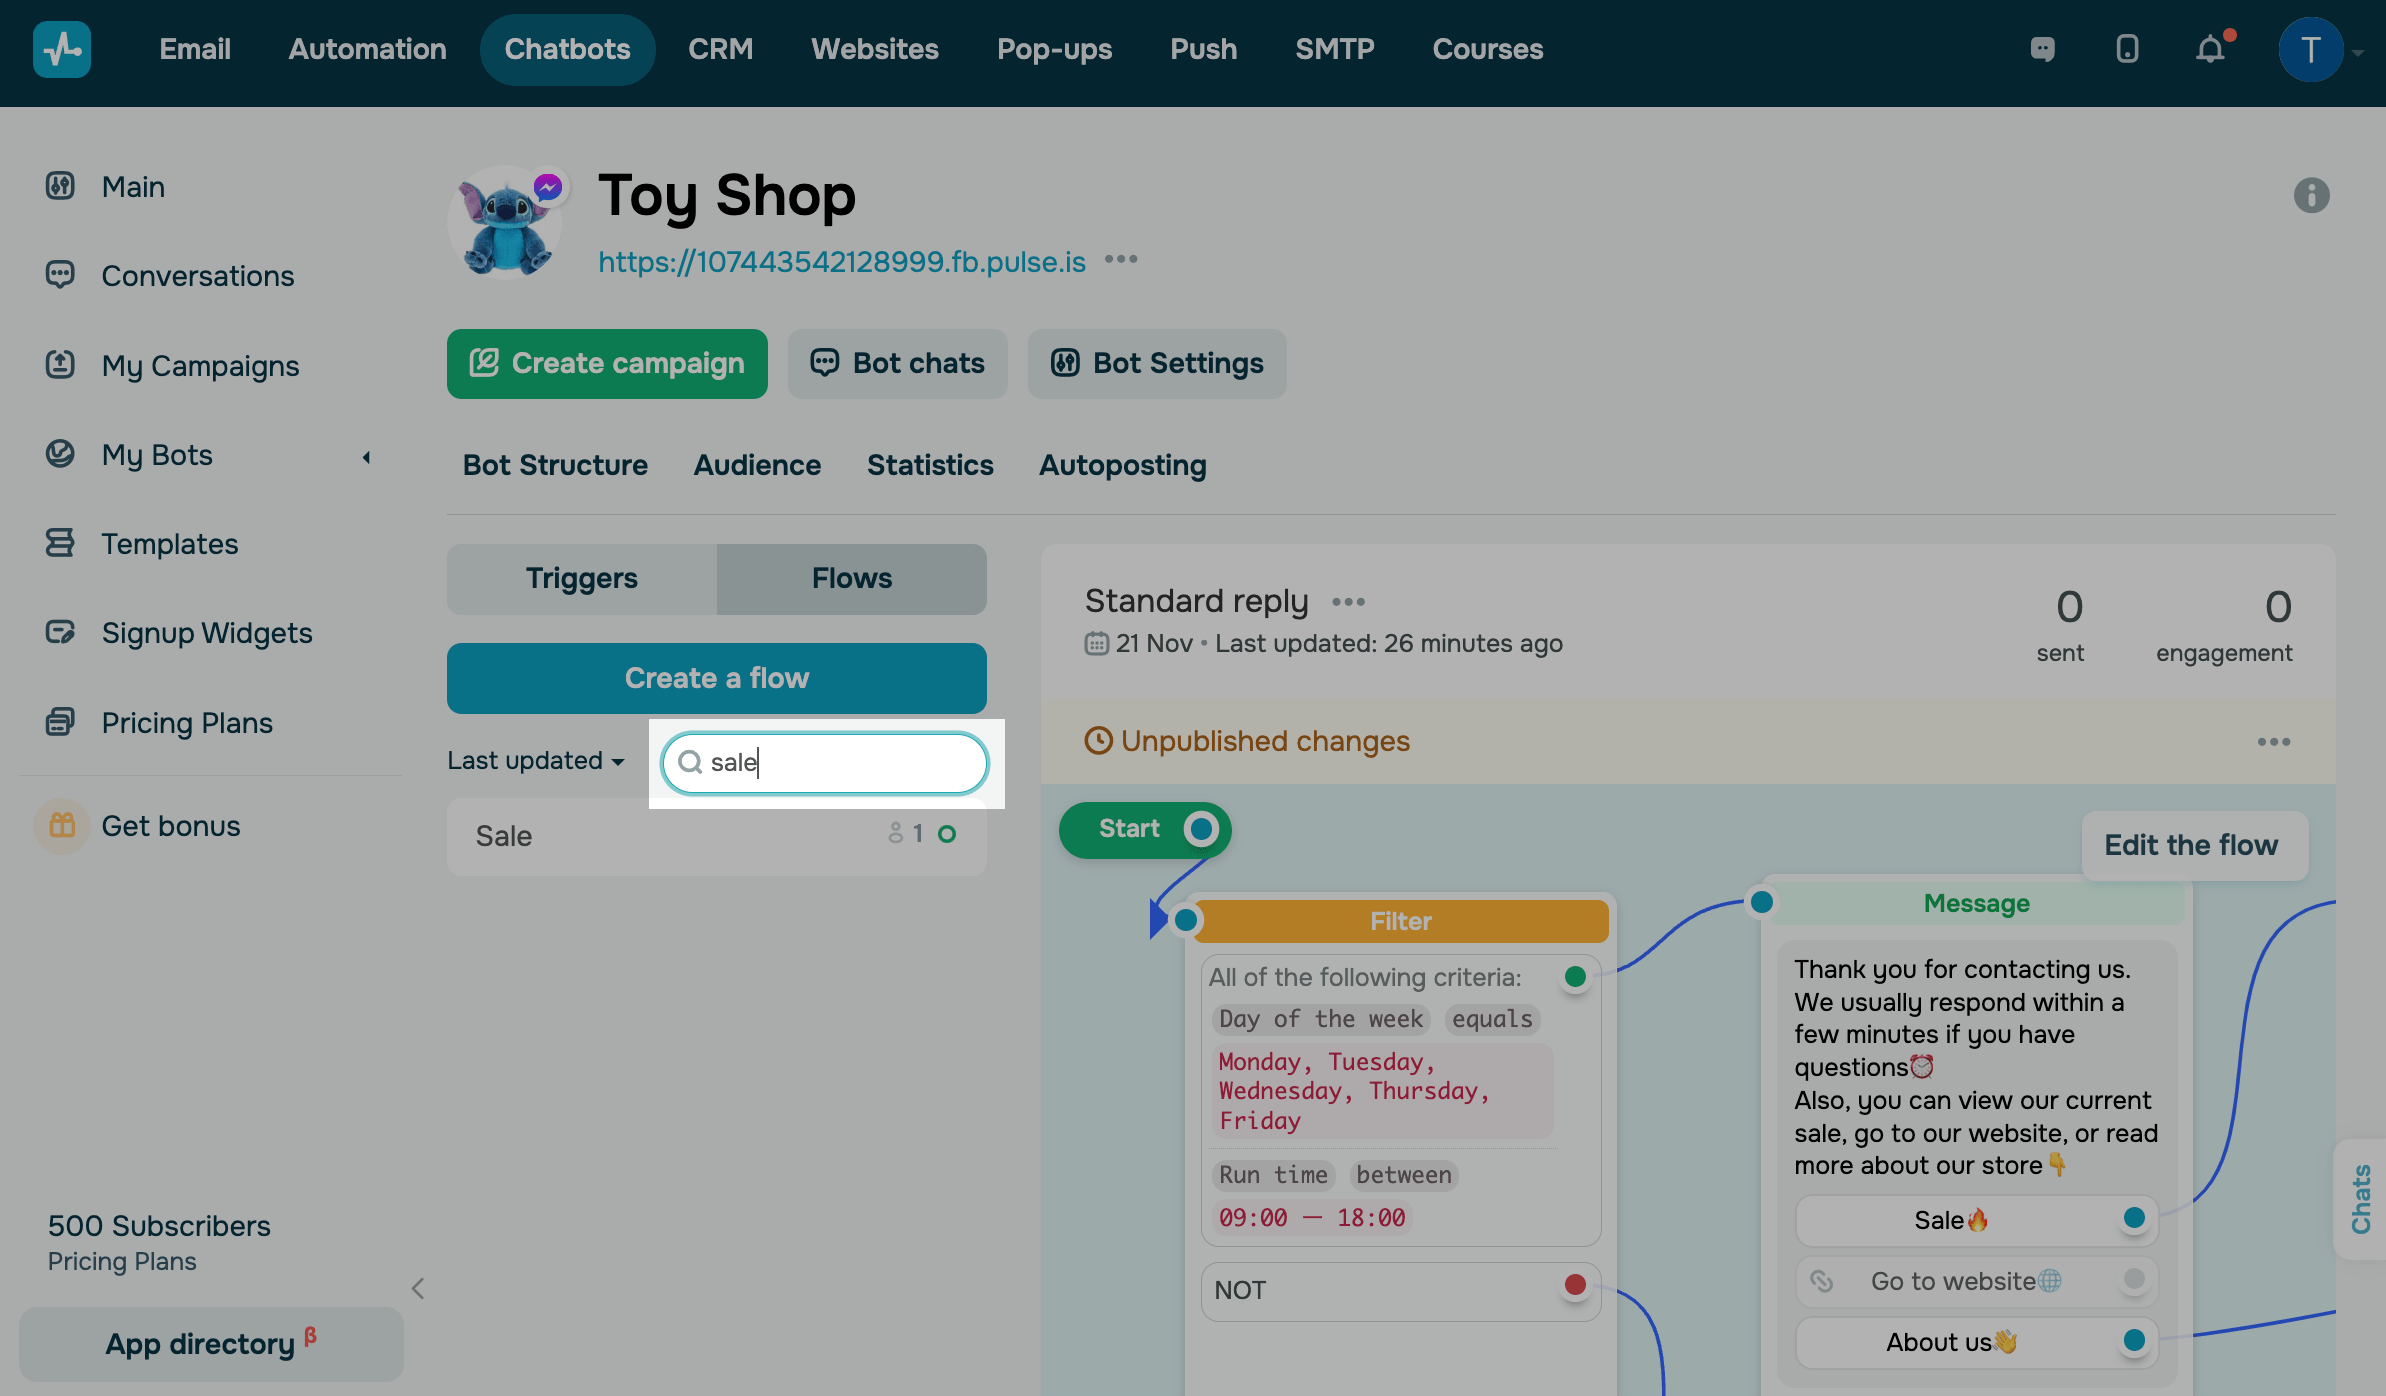
Additionally, you can sort your flows by creation date, last updated date, and name.

Create folders to organize your flows and make navigation easier. For example, you can create a folder with flows triggered by a purchase or another event.

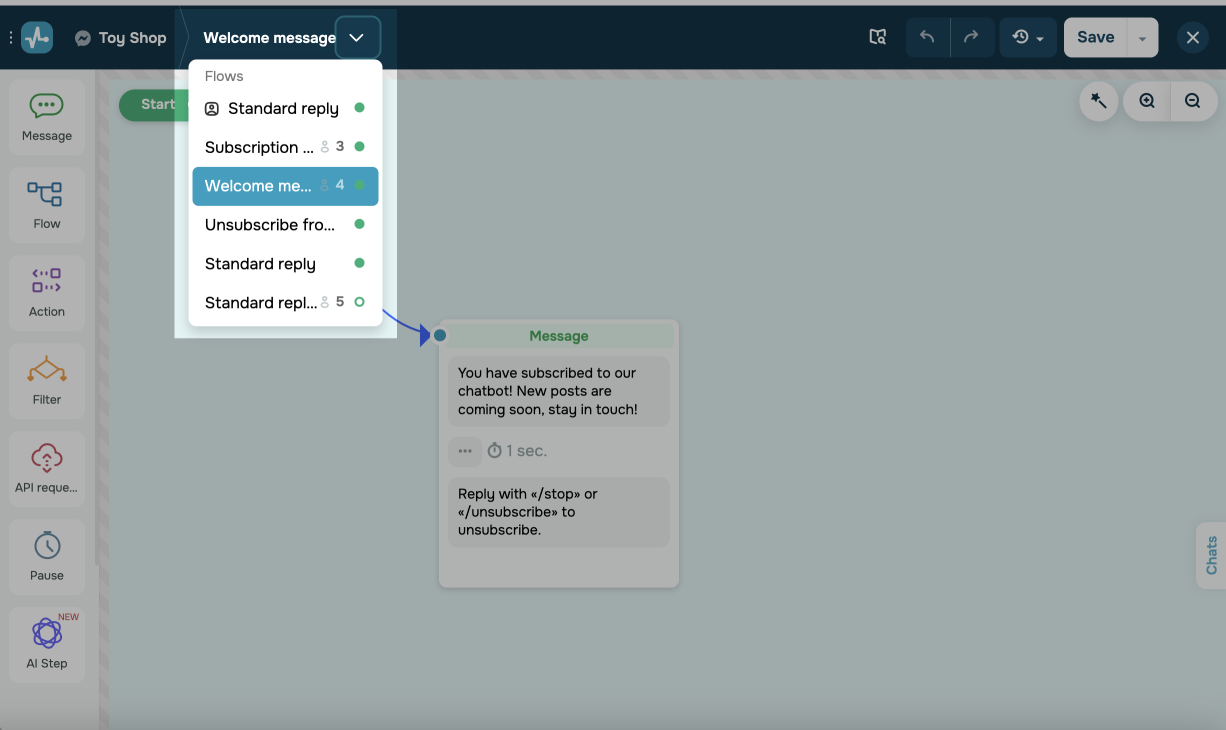
You can also view and switch to other saved flows directly within the builder.
How to manage your flow history
While editing your flow, you can undo or redo the last changes before they were saved. To do this, click Undo or Redo.
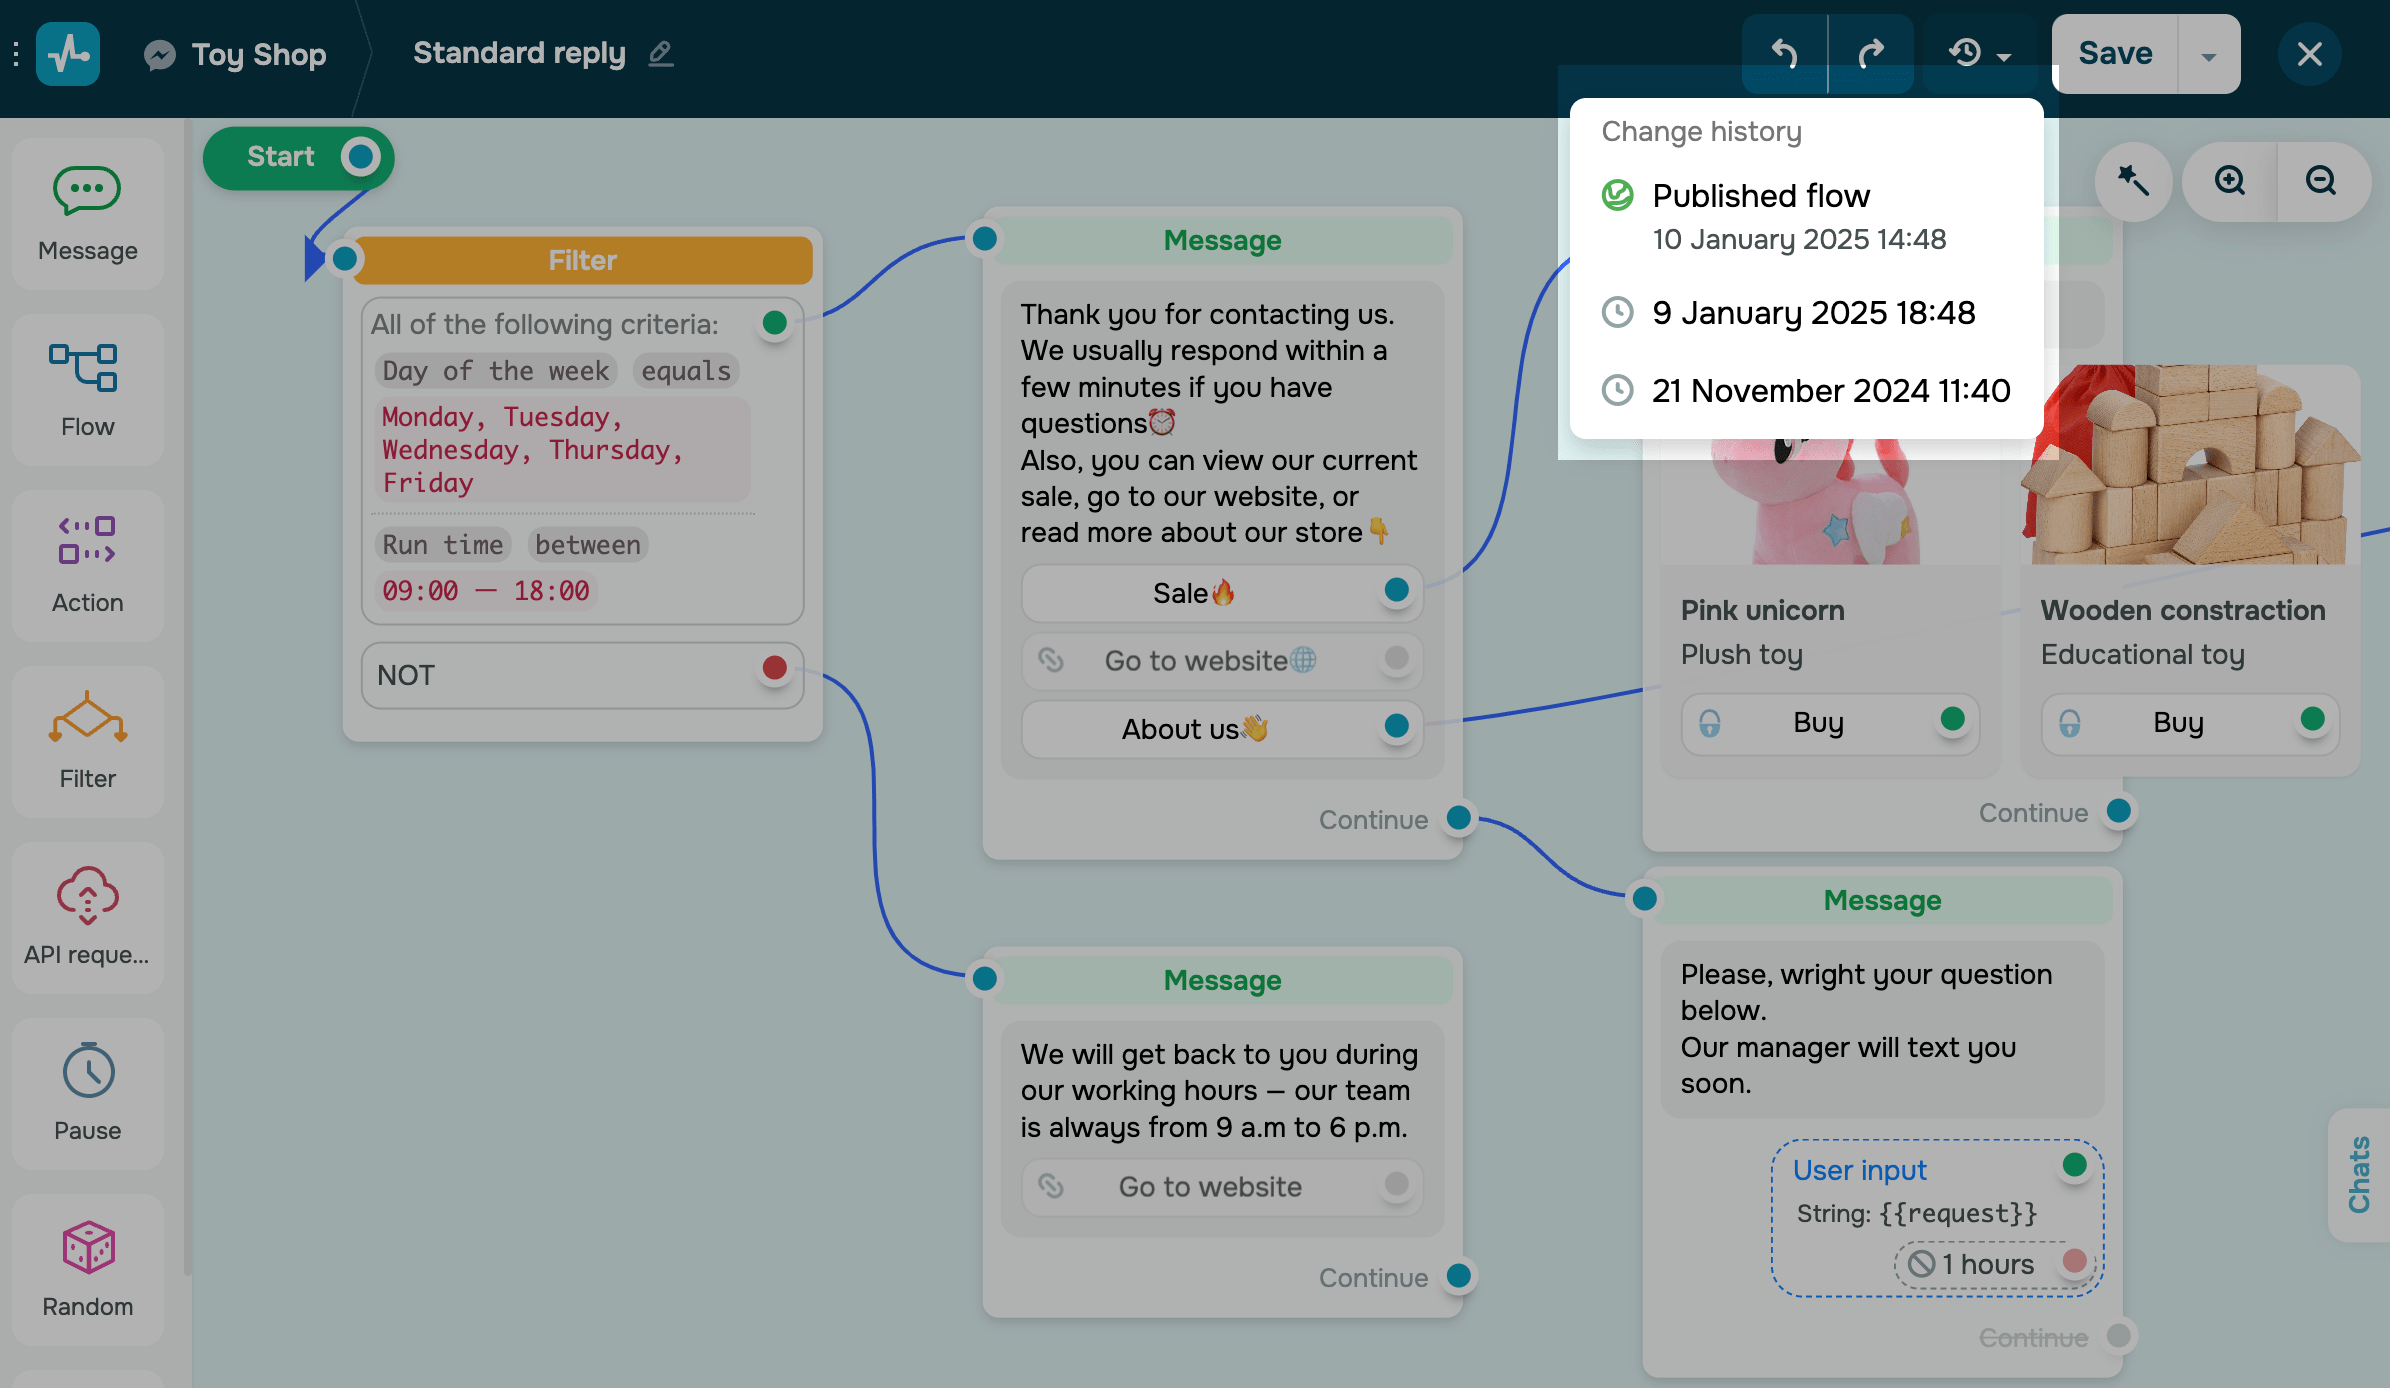
When you save your flow, you won't be able to click Undo and Redo, but you can revert it to previous saved versions. To do this, select a different saved version from the drop-down list, and continue working with the selected flow.
Please note that a maximum of 20 flow versions can be saved in the flow history. Next to the date changed, you can see who created every version. The flow history feature is available on a paid pricing plan.
How to manage your flow
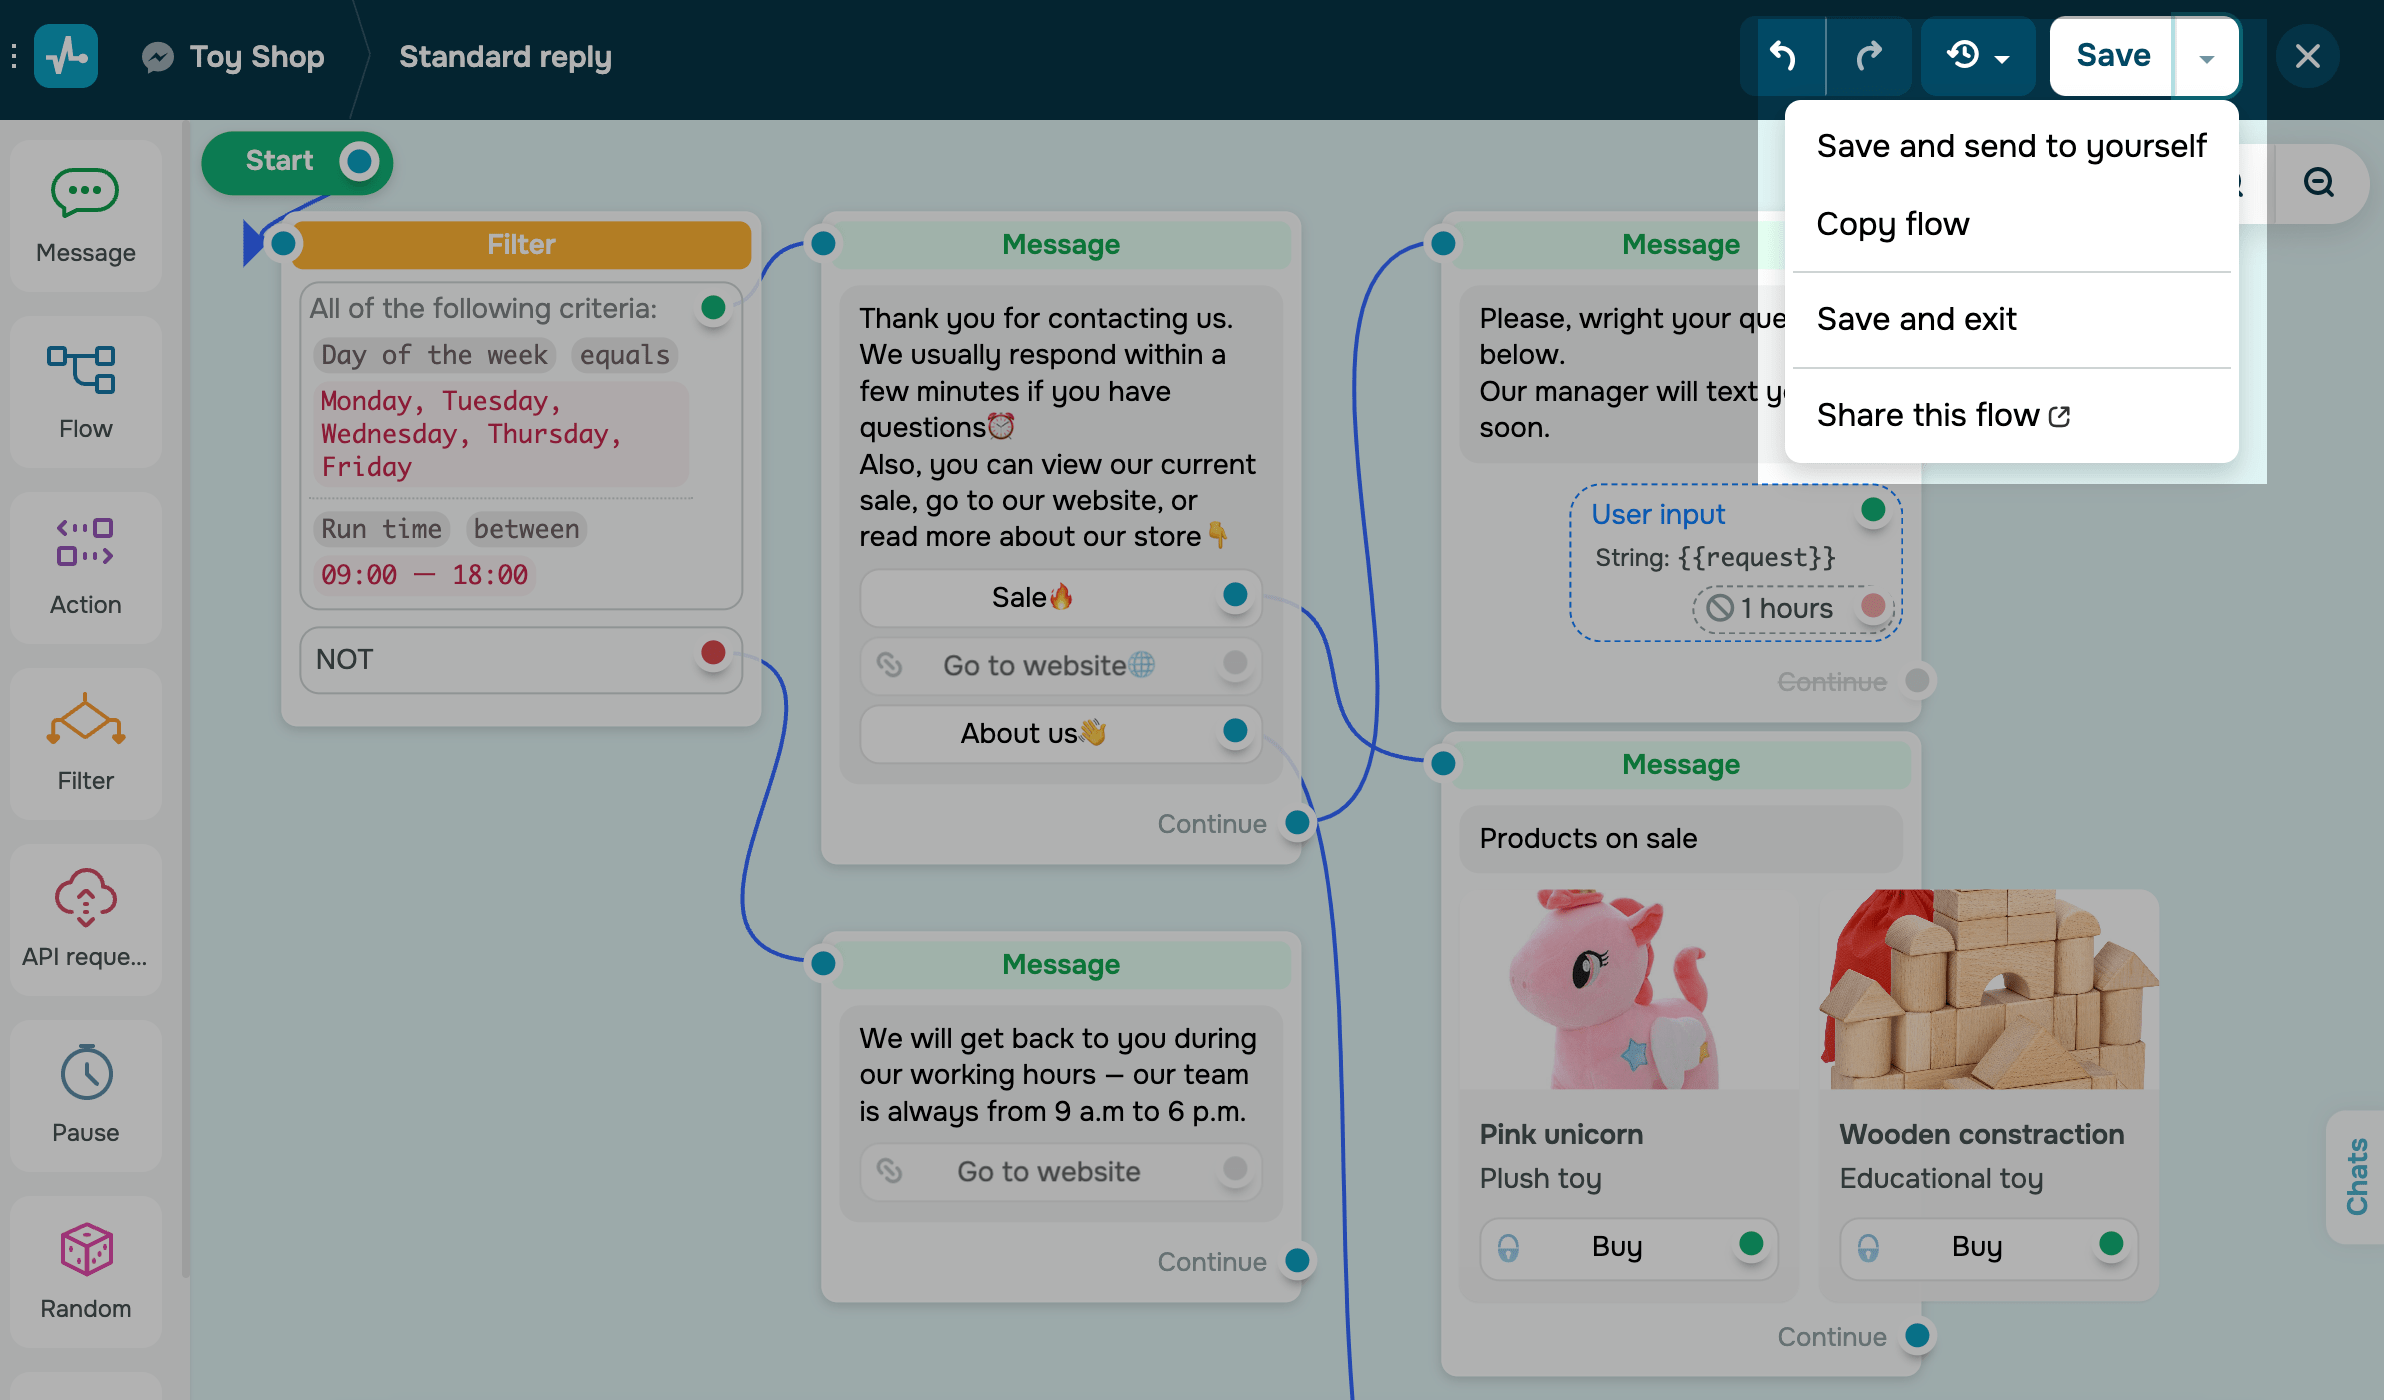
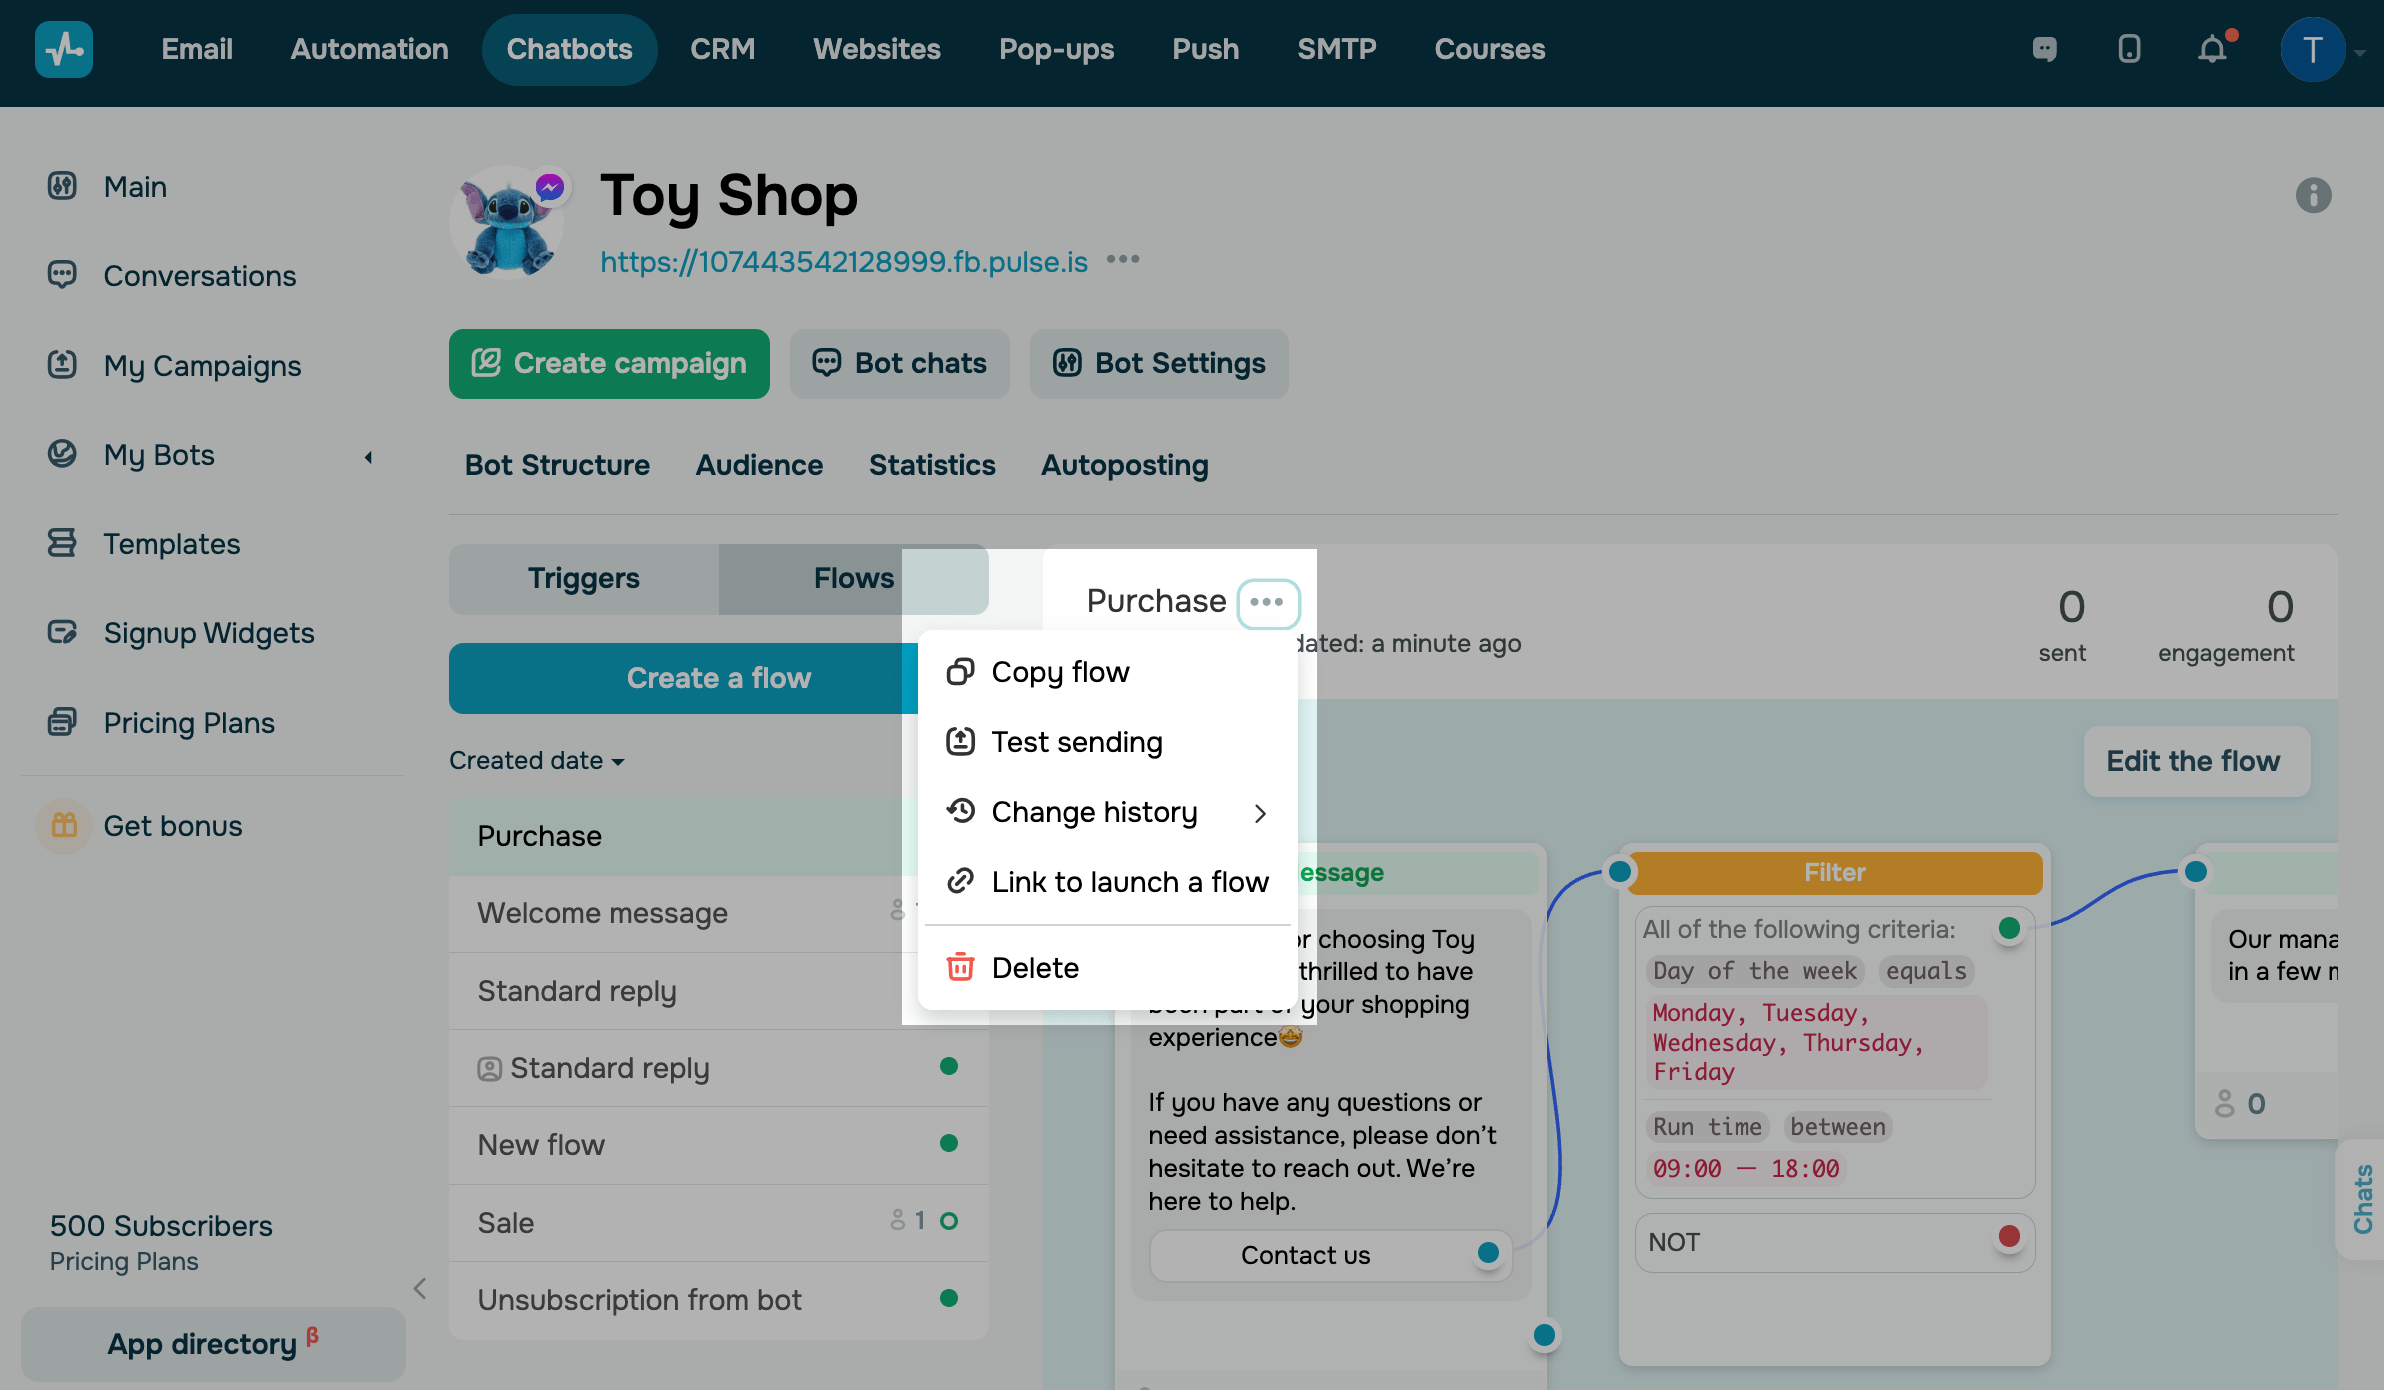
In the drop-down menu, you can select the following actions:
- copy flow (copy the flow to another chatbot);
- test campaign (send yourself a flow script message);
- link to launch a flow (copy the flow link);
- delete (delete the flow).
Please note that you can only copy a chatbot flow to the same communication channel from which you copy it. For example, if you have a Telegram chatbot flow, you cannot copy it to a Facebook chatbot.
How to test your flow
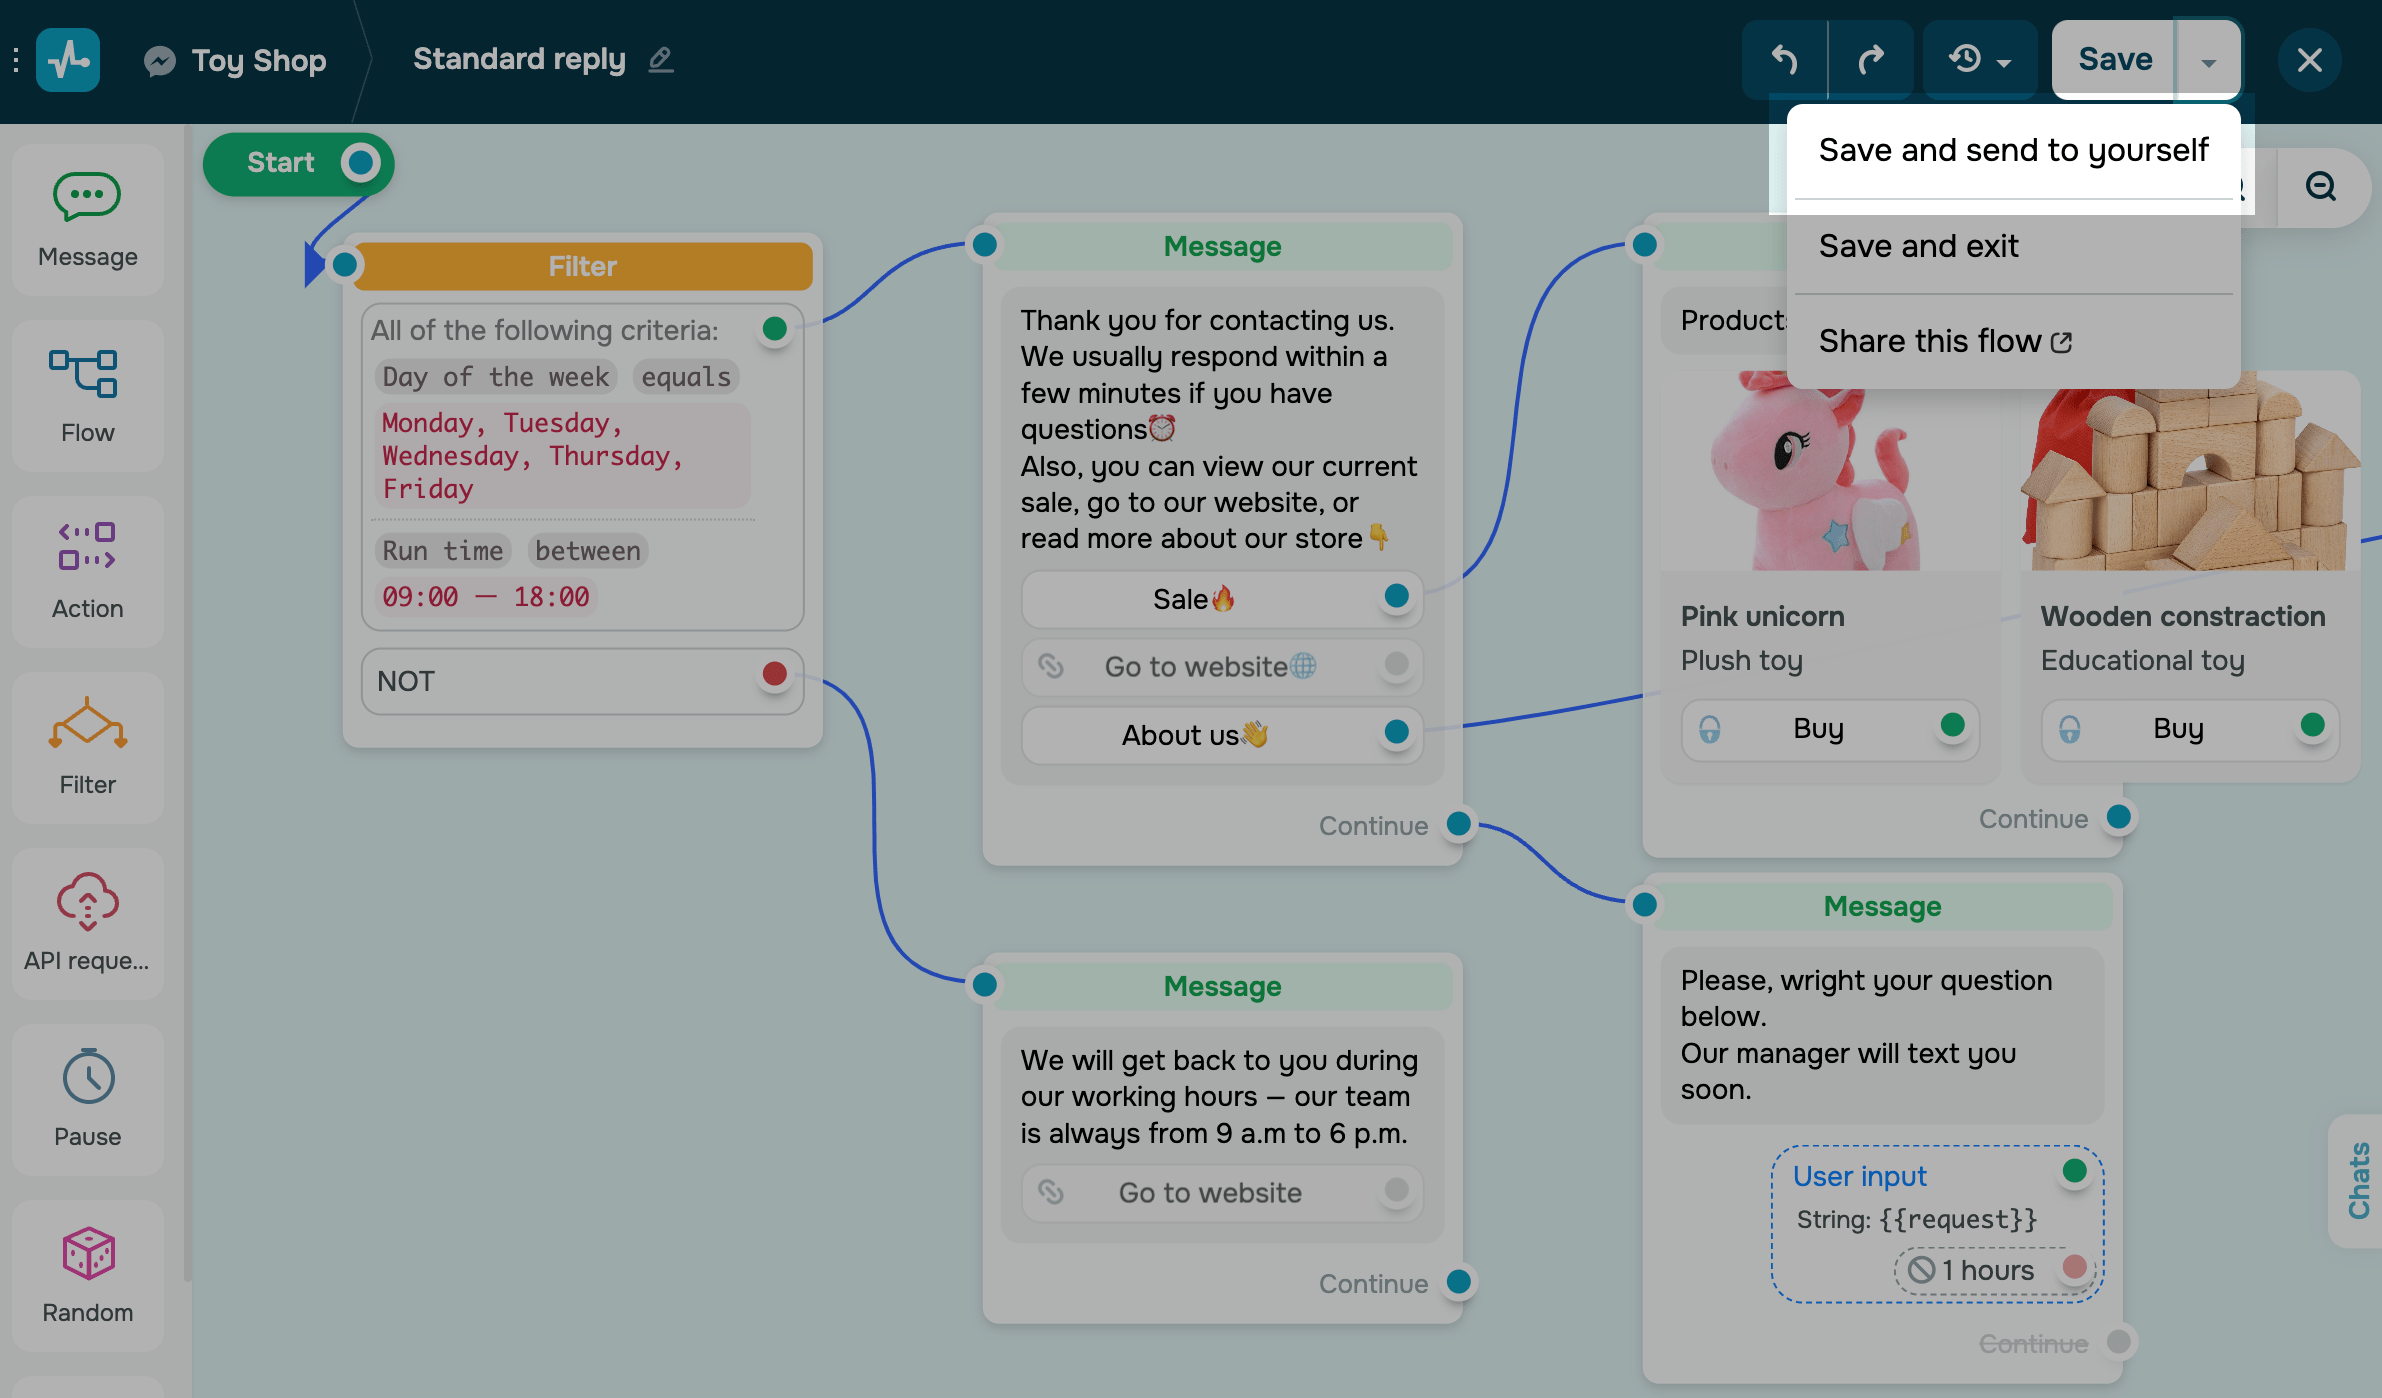
You can test and send yourself the flow to see if everything is set up and working as expected. To do this, click Save and send to yourself in the builder.
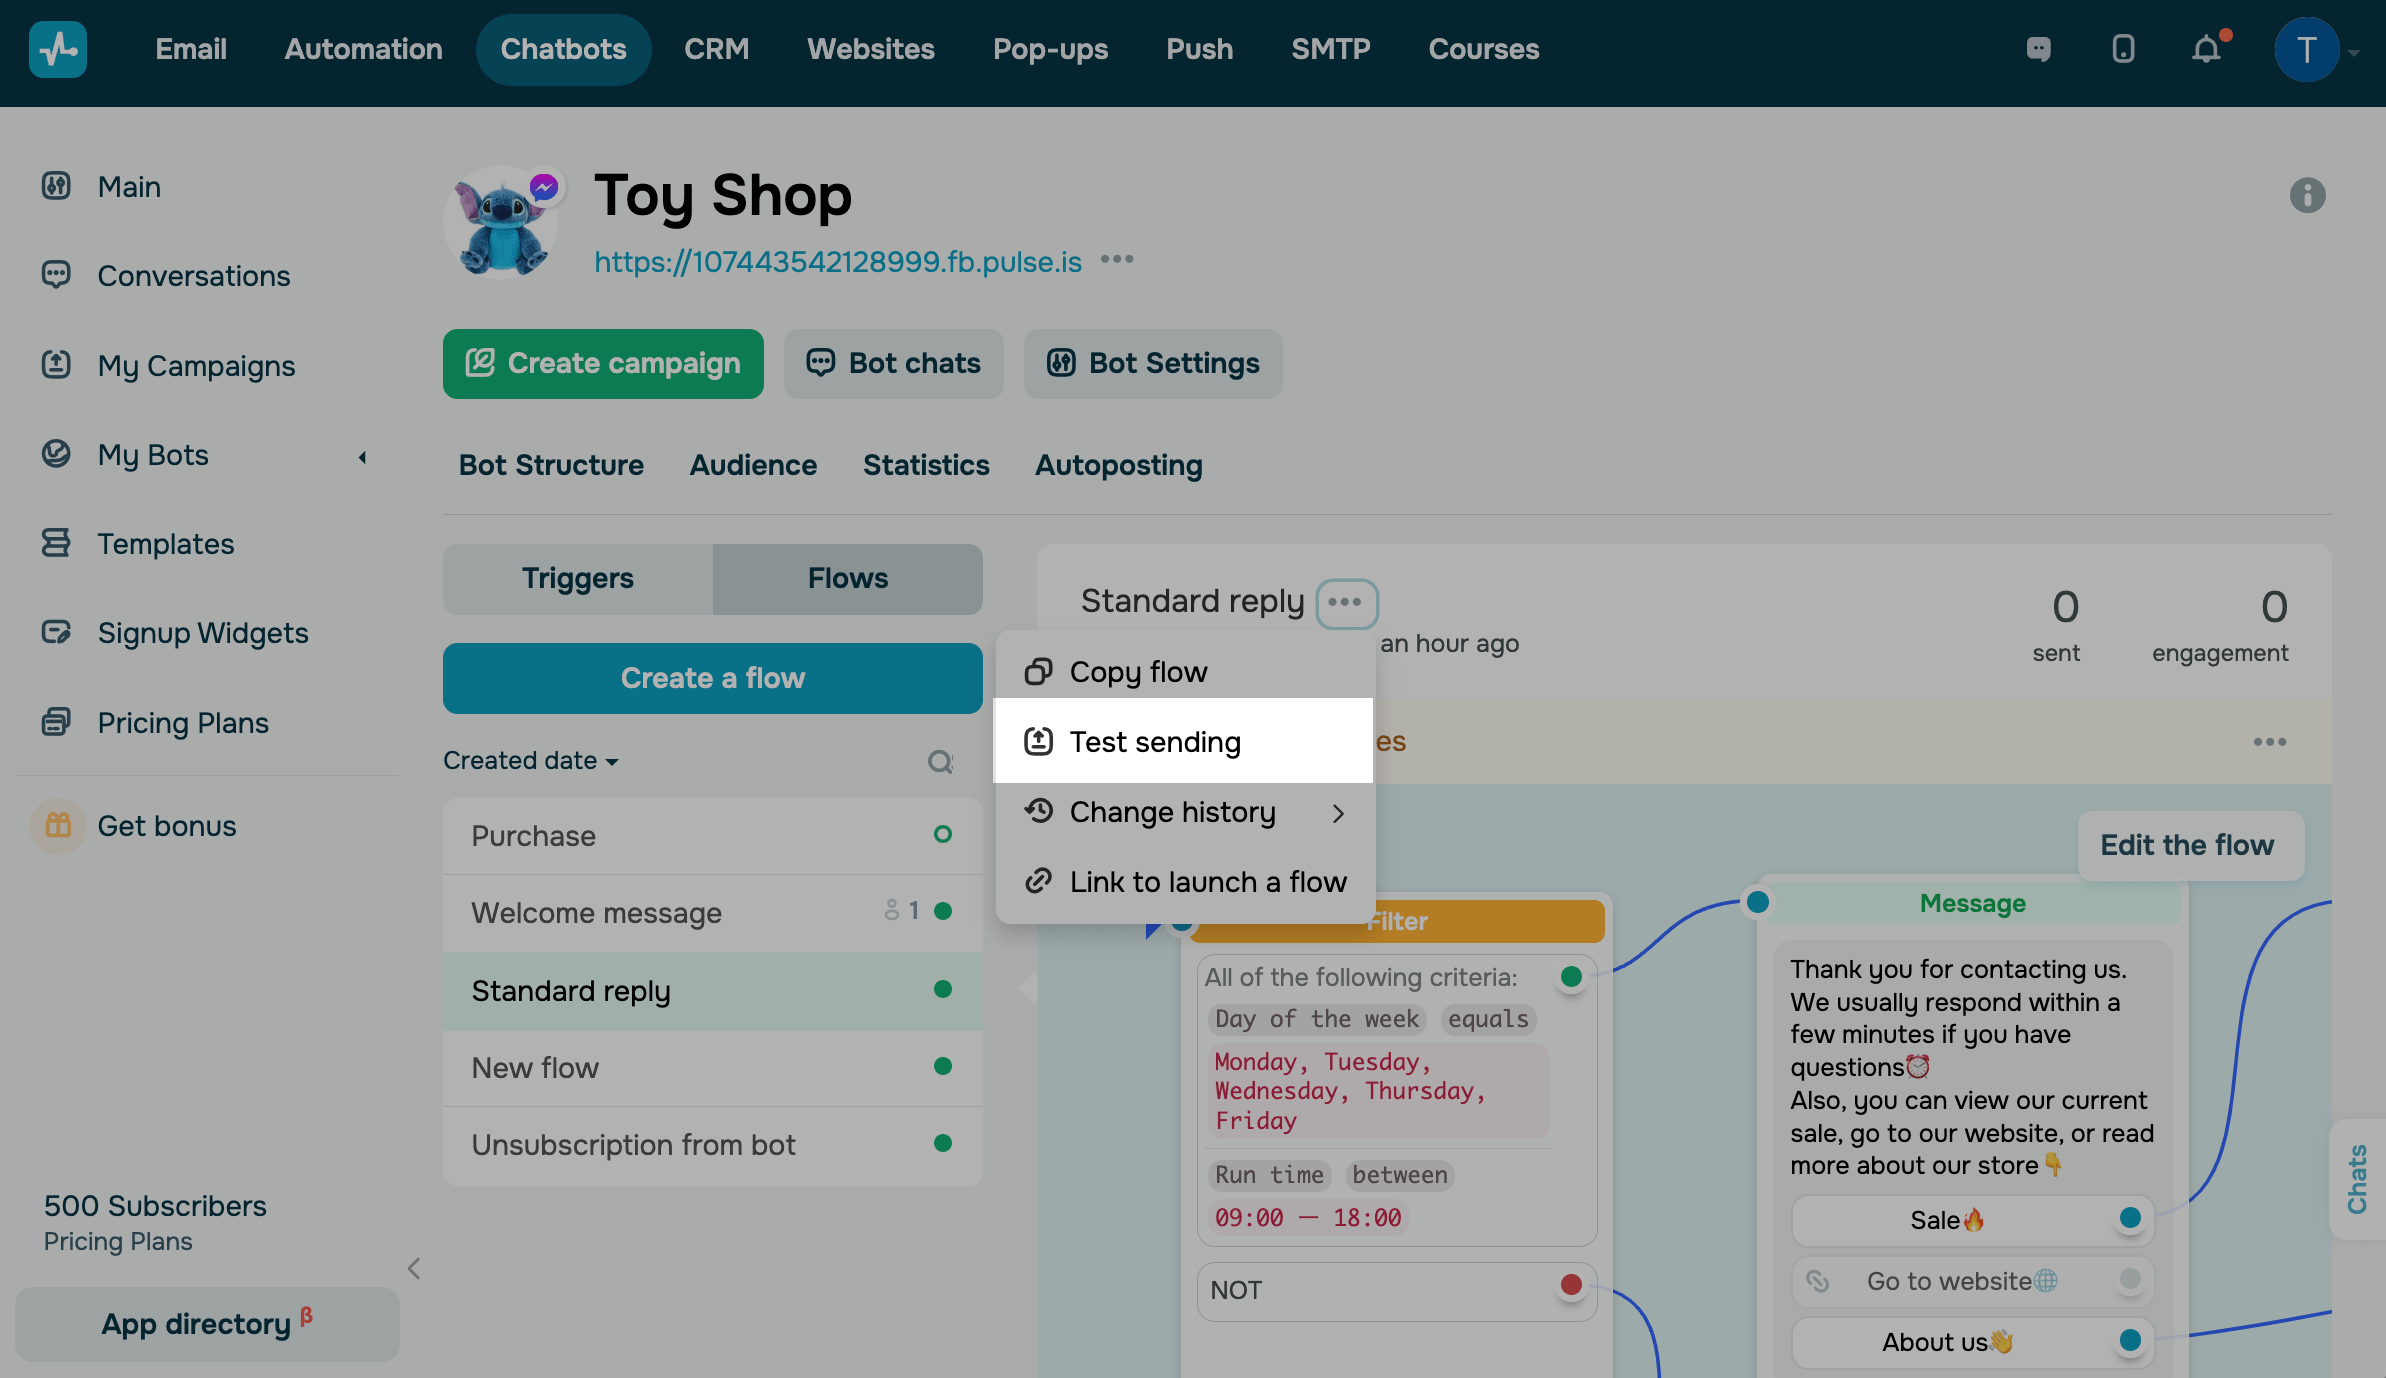
You can also send yourself a message on the flow management page. To do this, select Test campaign in the drop-down list.
Last Updated: 09.09.2024
or