Trigger SendPulse pixel events manually
If you want to create a pixel event scenario not covered by available conditions, use a code-based trigger. This helps you trigger events flexibly using generated code with defined variables and customize your data transfer settings.
Let’s talk about how to trigger a SendPulse pixel event manually.
Configure data transfer
In your pixel settings, select the Manual, code-based trigger type. Turn on the Transfer additional data toggle and enter a variable name in the Event variable field. In the Variable type field, select String or Number depending on the type of data you want to send.
You can pass any parameters used to support your website or business workflows, such as prices, product names, IDs, statuses, and more. The pixel sends variables to SendPulse tools exactly as provided, without changing or processing the data.
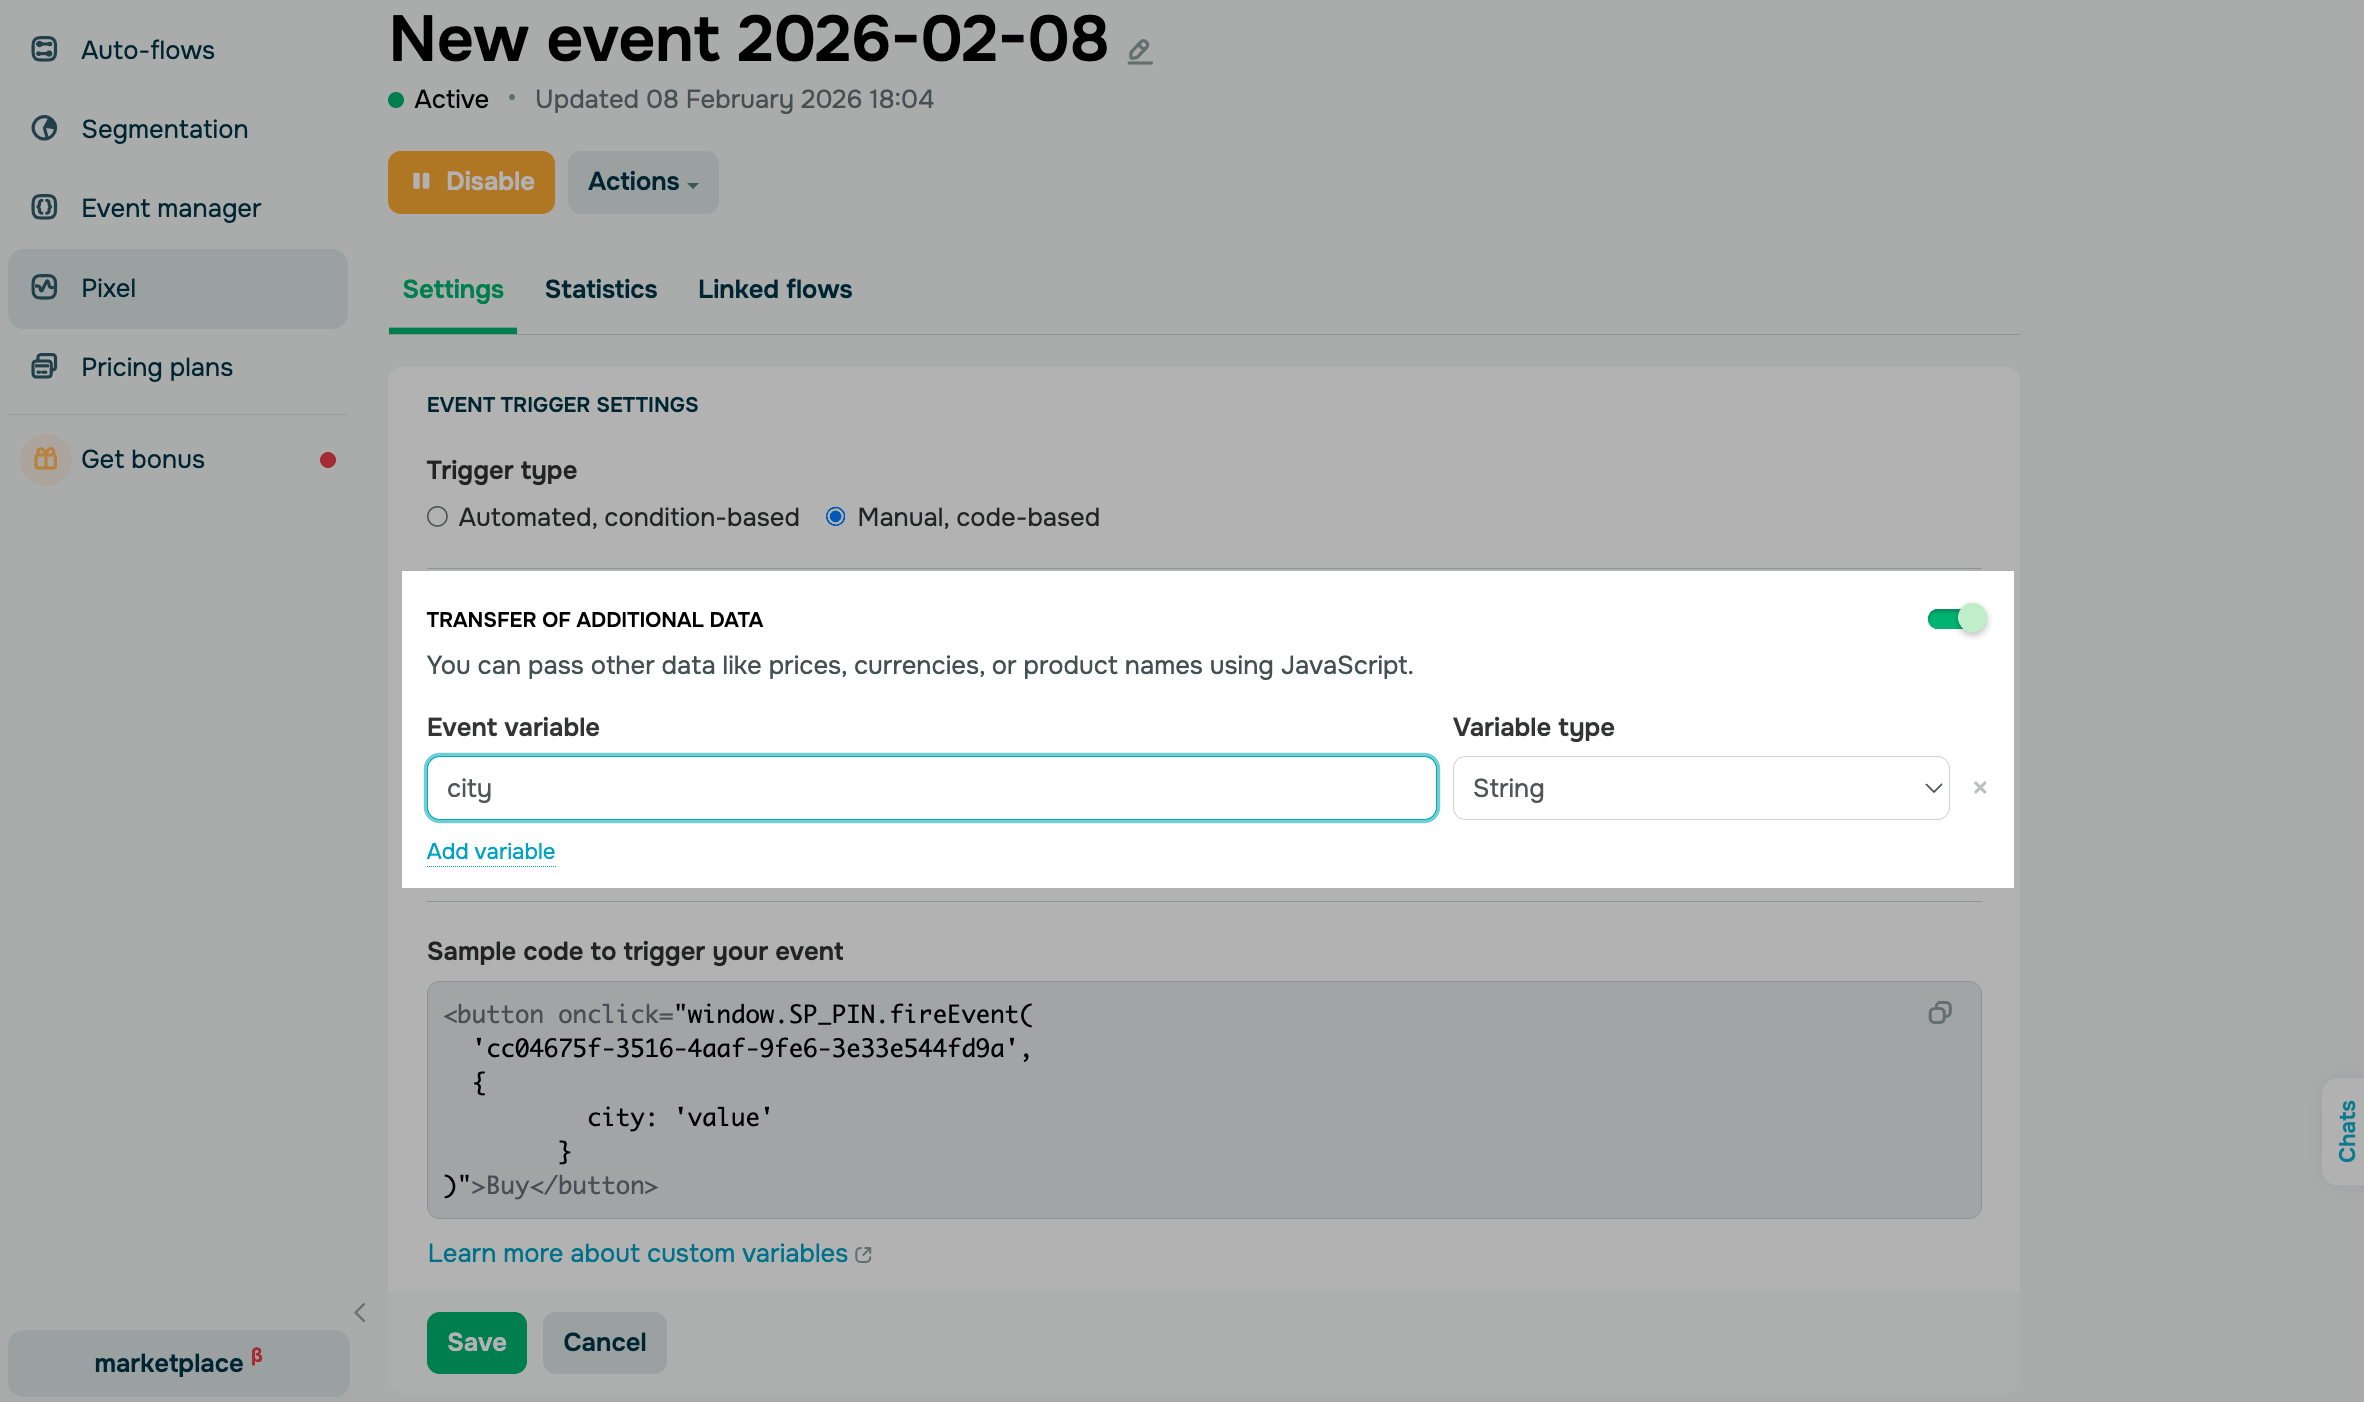
Click Save. SendPulse will generate a sample code snippet with your specified variables.
Install the pixel code
You can use the generated code directly in your website interface, including buttons, forms, or any JavaScript elements, where you need to manually send an event to SendPulse.
You can trigger the event:
- once its condition is met;
- in response to a user action;
- once an action, such as payment, registration, or confirmation, is taken.
If a visitor is identified, the event and all transmitted variables are linked to their profile in SendPulse.
Last Updated: 25.02.2026
or