Create a certificate
You can create a final certificate that students will receive after they successfully complete your course, or add a custom certificate in your course. The certificate will indicate to whom it was issued, the name of the course, instructor names, and issue date. You can customize its style and add images that suit your course.
You can also create a unique certificate and upload a personalized certificate for each student.
Read more: How to upload a custom course certificate.
Read more about how to set up the criteria for issuing a certificate: Course completion criteria.
Create a certificate
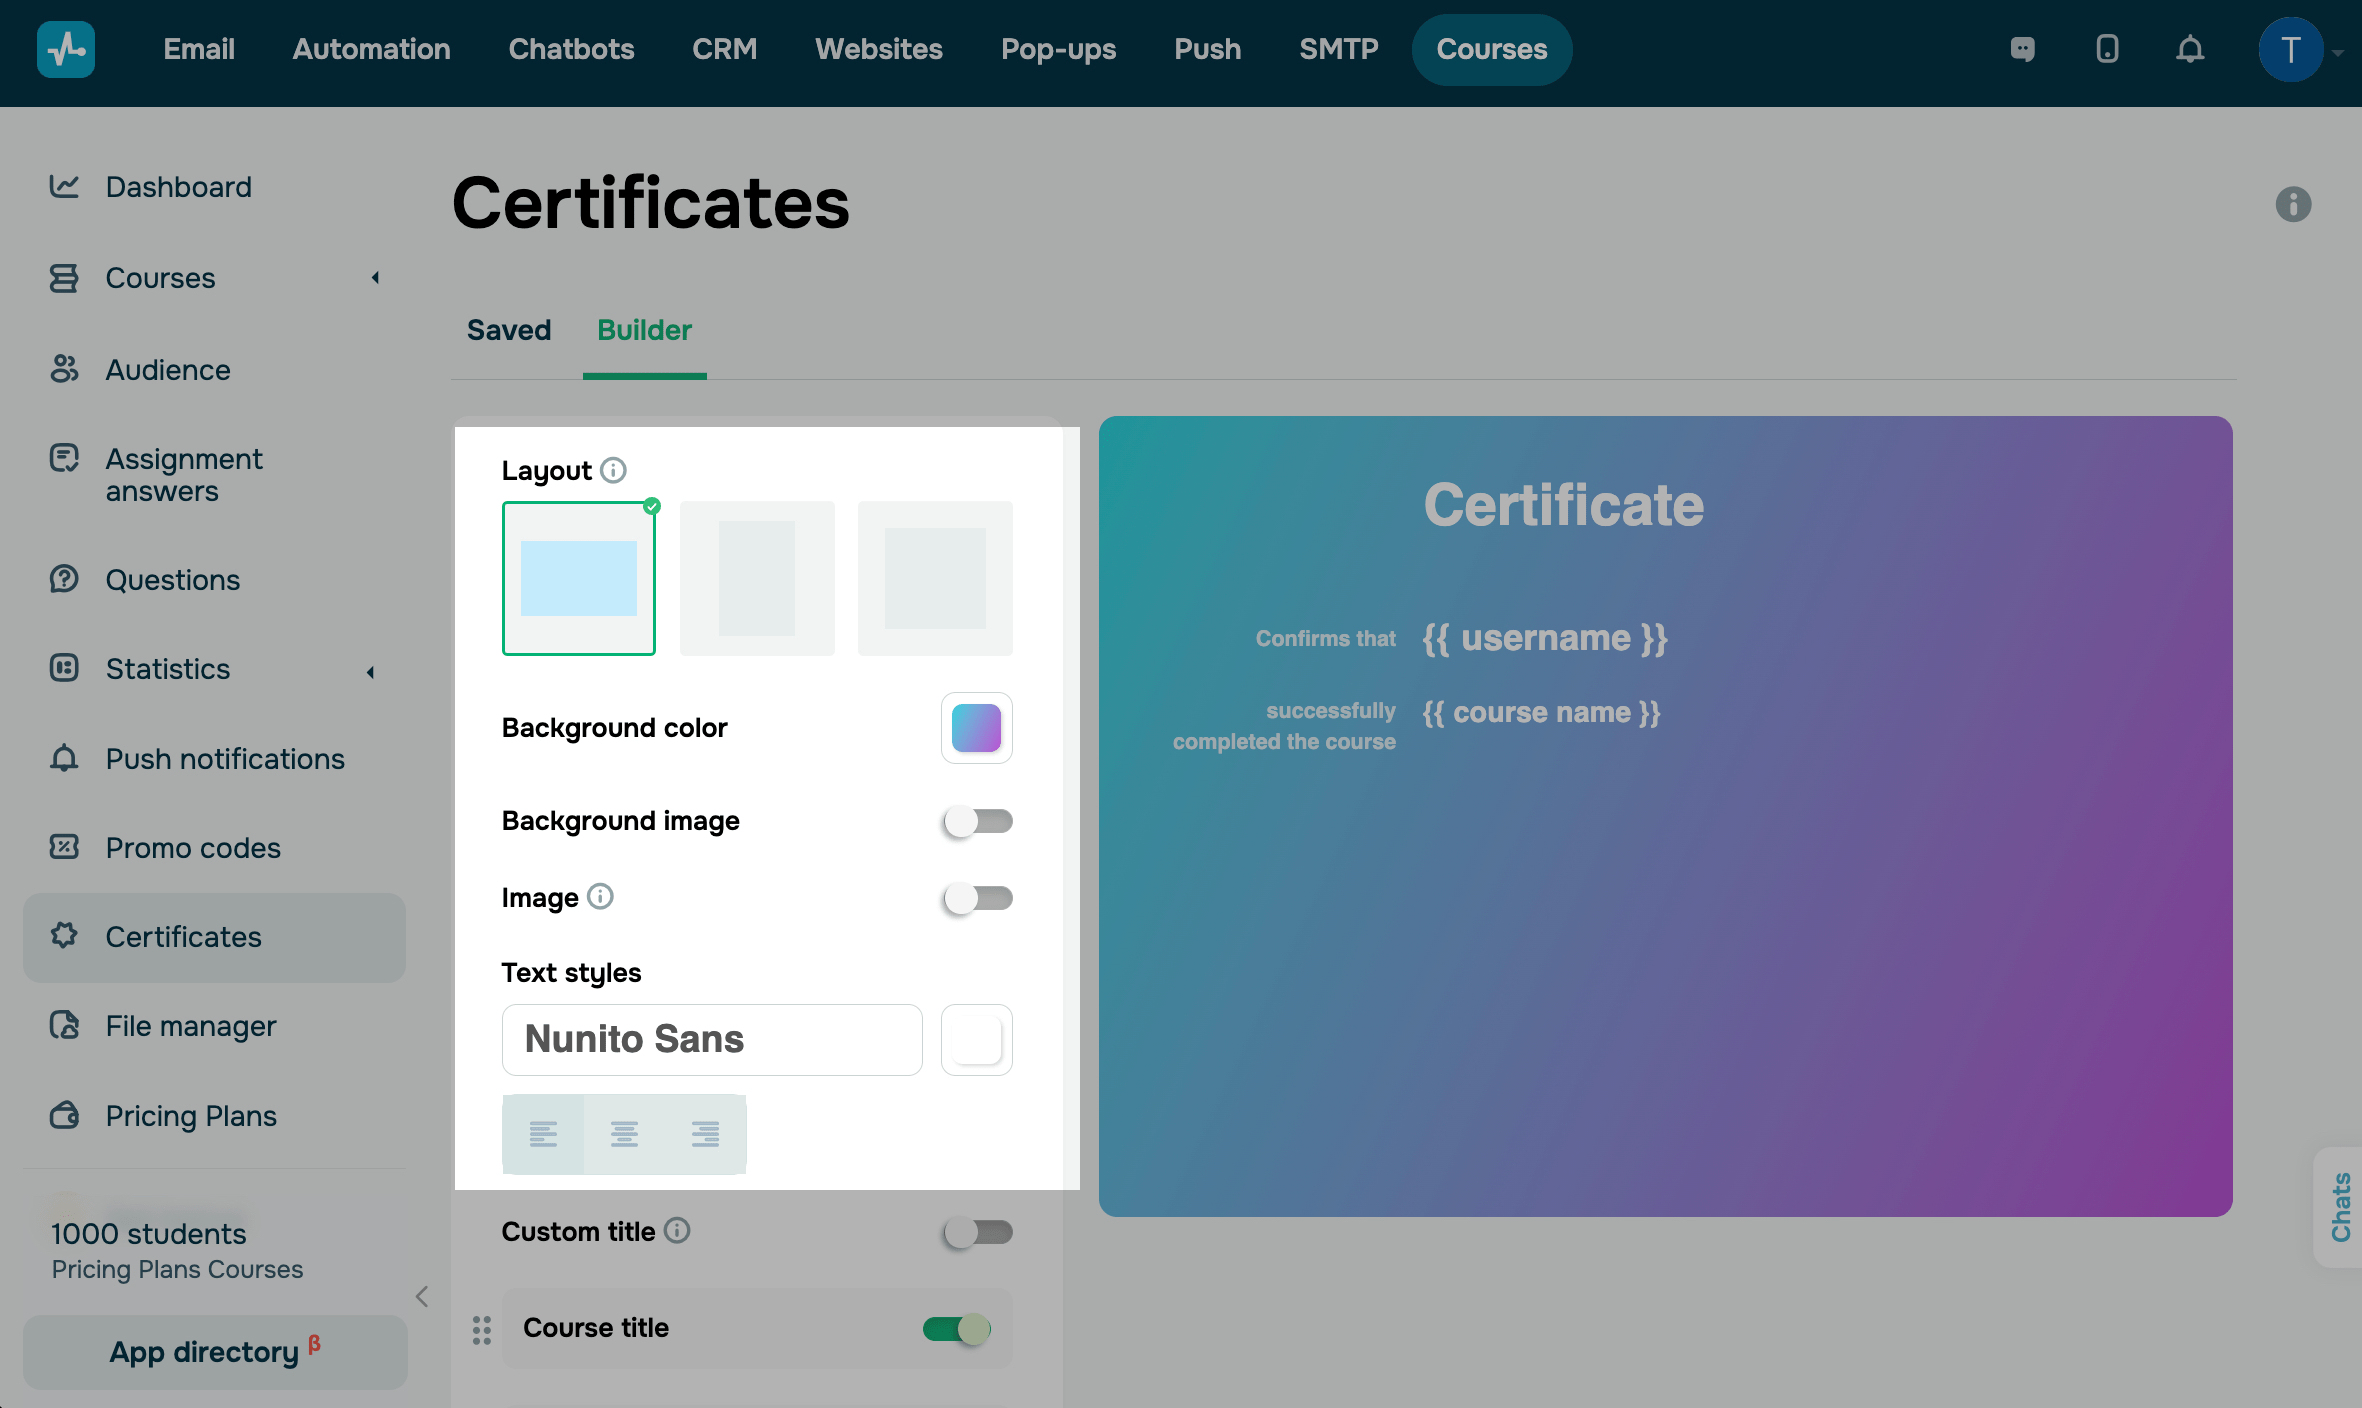
Go to the Certificates > the Builder tab.
Customize the certificate style
To customize your certificate, you can use the following style options:
| Layout | Select a certificate layout:
|
| Background color | Select a background color from the pictogram. |
| Background image | Sets a background image instead of a color. Turn on the toggle and upload a file. |
| Image | Adds an extra image on the right. Turn on the toggle and upload a file.
Set a display width. When selecting an image, keep your certificate layout in mind. Recommended width: 240px, 320px, or 440px. Recommended height: 890px, 1780px, or 1260px. Smaller images will be stretched, and larger images will be cropped. |
| Text styles | Select a font, color, and alignment. |
Customize the certificate content
Students receive their certificates in the language set in their account at the time of issuing them. By default, a student account is set to the same language that was used on your website when they registered for your course. A student can change the language in their personal account anytime.
By default, a certificate contains the information about students who completed your course and your course name.
{{username}} |
Your students' first and last names mentioned in the Students tab. |
{{course_name}} |
Your course name that you can edit on the course page. |
You can also add more information by turning on the corresponding toggles.
| Custom title | Enter your certificate title. |
| Instructors |
Choose course instructors whose names to add to the certificate:
By default, all course instructors are added. First and last names of invited course instructors replace the |
| Dates | A student’s certificate issue date replaces the {{DD/MM/YYYY}} variable. Certificate issue dates are determined by time zones set in instructors’ accounts at the time of generating certificates (when students click Generate Certificate in their personal accounts). |
| Your logo | Upload and select your company logo |
| SendPulse logo |
Turn off this toggle to remove the SendPulse logo. Available with a paid pricing plan. |
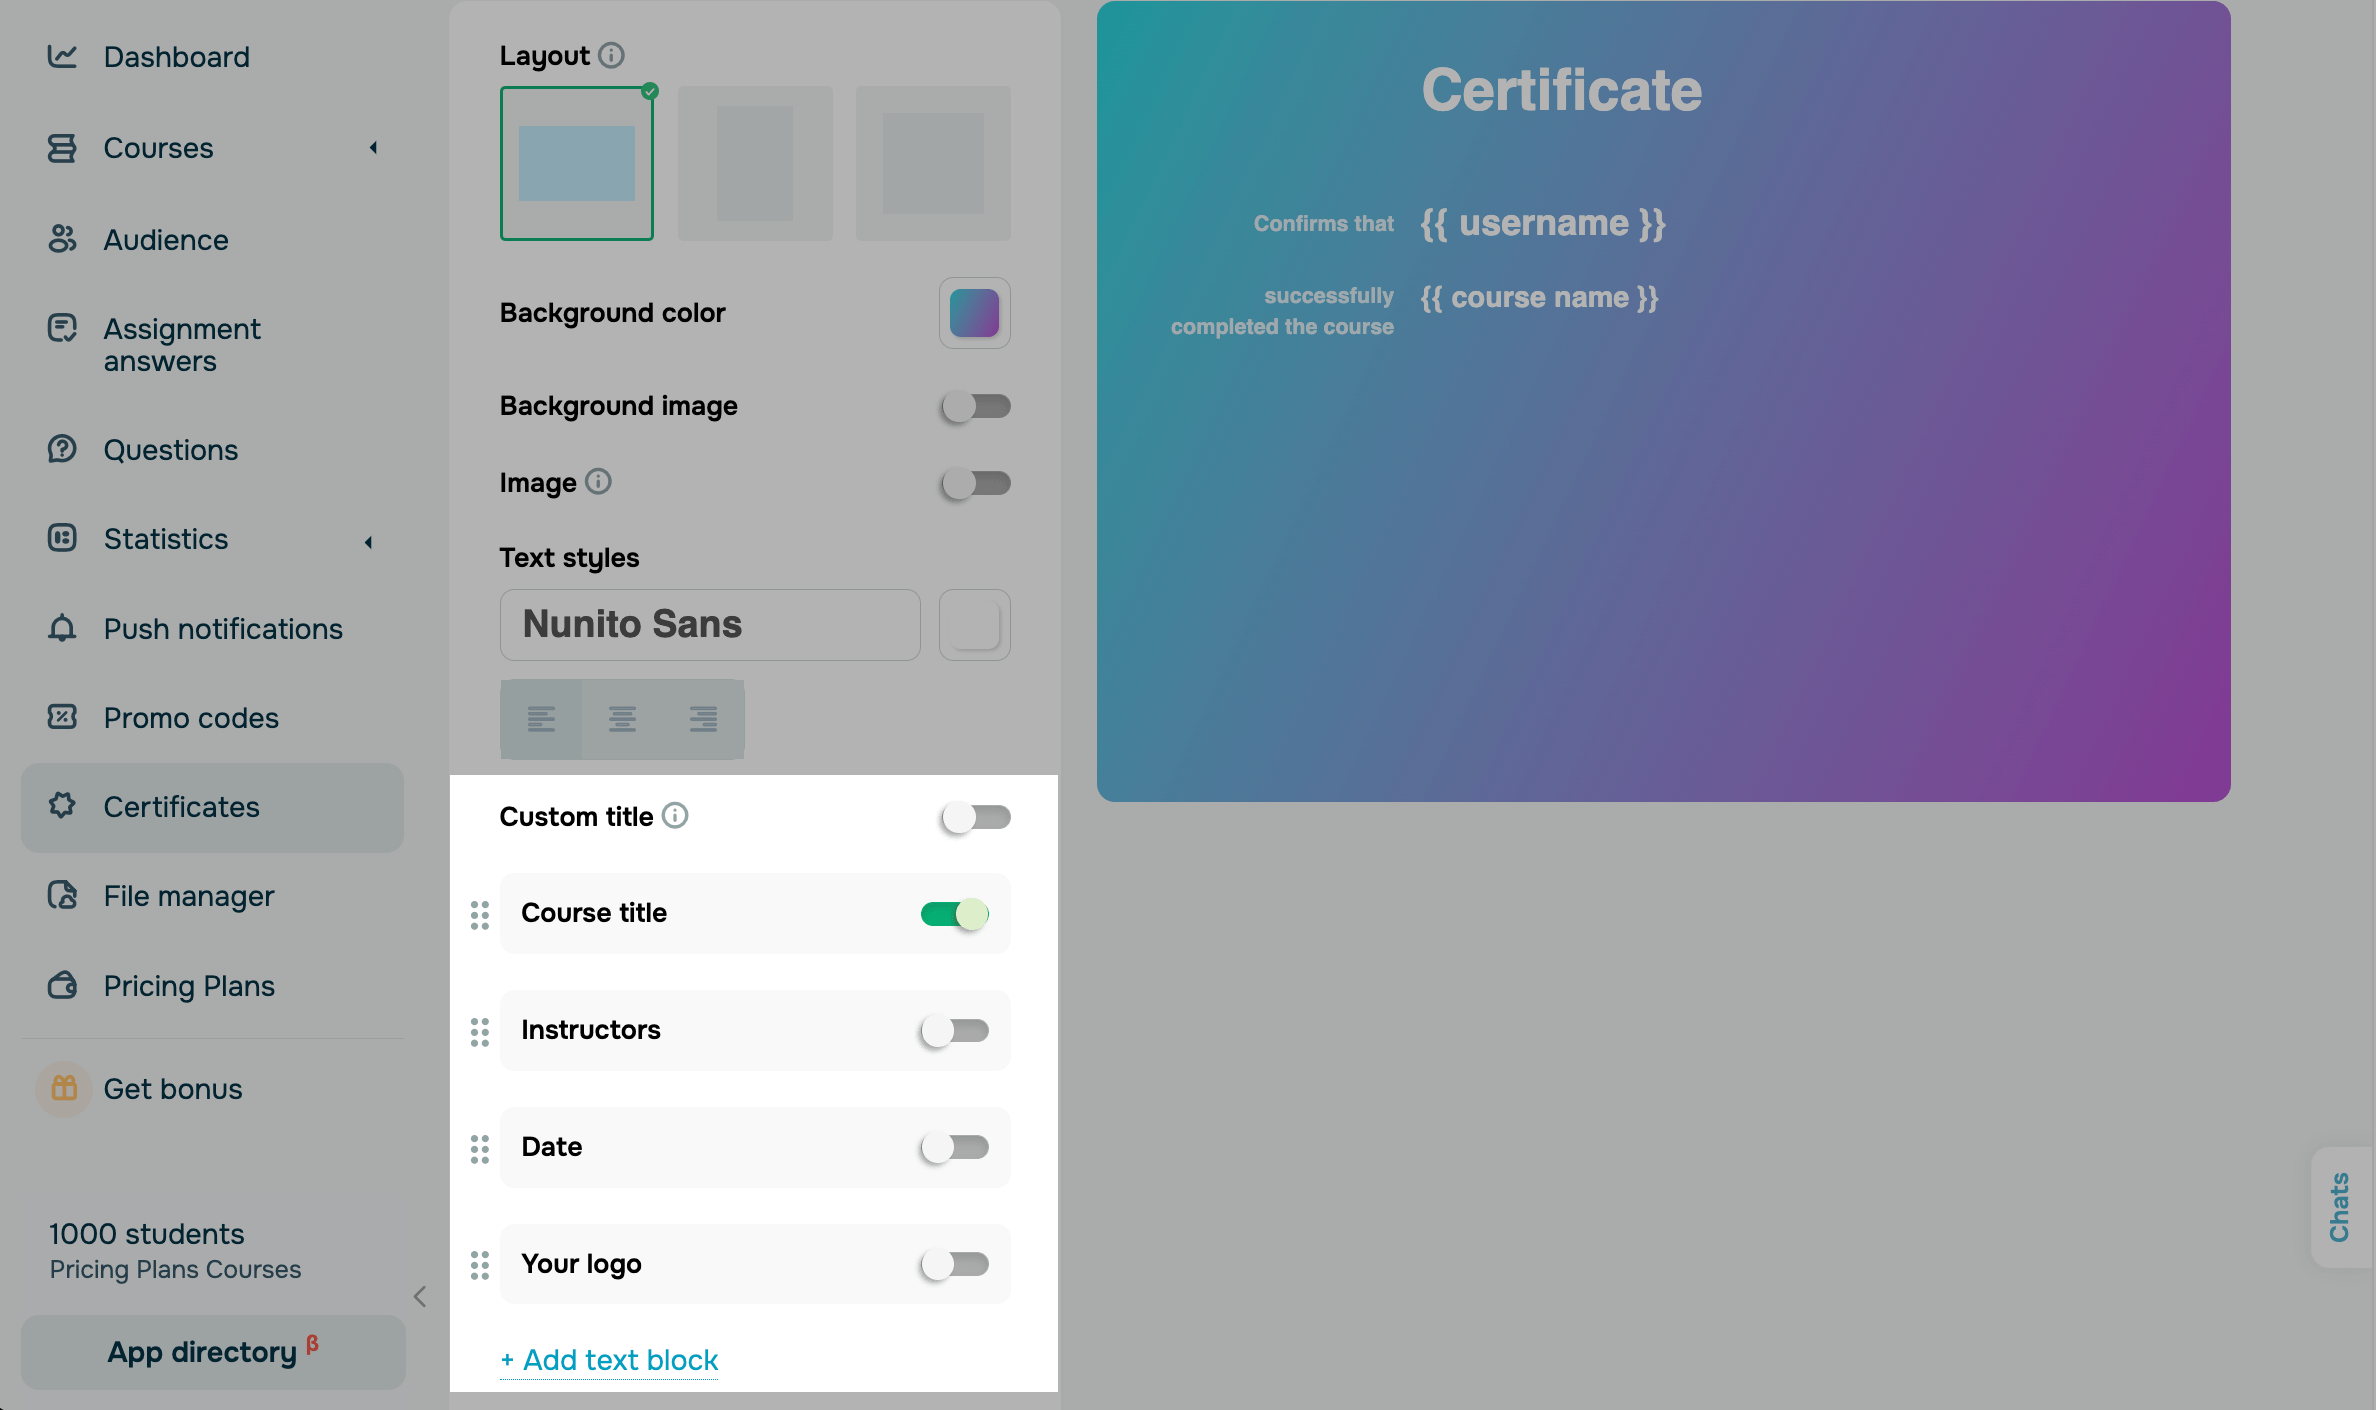
You can also add a text block and additional information. Click Add text block, and enter and format your text.
Any additional text you add will not be automatically translated and will appear unchanged in certificates in all languages.
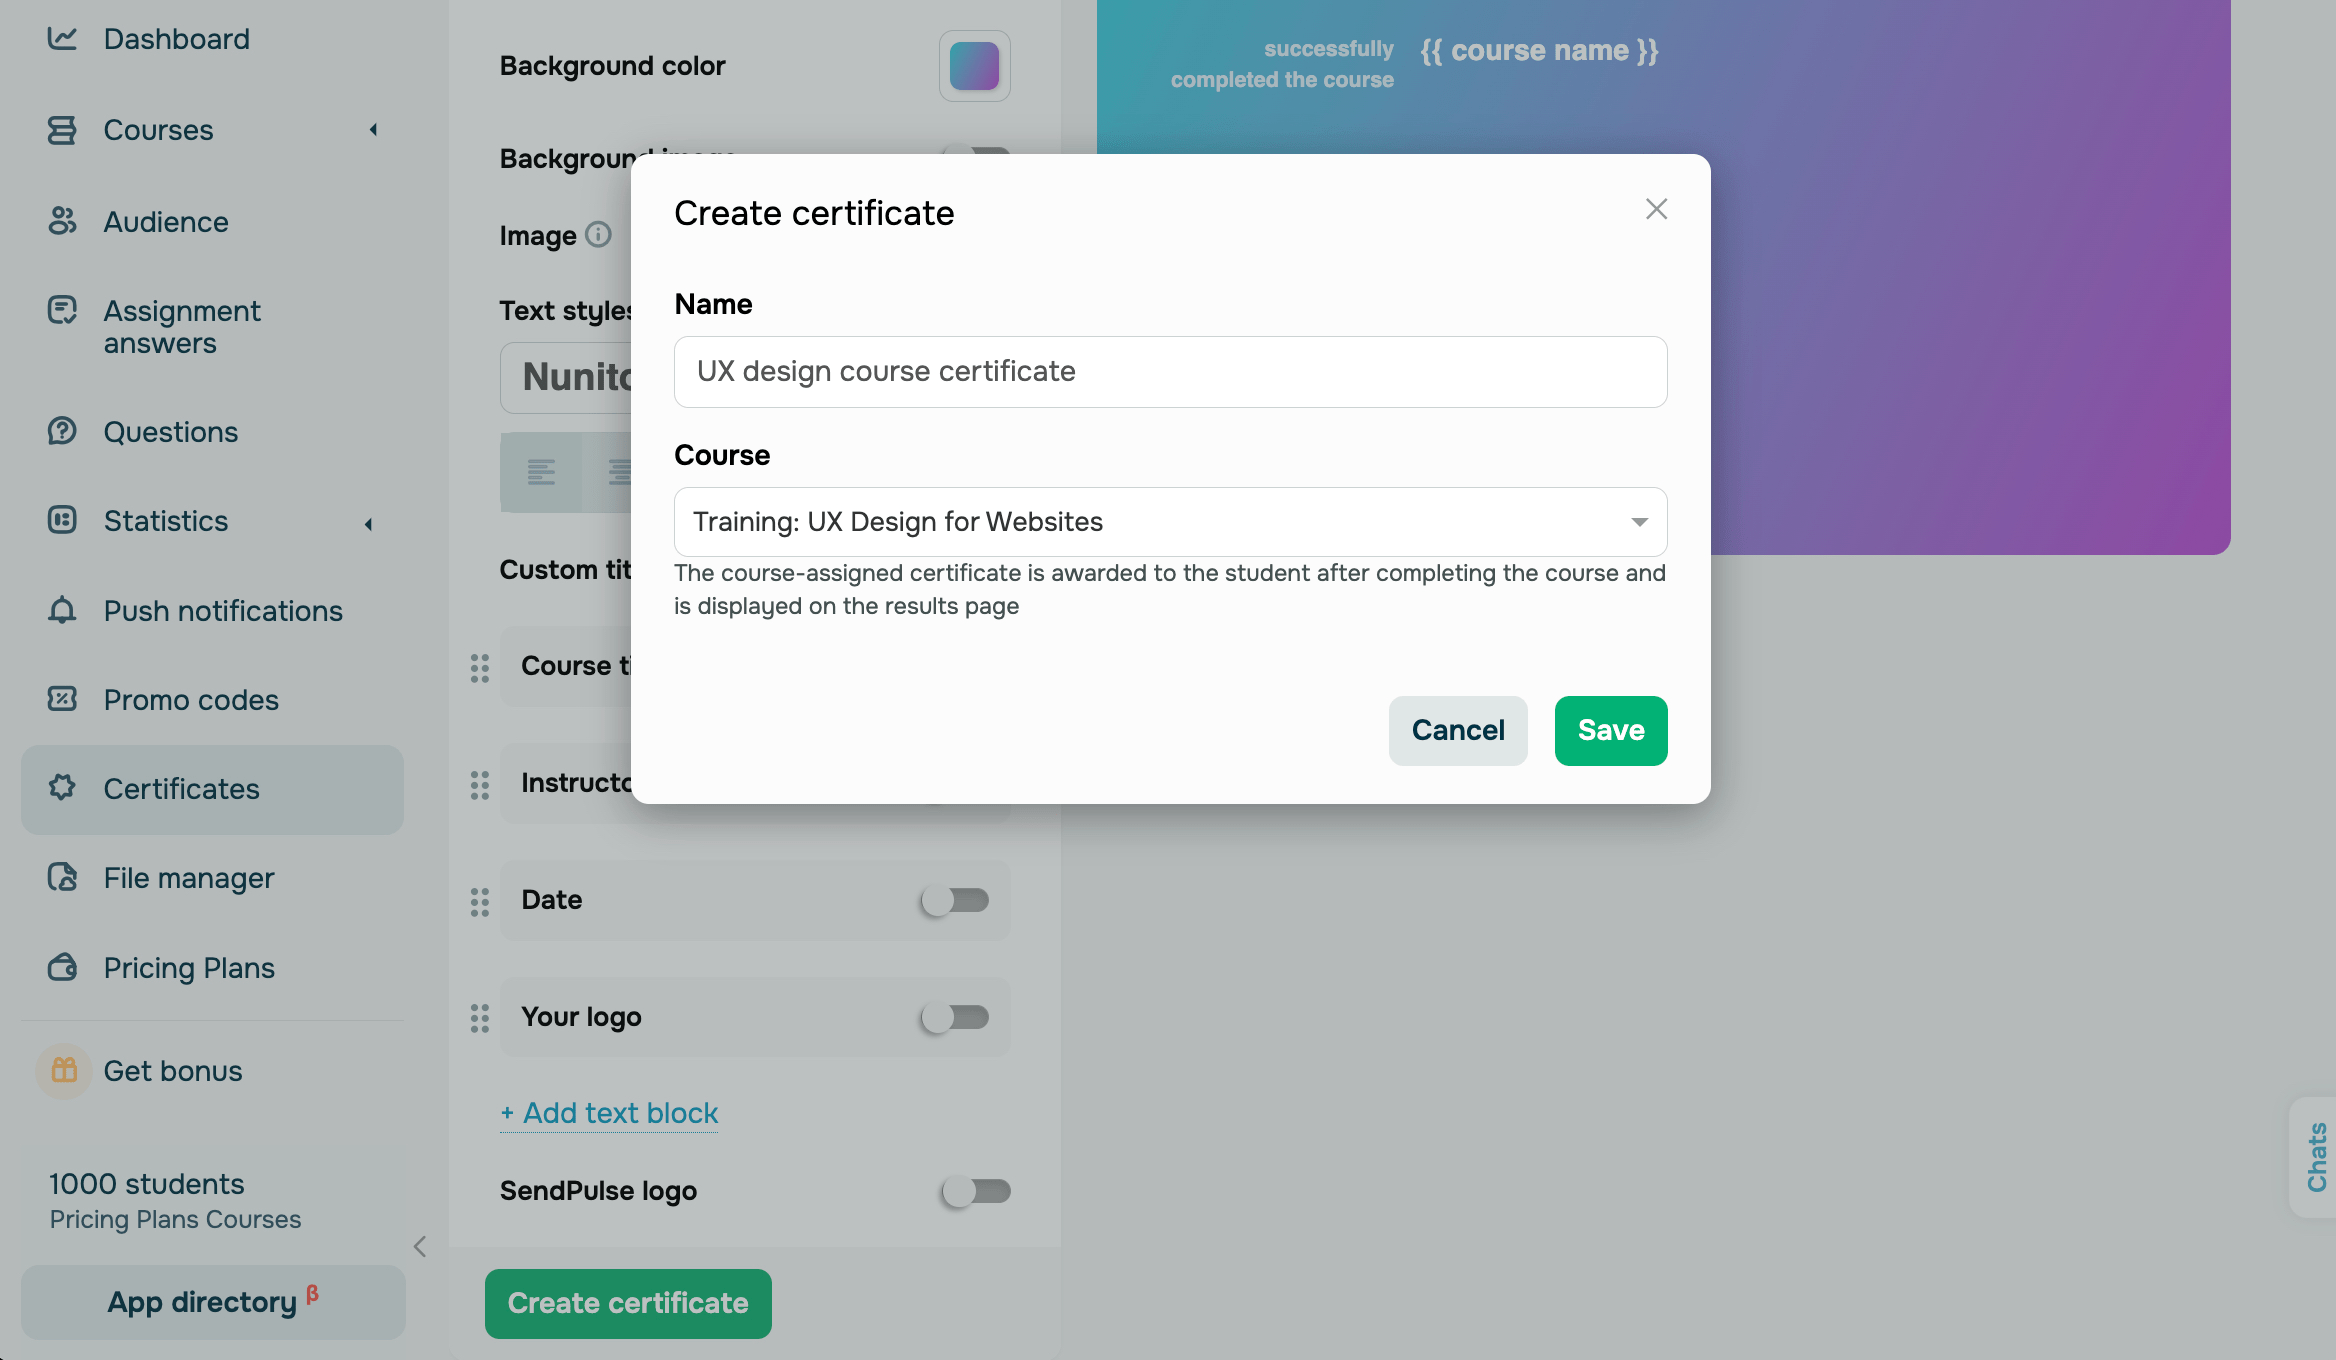
Save and assign the certificate to your course
Having finished customizing your certificate, click Create.
Enter the name of the certificate — this name will be displayed only in your personal account.
Select the course upon completion of which you want to issue the created certificate. If the course already has a certificate, the new certificate will be applied to it.
You can also add an intermediate certificate within a course.
Manage certificates
You can always return to the certificate settings, change its content, style, and assign it to another course.
Read more: How to manage certificates.
Add an intermediate certificate to your course
You can add certificates to mark a student's course progress, for example, after they finish a certain course section.
Read more: How to add an intermediate certificate.
Last Updated: 13.06.2025
or