How to connect your Gmail inbox to the SendPulse CRM system
Synchronizing your Gmail inbox and CRM system can help you manage your emails, automatically collect and update customer data, and process and delegate customer requests. This makes it easier to analyze and track your interactions with clients and partners.
In this article, we will talk about how to connect your Gmail inbox to the SendPulse CRM system.
Synchronization requires access to your email address and permissions to read, compose, send, and permanently delete all your emails.
Use of SendPulse Gmail Integration and transfer of information received from the Google API to any other application will be in accordance with the Google API Services User Data Policy, including restricted use requirements.
You can read our Privacy Policy and Terms of Service before getting started.
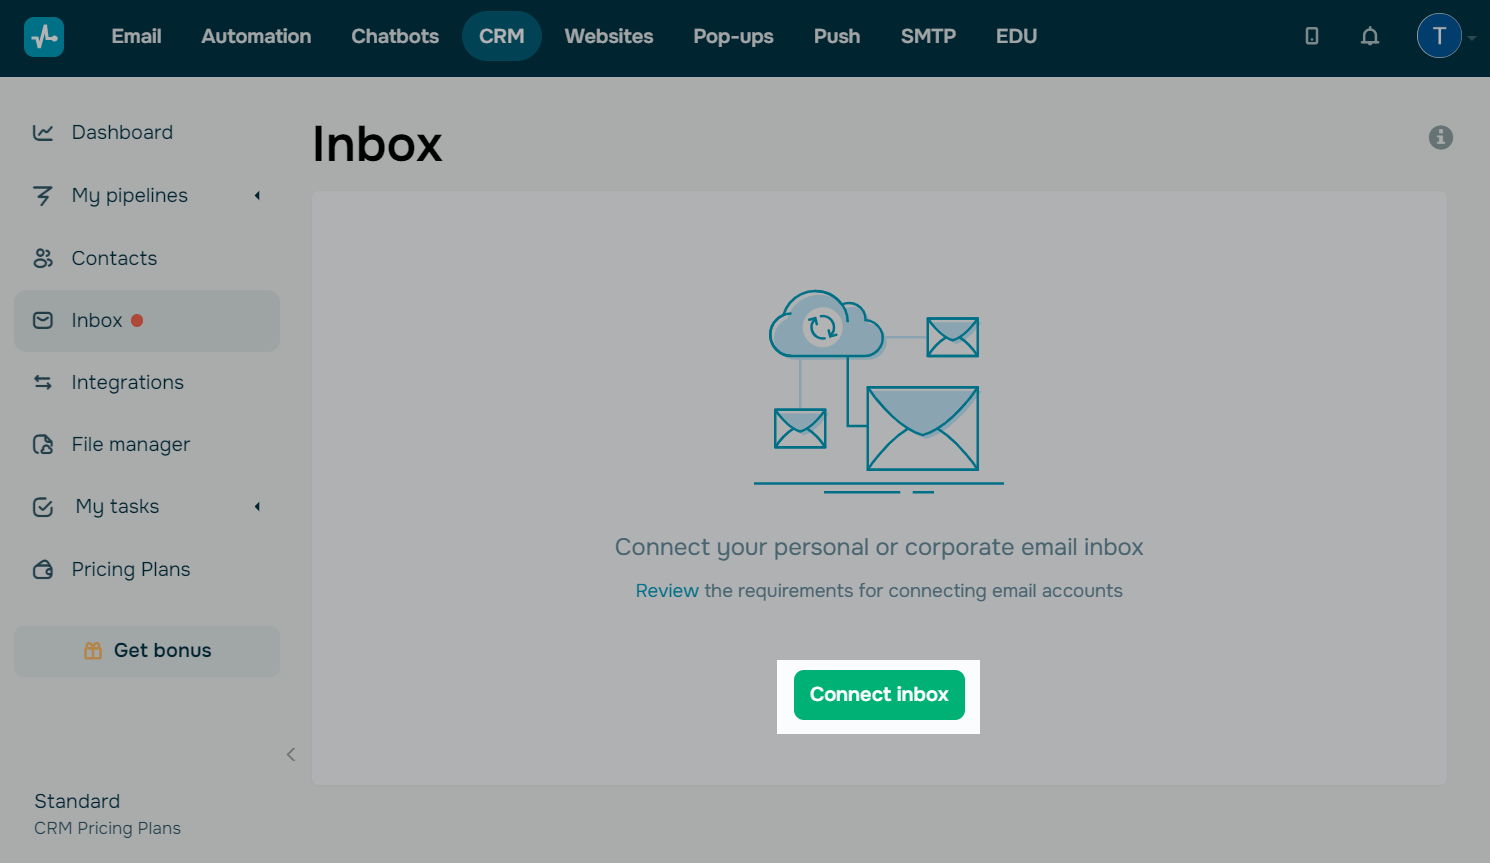
Connect your inbox
Go to CRM > Inbox, and click Connect inbox.
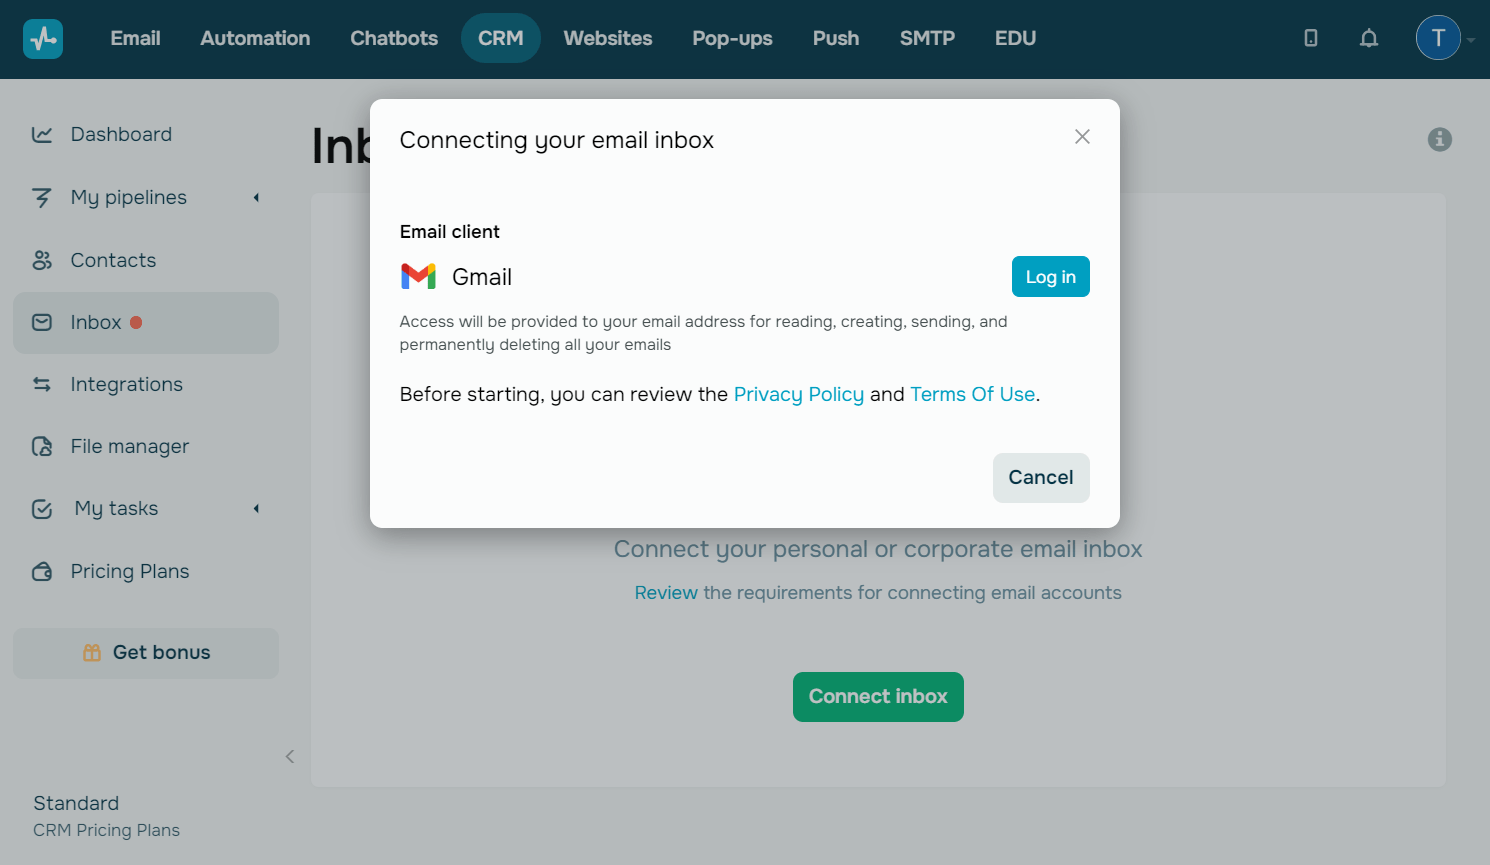
In the opened modal window, click Log in next to your Gmail inbox.
Your connected Gmail inbox will be available to all account users whose roles provide access to CRM integrations.
Read also: How to manage user roles.
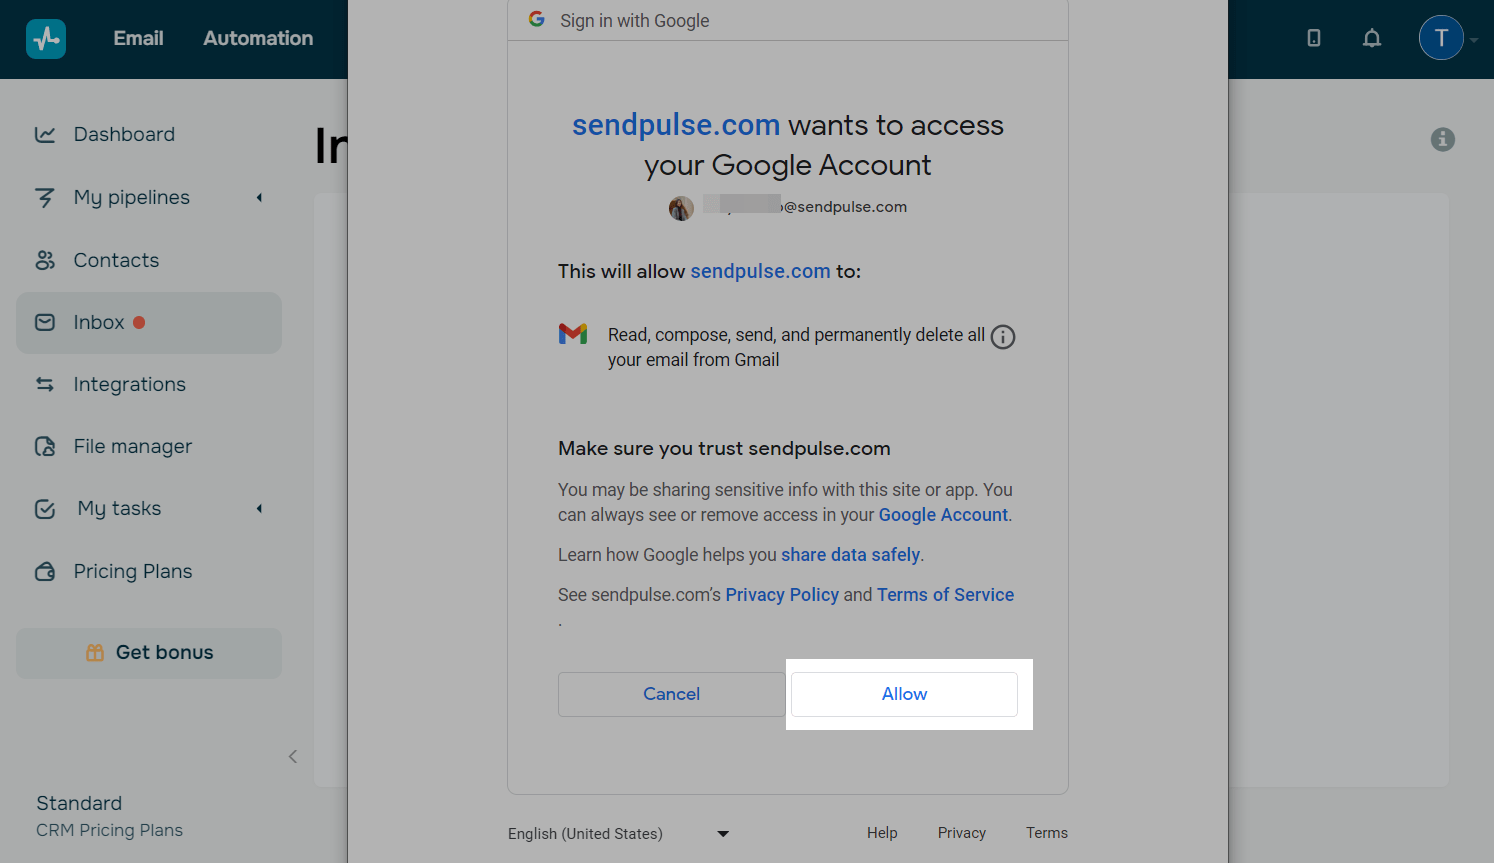
In the opened browser tab, select the inbox you want to connect, and allow synchronization with SendPulse.
Wait until the synchronization is completed — this may take up to 5 minutes.
During synchronization, the system uploads the latest 1,000 emails from your inbox — all new emails you receive afterward will be added to them too.
Set up your inbox
You can add or remove your inboxes, add a sender name and email signature, automatically create CRM contacts and deals, and assign team members to them.
Adding inboxes
You can connect several inboxes, for example, for each company manager.
To do this, open the list with your email address, and click Add inbox.
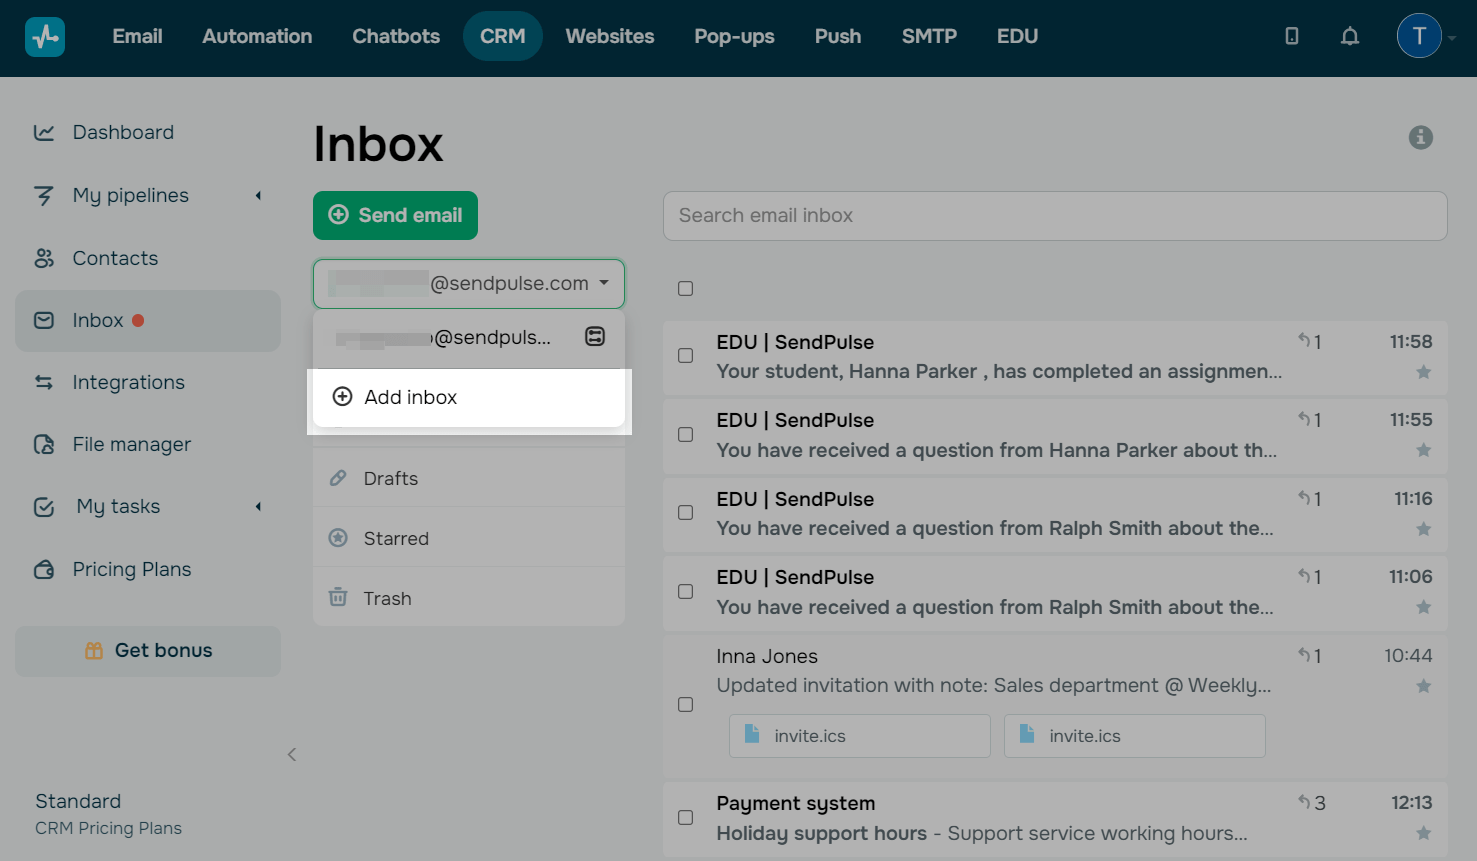
Using this drop-down list, you can also switch between your inboxes.
Click the edit icon next to your inbox to add your sender name and email signature and enable CRM actions.

Adding a sender name and email signature
You can edit your sender name for emails sent through the CRM system. By default, this field contains the account owner's name.

You can also add a signature that will be included in your emails automatically. You will be able to see it in the email body and, if necessary, edit it when composing your email.
This email signature and sender name are not synchronized with Gmail, so your SendPulse settings will not affect the emails you send directly from Gmail.
Enter your email signature, and format it as needed.

Enabling CRM actions
You can automatically create deals and contacts in the CRM system after receiving and sending emails.
To automatically create deals with new email addresses, select the Create deals for new email addresses checkbox. Select a pipeline and stage to which you want to save your deals, and assign a team member.

To automatically create new contacts, select an email type:
- incoming emails from new email addresses;
- outcoming emails to new email addresses.

Deleting inboxes
You can delete any email inbox from your account. Afterward, all your sent or received emails will be deleted. Information about your sent emails will be recorded only in your deal and contact history.
Read also: Contact history, Deal history.
Click Delete email inbox, and confirm the action.

Manage your emails
You can view, create, and send emails, mark them as starred or unread, search for emails by their contents, and delete them only from your CRM system.
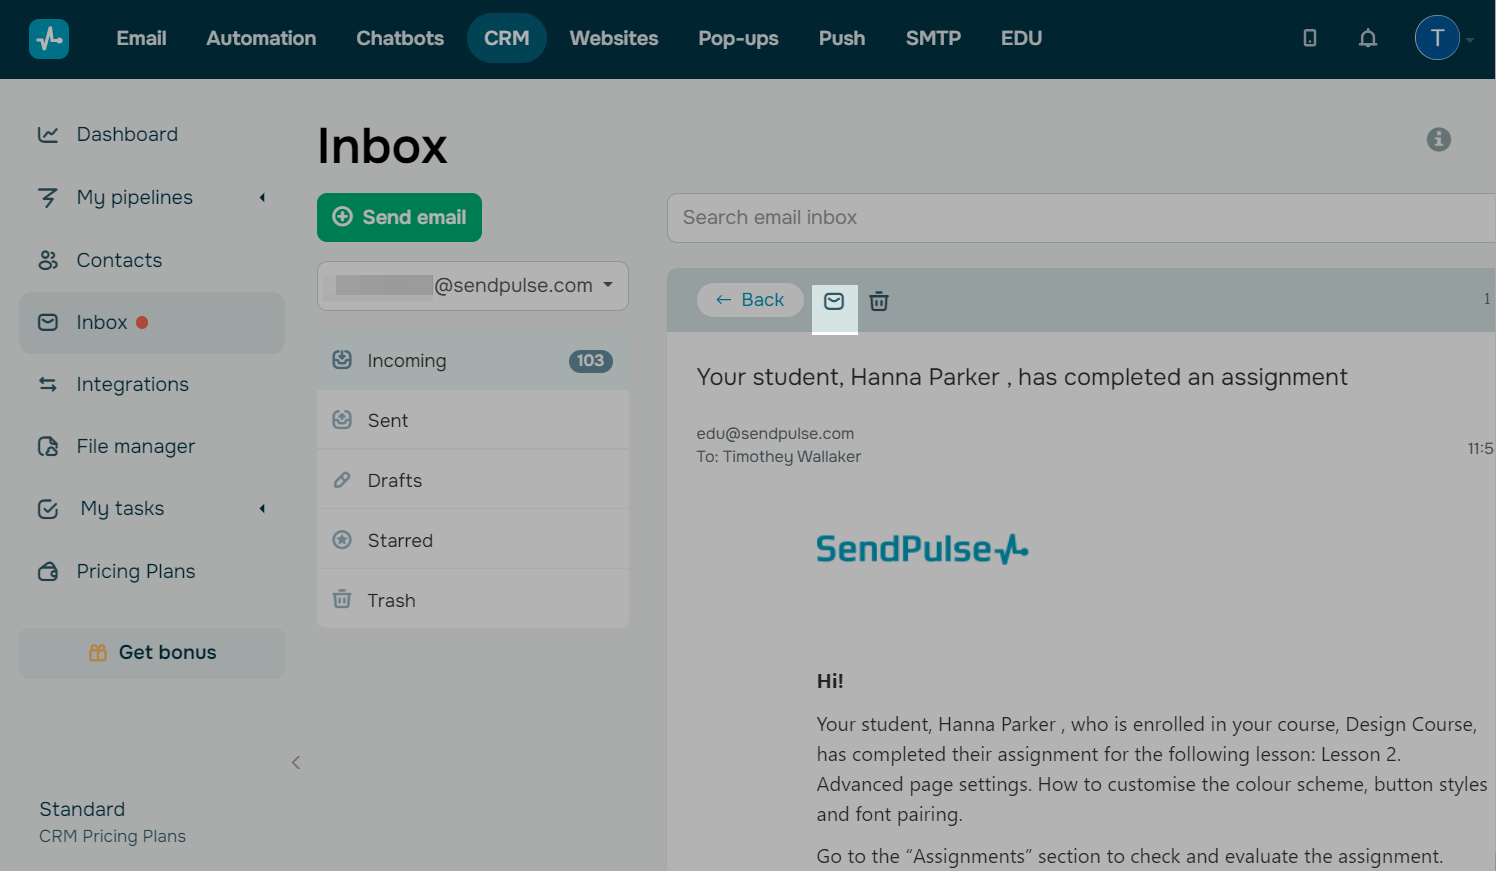
Viewing
The SendPulse CRM system synchronizes with your Gmail inbox and updates your email list every 5 minutes.
However, status changes upon opening an email are not synced between the CRM system and your inbox. This means that if you open an email in your CRM system, its status in your inbox will remain unchanged, and vice versa.
All emails are uploaded with their current opening status. Your unread emails will appear in a lighter color.
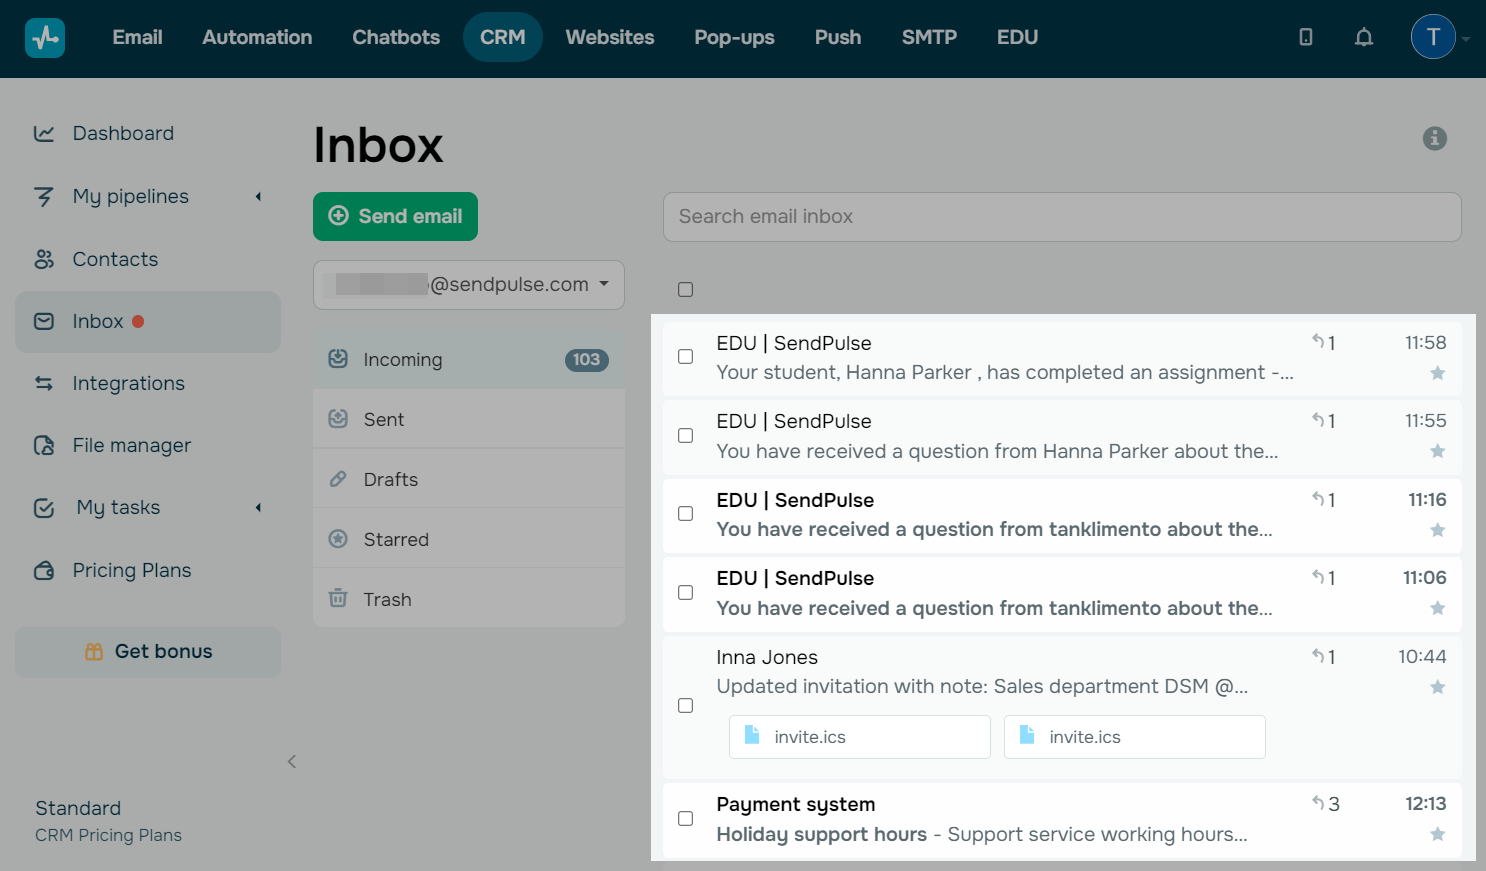
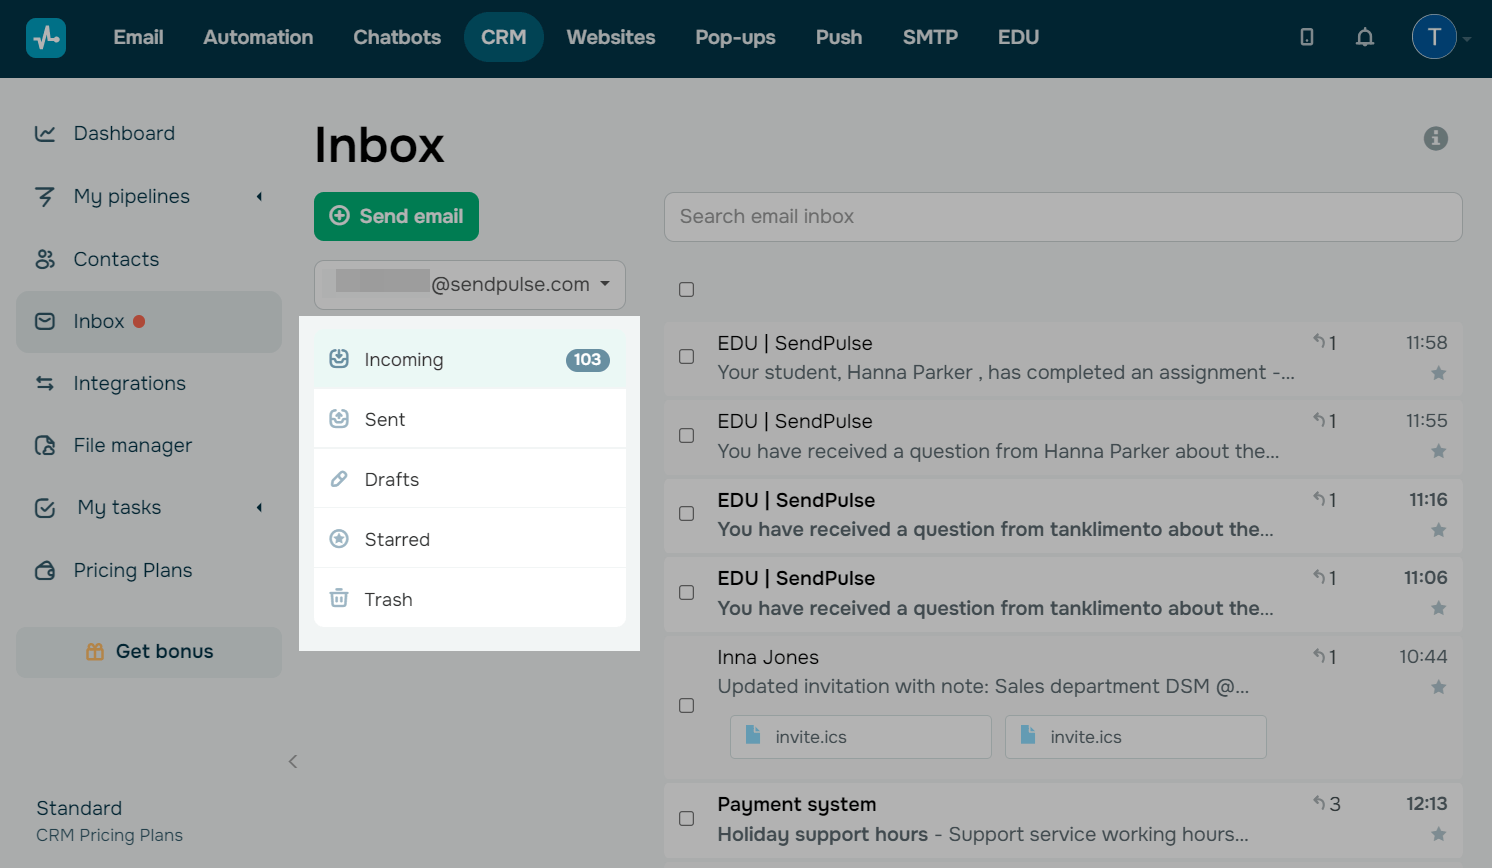
You can find all your emails in the following tabs: Inbox, Sent, Drafts, Starred, and Trash.
You can also mark an email as unread even if you have already opened it. To do this, open an email, and click the envelope icon.
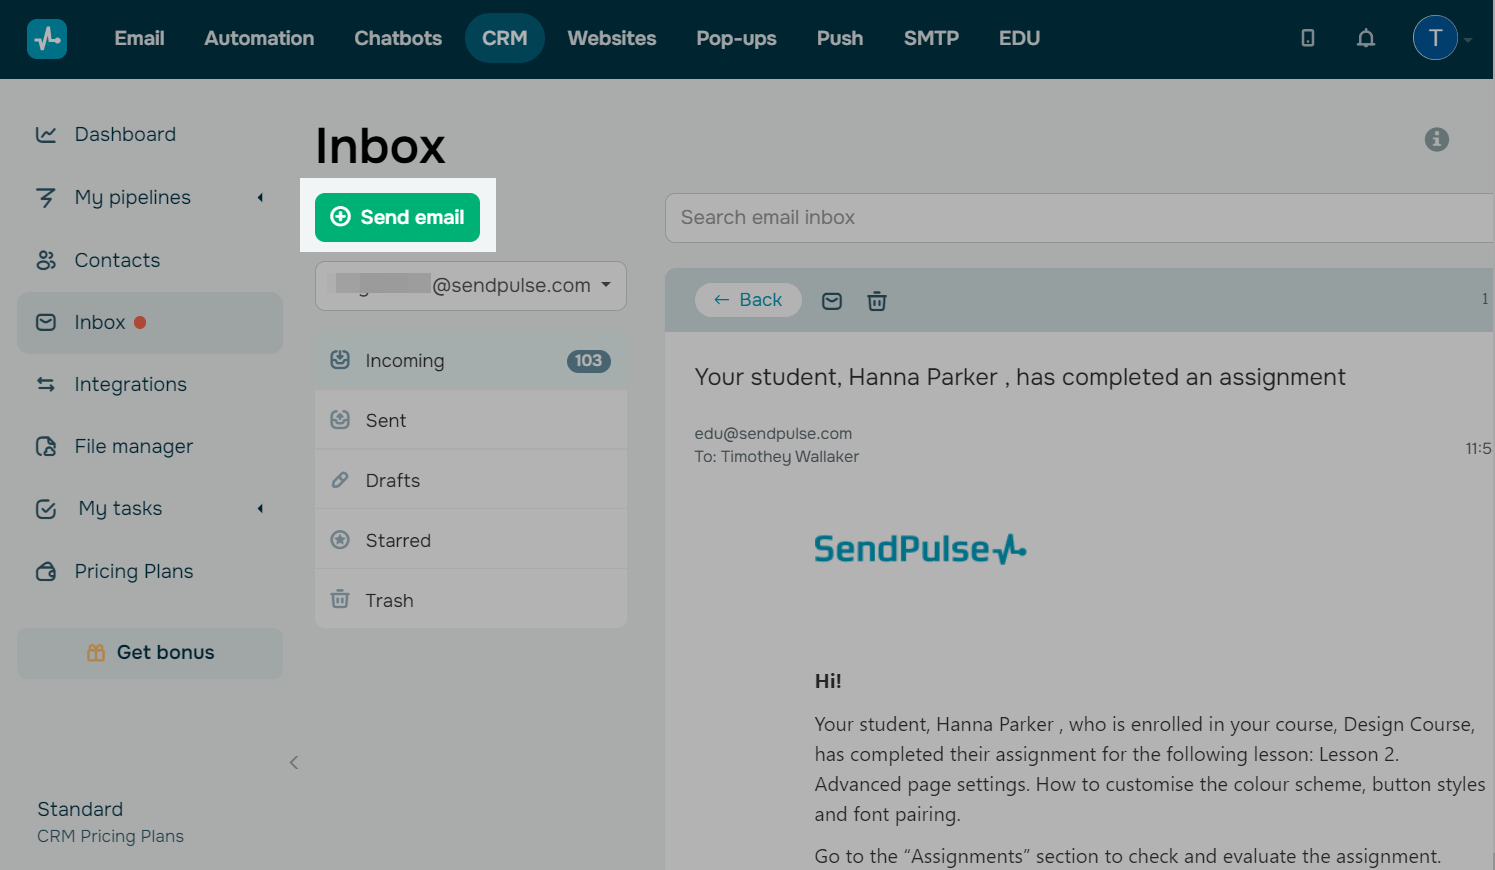
Sending
To create an email, click Send email.
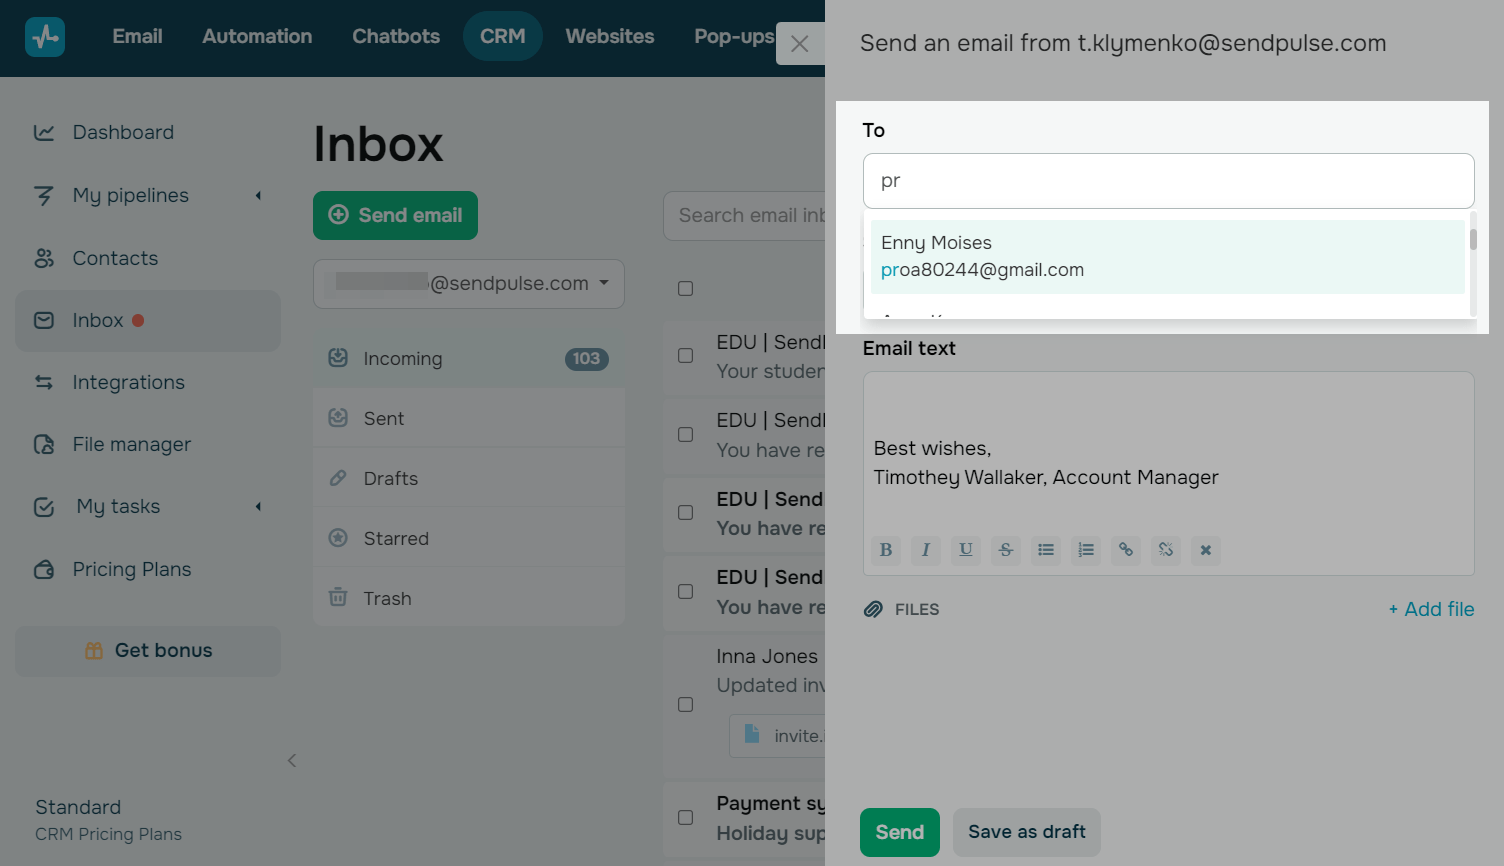
Enter your recipient's email address.
If you want to send an email to one of your contacts, start entering their email address — all email addresses with this letter combination will appear on the drop-down list.
You can add several email addresses visible to your recipients in the cc field, letting them know that others have also received this email.
Enter your email subject line and body in the corresponding fields. If you have an email signature, it will be added automatically.
You can also add an attachment — to do this, click + Add file.
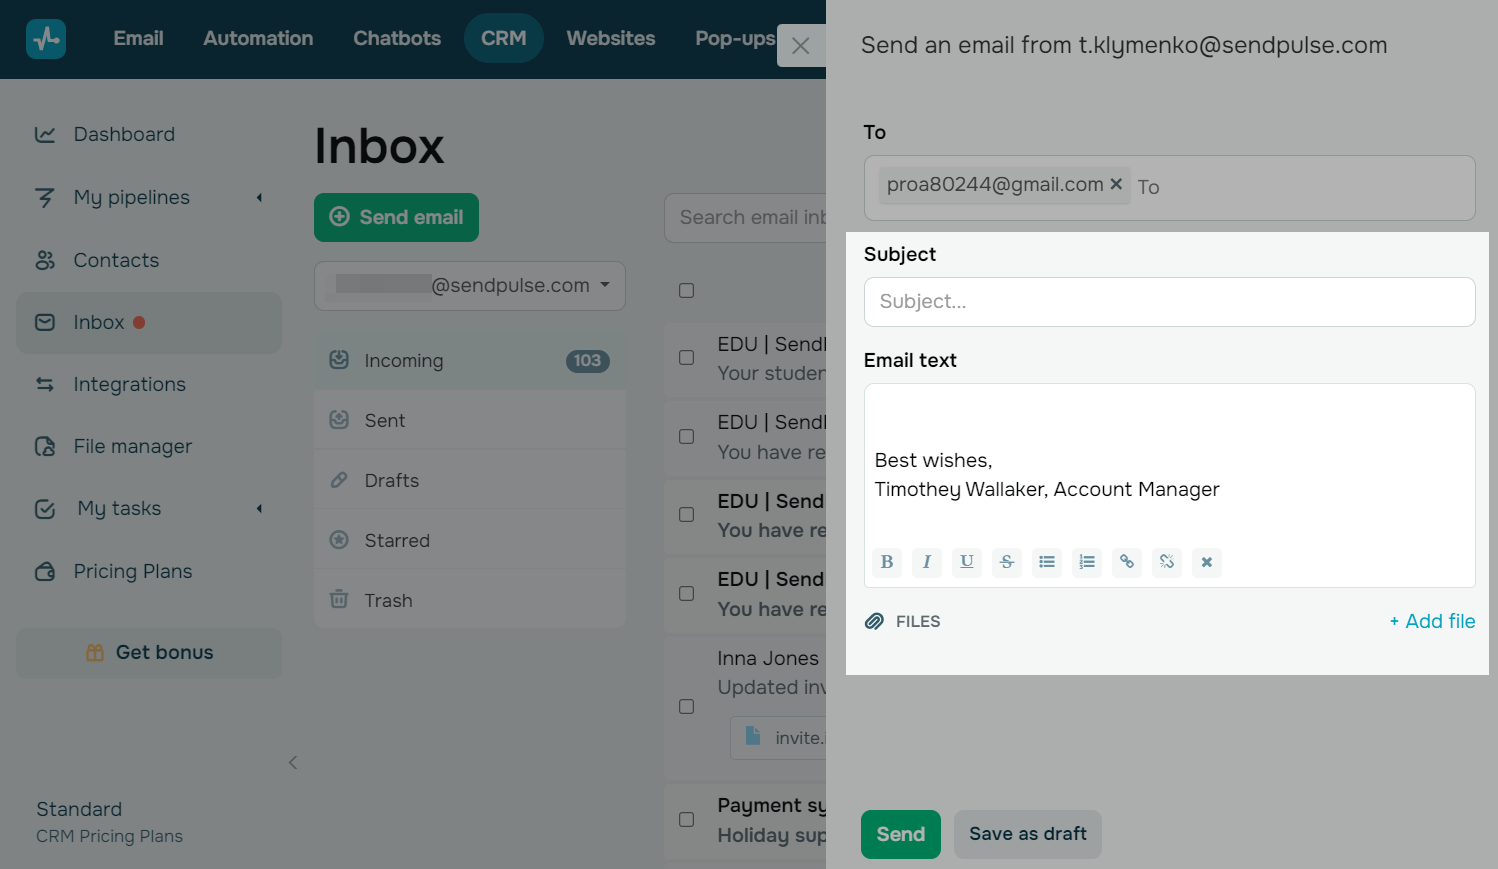
Click Send to send your email immediately, or click Save to add it to your drafts.
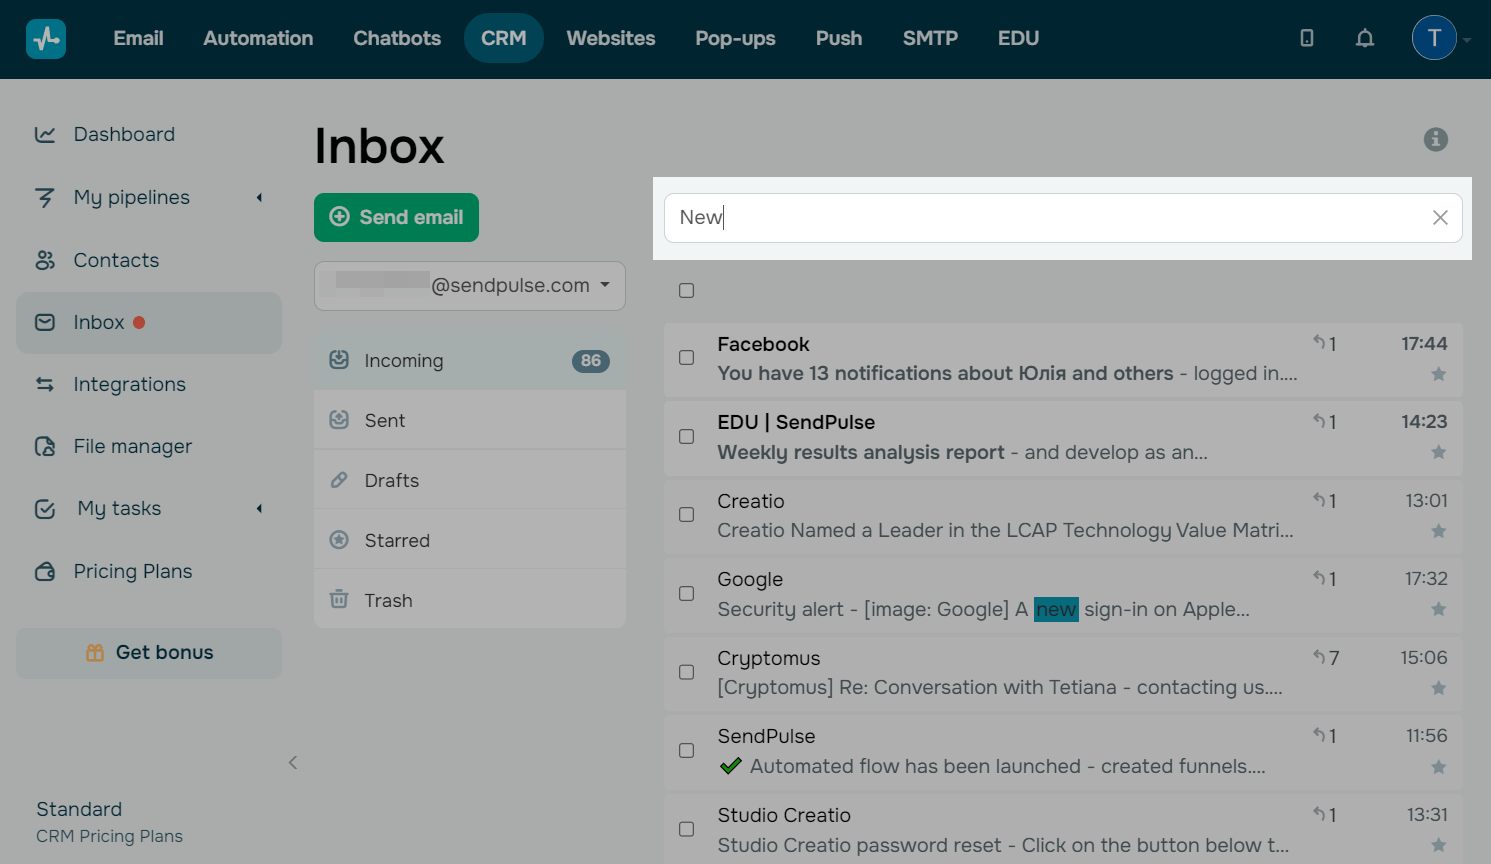
Searching
You can find emails by specific words used in them. To do this, enter a word in the search bar, and click Enter.
Deleting
Deleting an email only from the SendPulse CRM system will not remove it from Gmail.
To remove one or more emails, select them, and click Delete.

To delete a specific email, open it, and click the trash can icon.

Last Updated: 25.03.2024
or