Using an ordinary Gmail address is fine if you’re going to send some photos from the family reunion to your aunt. Yet in email marketing, you need to have a professional-looking email address to communicate with your audience. Even if your database isn’t big-brand massive, take the effort to set up your business email address and reach your subscribers from your company domain — using tips from this blog post.
Content:
- What is a business email address?
- Benefits of a business email address
- How to set up a business email address with Google Suite
- Step 1. Add a custom domain
- Step 2. Verify your domain
- Step 3. Add an SPF record
- Step 4. Add a DKIM record
- How to set up a business email address with Zoho Mail
- Step 1. Add your domain to Zoho Mail
- Step 2. Verify your domain
- Step 3. Set up MX records for Zoho
- Step 4. Configure an SPF record for Zoho
- Step 5. Set up a DKIM record for Zoho
- Wrapping up
What is a business email address?
A business email address is an email address that contains your company’s domain name, following the format like name@companyname.com. This way, whenever you send emails using your custom domain email address, your recipients will see your domain name and recognize you as a sender.
When choosing a name for your business email address, make sure it is clear so that recipients will have an idea who they are hearing from. Take a look at some examples:
- press@yourdomain.com — for public relations, media, press;
- support@yourdomain.com — for customer support;
- sales@yourdomain.com — for sales department;
- name@yourdomain.com — for personal email addresses of your staff.
This way, your email address will get that professional look and become recognizable for users.
Benefits of a business email address
Apart from adding up to your brand recognition, there are other merits of using a custom domain email address while emailing your subscribers:
- Increased loyalty. The user is likely to associate a business email address with the specific brand. This fuels a user’s loyalty as they get emails not from a random sender, but rather from the company’s representative.
- High deliverability. Since setting your own domain requires DKIM and SPF settings, the deliverability of your emails will increase compared to emails sent from common domains.
- Surefire safety and control. The account settings of a business email address typically include additional safety parameters, which allow you to change the password or block an account.
And now let’s have a look at the step-by-step algorithms for creating a business email address on a custom domain using Gmail and Zoho.
How to set up a business email address with Google Suite
Price: free 14-day trial, $5 for basic plans, $10 for business plans, $25 for enterprise plans.
Google Suite is a collection of software for business, collaboration, productivity, and education launched by Google. It provides access to information across computers, phones or tablets and is available for offline use. This way, you can view, edit, and create your content and get it synced when you access the internet. The service is ad-free and keeps the business’s data is safe by managing their content on employee and company-owned devices.
Step 1. Add a custom domain
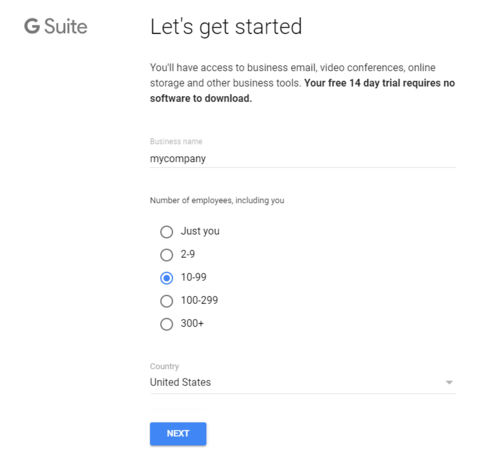
Click “Get started” at the Google Suite front page; then indicate the name of your company, number of employees, and your country.
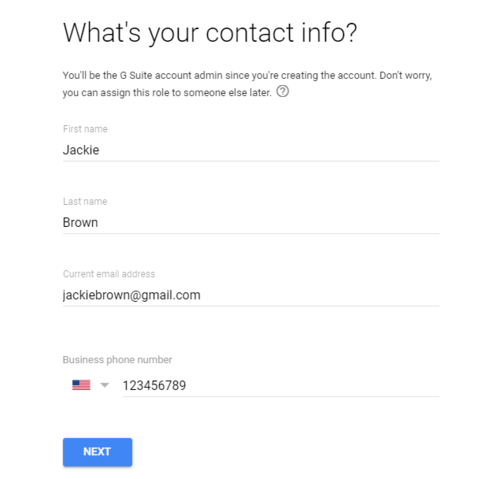
Next, specify your name and current email address.
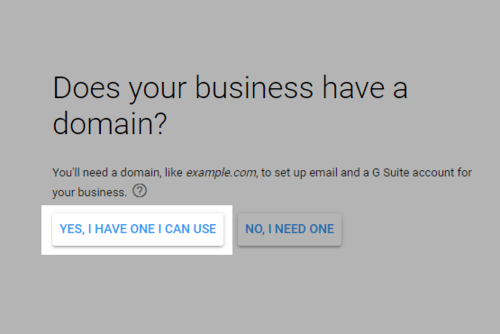
After that, set up a business email address for the already existing domain.
Specify the domain, user name, password and choose the pricing plan.
Step 2. Verify your domain
Google Suite offers four ways to verify the domain:
- a TXT record;
- a meta tag;
- a MX record;
- an HTML file.
Let’s continue by verifying the domain by adding the MX record.
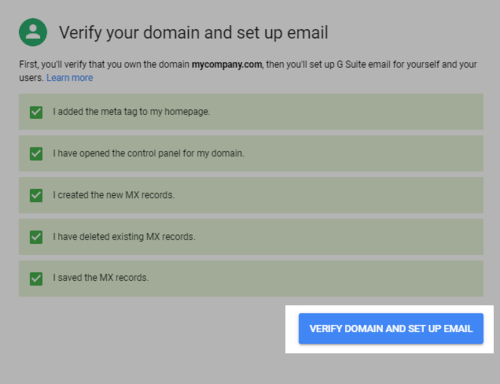
Start off by deleting previous MX records in the domain DNS admin panel. Next, create new MX records, copy the values offered by G Suite, and paste them to the MX records you’ve created.
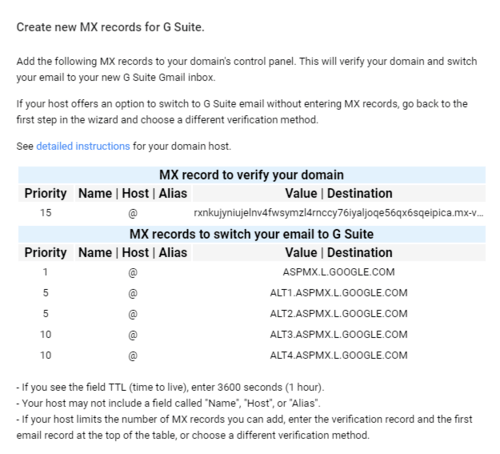
Save the MX records you’ve added to the domain DNS admin panel and press “Verify domain and set up email” in the corresponding panel in Google Suite.
Step 3. Add an SPF record
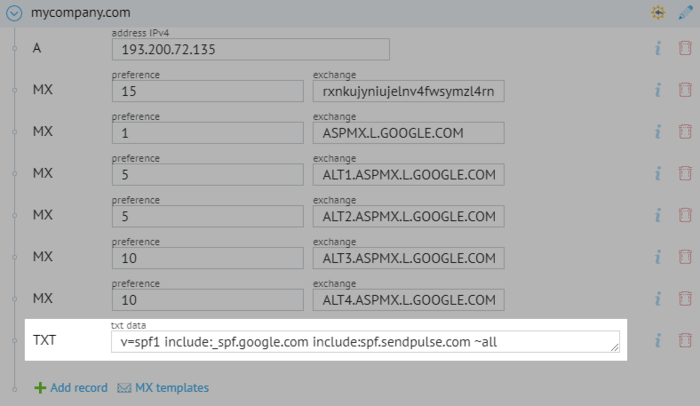
Go to the DNS panel of your domain and create a TXT record with the following values: v=spf1 include:_spf.google.com ~all. To be able to use this domain for sending emails through SendPulse, your SPF record should look as follows: v=spf1 include:_spf.google.com include:spf.sendpulse.com ~all.
Step 4. Add a DKIM record
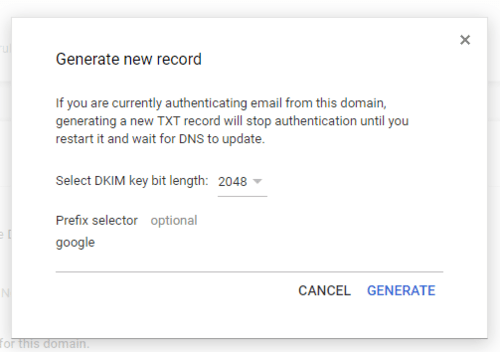
Log in to your G Suite admin page and go to the following sections: Apps → G Suite → Gmail → Email Authentication. Choose your domain and click “Generate new record.”

In the pop-up window, leave the settings as they are and click “Generate.”
Copy the generated TXT record from Google and proceed to the domain DNS admin panel.
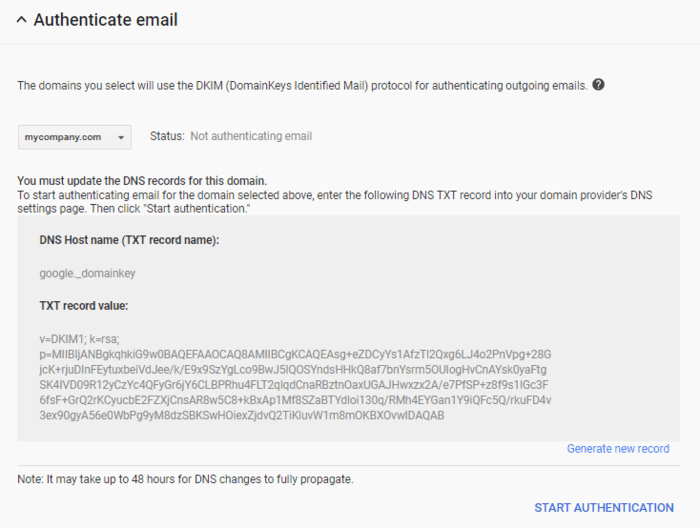
Now return to your domain DNS admin panel and insert the generated DKIM record.
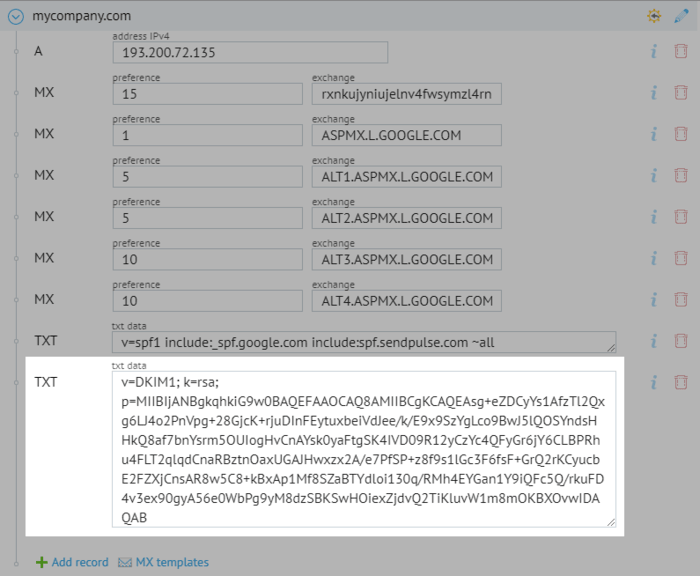
Switch to your Gmail settings and click “Start authentication.”
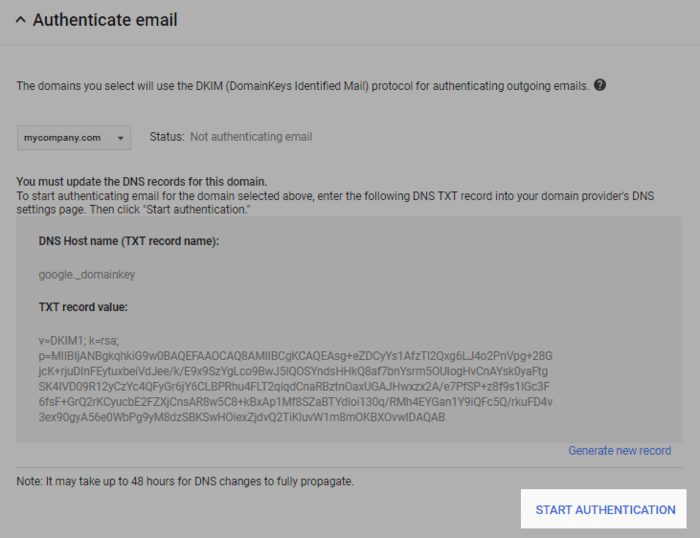
Keep in mind that the authentication process may last up to 48 hours.
How to set up a business email address with Zoho Mail
Pricing: free test account, €1 for mail lite, €4 for mail premium, €3 for workplace.
Zoho Mail is an ad-free email service with extensive control options. It allows you to create up to 5 free accounts for your business, each with 5GB of memory. In case you don’t own a domain, you can buy one at Zoho. The service also provides hosting for a single domain.
Step 1. Add your domain to Zoho Mail
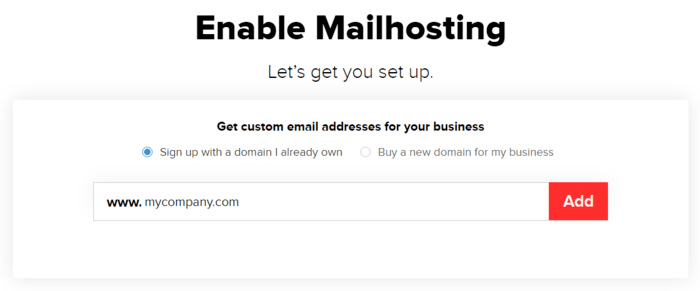
Create an account with Zoho Mail and switch to Zoho Workplace to create an email for your domain. Choose a free plan, tick “Sign up with a domain I already own,” and specify your actual domain.
Step 2. Verify your domain
Choose the DNS service provider for your domain. In case your provider isn’t on Zoho’s list, choose “Others.”
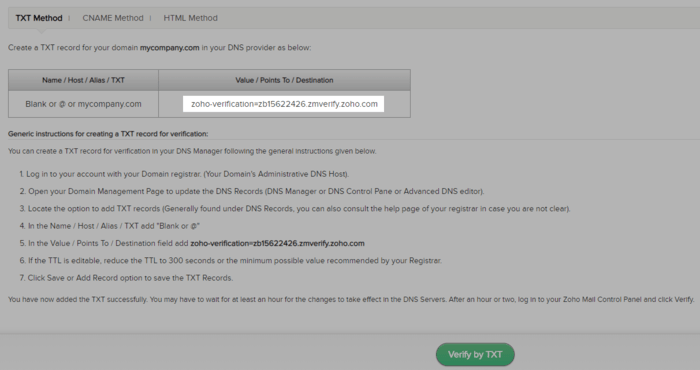
Choose the TXT method to verify your domain. Copy the suggested value, proceed to the DNS admin panel, create a TXT record, and paste the value you have copied. Press “Verify by TXT.”
Indicate the preferable user name and create an account.

Step 3. Set up MX records for Zoho
Copy the values Zoho suggested, create three MX records in the DNS admin page, and paste the copied values. Upon that, press “MX Lookup” and “Next.”
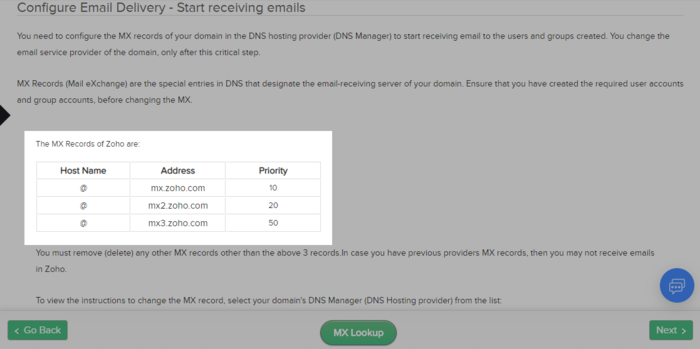
Step 4. Configure an SPF record for Zoho
In the DNS admin page, create a TXT record with the values offered by Zoho.
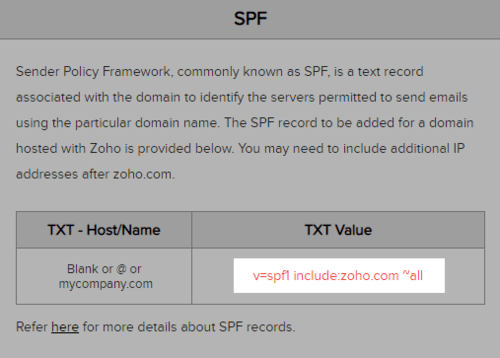
To be able to use this domain for email campaigns created with SendPulse, add the following parameter to the record: v=spf1 include:_spf.zoho.eu include:spf.sendpulse.com ~all.
Step 5. Set up a DKIM record for Zoho
Proceed to DKIM setup in the SPF/DKIM panel.
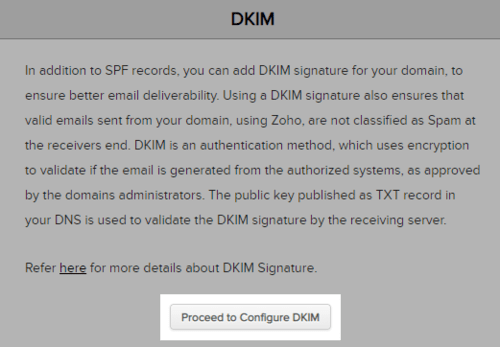
Choose the necessary domain and “+Add selector.” Specify the selector’s name and click “Save.” The service will generate a TXT value for a DKIM record. Copy this value and paste it to the newly created TXT record in the DNS admin panel. After that, click “Verify.”
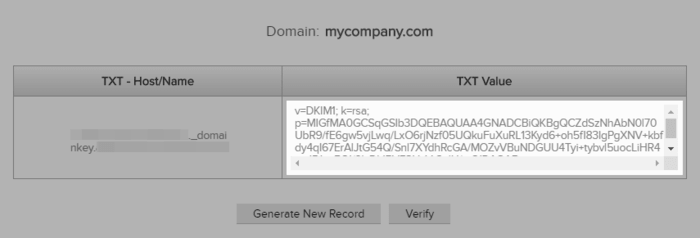
The verification process may last up to 40 minutes.
Wrapping up
To create your custom domain email address, proceed as follows:
- Choose a service you’ll use to create your business email address. Pay attention to the interface’s usability, set of tools, and pricing plans.
- Add and verify your domain. This will prove that you are the owner of the domain.
- Add MX records. These records denote the servers that process the email.
- Add an SPF record. The record determines the list of servers for sending emails from your domain.
- Create a DKIM record. This record elevates the chances that your emails will be delivered straight to users’ inboxes.
Upon creating a business email address, you’ll be able to get unique addresses for company’s departments, boost brand awareness, and elevate the deliverability of your email campaigns. And of course, a custom domain email address will let you use SendPulse to send various types of emails.


