In today’s ultra-competitive, always-on-the-go society, no one has time for slow website loading.
Google now penalizes clunky, inefficient websites by dropping their ranking in the search engine results pages (SERPs). Website owners have only seconds before visitors become frustrated and move on. That isn’t a whole lot of time to persuade a visitor to hang around and become a raving fan of any great content you might have created.
Anything you can do to improve speed and efficiency, you should do quickly because the percentage of people who leave a slow website and never come back is dishearteningly high.
So, how do you make sure your page load as quickly as possible? Read on to learn a few tricks and pro-tips that will reduce latency issues and speed the process along.
Reduce the number of Hypertext Transfer Protocol requests
Hypertext Transfer Protocol (HTTP) requests account for about 80 percent of web page load times. They occur when the browser is required to pull a page, picture, or file from the server. The average web browser will only open between four and eight of these connections at a time.
That means even if you have the theoretical speed, pages with numerous requests are going to take a while to load. You can limit the number of HTTP requests easily by keeping page design clean and simple or by reducing the number of images and video files on each page.
Another way to speed up a slow website is by combining CSS and JavaScript files into a single, larger file. This reduces the number of times the browser has to return to the server to fetch files and load them onto the web page by reducing the cumulative number of files. The process is simple enough that even a beginner can do it, and it’s essentially the same for both file types.
To combine files, simply copy/paste the code from one file to another. Once all of the appropriate coding is transferred, delete the original files and extra HTML code. All this takes is a simple copy-paste and can be done in any text editor, such as TextEdit on Mac OS X or Notepad on Windows.
Optimize and compress your files
There are two file types you should compress to improve website load times: 1) images, and 2) code files like CSS and JavaScript. Let’s look at each.
How to compress images
Images take up the majority of available web page resources. You should examine your site and remove any that are unnecessary. Once you have only the images you want, run each through a photo optimization program.
Google has a great image optimizer in their developer tools. Each image should be less than 150 KB and be of medium quality — about 72dpi. No image should be wider than 1,920 pixels. Sometimes optimization is as simple as changing the file format for your images.
To use Google’s image optimizer, or any other optimizer tool, simply upload an image from your computer, click the Optimize or Compress button, then download the newly compressed image. Most image compression tools are able to compress files to anywhere from 50% to as little as 5% of their original size — a huge win for page speed.
How to compress CSS files
As for Cascading Style Sheets (CSS ), you can copy all of the coding into one main file, but make sure to use copy/paste rather than the @import command, as that can cause more delays.
You can compress, or minify, the JS code by eliminating unnecessary spaces, comments, and line breaks. Free web apps like Minifier can do it for you. Here’s how to use the tool:
1. Go to Minifier.org in your browser. Log in to your WordPress dashboard and go to Appearance > Editor.
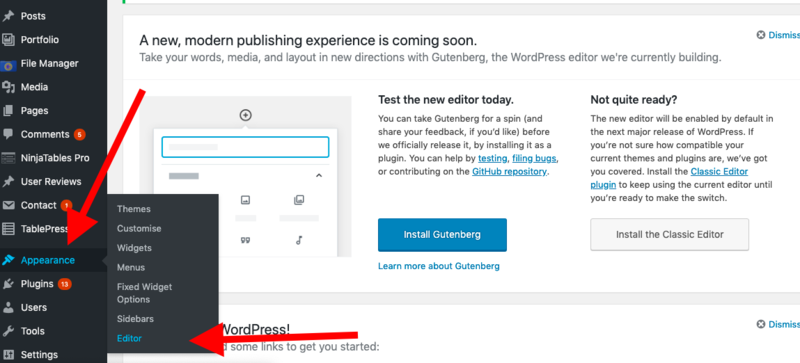 In the WordPress dashboard, on the left sidebar, click Appearance, then Editor
2. Then, click on style.css and copy all the code on the screen.
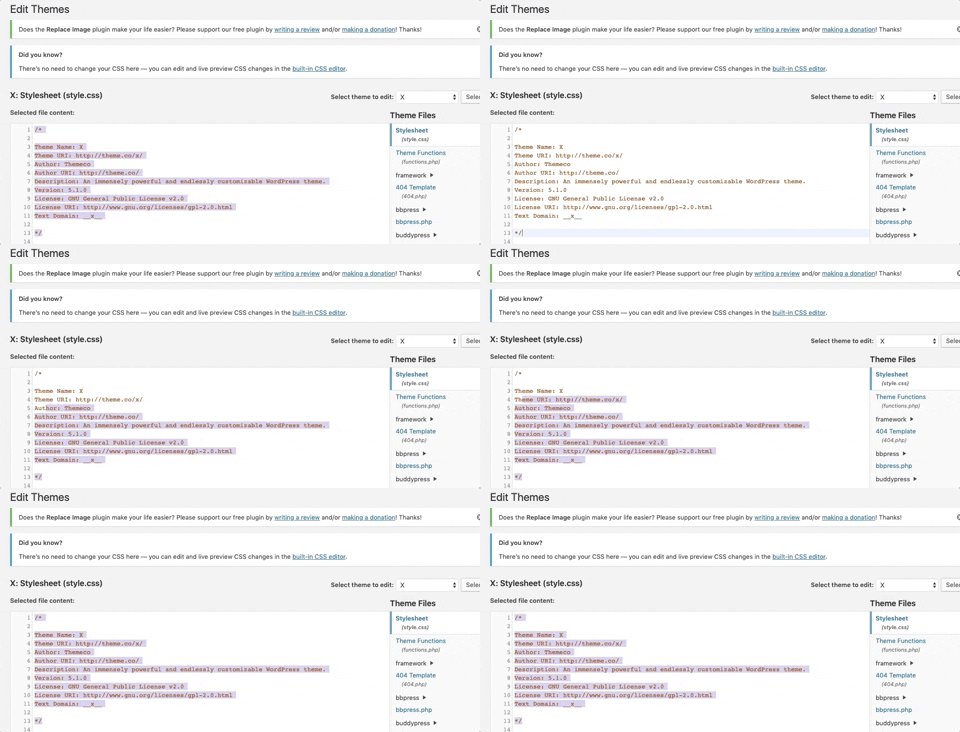 Copy all the code from style.css in the right sidebar
3. Then, past the code into the window in Minifier. Make sure CSS is selected, then click the big MINIFY button.
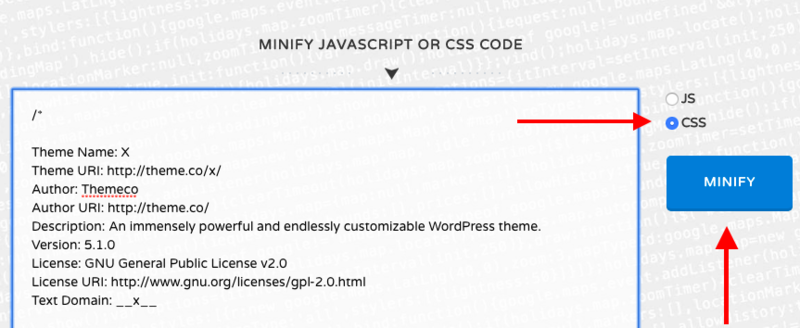 Paste your code into the Minifier code box
4. Last, paste the output from Minifier back into your style.css sheet and click Update File.
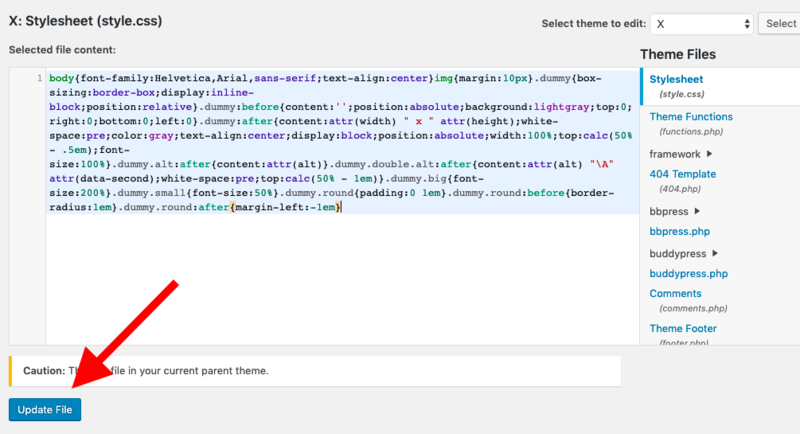 The style.css sheet with “minified” code
Congratulations! You’ve now minified your CSS code. In other words, you compressed it to save space, thus speeding up the way in which that code loads on your site.
You can repeat the process with any type of code, including JavaScript. Just make sure that you select the JS option in Minifier before hitting the MINIFY button.
Reduce the number of redirects on your page
Moving or deleting pages may streamline the look of your website, but it reduces speed by slowing down your page load times with redirects. You see, every time you move or delete a page, the browser encounters an obsolete or broken link and has to regroup.
This is especially frustrating to users on mobile devices, who now make up the bulk of web traffic.
The solution is to identify and eliminate the problem. This tip requires a little investigation, but there are programs available that will make short work of identifying all redirects.
For example, an app called GTmetrix allows you to enter your URL into an on-site search bar and obtain a free, on-the-spot performance analysis which lists all the redirects on your site.
Utilize browser caching
Caching allows you to download portions of your website into temporary storage on a user’s system. Browser caching makes the page load faster in the future. A related trick is to make sure the front page of your website loads particularly fast. As users move through to the rest of your site, the load times of the entire site are improved by caching.
WordPress offers several plugins that leverage browser caching, including .htaccess and W3 Total Cache. If you want to do it the old-fashioned way, edit the coding in the .htaccess file to expiration times for image and CSS files.
To do this, follow these steps:
1. First, login to cPanel.
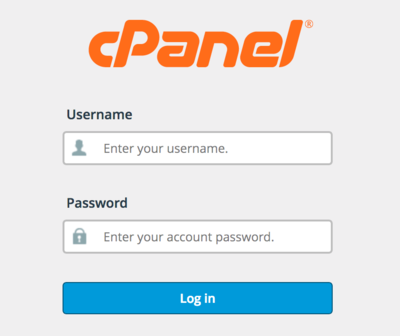 The cPanel login screen is often hard to find. It should look like this
2. Next, find and launch the File Manager.
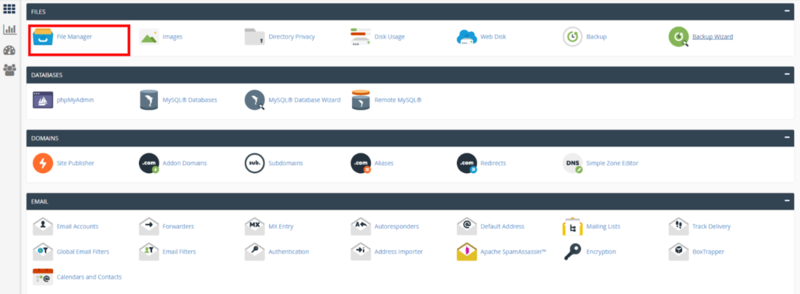 Look for the File Manager app in the cPanel dashboard
3. Then, go to the Settings option and click ‘Show Hidden Files.’
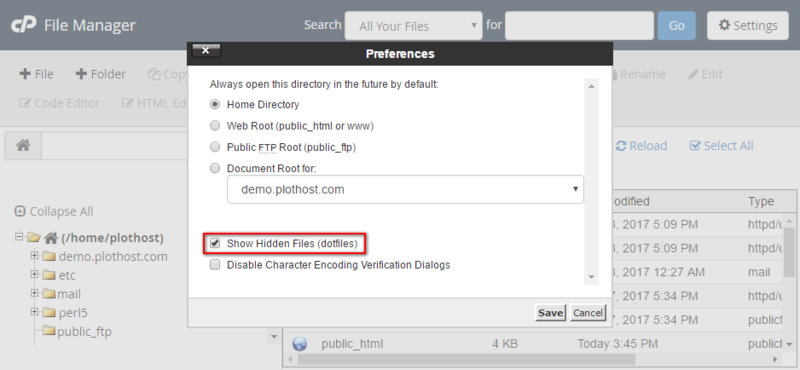 Settings displayed in the File Manager
4. Now, locate the root directory and find the .htaccess file in the public_html folder.
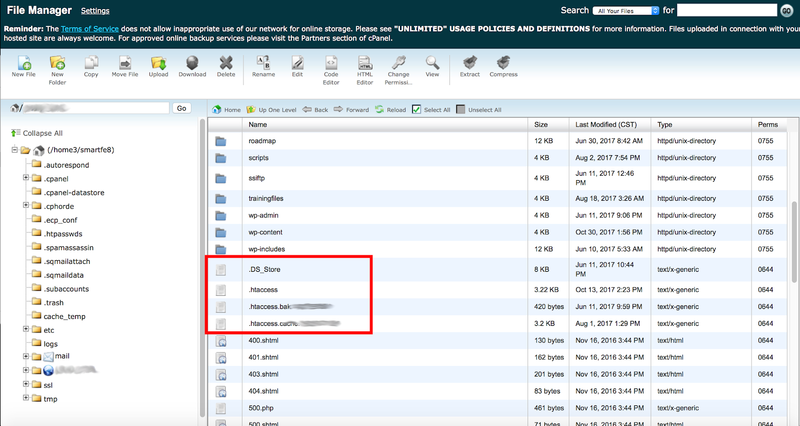 Location of the .htaccess file in the File Manager
5. Last, right click on the .htaccess file, click ‘Edit,’ and add the following code:
## EXPIRES CACHING ##

ExpiresActive On

ExpiresByType image/jpg "access 1 year"

ExpiresByType image/jpeg "access 1 year"

ExpiresByType image/gif "access 1 year"

ExpiresByType image/png "access 1 year"

ExpiresByType text/css "access 1 month"

ExpiresByType text/html "access 1 month"

ExpiresByType application/pdf "access 1 month"

ExpiresByType text/x-javascript "access 1 month"

ExpiresByType application/x-shockwave-flash "access 1 month"

ExpiresByType image/x-icon "access 1 year"

ExpiresDefault "access 1 month"

## EXPIRES CACHING ##
Then click ‘Save,’ and voila! You’re all set.
Choosing a reliable web host
Your choice of web host and its type can have a significant impact on website speed. There are three hosting options:
- Shared is the least expensive option. The important thing to note is that your website will be packed onto a server with others. Maybe lots of others. Some hosts are notorious for not providing adequate computing resources like disk space, CPU, and RAM for the number of clients served. For a starter or low traffic site, though, this isn’t a terrible option.
- A virtual private server or VPS is a step up from shared hosting in price and service. Though your site is physically located on a server with other sites, you have your own partition and copy of the operating system as well as dedicated computing resources that can’t be siphoned off by your neighbor’s site. For higher traffic sites and ecommerce, where downtime means money lost, this is a better hosting choice.
- There’s no hard and fast traffic level at which you’ll need a dedicated server but if you regularly see six figures per month, it might be worth considering. At $80 to $100 monthly, this is the most expensive option but, rather than space on a server, you’ll have the whole server to yourself and no limits on allocated resources.
A recent report from Hosting Canada, a community-supported research organization, notes that the difference in page load speed even between well-known web hosts can be considerable. For example, a decade’s worth of testing revealed average loading times range from 226ms up to 2,850ms depending upon the particular host.
When it comes to retaining first time visitors long enough to create the interest to stick around, fractions of a second delay can send them on their way never to return. It wouldn’t be the worst idea in the world to test your website speed at Pingdom on a regular basis. Just drop your URL into the form and click “start test.” If you make changes based on this article and don’t see improvement, it might be time to try a different host. Some hosts offer tools to analyze and optimize website speed.
If your website includes videos or other large files, it makes sense to host them externally. Using your own servers will blast through available bandwidth, bringing your site to a crawl.
Repeatedly maxing out your allotted bandwidth may actually find yourself violating the terms of use with your hosting company, which can get your entire site removed.
Using an external hosting site for video content, such as YouTube, optimizes the experience for viewers while keeping your website in good standing with your host company.
Use a content delivery network
When using a content delivery network (CDN), your website is “cached” — another way of saying “stored” — on a network of geographically dispersed servers.
 Left: no CDN (slower). All data is routed through one central computer.
Right: CDN (faster). Data is stored locally (cached) on many different computers.
This allows the virtual elimination of loading lags that occur when hosting servers are far away from the requesting computers.
Pages that are image-dependent will benefit the most from using a CDN.
Final Thought
Let’s recap the pertinent points for improving slow website speed:
- Reduce the number of HTTP requests. A request is generated each time the browser asks for a file from the server. Try a minimalist design approach.
- Optimize or compress files for images and code files like CSS and JavaScript.
- Reduce the number of redirects. Over time, natural site changes result in redirects, which costs time while the browser tries to figure out where the link is supposed to go. Keep these cleaned up.
- Enable browser caching. It saves static files in a user’s browser memory, making the website load faster on future visits.
- Choose a reliable web host and bump up from shared to VPS hosting when you get serious about performance.
- Subscribe to a CDN service. Maintaining copies of your site in dispersed geographic locations makes for faster delivery to end users.
There are a variety of things that affect website load times. Optimization is not a static process, rather something to continually monitor and make adjustments. Thanks to the reality of an ever more sophisticated internet, a site’s speed will naturally degrade over time. You’re going to have to fight just to stay even.
But why go to the point of creating an excellent content marketing campaign if no one hangs around to see it? Good luck!