How to create custom variables
In addition to the standard variables that are available in the SendPulse service, you can add custom variables. There are several ways to do this:
- create variables in a mailing list;
- add variables while uploading a file with contacts and additional data for them;
- pass through the API using the Add email addresses to the mailing list and Change the value of a variable for an existing contact methods;
- change values automatically in the Action: Update variable for contact element
How to create a custom variable in a mailing list
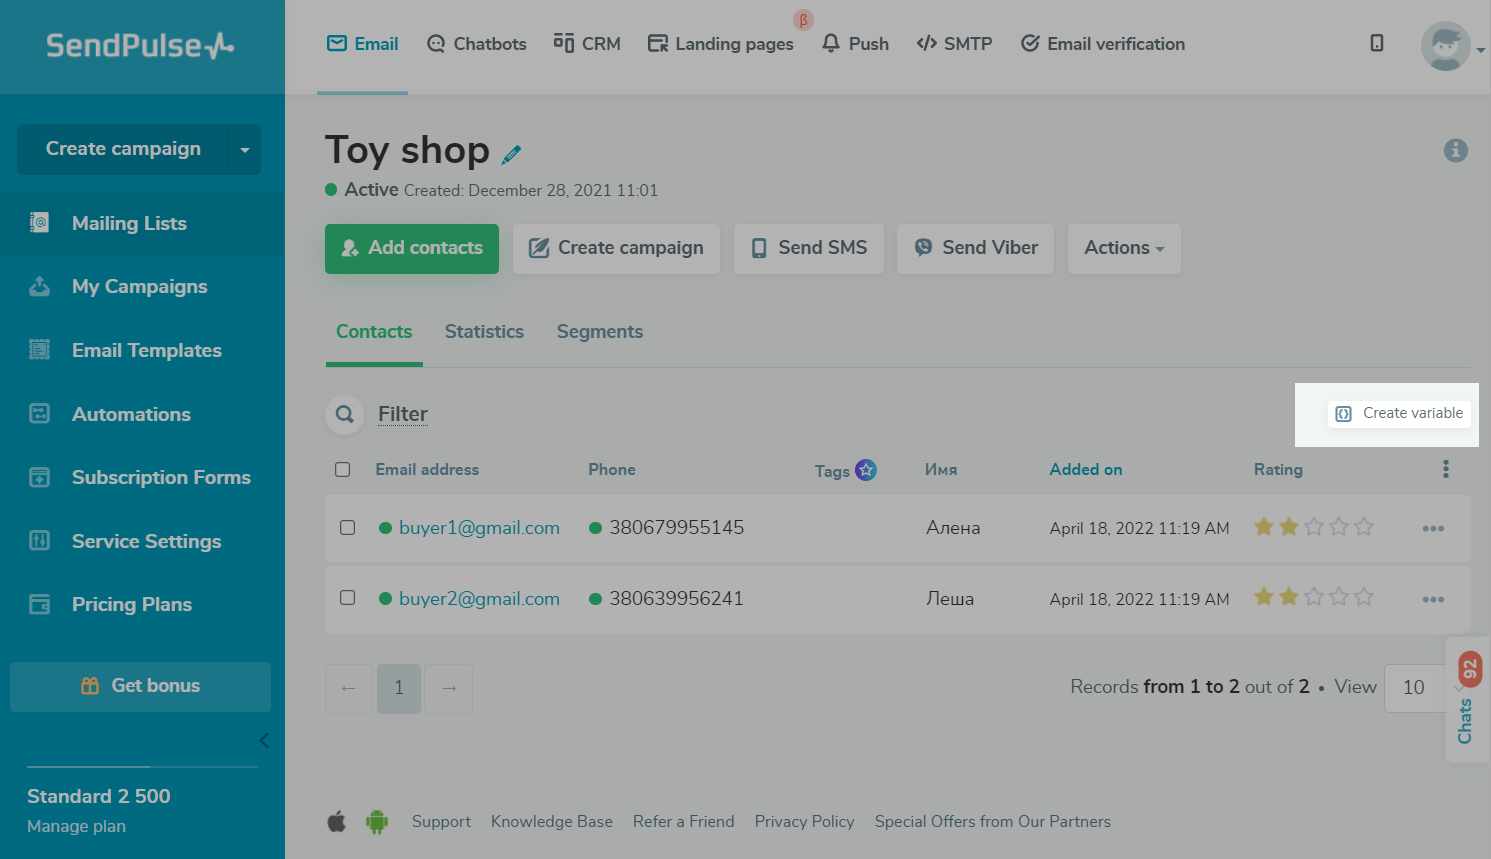
Open a mailing list where you want to add a variable and click Create variable.
The maximum number of variables in a mailing list is 50.
Enter a variable name. The maximum number of characters in the variable name is 255.
You can use the following characters in the variable name:
- all Unicode alphabetic characters (regex meta group);
- all numeric characters (regex meta group);
- dots, commas, question marks, and exclamation points;
- single and double quotes;
- hyphens and underscores;
- right slash;
- space.
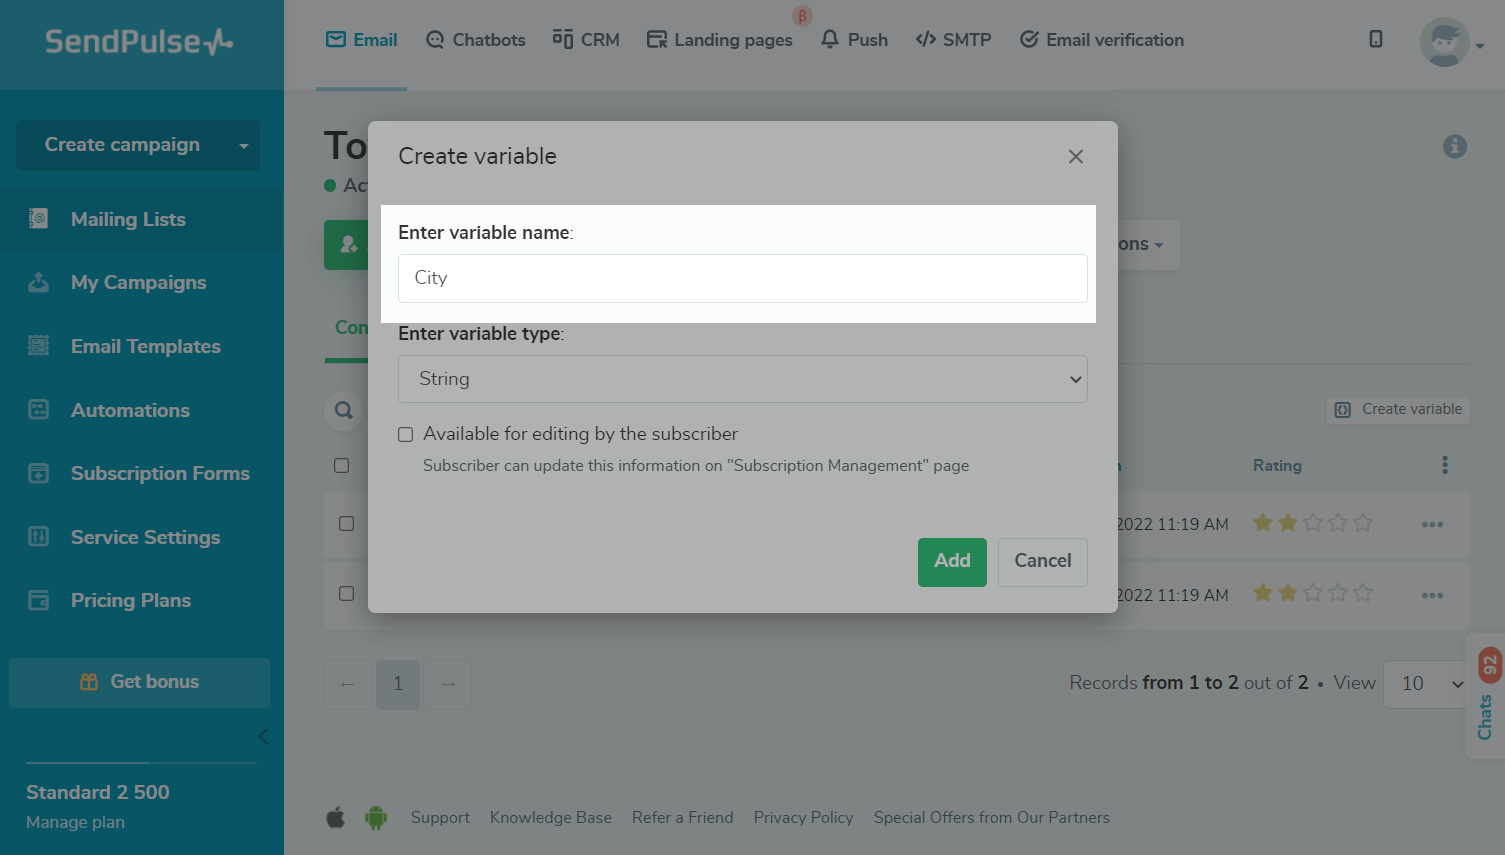
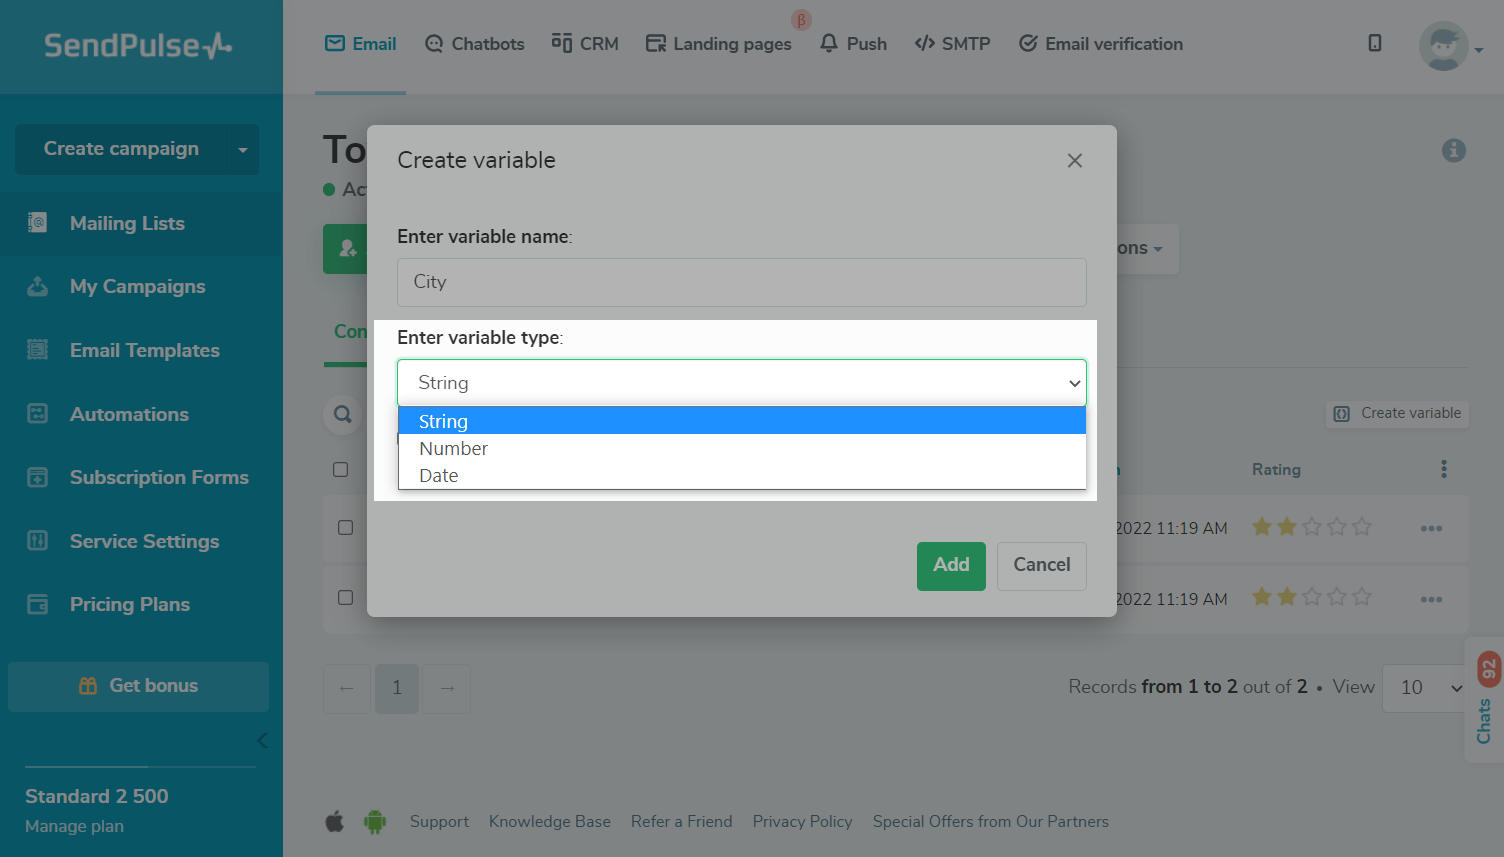
Select the variable type.
The variable type depends on the type of information that needs to be passed in it:
| String |
Stores a text value, such as subscriber name and company name. The maximum number of characters in a |
| Number |
Stores a numeric value, such as a phone number. If a number exceeds 16 characters, rounding is applied. When it reaches 17 characters, the last two digits are rounded. |
| Date |
Stores a numeric value in the calendar date format, such as date of birth and date of registration. To display the |
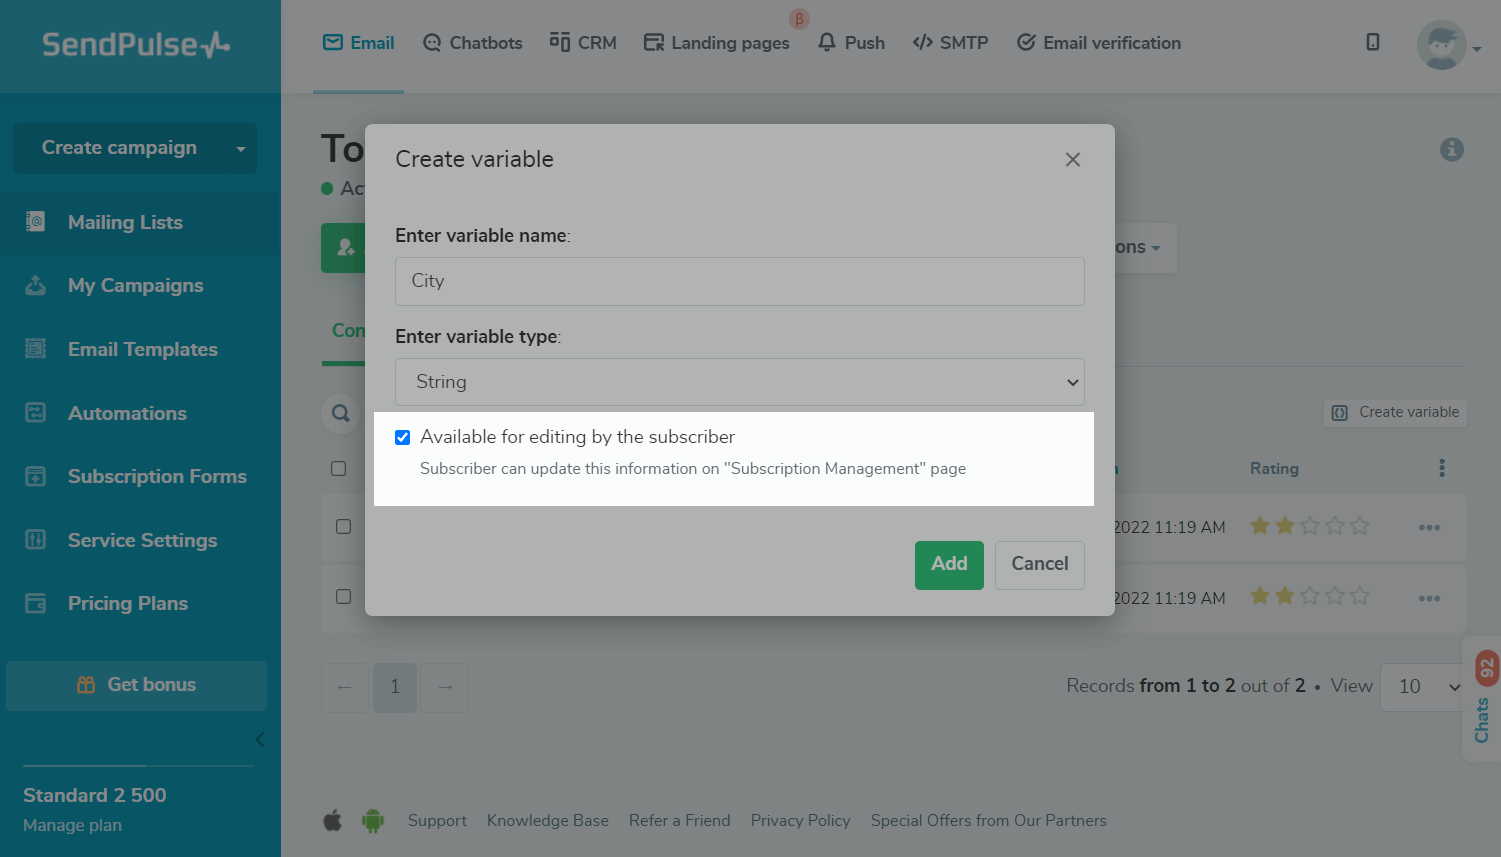
Select the Subscriber editable checkbox if you want to allow subscribers to edit their data themselves.
How to Add Variables While Uploading a File with Contacts
Open a mailing list where you want to add a variable and Add contacts.

In the Upload file tab, choose a file with contacts, and click Upload. Supported file formats are TXT, CSV, XLS, XLSX.

In the next step, add a variable for each column with additional data from the file: above a column, click Disabled and add a variable from the drop-down list or create a new variable.

Click Add to upload the contacts from the file to the service.

After the contacts are uploaded into the mailing list, all the variables that you enabled during the upload will be displayed in additional columns.

You can edit the names of variables or delete custom variables. Hover over a name of a variable with a mouse pointer and click the pencil icon to edit the variable name or click the bin icon to delete the variable.

How to edit variable values
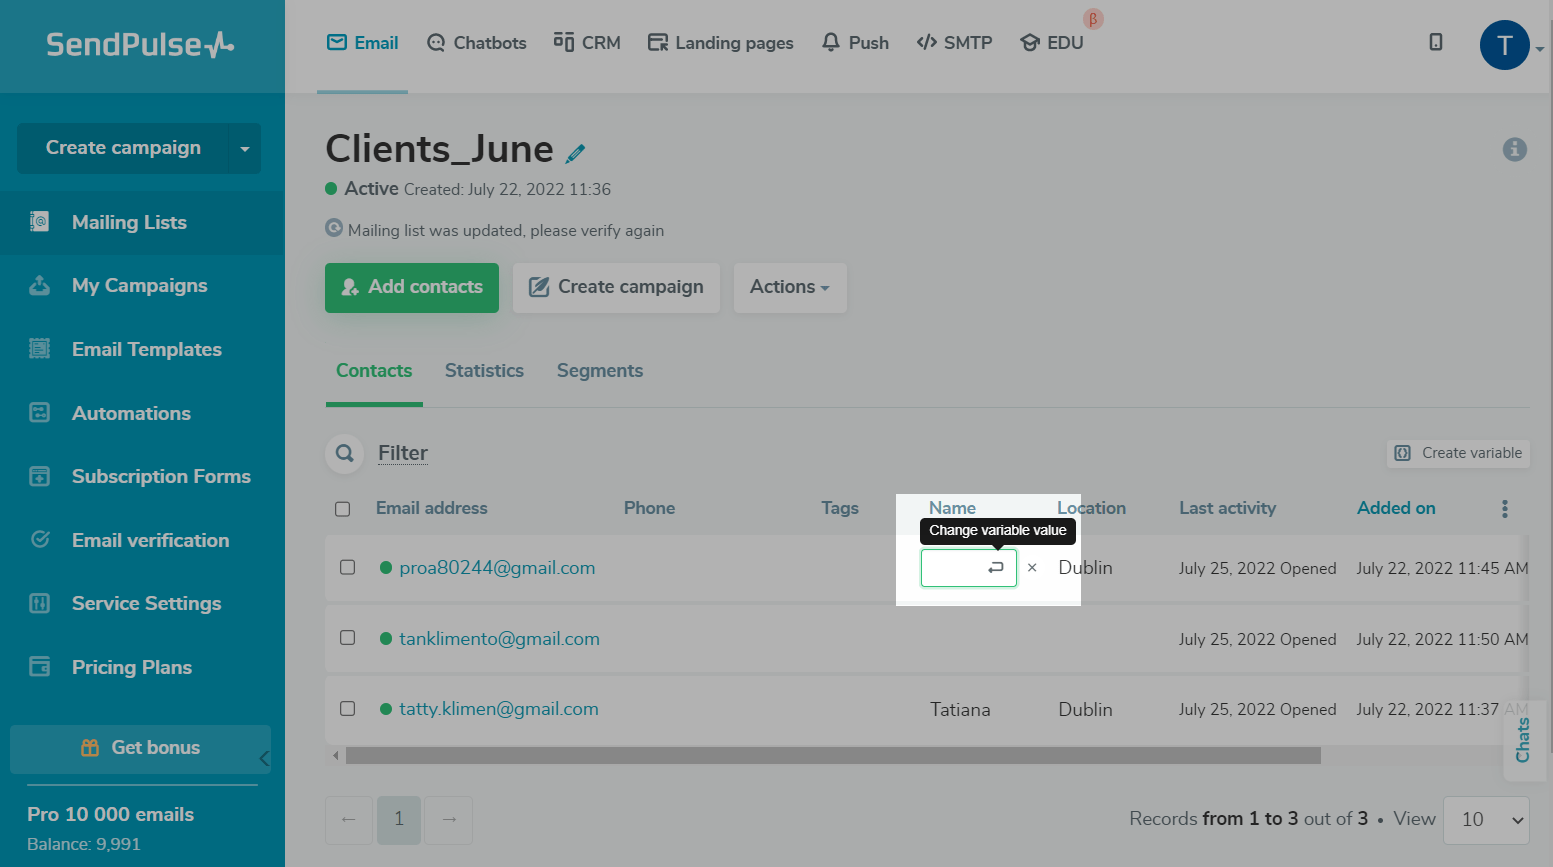
To edit a value of one variable for a single contact, click this value and make changes. Save the updated value by pressing the Enter key or by clicking the arrow icon (Change variable value).

To update variable values for several contacts at once, upload a file with the list of contacts and updated data to the service. Select the Update variable values for existing contacts checkbox and click Add.

How to add custom variables to an email template
You can create your email template in the layout template editor or an HTML editor, or import a ready-made template. To add a variable to any of these templates, enter it in double curly braces, for example {{name}}, in the right place in the template.
Note: For data from variables to be added to emails, variable names must completely match in mailing lists and templates. If you specify a variable name with a capital letter in a mailing list, for example {{Name}}, then enter this variable with a capital letter in templates.
To add variables to a template while creating a campaign, select an email template and proceed to edit it. Place the cursor in the place where you want to add a variable and click the Variables.

Select a variable from a drop-down list. The standard variables and all the variables from the mailing lists that you choose for this campaign are available in the drop-down list.

You can also use smart personalization in emails to increase the efficiency of email campaigns.
How to Delete Variables
You can delete a variable for a specific contact or the whole mailing list.
The Email and Phone variables cannot be deleted.
To delete a variable value for a single contact, hover over the variable, and click the pencil icon. Then delete the variable value, and press Enter or the arrow icon next to the field where the value was.
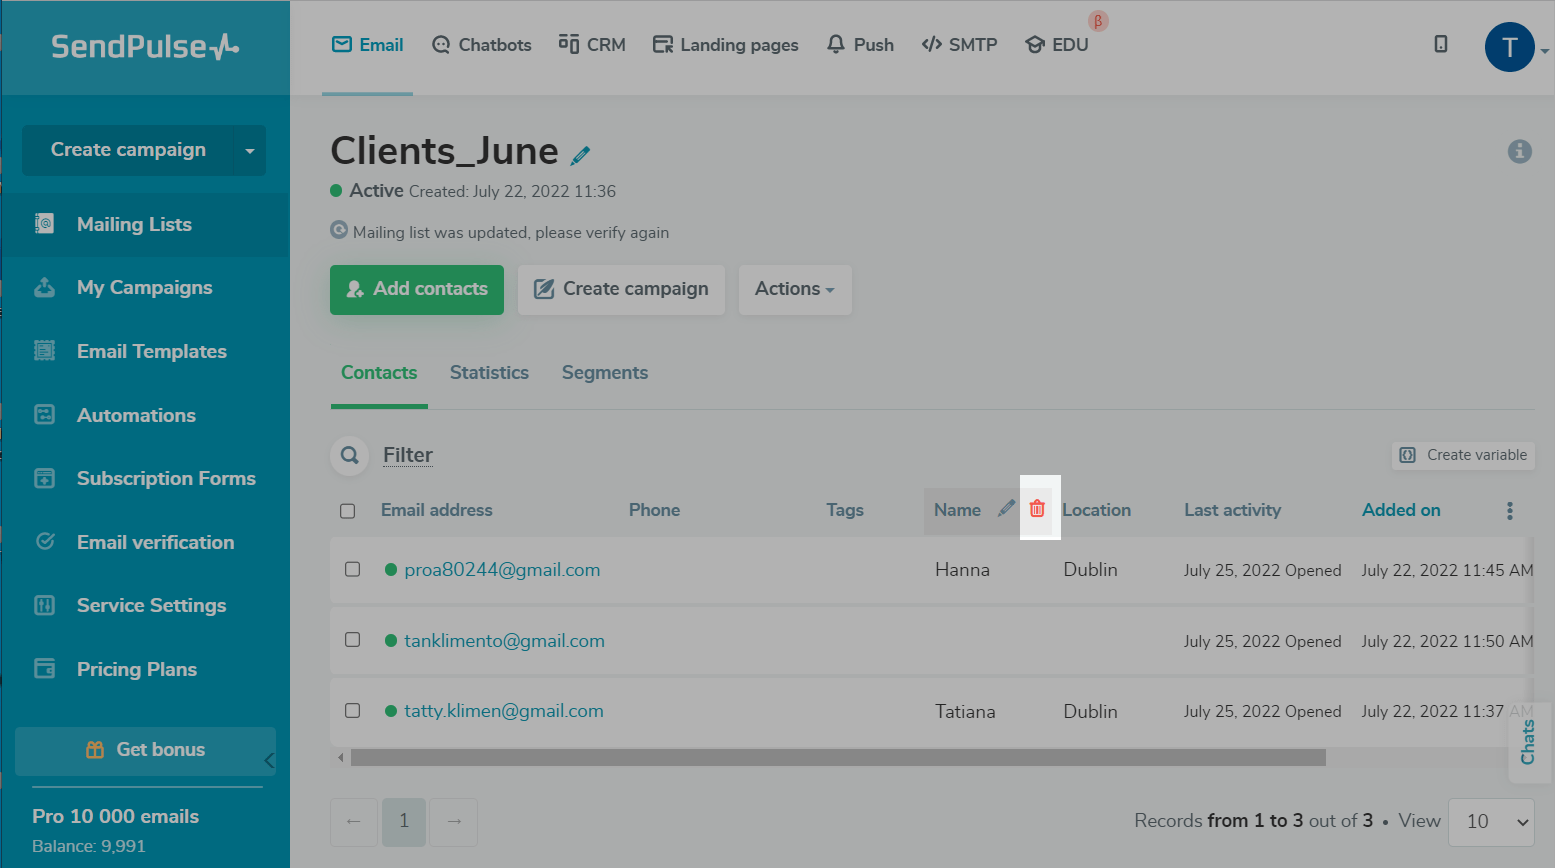
To delete a variable, hover your cursor over the column name. Then click on the trash can icon that appears.
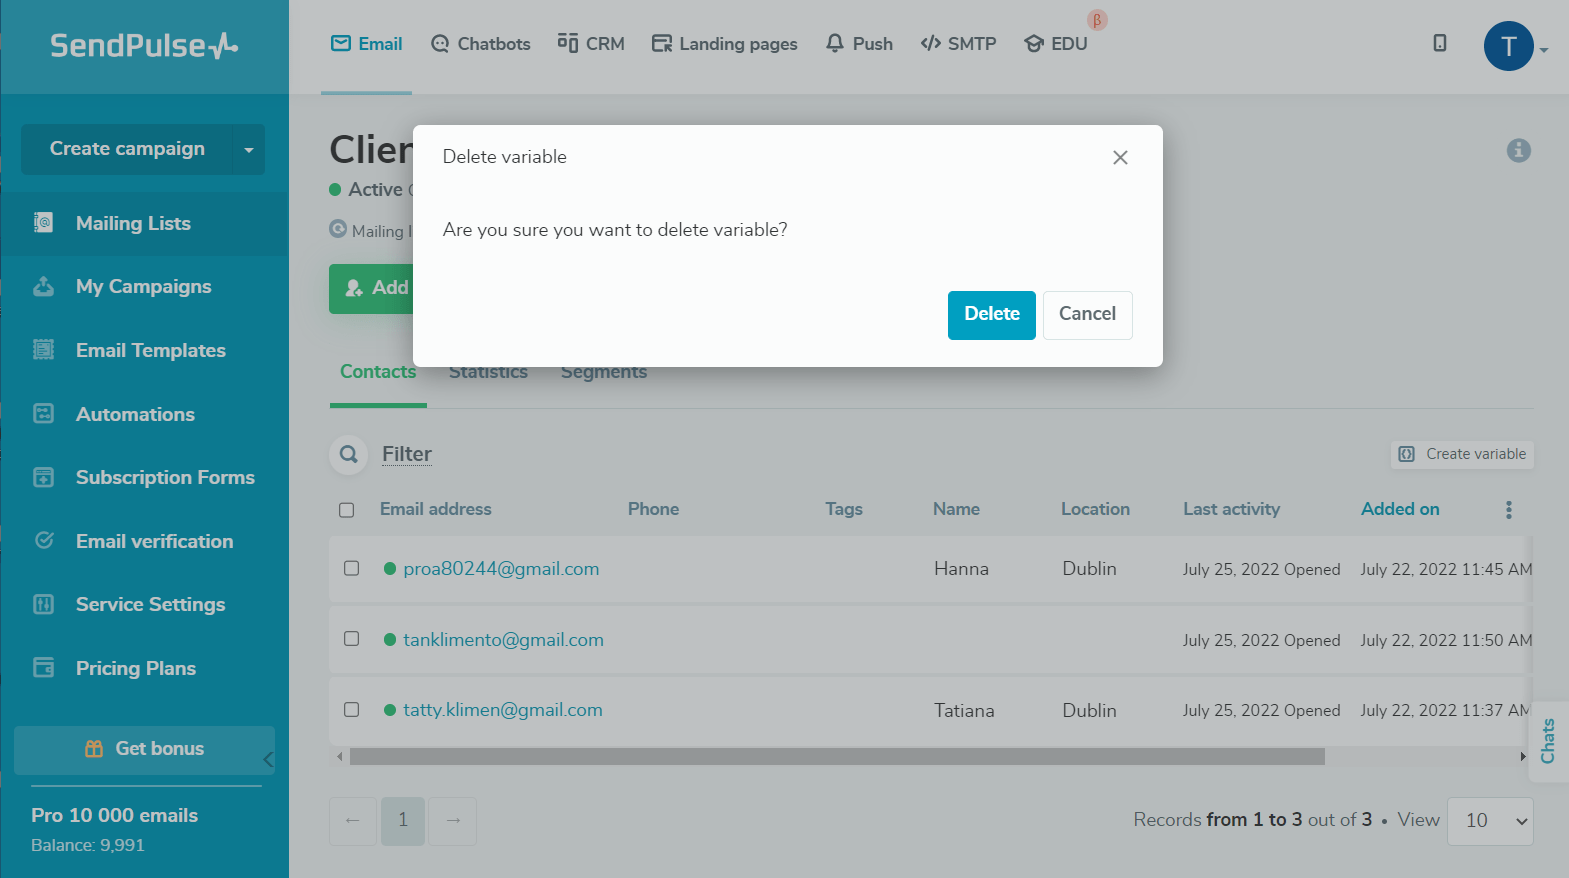
Afterwards, you will see a pop-up window where you need to confirm that you actually want to delete the variable.
How to Hide Variables
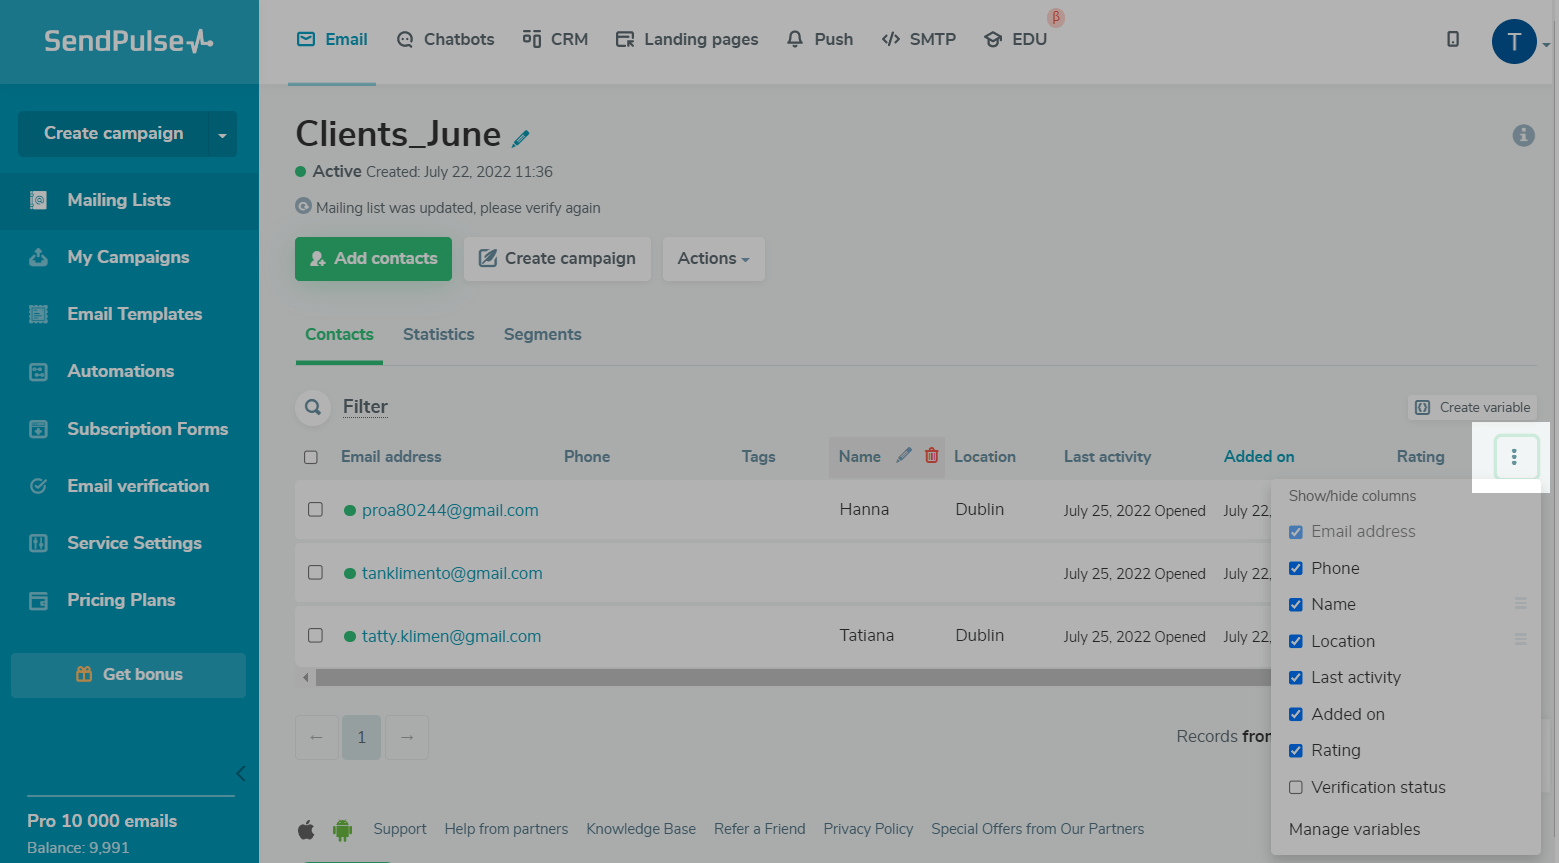
You can hide certain variables in the contact list. Click on the three dots on the right and select which variables you want to display in the checkbox that opens.
Last Updated: 08.02.2024
or